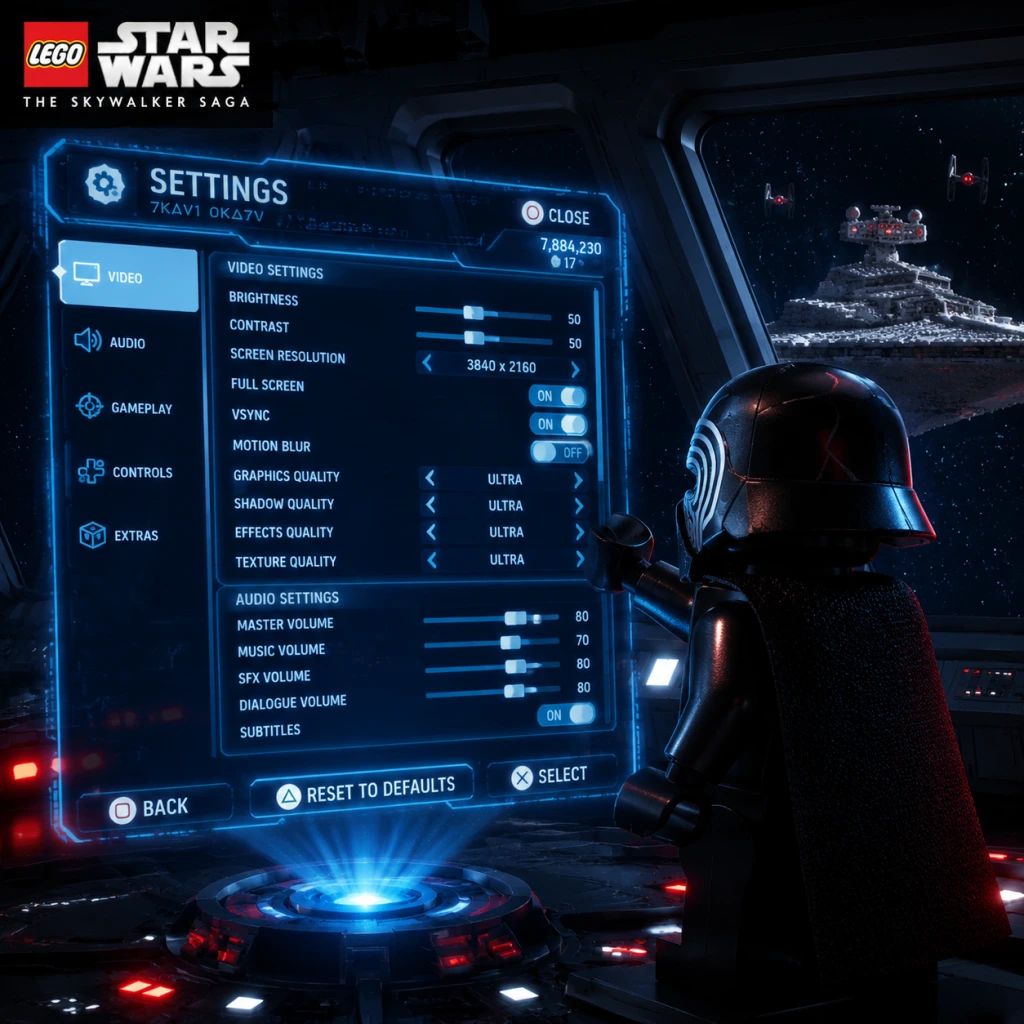
Game Settings
LEGO Star Wars: The Skywalker Saga – Game Settings Guide
This comprehensive guide covers every setting in LEGO Star Wars: The Skywalker Saga, organized by category. You'll find optimal configurations for different hardware levels, tips to avoid common mistakes, and special attention points that greatly affect your experience.
---
1. Graphics Settings
1.1 General Display
- Resolution: Set to native monitor/TV resolution (e.g., 1920×1080, 2560×1440, 3840×2160).
- Display Mode: Fullscreen (best performance), Windowed Borderless (easier multitasking), Windowed.
- VSync: On (eliminates screen tearing, may cap FPS to refresh rate), Off (can cause tearing but may feel smoother on high-refresh displays).
- Frame Rate Limit: Recommended to match your monitor refresh rate (e.g., 60, 120, 144). For low-end PCs, 30 or 60 FPS limit keeps performance consistent.
- Field of View (FOV): Adjusts camera zoom. Default is acceptable; increase for wider peripheral view (may affect performance).
- Brightness: Calibrate using in-game test pattern (the image should show both the brightest and darkest details without crushing).
1.2 Quality Presets (PC)
The game offers presets: Lowest, Low, Medium, High, Very High, Epic, and Custom.
| Hardware Tier | Recommended Preset | Additional Tuning |
|---|---|---|
| Low-end (e.g., GTX 1050, 8GB RAM, SSD) | Medium | - Set Texture Quality to Low<br>- Disable Motion Blur & Depth of Field<br>- Resolution Scaling: 70-80% (if needed) |
| Mid-range (e.g., RTX 3060, 16GB RAM) | High | - Keep Shadows: Medium<br>- Turn Off Ray Tracing (if available)<br>- Enable DLSS / FSR: Quality mode |
| High-end (e.g., RTX 4080, 32GB RAM) | Epic | - Enable Ray Tracing (if desired)<br>- DLSS: Quality or Balanced<br>- Texture Quality: Ultra |
1.3 Advanced Graphics Options
- Texture Quality: Controls sharpness of surfaces. High settings improve immersion but use more VRAM.
- Shadow Quality: Low = blocky, High = soft ambient shadows. Medium is a good balance.
- Post Processing: Includes Bloom, Lens Flare, Depth of Field, Motion Blur. Disable for clearer image and better performance.
- Anti-Aliasing: Use TAA (Temporal Anti-Aliasing) for best stability; FXAA for less performance hit but more blur.
- Ambient Occlusion: SSAO or HBAO+ adds realism to shadows in crevices. Medium recommended.
- Reflections: Screen Space Reflections (SSR) look good but can be turned to Low on weaker hardware.
- Volumetric Fog: High quality shows light shafts. Low improves performance in foggy areas.
- Ray Tracing: PC only (if supported). Requires RTX card. On Epic/Ultra it adds realistic reflections and shadows. Performance hit is significant – enable only on high-end systems.
- NVIDIA DLSS: For RTX cards – Quality mode for best image quality with decent FPS boost; Performance mode for big FPS gains.
- AMD FSR / Intel XeSS: Good alternatives for non-RTX cards. Set to Quality for minimal visual loss.
- Dynamic Resolution Scaling: Automatically lowers resolution when FPS dips. Useful for maintaining target frame rate.
- PS5 / Xbox Series X: Offer a Performance mode (target 60 FPS, lower resolution) and Quality mode (target 30 FPS, higher resolution and ray tracing). Choose Performance for smoother gameplay.
- Xbox Series S: Usually locked to Performance mode (60 FPS at 1080p). No separate toggle.
- PS4 / Xbox One: Fixed settings, no performance/quality toggle. V-Sync on by default.
- Screen Brightness: Misadjusting this can make dark areas impossible to see. Use the in-game calibration screen and set so the leftmost icon is barely visible.
- Resolution Scale: Setting below 100% (e.g., 70%) can cause blurry text; avoid if possible. Use DLSS/FSR instead.
- Motion Blur: Many players find it distracting in a fast-paced game; disable it for clearer visuals.
- Ray Tracing: While beautiful, it can cause frame rate drops below 30 FPS even on high-end cards. Test in busy areas (e.g., Mos Eisley) before settling on it.
- Master Volume: Adjust overall loudness.
- SFX Volume: Sound effects (blasters, explosions, lightsabers). Keep high for combat cues.
- Music Volume: John Williams' score is iconic – recommend keeping at 80-100%.
- Dialogue Volume: Character voices, including LEGO mumbles. Important for story beats.
- Ambient Volume: Environmental sounds (wind, droids, animals).
- UI Volume: Menu sounds and button clicks.
- Audio Output Mode: Stereo (headphones), Surround (5.1/7.1), or Auto. If using headphones, select Stereo for best directional cues.
- Dynamic Range: Wide (more contrast between quiet and loud) vs Narrow (more consistent). Choose Wide for immersive use, Narrow for late-night playing.
- Subtitle Language: Separate from voice language (see Language section).
- Subtitle Background: On/Off – helps readability.
- Subtitle Display: Turn On if playing in a noisy environment or if you have hearing difficulties.
- Music Volume: Do not lower too much – the score is a huge part of the Star Wars experience.
- Dynamic Range: Wide can make explosions very loud and whispers very quiet; adjust if you find it jarring.
- Keyboard & Mouse (PC) : Default keybinds are standard. WASD movement, mouse for camera, space for jump, E for interaction.
- Controller: Wired or Bluetooth controller (Xbox, PlayStation, Switch Pro). The game fully supports PlayStation button prompts on PC.
- Vibration: On/Off. Affects immersion in lightsaber clashes and explosions.
- Invert Camera Y Axis: For players who prefer inverted look.
- Camera Sensitivity: Adjust horizontal and vertical turning speed. Default is moderate; increase if you want faster camera turns during combat.
- Trigger Deadzone: Only relevant for racing or flight sections – leave default unless sticks drift.
- Camera Invert: Easy to miss – if you find yourself looking up when you press down, enable invert.
- Controller Vibration: Can cause battery drain on wireless controllers; disable if you prefer longer sessions without recharge.
- Keyboard vs Controller: The game is optimized for controller. If using KB+M, remap Force powers to easy reach (e.g., Q, E, R, F).
- Flying Controls: The spaceship sections (e.g., trench run) are notoriously tricky. Consider increasing stick sensitivity for sharper turns. Practice in free roam to get comfortable.
- Subtitle Size: Small, Medium, Large. Choose Large for readability from a distance.
- Subtitle Background Opacity: Adjustable from 0% (transparent) to 100% (solid).
- Colorblind Mode: Options for Deuteranopia, Protanopia, Tritanopia – changes UI colors to enhance readability.
- High Contrast UI: Makes texts and icons stand out more.
- Screen Narration (PC only): Reads UI elements aloud – enable if needed.
- Sound Cues: Use audio-only indicators for puzzles or collectibles (e.g., a chime when near a Kyber Brick).
- Auto Aim: On – helps with blaster aiming; Off for challenge.
- Auto Solve Puzzles (for certain side quests): Can skip some puzzles if disabled.
- Simplified Combat: Reduces button complexity (e.g., auto combos). Ideal for younger players or those with motor difficulties.
- Hold to Sprint: Toggle vs Hold. Choose based on preference.
- Colorblind Mode: Not available in all menus; test in-game to see if it helps.
- Subtitle Size: Larger sizes may overlap with UI; adjust background opacity to improve.
- Auto Aim: In hectic combat, auto aim can prevent frustration. Turn off for a more traditional challenge.
- Text Language: Choose from 14+ languages (English, French, German, Spanish, Italian, Japanese, etc.)
- Voice Language: Separate from text – can have text in English but voices in Japanese (or vice versa).
- Subtitle Language: If voice language is different, subtitles can be set to another language.
- Voice vs Text Mismatch: If subtitles don't match spoken lines, ensure both are set to the same language.
- Regional Restrictions: Some voice packs may require downloading additional content on console (e.g., Japanese voice pack on Western PS5).
- No dedicated multiplayer – online features are limited to leaderboards, achievements, and cloud saves.
- Sign in to Online Services: Enables achievements and leaderboards. Optional for single-player.
- Auto-Sync Cloud Saves: Ensures progress is saved across devices (if supported by platform).
- Telemetry: Off by default – can be disabled in settings menu.
- Cross-Platform Saves: Only between same platform families (e.g., PC to PC via Steam Cloud; none between console and PC).
- Cloud Saves: On PC, ensure Steam or Epic cloud sync is enabled to avoid losing progress.
- Online Sign-In: If you see a login prompt at launch, you can skip it – it only affects online features.
- Difficulty Mode: There is no traditional difficulty slider – game scales automatically, but you can enable/assist features:
- Auto-Collect Studs: Automatically picks up studs without pressing button. Recommended On for convenience.
- Gyro Aiming (Switch/PS5): Motion controls for fine aim – enable if comfortable.
- HUD Opacity: Scale from 0 to 100%. Lower for immersive screenshots.
- Minimap: Display is overlay or off.
- Objective Markers: On/Off – can turn off for exploration (no hand-holding).
- Toggle Weapon Wheel: Hold vs Toggle – choose Toggle to keep Force powers menu open until dismissed.
- Auto-Save Frequency: Not adjustable – game autosaves often (after missions, collectibles).
- Manual Save Slots: Available in the menu (per character progress). Use multiple slots to avoid overwriting.
- Auto Collect Studs: Enabling saves button presses but you lose 'manual' satisfaction – highly recommended to keep on.
- Minimap: Off for a more cinematic experience, but on for navigation in open worlds.
- Fall Damage: Turn off if you dislike dying while exploring high platforms (common in Coruscant or Death Star levels).
- Gyro Aiming: Only available on Switch (in handheld) and PS5 (DualSense). Can improve blaster accuracy but may feel disorienting at first.
1.4 Upscaling Technologies
1.5 Console Graphics Settings
1.6 Special Attention Points
---
2. Audio Settings
2.1 Main Audio
2.2 Advanced Audio
2.3 Special Attention Points
---
3. Controls Settings
3.1 Input Method
3.2 Controller Configuration
3.3 Keyboard & Mouse Customization (PC)
All actions can be remapped: Movement, Actions (Attack, Jump, Force, Blaster), Camera, Quick Menu, etc. Useful for left-handed players or unusual setups.
3.4 Special Attention Points
---
4. Accessibility Settings
4.1 Visual Accessibility
4.2 Audio Accessibility
4.3 Gameplay Accessibility
4.4 Special Attention Points
---
5. Language Settings
5.1 Available Options
5.2 Special Attention Points
---
6. Network Settings
6.1 Online Features
6.2 Data & Privacy
6.3 Special Attention Points
---
7. Gameplay Settings
7.1 Difficulty & Gameplay Options
- Invincibility Toggle: Under Accessibility? Actually, there's a cheat to turn on invincibility after unlocking cheats.
- Fall Damage: On/Off – disable for stress-free platforming.
- Friendly Fire: Off by default – can turn on for chaos.
7.2 HUD & UI
7.3 Save & Load
7.4 Special Attention Points
---
8. Optimal Settings Summary by Hardware
8.1 PC (All Specs)
| Component | Low-End (30 FPS target) | Mid-Range (60 FPS) | High-End (60-120 FPS) |
|---|---|---|---|
| Resolution | 1080p | 1080p/1440p | 1440p/4K |
| Preset | Medium (with Low Shadows, Low Textures) | High | Epic (with RT off for 120 FPS) |
| Textures | Low | High | Ultra |
| Shadows | Low | Medium | High |
| Anti-Aliasing | FXAA | TAA | TAA + DLSS Quality |
| Upscaling | FSR Balanced (if needed) | DLSS/FSR Quality | DLSS Quality/Balanced |
| V-Sync | On | On | On (or G-Sync) |
| Motion Blur | Off | Off | Off |
| Volumetrics | Off | Low | High |
8.2 Console
| Console | Recommended Mode | Notes |
|---|---|---|
| PS5 / XSX | Performance | 60 FPS is more valuable than ray tracing for this game. |
| Xbox Series S | N/A (fixed) | 60 FPS at 1080p. No mode toggle. |
| PS4 / XB1 | N/A | 30 FPS with occasional dips. Lower resolution but stable. |
| Switch | N/A | 30 FPS target, heavily scaled. Play in docked mode for best clarity. |
9. Easiest Settings to Misconfigure
1. Resolution Scale – Setting this below 100% can make text unreadable. Use DLSS/FSR instead.
2. Brightness – Too high washes out colors; too low hides details. Always use the calibration screen.
3. VSync – Turning it off on a standard 60 Hz monitor can cause distracting tearing. On high-refresh displays, use G-Sync/FreeSync and cap FPS.
4. Controller Vibration – Can cause battery drain or become annoying; easily overlooked.
5. Subtitle Language vs Voice Language – Ensure they match if you want correct spoken dialogue.
6. Auto-Collect Studs – When off, you must press a button to pick up studs – many players miss this and think the game is broken.
7. Camera Invert – Misconfigured can make flying sections nearly impossible.
---
10. Final Setup Checklist
- [ ] Set resolution to native display.
- [ ] Calibrate brightness using in-game test.
- [ ] Choose performance or quality mode (console) or apply PC preset based on hardware.
- [ ] Enable subtitles and set language preferences.
- [ ] Check control scheme – especially flying axis invert.
- [ ] Turn off motion blur and depth of field for clarity.
- [ ] Enable Auto-Collect Studs.
- [ ] Save your settings and restart the game to apply changes.
---
By following this guide, you'll have an optimized, comfortable, and fully customized LEGO Star Wars: The Skywalker Saga experience. May the Force be with your settings!