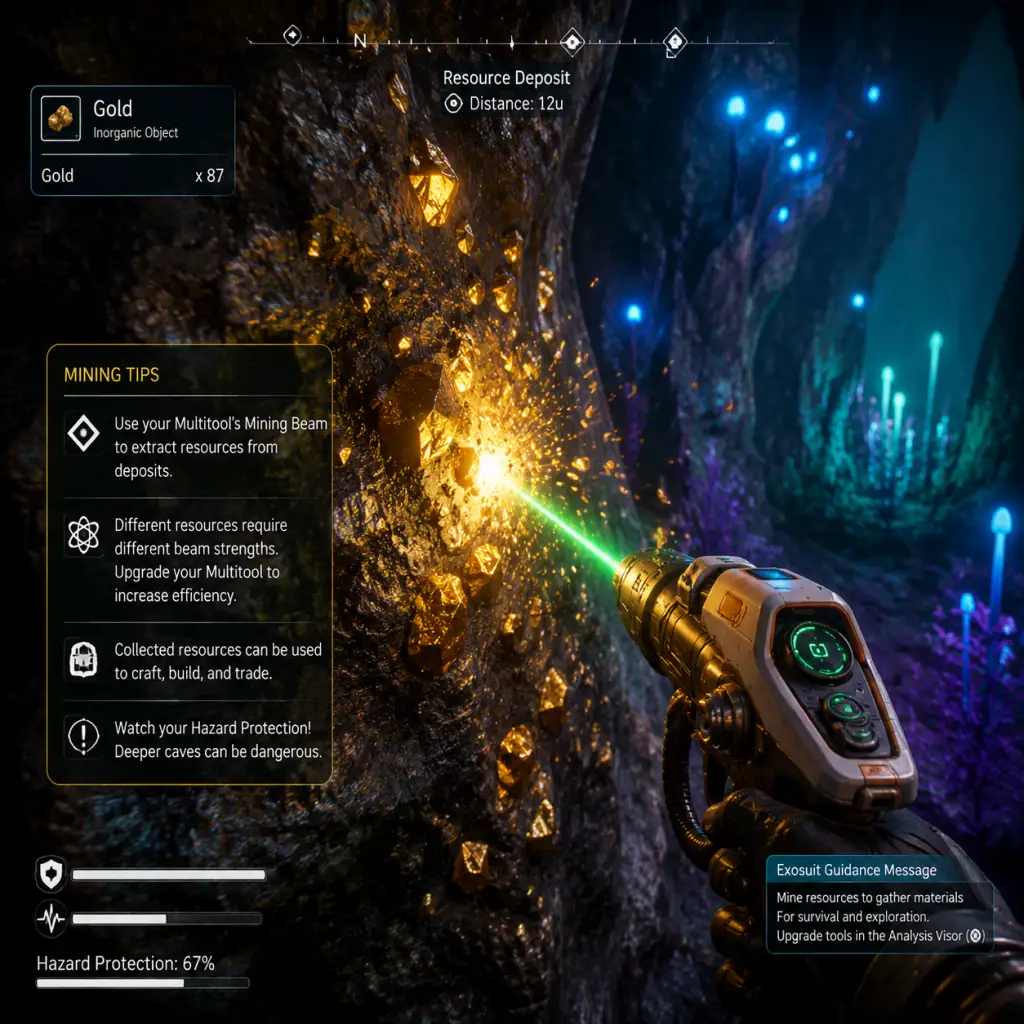
Game Tips
No Man's Sky Game Tips – Comprehensive Guide
This guide provides essential tips for every Traveller, from the first moments on a hostile world to late-game fleet operations. Tips are grouped by category, with difficulty levels indicated (Beginner / Intermediate / Advanced).
---
1. Beginner Survival & Early Game
1.1. Always Mine Carbon, Ferrite Dust, and Di-hydrogen First
- Why: Carbon fuels your Mining Beam, Ferrite Dust repairs your ship, and Di-hydrogen refuels your jetpack and life support. Neglecting these basics leads to stranding or death.
- When: Immediately after fixing your scanner and Analysis Visor.
- Pro Tip: Punch trees? Yes, melee attack on flora gives a few carbon when your beam is low.
- Why: Extreme weather depletes hazard protection rapidly. Digging a hole with the Terrain Manipulator (craft after fixing ship) creates instant shelter.
- When: Any time a storm icon appears on the HUD.
- Advanced: Use the Terrain Manipulator to create a tunnel under your ship, then emerge safer.
- Why: The Base Computer unlocks teleportation and tutorial progression. A simple wooden shack with a bed (for respawn point) is enough.
- When: After obtaining chromatic metal (from copper/hot planets).
- Cost-saving: Place only a Base Computer, a Teleporter, and a Biofuel Reactor (with a few solar panels later) to save materials.
- Why: Scanning flora, fauna, and minerals earns Nanites and Units. Fully scanning a planet gives bonus Nanites when uploaded to the Discovery Services.
- When: Always keep the visor active during exploration. Hold the scan button to identify multiple things.
- Tip: Fauna scanning is tricky; crouch and wait for creatures to stop moving. Explosive animals are safe if you juke.
- Why: Following these lines often leads to wealthy systems (economy tier: ★, ★★, ★★★). Wealthier systems have better ships, multi-tools, and prices.
- When: After obtaining an Economy Scanner (learn from manufacturing facility blueprint).
- Advanced: Install Conflict Scanner to avoid high-conflict systems if you're not combat-ready.
- Why: Exocraft (like the Roamer) have dedicated scanners to locate alien structures, drop pods, and buried tech modules. They also provide hazard protection and infinite fuel (after upgrades).
- When: After building the Exocraft Geobay from the Anomaly or base missions.
- Beginner Alternative: The Pilgrim exocraft is fast but fragile; the Nomad hovers over water.
- Why: Save Beacons create permanent waypoints that survive relogging. Useful for marking rare resource deposits, portal locations, or a nice view.
- When: When you find a spot you need to return to frequently.
- Better: Also place a Base Teleporter near your most-used spots.
- Why: Portals allow instant travel across the galaxy using 12-glyph addresses. Once activated, you can use coordinates shared by other players to reach specific planets.
- When: After completing the Artemis path or locating a portal via alien monolith.
- Tip: Collect all 16 glyphs by finding Traveller graves (get coordinates from NPC Travellers in space stations). For quick access use the “Catalyst” questline.
- Why: Oxygen plus a catalyst (like Carbon) can create many useful materials. For example, Oxygen + Ferrite Dust → pure Ferrite. Oxygen + Ammonia → Ammonium Chloride (for starship fuel).
- When: Always carry a portable refiner and keep oxygen plants in your base.
- Advanced: Oxygen + Fungal Mould → Mordite (or other elements via farm). This is a core recipe for endless crafting loops.
- Why: These metals refine into Chromatic Metal which is essential for building warp drives, advanced technology, and base components. Each tier allows to other color stars.
- When: First Copper for basic chromatic, then Cadmium (red stars), Emeril (green), Indium (blue).
- Optimization: Refining 1 Indium + 2 Chromatic Metal = 4 Indium (duplication glitch fixed; this recipe now gives more but not infinite). Use Indium to craft warp hypercores.
- Why: The Freighter Matter Beam lets you access all stored items on your freighter from anywhere in the same star system. This saves trips back to base.
- When: After obtaining a freighter (first free one after a few warps).
- Setup: Install the Matter Beam in the freighter’s tech inventory (blueprint from freighter upgrade terminal).
- Why: Some resources like Storm Crystals (only during extreme storms) and Ancient Bones (buried) are high-value. Always keep a few stacks for trading.
- When: Check weather forecast in ship cockpit; fly to extreme planets during storms to grab Storm Crystals.
- Location: Use the Survey Device (exocraft upgrade) to locate resource hotspots – build mineral extractors there for passive income.
- Why: Photon Cannon is decent but has slow fire rate. The Infra-Knife Accelerator fires rapidly, shreds shields, and with upgrade modules melts enemy ships. Best for dogfights.
- When: Install as soon as you can buy the blueprint from the Anomaly or get from crashed ship tech.
- Advanced: Combine with the Cyclotron Ballista (slows enemies) for crowd control.
- Why: Sentinels have different weaknesses: the Blaze Javelin (charged shot) one-shots small sentinels, while the Pulse Spitter (high fire-rate) is better for large walkers.
- When: Use Blaze Javelin + Advanced Boltcaster for most fights. Plasma Launcher is risky (can kill you).
- Tactic: When fighting Walkers, shoot the legs first to immobilize, then the top weak point.
- Why: The Personal Forcefield blocks all damage from one direction, including sentinel attacks. Allows you to heal safely even in combat.
- When: Bind it to a hotkey. Use when surrounded or when hazard protection is low.
- Tip: Also useful for mining hazardous plants safely.
- Why: Better engines let you outrun pirates; shields absorb more hits. A fully upgraded shield allows you to charge through asteroids without damage.
- When: As soon as you have Nanites, buy S-class upgrades for shields and pulse drive.
- Advanced: The Positron Ejector is a shotgun-like weapon that destroys asteroids and enemies quickly – best close-range.
- Why: Solar panels generate power during day, stored in batteries for night. Electromagnetic Generators (if you find a hotspot) give 24/7 free power, but require locating with the Survey Device.
- When: Build at least 2 batteries per row of solar panels to avoid brownouts during storms (cloudy reduces solar output).
- Pro Tip: On planets with high sentinel activity, build underground to avoid detection and power loss from attacks.
- Why: A single Biodome with ladders can harvest up to 16 planting slots instantly. Compare to trays that need manual picking.
- When: After unlocking the Armorer's questline or the blueprint from the Anomaly (requires Salvaged Data).
- Layout: Build a biodome on a flat roof, connect via corridor. Use ladders stackable for multiple floors.
- Why: Each container holds 20 slots but you cannot rename them. Use color-coding in the build menu: red for combat, blue for crafting, green for food, etc. Then place signs.
- When: Immediately after getting the blueprint (base computer archives).
- Tip: You can access all containers from your freighter if you install the material hauler and containers on the freighter.
- Why: The NPC specialists (Scientist, Farmer, Armorer, Exocraft) give unique blueprints and open more advanced tech. Finish their quests before building a mega base.
- When: After building a small base, hire each specialist from space stations.
- Note: Scanning terminals require a multitool with a scanner – some blueprints are gated behind these missions.
- Why: Each system has two economies (buy and sell). Items like “Geodesite” are scarce in mining economies but common in high-tech ones. Scan the terminal to see “Demand” percentages.
- When: Install the Economy Scanner on your ship. Set galaxy map filter to “Economy”. Visit a high-tech (★) system with “Trading” as primary economy – sell tradeable items like Gold or Platinum for profit.
- Advanced: Use the “Cobalt Crash” method: buy Cobalt in a normal system (sell to ships) then sell it in a wealthy system (drops price), then buy back cheap and repeat. But be careful – crashing a market removes profit.
- Why: Solving the puzzles (choose correct technology) gives free blueprints worth millions of Units worth of savings. Also gives Nanites.
- When: Always break into a facility; use the Exocraft's advanced mining beam to breach quickly.
- Puzzle Tip: The password system is based on random numbers. Cheat sheet available online but in-game: the correct answer is usually the one with the most logical connection to the game's lore.
- Why: Your frigates (combat, exploration, trade, etc.) can be sent on expeditions that return with Units, Nanites, crafting materials, even Storied items (like Salvage Frigate Modules).
- When: After obtaining a freighter and constructing a fleet command room. Start with one mission, build more rooms to send multiple.
- Optimization: Purchase only S-class frigates; they level up faster and have fewer problems. Replace damaged C-class ones.
- Why: The Nutrition Processor can turn simple ingredients into high-value food like “Herb Encrusted Flesh” or “Delicious Vegetable Stew”. Selling to NPCs on the Anomaly yields double the base value.
- When: After you have a farm (plants) or hunting (meat from fauna). Install the nutrition processor on your freighter.
- Tip: The most efficient recipe is “Stewed Vegetables” = 2 fungal mould + 1 cactus flesh + 1 pulpy roots: sells for ~30k Units each.
- Why: Higher class (C, B, A, S) means better stats and potential damage. S-class Alien or Experimental tools have the best damage and scanning bonuses.
- When: Save nanites to upgrade your multi-tool from space station vendors or from missions. Do not waste upgrades on low-slot tools.
- Location: Check all space stations, minor settlements on planets (with a settlement chart), and crashed ships (some have tools).
- Why: Pulse Drive upgrades (from the Anomaly or random drops) significantly increase warp distance when placed adjacent to each other (adjacency bonus). Also improve maneuverability.
- When: After you have your first A/S class fighter or explorer (explorers have hyperdrive bonus).
- Arrangement: Place three upgrades in a square in the tech inventory, then three more in general inventory (but check adjacency – each upgrade group works separately).
- Why: The technology inventory gives a 25% bonus to installed modules. Always place upgrades there when possible. General inventory is for storage only.
- When: Max out ship slots (48+21+21 = 90 total slots) via spending Units at space stations or using Starship AI Valves (rare).
- Tip: Buy cheap ships and scrap them at stations for salvage (modules that can be sold for nanites or installed).
- Why: Derelict freighters (random encounters in space) yield Tainted Metal, which refines 1:1 into Nanites (1 Tainted Metal = 1 Nanite). Also give freighter upgrade modules and storage augmentation plans.
- When: Once you have a strong multi-tool with a combat scope (S-class). Bring plenty of ammo and shield packs.
- Method: Each freighter has a captain's log and a single nest of creatures. Clear the nest, loot the engineer's terminal, and grab all salvage. Then teleport out.
- Why: Stasis Devices sell for ~15 million Units each. Building one requires complex recipes (like Iridesite, Hot Ice, etc.) but the materials can be gathered from base farming and gas extraction.
- When: Endgame only – you need a massive base with gas extractors (Sulfurine, Radon, Nitrogen) and crystalized minerals from frigates or mining.
- Shortcut: Trade via galactic market manipulation is faster for early wealth; Stasis Devices require hundreds of hours of setup.
- Why: The intergalactic trade network or Civilised Space communities share portal addresses for bases with activated Indium farms, nip-nip buds, or exotic ships.
- When: After activating all 16 glyphs (or using a save editor).
- Resources: Websites like NMS Coordinate Exchange have current addresses.
- Why: The Living Ship quest chain takes time (real time waiting) but gives a unique organic starship that can only be upgraded with nanites. It has unique modules for hyperdrive and pulse drive.
- When: After you have a freighter for storage. The quest requires specific materials like Neural Stem, etc. – best to start early and let timers run in background.
- Tip: Keep one spare ship slot when eggs mature; accept the living ship mission from the Anomaly.
- Quick Actions: Use the D-pad (or keyboard shortcuts) to quickly refill hazard protection, life support, and pulse engine without opening menus.
- Exocraft Radar: While in an exocraft, you can ping for nearby buildings using the same button as scan on foot – useful for finding trade terminals.
- Warp Cell Economy: Instead of crafting Warp Cells one by one, build an antimatter reactor (blueprint from freighter missions) to produce antimatter from carbon and chromatic metal on the fly.
- Storage Is Cheap: Always buy one extra ship slot per stop at a space station. Costs scale up but 50 million Units is nothing late game.
- Play in Permadeath for Trophies: Permadeath mode is for challenge runs; use the tips above but be extra careful – storms are deadlier, sentinels more aggressive.
- Don’t hoard early Nanites – Spend them on S-class upgrades for your multi-tool and ship. Nanites are plentiful later from frigate missions.
- Don’t ignore the Anomaly – It’s the hub for multiplayer, buying blueprints with salvage data, and upgrading everything. Visit often.
- Don’t build a massive base on your first planet – You will outgrow it quickly. Instead, build a simple shack and move to a lush, low-sentinel planet later.
- Don’t sell your first freighter – The first one offered is free; accept it even if it’s low-class. You can buy a better one later and transfer everything.
- Don’t ignore the Atlas Path – Completing it gives black holes that warp you closer to the center. It’s a core story element.
1.2. Shelter During Storms
1.3. Crafting Your First Base Computer – Don’t Build a Huge Base
1.4. Use the Analysis Visor on Everything
---
2. Exploration & Navigation
2.1. The Galaxy Map – Grey Lines are Trade Routes
2.2. Use Exocraft for Planetary Exploration
2.3. Mark Points of Interest with Save Beacons
2.4. Portal Travel – Activate One Portal Per Galaxy
---
3. Resource Management & Refining
3.1. Refiner Recipes – The Value of Oxygen
3.2. Stellar Metals – Copper, Cadmium, Emeril, Indium
3.3. Store Excess in a Matter Beam (Freighter)
3.4. Group Resources by Rarity – Harvest Every Day
---
4. Combat & Survival
4.1. Damage Types – Photon Cannon vs. Infra-Knife
4.2. Sentinel Combat – Use Blaze Javelin or Pulse Spitter
4.3. Shield Management – Install Personal Forcefield (Tau, Sigma)
4.4. Space Combat – Upgrade Pulse Drive and Shield
---
5. Base Building & Production
5.1. Power Management – Solar + Batteries for Normal Planets
5.2. Farming Modules – Biodomes are OP
5.3. Storage Containers – Color Code Them
5.4. Exocraft Specialist Missions – Unlock All Blueprints
---
6. Economy & Trading
6.1. Buy Low, Sell High – Use Trade Terminal Data
6.2. Manufacturing Facilities – Learn Blueprints, Not Just Loot
6.3. Frigate Missions for Passive Income
6.4. Cooking – Actually Profitable
---
7. Multi-Tool & Ship Optimization
7.1. Multi-Tool Classes – Focus on S-Class with Max Slots
7.2. Ship Upgrades – Install Pulse Drive Upgrades for Hyperdrive Range
7.3. Inventory Expansion – Cargo vs Technology
---
8. Advanced & Endgame Tips
8.1. Derelict Freighters – Earning Tainted Metal
8.2. Maxing Out Units – Stasis Device Farming
8.3. Portal Travel to Player Bases
8.4. Living Ship Missions – Don’t Rush
---
9. Miscellaneous Quality-of-Life Tips
---
10. Common Mistakes to Avoid
---
This guide covers the entire journey from starter planet to galactic mogul. Adapt your strategies as new updates arrive – Hello Games frequently adds content. Remember: the universe is your oyster; explore, build, trade, and survive.