Getting Started
Getting Started
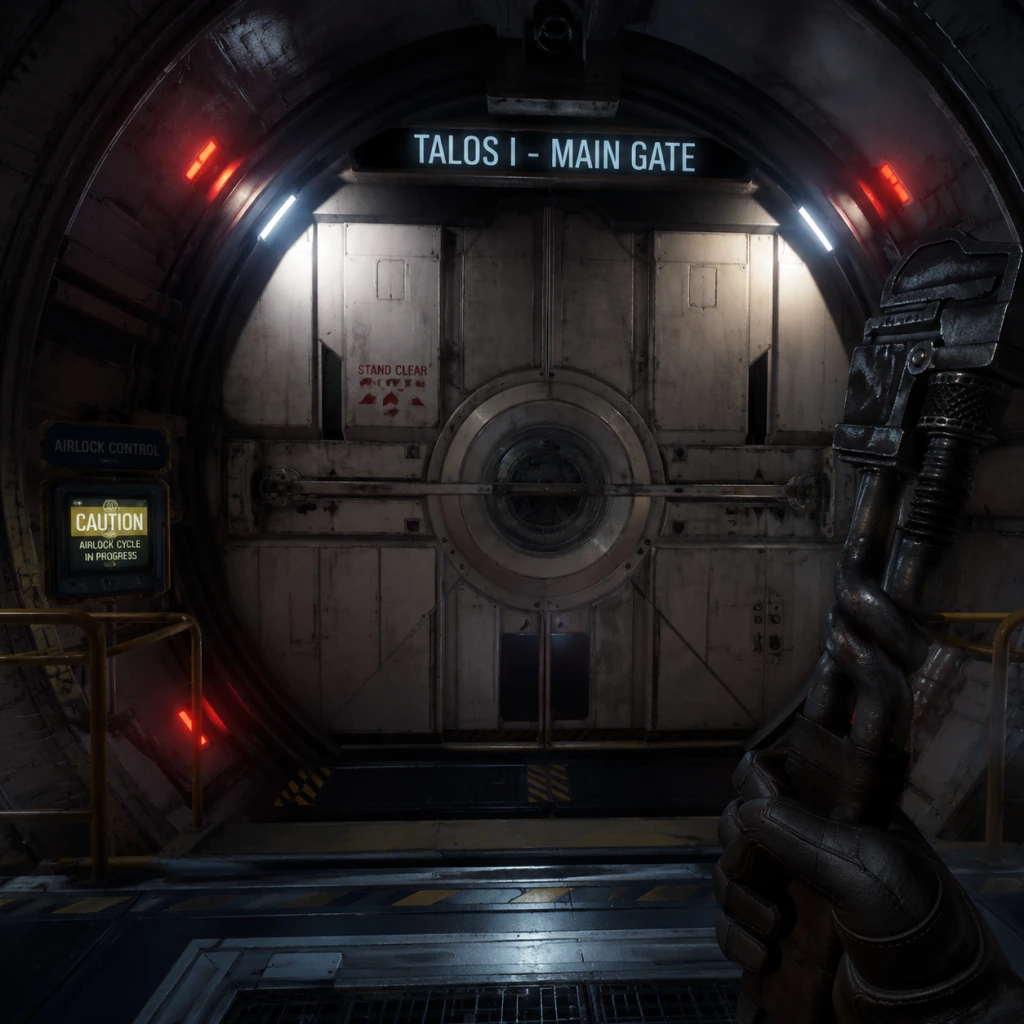
Welcome to Prey (2017), Arkane Studios’ masterful immersive sim set aboard the space station Talos I. This guide is written specifically for brand-new players to make your first hours smooth, efficient, and fun. We’ll cover everything from the opening moments to your first day’s goals, so you can avoid common pitfalls and start mastering the station from the very beginning.
---
First Hour Walkthrough
Your journey begins in a simulation. Here’s a step-by-step breakdown of the first hour (spoiler-free for story but detailed for gameplay):
1. Waking Up in Morgan’s Apartment (10 min)
- You start in a tidy apartment. Explore every drawer, cabinet, and locker. Look for the keycard on the desk, the wrench, and the Tranq gun (sedative pistol).
- Talk to the brother (through the glass) and complete the initial tests (sign a waiver, use the arm scanner).
- Crucial: Find the Neuromod device on the coffee table and install it – this unlocks your first ability (sprint).
- Head to the testing area. Scan the objects as instructed, then pick up the dart gun and shoot the target.
2. The Simulation Test (10 min)
- You enter a replica of the station – this is a test of your skills.
- Follow the objectives: locate the Mimic, use the wrench to kill it.
- After killing it, a fake Morgan appears; examine the body for a keycard.
- Use the elevator to reach the shuttle bay.
- Pro tip: Take your time. Loot everything – there are plenty of resources even in the simulation.
3. The Real Wake-Up (10 min)
- After the simulation, you wake in the real Morgan’s apartment.
- The station is now in chaos. Grab the wrench and the GLOO Cannon (on the wall near the kitchen).
- Use GLOO to block the broken window (or just avoid it) and head to the lobby.
- You’ll encounter your first real Mimic – use the wrench (or GLOO to slow it) to kill it.
- Important: Scan the Mimic with the Psychoscope (you’ll get it soon) to unlock its research.
4. Meeting January & First Objectives (20 min)
- In the lobby, you’ll hear January (an operator) over the intercom. Follow it to the Neuromod Division.
- January gives you the Psychoscope (wear it to scan enemies and objects) and a fabrication plan for the Shotgun.
- Your first clear goal: Get to the Hardware Labs to find the Shotgun parts.
- Along the way, scavenge everything: suit repair kits, spare parts, ammo, recycler charges, food.
- Don’t skip the side office with the fabricator – you can make the Shotgun once you have the plan and materials.
---
Character Creation
Prey’s character creation is minimal:
- Gender: You choose Morgan Yu’s gender (male or female) at the very start. This affects only voice lines and appearance – no gameplay differences.
- Name: Morgan Yu is fixed.
- No stats or class selection: All skills are learned later via Neuromods.
Confirmation: The choice is made in the first scene when you look in the mirror. Pick whichever you prefer – there’s no wrong answer.
---
Controls (All Platforms)
#### PC (Keyboard + Mouse)
| Action | Key |
|---|---|
| Move | W, A, S, D |
| Look | Mouse |
| Jump | Space |
| Crouch | Ctrl |
| Run | Shift (hold) |
| Interact | E |
| Attack (melee) | Left-click |
| Throw object | G |
| Inventory | Tab |
| Weapon Wheel | Q (hold) |
| Reload | R |
| Use Medkit | H |
| Use Psi | Z (if you have psi abilities) |
| Lean | Q + side mouse button? Actually lean is automatic near edges. |
| Scanner (Psychoscope) | Middle Mouse Button or V |
| Fabricator & Recycler | Stand near, press E |
| Quick switch weapon | 1, 2, 3, 4 (or mouse wheel) |
#### Xbox (Xbox One / Series X|S)
| Action | Button |
|---|---|
| Move | Left Stick |
| Look | Right Stick |
| Jump | A |
| Crouch | B (hold) |
| Run | Left Stick (click) |
| Interact | X |
| Attack | Right Trigger (shoot), left trigger (alt fire/throw) |
| Reload | Y |
| Inventory | Menu button |
| Weapon Wheel | RB (hold) |
| Scanner (Psychoscope) | LB |
| Use Medkit | D-Pad Up |
| Use Psi | D-Pad Down (if equipped) |
| Lean | Auto – hold left stick toward cover edge |
| Fabricator | Stand near, press X |
| Action | Button |
|---|---|
| Move | Left Stick |
| Look | Right Stick |
| Jump | X |
| Crouch | Circle (hold) |
| Run | L3 (click left stick) |
| Interact | Square |
| Attack | R2 (shoot), L2 (alt fire/throw) |
| Reload | Triangle |
| Inventory | Touchpad (click) or Options |
| Weapon Wheel | R1 (hold) |
| Scanner (Psychoscope) | L1 |
| Use Medkit | D-Pad Up |
| Use Psi | D-Pad Down |
| Lean | Auto – hold left stick against wall |
UI Overview
Your HUD is minimalist but informative:
- Health Bar (top left): Your physical health. Red when low.
- Suit Integrity (below health): Your space suit’s durability. If it reaches zero, you take damage in vacuum or hazardous areas.
- Psi Bar (green bar, right of health): Only appears after you install a psi ability. Used for powers.
- Crosshair (center): Changes shape when aiming at interactables.
- Weapon & Ammo (bottom right): Current weapon, ammo count (magazine / total).
- Objective Marker (top center): Shows your current mission waypoint.
- Compass (top): Shows direction and points of interest (green dots for objectives, white for loot containers).
- Stamina Ring (around crosshair): Appears when sprinting or using heavy attacks.
- Quick Slots (bottom left): Up to 4 items (medkit, psi hypo, etc.) assigned via inventory menu.
- Inventory Screen (Tab / Menu): Shows all items, weapon wheel (hold Q/R1/RB).
- Psychoscope Scanner Overlay: When using scanner, enemies/objects highlight with info and research progress.
- Fabricator / Recycler: When near a machine, a UI appears showing available materials and recipes.
- Save the technician from the fire (in the starting area).
- Find the safe code in the Lobby office (code: 0451?).
- Look for the “Morgan’s Office” side quest to learn about the story.
- Explore thoroughly: Search every desk, vent, and locker. Loot is the lifeblood of Prey; you’ll need everything.
- Read emails and notes: They provide quest clues, passwords, and lore.
- Use the GLOO Cannon creatively: Fire at walls to create climbing steps, block vents (prevent enemies from spawning), or freeze mimics.
- Recycle everything you don‘t need: Junk like bananas, cups, and spare parts can be turned into raw materials.
- Fabricate often: Use materials to make ammo, medkits, and neuromods.
- Save frequently: The game has no auto-save in some areas; manual save (F5 on PC, quick save menu on consoles) every 10 minutes.
- Scan enemies early: Researching mimics and phantoms unlocks damage bonuses.
- Upgrade the Wrench: It’s your most reliable weapon – upgrade it at workbenches.
- Carry a Recycler charge: They can instantly turn a pile of junk into materials and also harm enemies.
- Don’t engage multiple enemies without a plan: Mimics can swarm – use GLOO to block paths or climb to safety.
- Don’t ignore suit integrity: If your suit is damaged, you’ll take damage from vacuum. Always carry a repair kit.
- Don’t waste ammo on environmental objects: Use melee or GLOO to clear debris instead.
- Don’t sell or recycle neuromods: They are essential for unlocking new skills – use them on the chair immediately.
- Don’t skip side objectives that grant neuromods: They are the fastest way to grow stronger.
- Don’t neglect hacking or repair skills early: Some doors and turrets require these to progress easily.
- Neuromods – Use them at the injection chair (in Morgan’s office, Neuromod Division).
- Fabrication Materials – Minerals, Synthetic Materials, Biological Materials (needed for everything).
- Weapon Upgrade Kits – Save for shotgun and wrench upgrades.
- Weapon Parts – To repair your weapons at workbenches (reduces damage).
- Medkits – Keep at least 3 at all times.
- PSI Hypo – If you plan to use abilities, keep 3-4.
- Bananas, cups, bottles, cans – They give materials.
- Spare parts (if you have a lot) – Keep 2-3 for repairs, recycle the rest.
- Junk weapons (like the pistol you find early) – Keep one, recycle duplicates.
- Unwanted food – Only keep enough to heal (~100 hp total); recycle the rest.
- [ ] Completed the simulation test and woke up on the real Talos I.
- [ ] Installed the first Neuromod (sprint ability).
- [ ] Obtained the Psychoscope from January.
- [ ] Scanned at least 1 Mimic and 1 environment object (crate, plant).
- [ ] Fabricated the Shotgun (found the plan in Hardware Labs or bought it).
- [ ] Upgraded either the Wrench or Shotgun at a workbench at least once.
- [ ] Crafted at least 2 Suit Repair Kits.
- [ ] Saved the game manually at least once.
- [ ] Recycled all banana peels, cups, and other junk.
- [ ] Stashed important items in a safe spot (e.g., Morgan‘s office).
- [ ] Listened to all audio logs and read emails in the main office areas.
- [ ] Reached the Hardware Labs and found the first “full” shotgun blueprint.
- [ ] Unlocked at least one Security Station (the map update helps navigation).
- [ ] Killed at least 3 Mimics using the GLOO + wrench combo.
- [ ] Unlocked the “Repair” skill (requires one Neuromod – recommended before Hacking).
Note: The game pauses when you open inventory or weapon wheel – use this to plan quickly during combat.
---
Essential Early Objectives
Your first main quests (in order of appearance):
1. Wake Up – Escape your apartment and reach the lobby.
2. The Neuromod – Install the device from the coffee table.
3. The Simulation – Complete the test (auto-trigger after leaving apartment).
4. Reach the Neuromod Division – Follow January’s voice to the Neuromod office (level 1 of the station).
5. Get the Psychoscope – January gives it to you.
6. Obtain the Shotgun – Fabricate or find the Shotgun plan, then build it.
7. Visit the Hardware Labs – Collect the spare parts and fabrication materials.
8. Learn to Scan – Scan at least one Mimic and one environment object (to unlock research).
9. Get a Suit Repair Kit – Find or craft one to restore suit integrity.
10. Access GUTS – You’ll need to go through the GUTS (zero-g tunnel) to reach the Arboretum later.
Side Objectives (not required but highly recommended):
---
What to Do First and What to Avoid
#### ✅ Do First
#### ❌ Avoid
---
Early Resource Priorities
Resources are finite. Prioritize these:
Always Keep:
Recycle Immediately:
Crafting Priorities (first 2 hours):
1. Shotgun ammo – Most useful early weapon.
2. GLOO Cannon ammo – Used for puzzles and blocking.
3. Medkits – You’ll burn through them.
4. Suit Repair Kits – Essential for exploring vacuum areas.
5. Neuromods (if you have the advanced recipe) – Requires specific materials.
---
Common Beginner Mistakes
1. Not saving often – You can lose 30 minutes of progress if you die. Manual save every 5-10 minutes.
2. Killing mimics with guns from a distance – They’re fast. Use the wrench + GLOO combo: freeze them with GLOO, then whack.
3. Ignoring the Psychoscope scanning – Scanning yields research points that give you permanent damage bonuses.
4. Over-encumbering yourself – Inventory weight is limited (you can carry unlimited inventory, but heavy items slow you? Actually no weight limit, just capacity limits? Prey uses a grid inventory – items have size, not weight. So you can carry many small items. But you have limited space. Don’t hoard unnecessary junk that eats grid space. Prioritize small, valuable items like neuromods and ammo.)
5. Not using the environment – You can climb on GLOO platforms, throw explosive canisters, hack turrets to fight for you.
6. Wasting Neuromods on weak skills – Avoid early skills like “Hacking I” unless you need it. Prioritize “Sprint”, “Wrench Proficiency”, “Shotgun Proficiency”.
7. Fighting Phantoms head-on – They have ranged attacks. Use cover, throw recycler charges, or avoid until you have a shotgun.
8. Forgetting to repair weapons – Weapons deal reduced damage when worn. Check workbenches and use Weapon Parts.
9. Not reading crew emails – Many safes and turrets have passwords hidden in office emails.
10. Trying to kill every enemy – Some are best avoided by sneaking or using alternative paths (vents, breakable walls).
---
Day-One Checklist
Use this list to ensure you’re on the right track after your first play session (roughly 2-3 hours).
Final Advice: Don’t be afraid to die – you’ll learn. The game rewards curiosity. If you get stuck, look for a vent, a loose grate, or a new path. Prey is about finding your own way. Good luck, Morgan. The station is yours to save – or not.
---
End of Getting Started guide. Remember: Always save before a big fight, recycle often, and use every tool at your disposal.