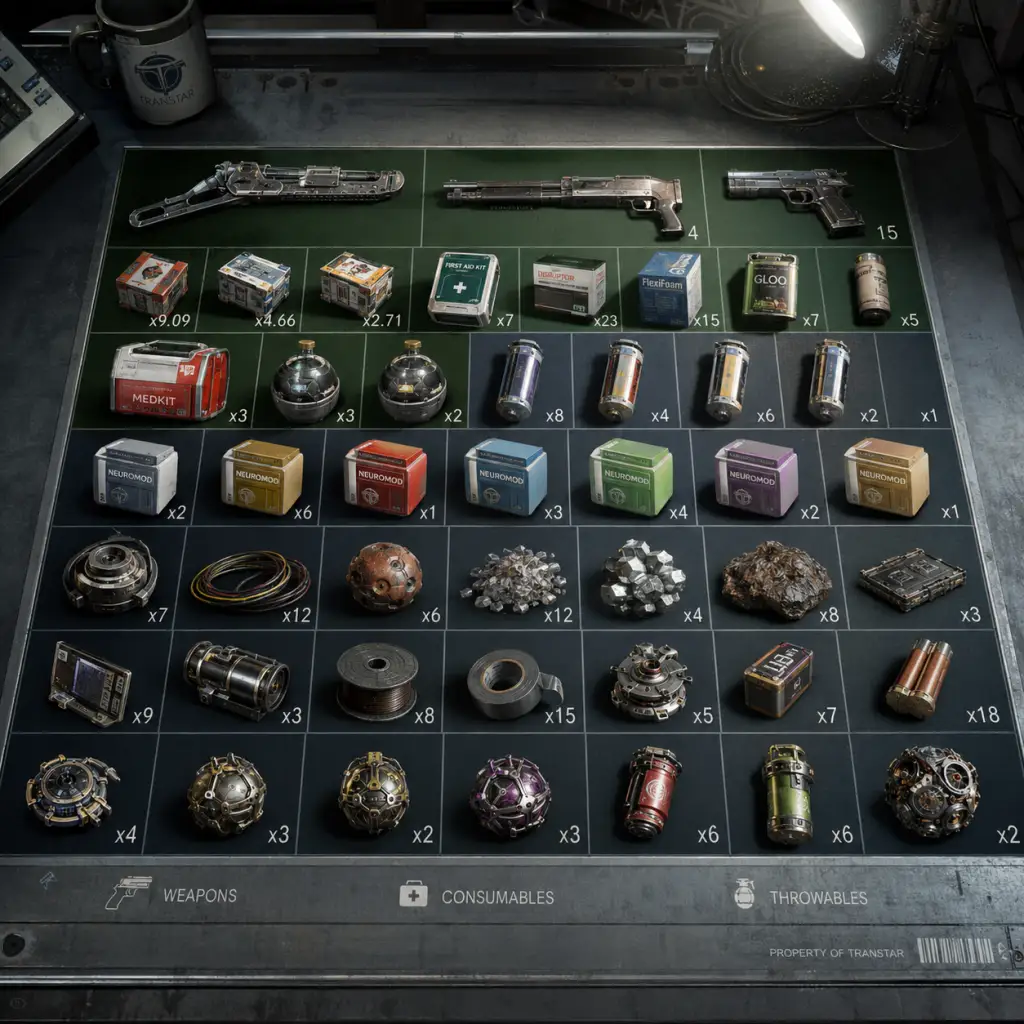
All Game Items
All Game Items – Prey (2017)
This section covers every major item category in Prey (2017). Items are grouped logically with descriptions, acquisition methods, usage tips, and synergies. All names follow the in-game terminology.
Weapons
Weapons are used for combat and sometimes for utility. Most can be upgraded at Fabrication Stations using Weapon Upgrade Kits. Each weapon has a unique role.
#### Wrench
- Description: A heavy, melee weapon. Infinite durability. Standard attack deals moderate damage; charged attack (hold attack button) deals heavy damage and can knock back smaller enemies.
- How to Obtain: Found in Morgan’s office (first area) – on the desk. Cannot be missed.
- Usage: Optimal against Mimics early game. Good for saving ammo. Upgrades increase swing speed, stamina cost reduction, and damage.
- Upgrades:
- Synergies: Combine with the Combat Focus neuromod ability (time slow) to land charged hits safely.
- Description: Semi-automatic pistol. Can be fitted with a suppressor for stealth kills. Moderate damage, slow rate of fire.
- How to Obtain: Security station in the Arboretum (given by Security Officer). Also found in storage rooms.
- Usage: Best for headshots on humans and smaller Typhon. Suppressor reduces aggro range.
- Upgrades:
- Synergies: Stealth builds; pair with Silent Operator chipset and Sneak attack bonus.
- Description: Pump-action shotgun. High close-range damage. Fires shells.
- How to Obtain: Crew Quarters – found in a locked bathroom stall; or from the Trauma Center after side quest.
- Usage: Devastating against Phantoms and Telepaths at close range. Can stagger enemies.
- Upgrades:
- Synergies: Use with Combat Focus to quickly unload multiple shells.
- Description: Electrical weapon. Fires a bolt that stuns organic enemies and overcharges robotic enemies (dealing damage over time).
- How to Obtain: Hardware Labs – on a table in the main room. Also loot from Operators.
- Usage: Stuns Typhon for easy kill or escape. Effective against Operators (overloads them).
- Upgrades:
- Synergies: Combine with Wrench or Pistol to kill stunned enemies.
- Description: Fires a foam-like substance that hardens on impact. Can block vents, create temporary staircases, and immobilize enemies.
- How to Obtain: Psychotronics – given by Dr. Calvino after fixing the broken test. Also found in multiple locations.
- Usage: Non-lethal option. Use to extinguish fires (in corridors), create platforms to reach high areas, temporarily freeze Mimics and Phantoms.
- Upgrades:
- Synergies: Combine with Combat Focus to freeze multiple enemies quickly.
- Description: Experimental weapon that fires a continuous beam of quantum energy. Very high damage over time. Requires Q-Beam ammo (spores).
- How to Obtain: Power Plant – in a locked room (requires Leverage 2 or hacking). Also found in the GUTS.
- Usage: Destroys large Typhon (Technopath, Telepath, Nightmare) quickly. Beam can be swept across groups.
- Upgrades:
- Synergies: Use after stunning an enemy with Disruptor or GLOO.
- Description: Handheld device that restores PSI points. Not a weapon but essential for Typhon abilities.
- How to Obtain: Loot from operators, found in MedBays and Neuromod Division.
- Usage: Consumes a PSI Hypo charge. Quickly restores PSI for abilities like Psychoshock, Kinetic Blast, etc.
- Description: Thrown grenade that creates a green field. All destructible objects and organic matter within are recycled into raw materials. Explosive damage to enemies.
- How to Obtain: Fabricate at Recycler (requires Recycler Charge recipe). Also found as loot.
- Usage: Destroy obstacles. Generate materials from junk. High damage to clusters of enemies.
- Upgrades: None.
- Synergies: Use on piles of junk after combat to gather resources.
- Description: Thrown charge that emits an electromagnetic pulse. Disables electronics, destroys robots, and stuns Operators.
- How to Obtain: Fabricate or loot from security rooms.
- Usage: Useful against Technopaths and turrets. Can disable security cameras briefly.
- Upgrades: None.
- Synergies: Combine with Stun Gun for double EMP effect.
- Description: Deployable device that creates a field nullifying Typhon abilities. Blocks Mimic attacks, phantom ranged attacks, etc.
- How to Obtain: Side quest “The Missing Crew” or fabricate.
- Usage: Throw at a cluster of Typhon to suppress their powers for several seconds. Also protects you from Mindjack.
- Upgrades: None.
- Description: A throwable device that emits a scanning pulse. Reveals enemies, lootable objects, and hidden areas on the map temporarily.
- How to Obtain: Fabrication or loot.
- Usage: Use in unfamiliar rooms to detect Mimics. Also highlights recyclable junk.
- Upgrades: None.
- Description: Deployable device that emits a sound to attract nearby Typhon to its location. Explodes on proximity or after a duration.
- How to Obtain: Fabrication or found in security lockers.
- Usage: Bait enemies away from your path or into traps. Could be coupled with explosive canisters.
- Upgrades: None.
- Description: Flashlight attachment for weapons (Pistol, Shotgun). Improves illumination in dark areas. Can be crafted at Fabrication.
- How to Obtain: Found on some weapons or fabricated.
- Usage: Essential in areas like Crew Quarters, Power Plant tunnels. No combat benefit other than visibility.
- Upgrades: None.
- Description: The wrench doubles as a leverage tool to move heavy objects (Leverage I). Higher levels allow moving larger objects.
- Note: Strength upgrade from neuromods enhances leverage capability.
- Usage: Unblock doors, create paths, reveal hidden caches.
- Description: Interactive terminal where you can craft items using blueprints and materials. Not an item per se but a key system.
- Description: Injectors that grant new powers or upgrades. Separate from suit mods. Covered in Core Gameplay, but relevant as items.
- How to Obtain: Fabrication (requires Neuromod blueprint, 1000 Manufacturing materials, 3 Typhon Organs, 75 Synthetic Materials), loot, rewards.
- Description: Physical chips inserted into suit’s chipset slots. Provide passive bonuses.
- How to Obtain: Scattered on desks, inside security lockers, found on dead operators.
- Common Chipsets:
- Equipping: Use the suit chipset interface (Pause menu -> Suit -> Chipset slots).
- Description: Permanent upgrades to the suit found as blueprints.
- Types:
- How to Obtain: Locate blueprints in specific zones, then fabricate at suit upgrade station (found on multiple floors).
- Description: Restores 40 HP instantly. Common throughout Talos I.
- How to Obtain: First aid kits, restrooms, medical rooms, loot from operators. Can be fabricated (requires 5 Organic Parts, 5 Synthetic Materials).
- Usage: Keep in quick slot for emergencies.
- Description: Cures major wounds (bleeding, broken bones, burns, etc.). Rare.
- How to Obtain: Found in medical bays, trauma center. Fabrication requires Neural Mod and Synthetic Materials.
- Usage: Use after taking critical physics damage.
- Description: Restores PSI gauge by 20-25 points. Allows more ability uses.
- How to Obtain: Loot, fabrication (requires 1 Neuromod blueprint, 2 Typhon Organs, 1 Synthetic Material).
- Usage: Essential for Typhon ability users.
- Candy Bar – small health (10 HP).
- Alcoholic Beverages (Wine, Vodka, etc.) – temporary buffs: increased stamina (whiskey) or increased PSI regeneration (wine). Some have negative effects (blurred vision).
- Soda – restores a tiny amount of PSI (e.g., 1-2).
- Water – restores PSI (5-10).
- Fruit/Edibles – minor health. Often found in Crew Quarters.
- Description: Repairs broken objects, such as turrets, operators, door mechanisms.
- How to Obtain: Fabrication (requires 5 Organic Parts, 5 Mineral Materials).
- Usage: Fix security turrets to fight for you. Repair broken oxygen pipes.
- Description: Temporary max HP increase (e.g., +25 for 60 seconds) and speed boost. Very rare.
- Improved Durability (less stamina cost)
- Increased Swing Speed
- Increased Damage
#### Silenced Pistol
- Extended Mag
- Damage Increase
- Reflex Sight (better hipfire accuracy)
#### Shotgun
- Increased Damage
- Increased Rate of Fire
- Reduced Spread (tighter pellet pattern)
#### Disruptor Stun Gun
- Increased Charge Capacity (more shots)
- Faster Recharge
#### GLOO Cannon
- Increased Capacity
- Reduced Spread (tighter stream)
#### Q-Beam (Quantum Beam)
- Increased Damage Output
- Longer Beam Duration (capacitor)
#### PSI Booster (not a weapon but utility)
#### Recycler Grenade
#### EMP Charge
#### Nullwave Transmitter
Tools & Equipment
These are non-combat items that aid exploration and puzzle solving.
#### Scout Charge
#### Typhon Lure
#### Tactical Flashlight
#### Leverage Tools (wrench, etc.)
#### Fabrication Station Access
Suit Upgrades & Chipsets
These are installed in the combat suit to enhance abilities.
#### Neuromods (for abilities)
#### Chipset Mods
- Chipset: Silent Operator – reduces step noise.
- Chipset: Kinetic Absorber – converts damage to PSI.
- Chipset: Life Support Efficiency – increases suit oxygen duration in vacuum.
- Chipset: Repair Efficiency – faster repair speed.
- Chipset: Combat Focus Duration – extends slow motion.
#### Suit Upgrades (Physical)
- Armor Plating – increases damage resistance. Blueprint found in Crew Quarters.
- Oxygen Upgrade – increases air capacity for EVA. Blueprint in Hardware Labs.
- Health Regeneration – slowly regenerates health over time. Blueprint in Trauma Center.
- Mobility Upgrade – increases sprint speed and jump height. Blueprint in GUTS.
Consumables & Medical Items
Used for healing, buffing, or restoring resources.
#### MedKits
#### Trauma Kits
#### PSI Hypo
#### Liquids Consumables
#### Repair Kits
#### Stimpak (rare)
Materials & Resources
Basic components used for crafting and repairing.
| Material | Description | Common Sources |
|---|---|---|
| Organic Parts | From dead humans, food, plants. Used for medkits, repair kits. | Loot bodies, break plants. |
| Synthetic Materials | Plastics, circuit boards. For nearly all crafting. | Break chairs, desks, CRTs. |
| Mineral Materials | Metals, scrap. For weapons and upgrades. | Break metal objects, lockers. |
| Typhon Organs | From Typhon corpses. Essential for neuromod fabrication. | Loot dead Typhon (Mimic, Phantom, etc.). |
| Q-Beam Spores | Ammo for Q-Beam. Found on Typhon or as loot. | Rare. |
| Weapon Upgrade Kits | Used to upgrade weapons at Fabrication stations. | Loot from security containers, some enemy drops. |
| Manufactured Parts | Combined resource used in some blueprints (e.g., 1000 Manufactured = 10 Organic + 10 Synthetic + 10 Mineral). | Fabricated at Recycler. |
Key Items & Quest Items
These cannot be consumed and are essential for progression.
#### Transcribe (Audio Logs)
- Description: Collectible recordings that provide story context and hints.
- How to Obtain: Found on desks, in dead bodies, in computers. Over 300 logs in total.
- Usage: Not required but adds lore.
- Description: Unlock specific doors or access restricted areas.
- Examples:
- How to Obtain: Quest rewards or loot (e.g., from dead staff).
- Description: Required to fabricate neuromods. Found in Psychotronics.
- Usage: Unlocks neuromod crafting.
- Description: The Leverage ability (strength) allows moving heavy objects without special tools.
- Description: Red barrels that explode when shot. Used as traps.
- How to Obtain: Scattered in environment.
- Usage: Shoot to damage nearby enemies.
- Description: Not an item but a neuromod ability that lets you turn into small objects. Acquired from Typhon abilities.
- Description: Items like wedding rings, dolls, etc. Part of side quests or just nostalgia.
- How to Obtain: Loot from specific crew quarters.
- Description: Digital notes with story or quest info. May contain passwords.
- How to Obtain: Computers, found on desks.
- Description: No gameplay function, only lore.
- Description: Used to unlock their personal logs.
- Primary Currency: Materials (Organic, Synthetic, Mineral, Typhon Organs).
- Secondary: Weapon Upgrade Kits (limit weapon upgrades).
- Fabrication Cost: Every craftable item has a material cost. Recycling junk yields materials.
- Synergies: Combining items with neuromod abilities (Combat Focus, Psychoshock) drastically increases effectiveness. For example, GLOO + shotgun = freeze and blast.
- Upgrades: Prioritize weapon upgrades early for the Pistol and Shotgun. Chipset mods greatly enhance survivability (e.g., Kinetic Absorber).
- Economy: Always carry a Recycler Grenade to turn clutter into materials. Break everything in safe rooms.
- Hidden Items: Many items are hidden behind vents accessible by GLOO staircases or by moving objects with Leverage.
#### Keycards & Keychains
- Morgan’s Office Key – open locked drawer in office.
- Arboretum Keycard – needed for main story.
- Deep Storage Keychain – required for endgame.
#### Neuromod Blueprint
#### Repair Tools (not an item but ability)
#### Explosive Canisters
#### Typhon Ability (Mimic Matter)
Collectibles
Items that track completion but have no gameplay use.
#### Crew Members’ Personal Effects
#### Datapads
#### Books & Magazines
#### Operators’ I.D. Tags
Currencies
No traditional currency. The game uses Fabrication Materials and Weapon Kits as de facto currency. You trade resources at Fabrication stations to craft items.