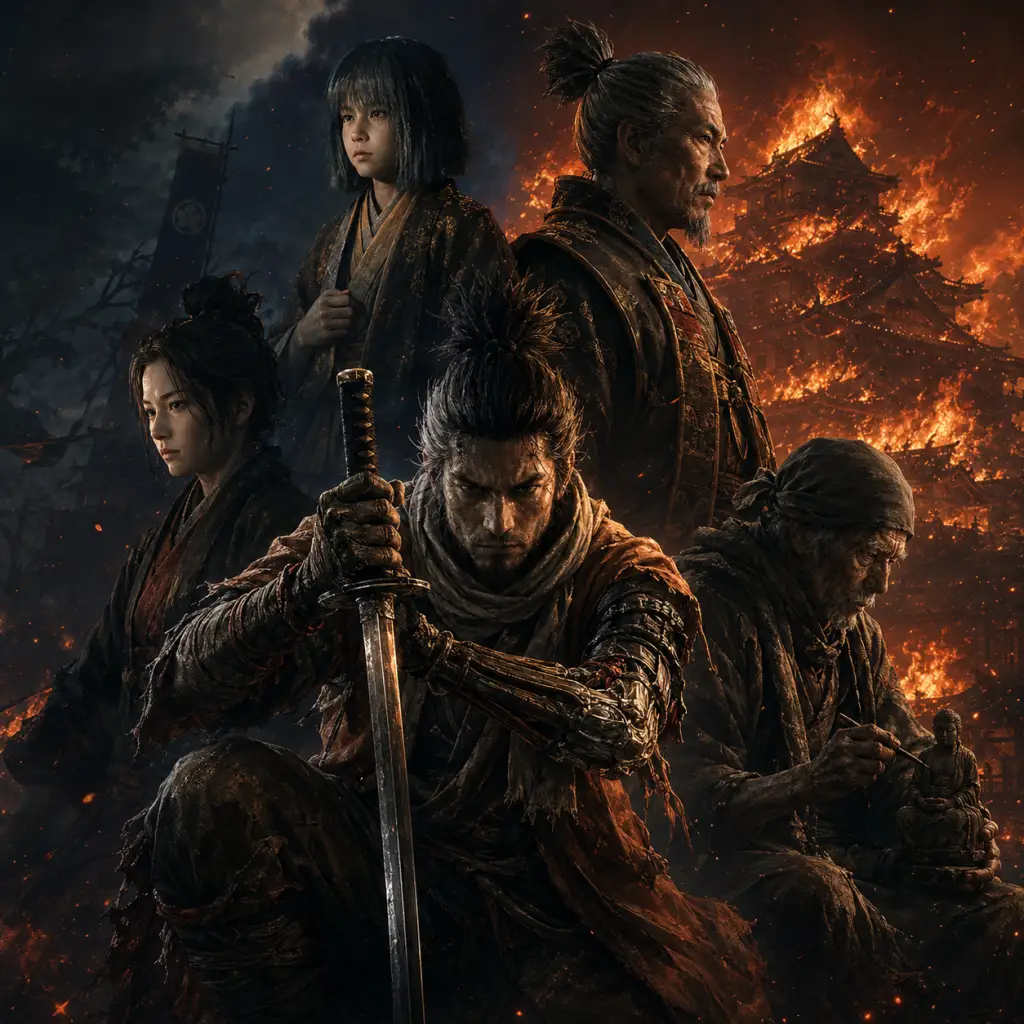
Characters & Roles
Characters & Roles Guide for Sekiro: Shadows Die Twice
This guide covers every major character in Sekiro: Shadows Die Twice, including the playable protagonist, key allies, antagonists, and influential NPCs. Since the game features a single playable unit—Wolf (Sekiro)—we also analyze how each character interacts with his journey, their strengths and weaknesses (from a story or combat perspective), and how to approach them effectively. For bosses, we provide recommended strategies and equipment.
---
1. Wolf (Sekiro) – The Playable Protagonist
Background: A shinobi of the Ashina clan, orphaned and raised by the Great Shinobi Owl. Bound by the Iron Code to protect his lord, Kuro the Divine Heir. After being defeated by Genichiro at the game's start, he loses his arm but gains the Prosthetic Arm from the Sculptor.
Strengths:
- Versatile Combat: Can use sword, prosthetic tools, combat arts, and stealth interchangeably.
- Posture Management: Excellent at breaking enemy posture via deflection and aggression.
- Mobility: Grappling hook, wall jumping, swimming allow unmatched vertical traversal.
- Resurrection: Can resurrect once per death (more with skill upgrades).
- No Stamina Bar: All actions cost health or posture; overcommitting leaves you open.
- Limited Healing: Only 1 Healing Gourd at start (can increase via Prayer Beads).
- No Block-All Shield: Must deflect perfectly or take damage; blocking lowers posture.
- Slow vs. Multiple Enemies: Stealth and positioning are required to avoid being overwhelmed.
- General Purpose: Kusabimaru (starting katana) upgraded to max; Loaded Umbrella (for parry); Firecracker (for beast bosses); Shuriken (to interrupt enemies).
- Posture Damage Build: High attack power + skills like Floating Passage and Ashina Cross; use Gokan’s Sugar to boost posture damage.
- Stealth Build: Sabimaru (poison), Gacherin’s Sugar (sneak), Suppress Sound skill; prioritize backstabs.
- Provides the Mortal Blade (necessary to defeat immortal enemies).
- Grants the ability to resurrect (using his power).
- Key to two endings (Return and Purification).
- Cannot fight; requires Wolf’s protection.
- Misunderstands the cost of the Dragon’s Heritage (he wants to die to stop the curse).
- Provides healing items (Healing Gourd, Pellets) and upgrades them (via Gourd Seeds).
- Unlocks the Mortal Blade’s true power.
- Can teach Wolf the combat art “Ashina Esoteric Text” (if you betray Kuro in Shura ending).
- Is a boss in one ending: Shura (Emma & Isshin fight).
- Limited involvement in combat – only fights during Shura ending.
- Her boss fight is challenging due to quick combos and mobility.
- Incredible posture recovery; long combos with a spear, sword, and gun.
- Ranged attacks (Glock in the final phase of Sword Saint).
- Lightning attacks (can be reversed).
- Huge health pool and high damage.
- Old Isshin has lower mobility and health than Sword Saint.
- Sword Saint’s attacks are telegraphed; he leaves openings after his long combos.
- Weak to fire (Firecracker) and lightning reversal.
- Old Isshin (top of Ashina Castle): Deflect his one-handed strikes; watch for the Ashina Cross (fast draw) – jump to avoid. He does a slow overhead slash that can be Mikiri countered if he follows with a thrust.
- Sword Saint Isshin (final boss): Phase 1: sword only – deflect and punish. Phase 2: adds spear and gun – stay close to avoid gunfire, deflect spear thrusts and Mikiri them. Phase 3: lightning attacks – jump and press attack to reverse lightning. Use Firecrackers sparingly.
- Old Isshin: Required boss for the Shura ending.
- Sword Saint Isshin: Final boss for the other three endings (after defeating Genichiro atop the castle).
- Prosthetic: Loaded Umbrella (to block gun shots and his massive sweep), Firecracker, and Mist Raven (to dodge his lunges).
- Items: Ako’s Sugar (boost attack), Gokan’s Sugar (boost posture), Divine Grass (heal all).
- Combat Art: Ichimonji Double or Whirlwind Slash for posture damage.
- Fast combos with good reach.
- Bow attacks (arrows) that can be deflected or dodged.
- Mortal Draw (a powerful unblockable slash) in his later phases.
- Lightning attacks in phase 3 (reversible).
- His posture depletes quickly under pressure.
- Furious attacks can be baited and punished.
- Lightning reversal is his main weakness in phase 3.
- Phase 1: Aggressive – deflect his combos and Mikiri his thrusts. Jump his sweeps. Use Shuriken to interrupt his bow shots.
- Phase 2 (with lightning): Same tactics, but when he uses lightning, jump and attack to reverse it for massive damage.
- Phase 3 (if you die optional): He does Mortal Draw – dodge sideways and punish.
- Loaded Umbrella (to block Mortal Draw if you fail to dodge).
- Firecracker (to stun him).
- Gokan’s Sugar for posture damage.
- Sabimaru (poison) is less effective.
- Highly mobile with aerial attacks.
- Illusions that spawn phantom assassins.
- Throws butterflies that can be deflected.
- Quick combos and unblockable sweep.
- Low posture recovery – stay aggressive.
- Illusions can be negated by using a Snap Seed, or you can wait 30 seconds.
- Weak to Shuriken (interrupts her airborne moves).
- Keep constant pressure; she will try to jump away. Use Shuriken when she is on wires to knock her down.
- When she summons illusions, either use a Snap Seed to destroy them instantly or run around until they vanish.
- Deflect her attacks to break her posture. Her combos are short; punish after the last hit.
- Shuriken (essential for knockdown).
- Snap Seeds (if you want to dispel illusions quickly).
- Loaded Umbrella (to block her butterfly projectile volley).
- Combat Art: Whirlwind Slash for wide area damage.
- Uses poison, smoke bombs, and a large sword.
- Can revive and heal (only in Father version).
- Uses anti-heal bomb (green smoke) that prevents item use.
- Fast attacks with good range.
- Open after missed attacks (e.g., after his triple slash).
- Weak to Firecracker (stuns him).
- His posture recovers fast; need to damage health to lower posture recovery.
- Great Shinobi Owl (Ashina Castle): He uses a sword and throws anti-heal bombs. Deflect his combos, dodge the anti-heal cloud. When he throws poison, move away. Use Firecracker to interrupt his combos. He is very aggressive; stay close but react to his feints.
- Owl (Father) (Hirata Estate): Similar but he has a second phase where he uses a shadowy clone attack. He also heals once – use Shuriken to interrupt healing. More aggressive and uses a sweep attack that can be jumped.
- Great Shinobi Owl: Required boss after collecting all three ingredients for Kuro (after defeating Guardian Ape and Corrupted Monk).
- Owl (Father): Optional boss in Hirata Estate (accessed by eavesdropping on Emma and the Sculptor, then using a key item).
- Firecracker (mandatory for stuns).
- Loaded Umbrella (blocks poison and anti-heal bombs).
- Gokan’s Sugar for posture damage.
- Divine Confetti for extra damage (especially Father version).
- Upgrades your Prosthetic Arm with new tools and vitality.
- Provides lore and guidance.
- Gives you the Phantom Kunai and other items.
- Cannot fight; is vulnerable to the Shura within him.
- Will die if you progress too far in the Shura ending.
- Gives you items like Divine Grass (full heal) and Frozen Tears (for Return ending).
- Provides lore about the Dragon’s Heritage.
- Can transport you to the Divine Realm for the final confrontation.
- Very frail; she cannot defend herself.
- Requires you to feed her the Fruit of the Divine Realm.
- Very long reach with sweeping attacks.
- Can block most attacks; high posture recovery.
- Uses a terror attack in phase 2? Actually not terror but an unblockable spinning slash.
- Can produce ghostly doubles.
- Vulnerable to Snap Seeds (dispels illusions).
- Weak to Divine Confetti (increases damage).
- Her posture depletes slowly if you damage health first.
- The real one is stationary during the illusion phase.
- Phase 1: Deflect her attacks; she has long combos. Mikiri her thrust attacks. Use Divine Confetti for extra damage. After depleting some health, use Snap Seed to remove her illusion clones.
- Phase 2 (if you fight her later or the true boss): Same but she uses a spinning slash that covers huge area – jump away. She also does a shadowy attack that requires you to look for the real one (clone vanishes). Attack the real one.
- Divine Confetti (boost damage and break through her block).
- Snap Seeds (to counter illusions).
- Loaded Umbrella (to block her wide sweeps).
- Combat Art: Ashina Cross for quick posture damage.
- Fast charging attacks; long reach with its tail.
- Throws feces that causes terror.
- Headless phase: uses a sword (its own arm) and extra moves.
- Can recover its arm if not dealt with.
- Firecrackers stun it.
- Its posture recovers slowly once you deplete health.
- Vulnerable to Mortal Blade in second phase (when it slams its sword).
- Weak to fire damage (burn it with Loaded Flame Vent).
- Phase 1: Stay close and deflect its attacks; be ready to jump or dodge the grab. Use Firecrackers when it rears up. When it farts, run away to avoid poison cloud.
- Phase 2: The ape loses its head and wields its own arm. It has a long, punishing combo. Deflect or dodge. When it does the deliberate sword slam, deflect it and it will be stunned, allowing you to use the Mortal Blade (if you have it) to damage its centipede. Otherwise, keep attacking its body.
- Firecracker (essential for phase 1).
- Loaded Flame Vent (to set it on fire).
- Mortal Blade (for phase 2 kill).
- Purple Gourd (to reduce terror buildup).
- Combat Art: Ichimonji Double for good damage.
Weaknesses:
Playstyle: Aggressive pressure with constant attacking and deflecting. Mix in prosthetic tools (Firecracker vs. beasts, Loaded Umbrella vs. gunfire) and Combat Arts (e.g., Ichimonji Double for posture damage). Use stealth to eliminate weaker enemies before engaging powerful foes. Master the Mikiri Counter for thrust attacks and jumping sweeps.
Unlock Conditions: Always available from the start. New tools and skills are unlocked via Prosthetic Tool upgrades (using Upgrade Materials) and Skill Points (earned by killing enemies).
Recommended Equipment/Builds:
Team Synergy: Wolf operates alone, but his actions affect NPC fates (e.g., Kuro, Emma, Sculptor quests). Choosing different endings requires specific interactions.
---
2. Kuro – The Divine Heir
Background: A young boy with the power of the Dragon’s Heritage, enabling resurrection. He is the last of the Divine Heir line, and Genichiro seeks his blood to gain immortality. Kuro is gentle, wise, and determined to end the cycle of death.
Strengths (as an ally):
Weaknesses:
Playstyle (NPC role): Kuro stays in the Dilapidated Temple or Ashina Castle during different phases. You interact with him to progress story, receive items, and make choices. He gives you the Hidden Tooth (for Purification ending) and the Mortal Blade after completing Mortal Journey.
Unlock Conditions: You meet Kuro at the start of the game. His questline is mandatory for story progression.
Recommended Equipment/Builds: Not applicable – he is not playable. However, when escorting him (very brief segment), just avoid combat and hide.
Team Synergy: Completing Kuro’s questlines unlocks the best endings and powerful items (e.g., Divine Grass). He is the emotional center of the story.
---
3. Emma – The Physician’s Daughter
Background: A young woman trained in medicine by the Sculptor and later by Dogen. She becomes the castle physician and acts as Wolf’s primary ally. She cares deeply for Kuro and the Sculptor. She is also a skilled swordswoman, having learned from Isshin.
Strengths:
Weaknesses:
Playstyle (as boss): She uses a swift sword with long combos and a lunging grab. She can also use a combat art similar to Ashina Cross. Stay aggressive, deflect her combos, and punish after she finishes. She has low posture recovery; use Firecrackers to stun her.
Unlock Conditions (boss fight): Occurs in the Shura ending (side with Owl).
Recommended Equipment (for fighting Emma boss): Loaded Umbrella (high defense), Firecracker, and a Combat Art with high posture damage like Ichimonji Double. Use Gokan’s Sugar to boost your posture damage.
Team Synergy: Emma provides narrative support and upgrades. Her quest branch determines your ending. Treat her well to get the best outcomes (Purification ending).
---
4. Isshin Ashina – The Sword Saint
Background: The legendary founder of Ashina, the greatest swordsman of his era. He is old and dying but retains immense skill. He is the grandfather of Genichiro. Depending on the ending, you may fight him in one of two forms: Isshin Ashina (old, sick) or Sword Saint Isshin (revived by Genichiro’s sacrifice).
Strengths (boss):
Weaknesses:
Playstyle (boss fight):
Unlock Conditions (boss):
Recommended Equipment (for Sword Saint):
Team Synergy: Isshin is a symbol of Ashina’s strength. Your relationship with him (helping him or killing him) determines the flow of the second half of the game. He respects strength and will offer you sake if you prove yourself.
---
5. Genichiro Ashina – The Fallen Heir
Background: The grandson of Isshin, desperate to save Ashina from the Central Ministry. He cuts off Wolf’s arm at the start and uses Kuro’s blood to gain immortality. He is a skilled archer and swordsman.
Strengths (boss):
Weaknesses:
Playstyle (boss fight):
Unlock Conditions (boss): First encounter at the top of Ashina Castle (mandatory). Second encounter as the final boss of the Shura ending (optional).
Recommended Equipment:
Team Synergy: Genichiro is the main antagonist. Defeating him is required for all endings except Shura. He is a recurring rival.
---
6. Lady Butterfly – The Mentor Betrayed
Background: A master illusionist and Wolf’s former mentor. She raised Wolf and taught him shinobi techniques, but later betrayed Owl and sought to use Kuro for herself. She uses illusions, a flurry of kicks, and summoning butterflies.
Strengths (boss):
Weaknesses:
Playstyle (boss fight):
Unlock Conditions (boss): Defeat her in the Hirata Estate memory (accessible via the Sculptor’s fallen bell). It is an optional boss but necessary for story.
Recommended Equipment:
Team Synergy: Her defeat reveals the truth about Owl and leads to completing the Hirata storyline. She is a major character in Wolf’s backstory.
---
7. Owl (Great Shinobi) – The Ruthless Father
Background: Wolf’s adoptive father and a legendary shinobi. He orchestrated the attack on Kuro and faked his own death. He values the Iron Code above all and will betray anyone, including Wolf. He appears in two fights: Great Shinobi Owl (Ashina Castle) and Owl (Father) (Hirata Estate).
Strengths (boss):
Weaknesses:
Playstyle (boss fight):
Unlock Conditions:
Recommended Equipment:
Team Synergy: Owl is the catalyst for the Shura ending and a major story driver. Choosing to obey or betray him determines your fate.
---
8. The Sculptor (Orangutan) – The Prosthetic Craftsman
Background: A former shinobi who was once a partner of Kingfisher. He lost his hand and now crafts prosthetic tools for Wolf. He resides in the Dilapidated Temple and shows signs of turning into a Demon of Hatred if not saved.
Strengths (as ally):
Weaknesses:
Playstyle (NPC): Always available at the temple. Interact to upgrade tools. You can also give him Sake to learn his story.
Unlock Conditions: Available from the start. You need to give him Upgrade Materials to improve tools.
Recommended Equipment/Builds: Not applicable. He supports Wolf's arsenal.
Team Synergy: Completing his questline (give him all sake, eavesdrop on him and Emma) can unlock the Owl (Father) boss and Purification ending. If you do not get the Mortal Blade, he turns into the Demon of Hatred boss.
---
9. Divine Child of Rejuvenation – The Mysterious Priestess
Background: A young girl found in the Hidden Tombs beneath Ashina. She is connected to the Divine Realm and is capable of creating divine grass and other holy items. She is crucial for the “Return” ending.
Strengths (as NPC):
Weaknesses:
Playstyle (NPC): She stays in the Inner Sanctum of the Senpou Temple. Gather the items she requests (Holy Chapter: Infested, Persimmon, etc.) to deepen her questline. She will eventually give you the Frozen Tears needed for the Return ending.
Unlock Conditions: You meet her after defeating the Corrupted Monk (Mibu Village) or by exploring Senpou Temple. She appears after you obtain the Holy Chapter: Infested.
Recommended Equipment: Not applicable. She is a quest giver.
Team Synergy: She is essential for the best narrative ending (Return). Her dialogue adds depth to the world and the lore of the Divine Heritage.
---
10. Corrupted Monk – The Guardian of Mibu Village
Background: A once-pure monk corrupted by the Senpou Temple’s forbidden arts. She guards the wedding cave and the Lotus of the Palace. She wields a large naginata and uses illusion attacks.
Strengths (boss):
Weaknesses:
Playstyle (boss fight):
Unlock Conditions: Required boss in Mibu Village (mandatory for story – she drops the Lotus of the Palace). Also appears as an optional boss in the Fountainhead Palace (a weaker version called the True Corrupted Monk).
Recommended Equipment:
Team Synergy: Defeating her grants access to the Fountainhead Palace, required for all endings except Shura. She is a barrier to the endgame.
---
11. Guardian Ape – The Beast of the Sunken Valley
Background: A massive, undead ape infected with the Centipede. It guards the Sunken Valley and is extremely aggressive. It uses a combination of brute force, toxic attacks, and a scream that causes terror.
Strengths (boss):
Weaknesses:
Playstyle (boss fight):
Unlock Conditions: Required boss in the Sunken Valley. Must be defeated to obtain the Shelter Stone.
Recommended Equipment:
Team Synergy: Defeating the Guardian Ape opens the path to the Ashina Depths and the Corrupted Monk. It also provides the Fistful of Ash (upgrade material) and an important Memory.
---
12. Additional Notable Characters
While not as central, these characters play important roles:
| Character | Role | Notes |
|---|---|---|
| Hanbei the Undying | Training dummy in the Dilapidated Temple | Provides unlimited practice and teaches Mikiri. |
| Kuro’s Mother (fate unknown) | Lore | Mentioned in documents; not seen. |
| Dogen | Physician, Emma’s mentor | Dead before game start; his research is important. |
| Kingfisher | Former shinobi partner of Sculptor | Mentioned in prosthetic lore; deceased. |
| The Divine Dragon | Final boss of the Divine Realm | Symbolic fight; grants the Tears. |
| Demon of Hatred | Optional boss | Transformed Sculptor if you progress Shura ending; very challenging. |
| Shichimen Warrior | Optional miniboss | Drops precious items; uses terror attacks. |
| Headless | Optional elite enemies | Gourd seeds and spirit emblems; require Divine Confetti. |
| Mist Noble | Meme boss | Extremely weak; notable for being anticlimactic. |
Conclusion
Each character in Sekiro serves a distinct purpose—whether as a mentor, ally, rival, or obstacle. Understanding their backgrounds, motivations, and weaknesses is key to mastering the game’s story and combat. For Wolf, your only playable character, adaptability is paramount: learn to mix stealth, deflection, prosthetic tools, and combat arts to overcome every foe. The bonds you forge with NPCs shape your ending, so use this guide to ensure you meet all criteria for the outcome you desire.