Core Gameplay
Core Gameplay Overview
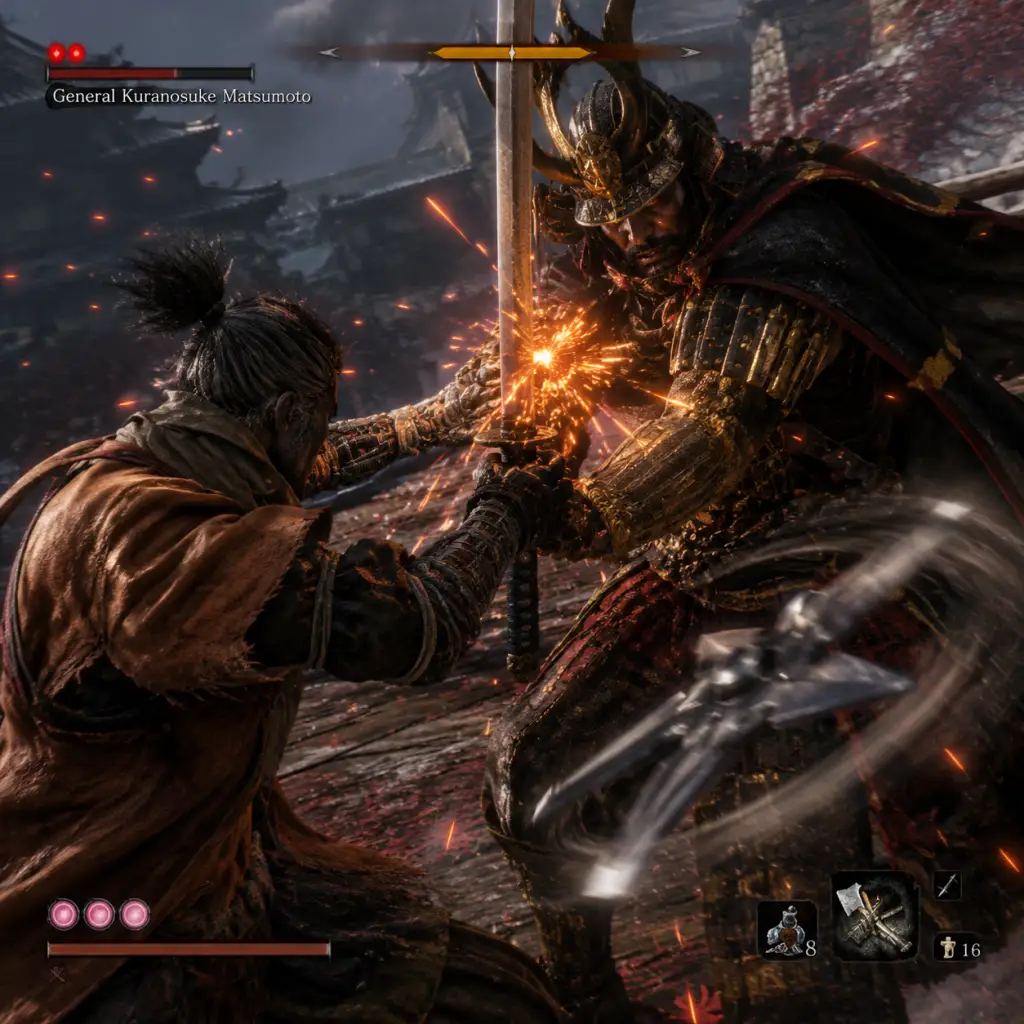
Sekiro: Shadows Die Twice is a third-person action-adventure game that blends stealth, exploration, and intense sword combat. The core gameplay loop revolves around learning enemy attack patterns, managing posture and health, and using the Shinobi Prosthetic Tool. The "Resurrection" mechanic allows a second chance in combat but comes with consequences (dragonrot). Progression is tied to acquiring Skill Points, Prayer Beads, and Memories to upgrade health, posture, and attack power. The game is structured around a central hub (Ashina Castle) and branching paths leading to distinct regions.
---
Player Progression Tiers
Early Game (Ashina Outskirts through Genichiro Ashina)
Typical State: The player has just earned the Kusabimaru sword, learned basic controls, and is exploring the outskirts of Ashina. The combat tutorial with Hanbei the Undying is essential. The first major boss is the Chained Ogre, but the true gatekeeper is Genichiro Ashina atop Ashina Castle.
Core Systems in Focus:
- Combat: Posture mechanics are emphasized. Perfect deflection builds enemy posture while maintaining your own. Enemy health and posture are separate; health damage makes posture recover slower. Examples: Early enemies like Ashina Soldiers and the Samurai General can be defeated purely through deflect timing.
- Stealth: The game strongly encourages stealth kills. From hiding in tall grass to using Shinobi tools like the Finger Whistle or Gourd Seed to distract, stealth dominance in early areas (e.g., Ashina Outskirts) can trivialize many encounters. Sweeping low health enemies with stealth deathblow is the safest approach.
- Prosthetic Tool: The Shinobi Prosthetic is introduced early. The Loaded Shuriken is used against dogs and enemies in mid-air; the Loaded Axe can break shields. Later in early game, you can find Flame Vent and Mist Raven Feathers.
- Progression: Skill Points are earned by accumulating XP; they unlock passive skills and Combat Arts. The first recommended skill is Mikiri Counter (passive) for countering thrust attacks, purchasable from the Shinobi tree. Prayer Beads are found in early areas (e.g., from Headless in Ashina Outskirts, or from the Bell Demon prayer bead in Hirata Estate). Memories are obtained from bosses (e.g., Gyoubu Oniwa's Memory increases attack power).
- Exploration: Linear path from Ashina Outskirts to Ashina Castle, with optional Hirata Estate (via Bell from the Sculptor). Exploring thoroughly yields early Gourd Seeds, Prayer Beads, and prosthetic upgrades.
- Economy: Sen (currency) drops from enemies and can be used at merchants (e.g., the Information Broker in Ashina Outskirts, Anayama the Peddler). Materials like Scrap Iron and Lump of Fat are needed for prosthetic upgrades. Early game, prioritize buying Gourd Seeds and prosthetic upgrade materials.
- Quests: Main story: reach the top of Ashina Castle to confront Genichiro. Side quests: the "Father" questline involving Owl, and the "Rat" sidequest in Hirata Estate. NPC interactions: talking to the old woman in Ashina Outskirts gives the Bell to visit Hirata.
- Spend time with Hanbei to practice deflect timing and counter thrusts/sweeps. Mastering Mikiri Counter (unlock from Shinobi tree) is mandatory.
- Use stealth to clear groups before engaging stronger enemies. The Shinobi Kite area is a perfect stealth corridor.
- Save Sen and upgrade your Healing Gourd as soon as you find Gourd Seeds. Buy the Mibu Possession Balloon for bonus Sen drops.
- Don't hesitate to use Spirit Emblems for prosthetic attacks, but manage them sparingly—early game has few vendors.
- Combat: Enemy variety increases (snake eyes, monkeys, headless). Posture management becomes even more critical. Mini-bosses like the Snake Eyes Shirahagi require careful axial deflects. The Ashina Elite boss in the dojo is a pure deflection test.
- Prosthetic Tool Upgrades: The Sculptor's last upgrade path requires Ashina Castle materials. Key upgrades include the Loaded Umbrella (blocks attacks), the Sabimaru (poison damage against some enemies), and the Akou's Sacrifice effect prosthetic. The Shinobi Firecracker is excellent against beasts (e.g., Guardian Ape).
- Progression: Prayer Beads are abundant—from mid-bosses like Long-arm Centipede Giraffe, from hidden areas like the bottomless hole. Memories continue from major bosses like the Guardian Ape and Corrupted Monk. Skill Points can be invested in Ashina tree (focus on posture damage) or Shinobi tree (utility and stealth).
- Exploration: The world opens up significantly. Sunken Valley leads to the Guardian Ape area; Senpou Temple leads to the Divine Child; Ashina Depths leads to the Mibu Village and the true Corrupted Monk. Optional areas: the Abandoned Dungeon and the Poison Pool. The Great Serpent is a setpiece encounter.
- Economy: You can now acquire more Sen from farming areas (e.g., the Antechamber near Ashina Castle with Nightjar enemies). Merchants like the Dungeon Jailer sell high-cost upgrade materials. Material farming: Scrap Iron from soldiers, Black Gunpowder from spear enemies.
- Quests: Main quest now requires acquiring the Mortal Blade (right arm upgrade) from Senpou Temple, the flower from Sunken Valley (Guardian Ape's memory), and the shelter from Ashina Depths (Corrupted Monk's bell). Side quests: the Divine Child's request for the Holy Chapter, the old woman's journey to find her son, and the "Father" flashback memory.
- Explore all three main branches thoroughly before moving on. Each area has two Prayer Beads, a Gourd Seed, and a unique prosthetic upgrade late in the area.
- For Guardian Ape: use the Firecracker prosthetic to stun it in phase 1; phase 2 requires deflect-heavy approach. Bring Loaded Umbrella for the terror scream.
- Unlock the Monk Fist or Ascending/Descending Carp skills from Ashina tree to improve posture recovery and attack.
- Use the Antechamber idol to farm Sen and XP efficiently—the Nightjar and Lone Shadow Swordman drop good loot.
- Combat: The Mortal Blade's combat art (Mortal Draw) costs spirit emblems but deals massive posture damage even through blocks. Late game bosses like the Guardian Ape duo, the Great Shinobi Owl, the Corrupted Monk (true version) require precision. The final boss, Isshin, the Sword Saint, is considered one of the hardest in video games—a long multi-phase fight requiring mastery of all mechanics.
- Prosthetic Tool: By late game, most upgrades are available. Whistle (Malcontent) can stun the Demon of Hatred. The Suzaku Umbrella is essential for blocking fire attacks from the Demon of Hatred. The Purple Lily Umbrella blocks terror from Headless.
- Progression: All Prayer Beads can be collected (40 total) for maximum vitality and posture. Attack power maxes at 99 (but practically 99 not needed; 30 is enough). Skill Points in late game can be used to unlock all skills. The final skill tree (Mushin) requires having beaten all three base tree masters.
- Exploration: Fountainhead Palace is the last new area, with beautiful but treacherous platforms. The Divine Dragon boss is a spectacle. After Fountainhead, the world state changes: Ashina Castle is besieged by Interior Ministry forces, adding new tougher enemies. This is the point of no return (if you kill the Divine Dragon).
- Economy: Sen becomes abundant. The best farming spot is the Antechamber (Nightjar + Lone Shadow) or the Ashina Dojo (multi-boss). Materials like Adamantite and Mausoleum Compound items are farmable.
- Quests: Endgame quests include: completing the Divine Child's quest for the Return ending, acquiring the Father's Bell from the Sculptor (requires eavesdropping), and the Demon of Hatred optional boss. Main story: after gathering all ingredients, you return to Ashina Castle to face Owl (Father), then Isshin.
- Before fighting the Divine Dragon, ensure you have all Prayer Beads and Memory upgrades—this is the last chance to backtrack easily.
- For Isshin, the Sword Saint, learn his combos. Use Ichimonji Double (skill) to recover posture. The umbrella blocks the gunshots in phase 2. Use Mortal Blade for quick damage openings.
- For Demon of Hatred, use the Malcontent whistle (upgraded) three times per fight to stun him. Suzaku Umbrella blocks all fire attacks. Stay close to his left leg.
- If missing Prayer Beads, consult a guide for locations in Headless, Schichimen Warriors, and Folding Screen Monkeys.
- NG+ Difficulty: Enemies have significantly more health and posture, deal more damage. Giving Kuro's Charm at the start makes blocking cause chip damage (except perfect deflections). Ringing the Demon Bell increases enemy damage and drops better loot. These can be combined for maximum difficulty.
- Progression Carried Over: All skill trees, combat arts, prosthetic upgrades, and memories carry into NG+. Sen and materials carry over, but prayer beads and memories do not—you must recollect them (attack power and vitality reset to base, but you can re-upgrade).
- Combat: With all skills unlocked, players can create powerful builds. The Mortal Draw + Living Force combination allows shooting flames through Umbrella. High attack power (e.g., 30+) makes minibosses easier, but hard bosses still challenge.
- Exploration: No new areas in NG+, but the world is covered in tougher enemies. Some items are replaced (e.g., Gourd Seeds are replaced with other valuables). The Demon of Hatred is still optional.
- Economy: Sen farming becomes more efficient; the best NG+ farm is the Antechamber (Nightjar + Lone Shadow) or the Interior Ministry Ninjas near the Demon of Hatred arena.
- Quests: You can choose different endings in NG+ (Shura, Purification, Return). Shura requires making a choice at the beginning of the endgame. New Game+ is required for the Immortality Severance ending achievement if you didn't choose it.
- Other Endgame: There are no dedicated endgame activities like dungeons; the challenge is purely boss replays (via memories?) Actually, there is no boss rush mode; the only way to replay bosses is through NG+. The game has no arena or multiplayer. The toughest challenge is Charmless + Demon Bell run.
- For the Charms and Demon Bell combo, prioritize skills that improve posture damage and recovery (e.g., Ascending Carp, Descending Carp). Use sugars (e.g., Ako's Sugar) liberally.
- In NG+, remember that you can also give the father's bell to enable the Purification ending.
- Fully upgrade everything before starting NG+ to smooth the initial levels. The Senoubi merchant sells rare upgrade materials if you have enough Sen.
- Practice perfect deflects against the most aggressive enemies (e.g., Interior Ministry Ninjas) early in NG+ to acclimate to increased difficulty.
- Posture vs. Health: Enemies have both posture (stagger bar) and health. Perfect deflects build enemy posture without taking damage. When posture is full, you can do a deathblow. Health damage reduces posture recovery rate, so mixing health damage helps.
- Deflect vs. Block: Blocking reduces posture but not health; holding block recovers your posture faster. Perfect deflect (timed block) greatly increases enemy posture damage.
- Mikiri Counter: A skill unlocked from the Shinobi tree; press dodge toward a thrust attack to stomp the weapon, building massive posture. Essential against many bosses.
- Sweep Danger: Red kanji means a sweep; jump to avoid, then press jump again for a stomp on the enemy's head.
- Grab Danger: Orange kanji means a grab; dodge away or use Mist Raven prosthetic.
- You can resurrect once per combat encounter (refreshed by resting). Costs one resurrection node (up to 3 nodes). If you die after using a resurrection, you get a second chance later with a full node. Dying permanently (no resurrection left) causes Dragonrot in NPCs, reducing the chance of their quest progress. Unseen Aid chance drops.
- Upgraded at the Sculptor's idol using materials and Sen. Each tool has multiple upgrades (e.g., Shuriken: Spring Loaded, Gouging, etc.). Spirit Emblems cost to use. Effective against specific enemies (firecracker vs beasts, spear vs centipedes).
- Attack Power: Increased by using Boss Memories (one per major boss). Max 99 but soft cap around 30-40.
- Vitality & Posture: Increased by collecting 4 Prayer Beads to make a Necklace. 40 total beads = 10 necklaces = max upgrades.
- Skill Points: Earned from XP; unlock in skill trees (Shinobi, Ashina, Prosthetic, Mushin). Full completion requires about 120 skill points.
- Sen: Used for purchases, prosthetic upgrades, and material combining. Lost on death (if not used). Can be stored in the inventory by buying items.
- Materials: Scrap Iron, Bundle, Black Gunpowder, Adamantite, etc. Drop from specific enemies or purchased.
- Spirit Emblems: Cost for prosthetic and combat arts. Max 15, increased by using Prayer Necklaces? Actually, max emblems increased by collecting the rare Emblem item found in secret areas (up to 20). Can be bought with Sen.
- Main quest is straightforward: defeat bosses to progress. Side quests include: The Divine Child's wish, the old woman seeking her son, the merchant Anayama's quest, the "Father" flashback, etc. Many are missable if not started before certain events.
Actionable Advice for Early Game:
---
Mid Game (After Genichiro until acquiring Mortal Blade)
Typical State: The player has defeated Genichiro Ashina, central Ashina Castle becomes a hub, and three main paths open: Sunken Valley, Senpou Temple, and Ashina Depths. The player now has access to more prosthetic upgrades, combat arts, and has likely unlocked more skill trees.
Core Systems in Focus:
Actionable Advice for Mid Game:
---
Late Game (Mortal Blade through Final Boss Isshin)
Typical State: The player has the Mortal Blade and can now kill headless enemies, access the Fountainhead Palace, and face the final act. The endgame includes revisiting areas like the Ashina Outskirts (now burning) and the final boss rush. The game's difficulty peaks.
Core Systems in Focus:
Actionable Advice for Late Game:
---
Endgame (Post-Credits, NG+, and Other Challenges)
Typical State: After defeating Isshin, the Sword Saint, credits roll. The player can continue their current save in the same world (post-game) to clean up remaining content, then start New Game+ (NG+) cycles. True endgame involves higher difficulty via Kuro's Charm and Demon Bell.
Core Systems in Focus (NG+):
Actionable Advice for Endgame:
---
Core Systems Deep Dive
Combat System
Resurrection System
Prosthetic Tool
Character Growth System
Economy
Quests & NPCs
---
This comprehensive guide covers the core gameplay loop across all progression tiers, ensuring you understand the systems, economy, and strategies to succeed in Sekiro: Shadows Die Twice.