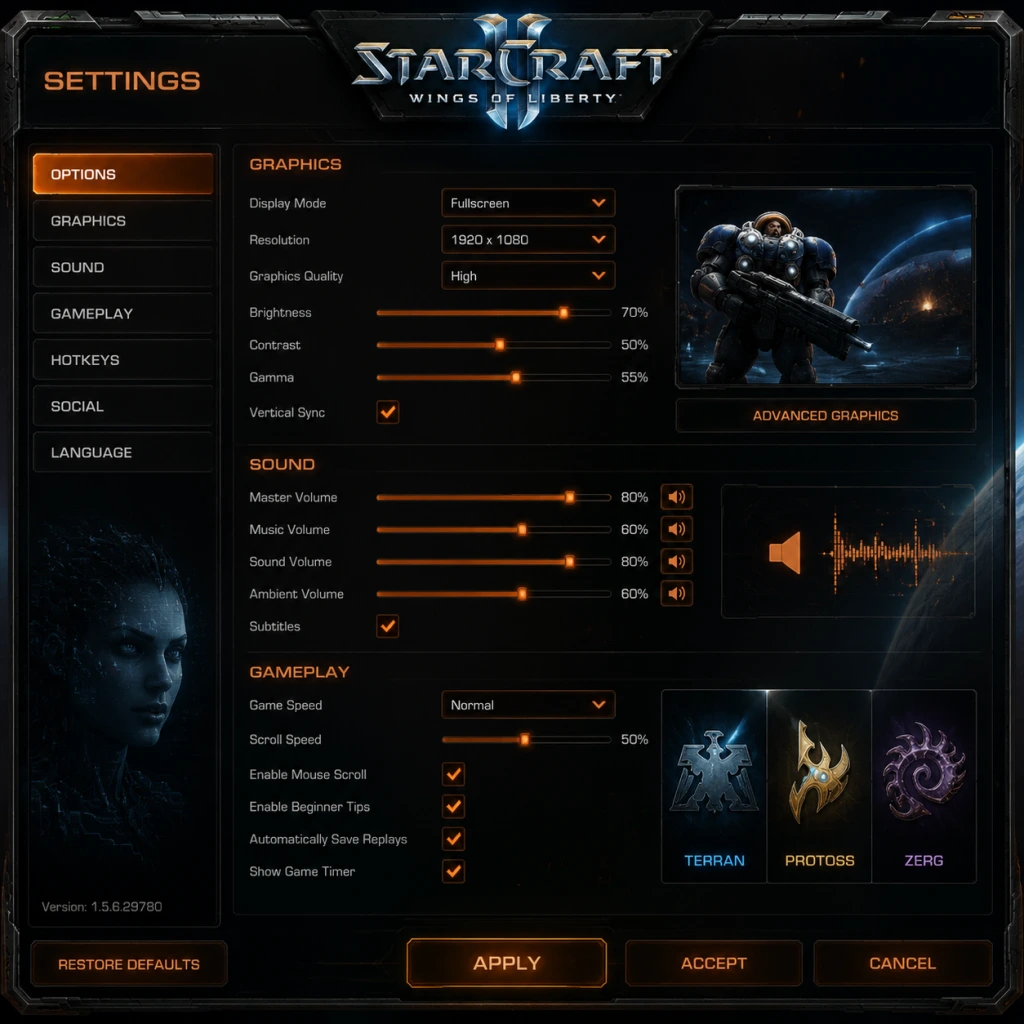
Game Settings
Game Settings Guide for StarCraft II: Wings of Liberty
StarCraft II: Wings of Liberty, now free-to-play as part of the unified StarCraft II client, offers a comprehensive settings menu accessible from the main screen (Options > Settings). This guide covers every major category—Graphics, Audio, Controls, Accessibility, Language, Network, and Gameplay—with recommended configurations for different hardware levels, pitfalls to avoid, and special attention points.
1. Graphics Settings
The graphics menu is split into three sub-tabs: Display, Video, and Sound (though Sound is covered separately). Key settings and recommendations:
#### Display
- Display Mode: Fullscreen (best performance), Windowed (alt-tab friendly), Windowed Fullscreen (borderless window, slight performance cost).
- Resolution: Native monitor resolution. For performance, use the 1920×1080 or lower if struggling.
- Refresh Rate: Match your monitor’s max (e.g., 60 Hz, 144 Hz).
- VSync: Off (recommended to reduce input lag); enable only if you see screen tearing.
#### Video (Quality Presets)
Presets: Low, Medium, High, Ultra – they set all sub-options but can be overridden individually.
| Setting | Low-End (Intel HD Graphics / low-spec) | Mid-Range (GTX 1060 / RX 580) | High-End (RTX 3070+) |
|---|---|---|---|
| Texture Quality | Low | Medium | High/Ultra |
| Shaders | Low | Medium | High |
| Lighting | Low | Low | Medium |
| Shadows | Off / Low | Low | Medium |
| Terrain | Low | Medium | High |
| Effects | Low | Medium | High |
| Reflections | Off | Off | Medium |
| Models | Low | Medium | High |
| Portraits | 2D | 3D | 3D |
| Physics | Low | Low | Medium |
| Post Processing | Off | Low | High |
| Anti-Aliasing | Off | FXAA | CMAA2 / SMAA |
- For competitive play (lowest input lag): Set everything to Low/Off except maybe Texture Quality to Medium. Disable VSync, disable triple buffering.
- For balanced quality/performance: Use Medium preset, then tweak Shadows to Low and Reflections Off.
- For max visuals: Ultra preset, but know that large battles will cause fps drops on any hardware. Lower Effects and Shadows help maintain framerates during clashes.
- Shadows have a heavy performance impact. Setting them to Off or Low yields big gains.
- Post Processing adds bloom and ambient occlusion; turn it off for clarity in competitive play.
- Portraits: 3D portraits cost extra GPU; 2D looks fine and saves resources.
- Master Volume: General level.
- Sound Effects, Music, Voice, Ambient: Independent sliders. For clarity, keep Effects high (100%), Music low (30-50%) if it distracts.
- Voice Language: Separate from text language (see Language section).
- Sound Output Device: Auto-detect or specify.
- Play Sound in Background: Recommended Off (otherwise audio may crackle if minimized).
- Channel Count: Stereo is standard; 5.1/7.1 if you have surround setup. For headsets, use Stereo.
- Voice Chat: In-game voice chat settings (push-to-talk, volume).
- If you experience audio stutter or crackling, lower Sound Quality from High to Medium or reduce Channel Count.
- Turn off Play Sound in Background to prevent audio conflicts when alt-tabbing.
- Global Hotkeys: Change any hotkey via the Hotkeys submenu (e.g., rebind Attack from A to Left Click).
- Custom Hotkey Profiles: Save and load profiles; essential for switching between races or playstyles.
- Use Legacy Hotkeys: Check this box if you prefer the original StarCraft: Brood War layout.
- Mouse Sensitivity: Adjust cursor speed; set between 50-70% for most players.
- Scroll Speed: How fast the map scrolls with edge scrolling. 50-70% recommended.
- Enable Hardware Cursor: On reduces cursor lag; off may improve compatibility on some systems.
- Invert Mouse: Rarely needed.
- Configure if you use a controller via third-party software; native support is limited.
- Keyboard: Rebind Control Groups and Camera Locations to accessible keys (e.g., rebind Camera 1 from F1 to Q). Many pros use `~` for base camera.
- Hotkey Layout: The default is "Standard (Starcraft II)". Consider using "Grid" for a simpler left-hand layout.
- Mouse: If your cursor feels sluggish, disable Mouse Smoothing (if present in your OS) and ensure Hardware Cursor is On.
- Color Blind Mode: Three options (Deuteranopia, Protanopia, Tritanopia) – changes minimap and unit colors.
- Subtitles: Enable for cutscenes and voice lines.
- UI Scale: Increase from 100% to 125% or 150% for larger text/buttons (useful on high-resolution monitors).
- Minimap Size: Slider to make minimap larger (e.g., 110-130%).
- Show Clock: Enable on screen.
- Cursor Size: Enlarge the mouse cursor (helpful for low-vision players).
- Audio Cues: Special sounds for events (e.g., production complete) – can be toggled.
- Color Blind Mode changes ally/enemy colors – test in a custom game to ensure contrast is clear.
- UI Scale may offset some menu elements – adjust in combination with Windows scaling.
- Text Language: All in-game menus, tooltips, and mission text. Options include English, Korean, Chinese, French, German, Spanish, etc.
- Audio Language: Voice over language. Can be different from text (e.g., English text with Japanese audio if available).
- Announcer Language: The unit responses and narrator – usually same as Audio.
- If you change language mid-session, a restart is required.
- Some languages (e.g., Korean) come with exclusive announcer packs for certain regions.
- Connection Details: Shows latency, bandwidth info (useful for diagnosing lag).
- Gameplay Data: Enable or disable network diagnostics.
- Ports: StarCraft II uses UDP/TCP ports 1119 and 6112-6119. If behind a strict NAT, you may need to port forward. Alternatively, use the Blizzard desktop app’s settings to optimize.
- Enable IPv6: Check if your ISP supports it; otherwise leave off.
- Speed Limit: Usually Auto; you can cap download speed for patches.
- If you experience disconnects or lag spikes, run a Network Test in the launcher (Blizzard app > Settings > Network).
- Disable Peer-to-Peer sharing for faster patch downloads if you have a fast internet connection (Blizzard app settings).
- Enable Simple Command Cards: Shows only basic commands (good for beginners).
- Display Build Grid: Shows grid lines on terrain for precise building placement.
- Enable Simplified Chat: Limits chat to pre-set phrases? (Not commonly used).
- Autosave Replays: On by default – highly recommended for post-game analysis.
- Autosave Interval: Every 10 minutes.
- Enable Ally Chat: On for team games; off for solo focus.
- Popup Notifications: Also togglable (e.g., “Your ally is under attack”).
- Minimap Pings: Toggle opacity and volume.
- Display Build Grid is critical for precise building placements (e.g., fitting depots against walls). Turn it ON.
- Turn off Help Tips to reduce screen clutter after you learn the basics.
- Autosave Replays saves every match – handy for reviewing mistakes, but can fill your disk; periodically delete old replays.
Special Attention:
2. Audio Settings
Special Attention:
3. Controls Settings
This tab includes Keyboard, Mouse, and Gamepad (if using).
#### Keyboard
#### Mouse
#### Gamepad
Special Attention:
4. Accessibility Settings
Special Attention:
5. Language Settings
Separate from Windows locale; set in Options > Language.
Special Attention:
6. Network Settings
Special Attention:
7. Gameplay Settings
Special Attention:
8. Recommended Quick Setup for Different Hardware
| System Type | Graphics Preset | Additional Tweaks |
|---|---|---|
| Low-end (laptop, Intel UHD) | Low (all sub-options Low) | Resolution 1366×768, VSync Off, Portraits 2D, Reflections Off, Shadows Off |
| Mid-range (GTX 1650, RX 570) | Medium (then drop Shadows to Low, Reflections Off) | Resolution 1920×1080, VSync Off or Fast Sync |
| High-end (RTX 3060 Ti+) | Ultra (then set Effects to High, Shadows to Medium) | Resolution 1920×1080 or 1440p, VSync Off, Post Processing Off for best competitive performance |
9. Final Setup Checklist
Before starting your first match:
- [ ] Set Graphics preset appropriate for your PC.
- [ ] Disable VSync and cap FPS via RivaTuner or driver (optional) if you want stable framerate.
- [ ] Configure hotkeys: at minimum rebind Control Group creation to something comfortable.
- [ ] Enable Display Build Grid and Autosave Replays.
- [ ] Adjust audio: lower music, higher effects.
- [ ] Set language if needed.
- [ ] Test network: run a speed test and ensure port forwarding if you have connection problems.
With these settings dialed in, you're ready to command the Koprulu Sector efficiently and with minimal technical hiccups.