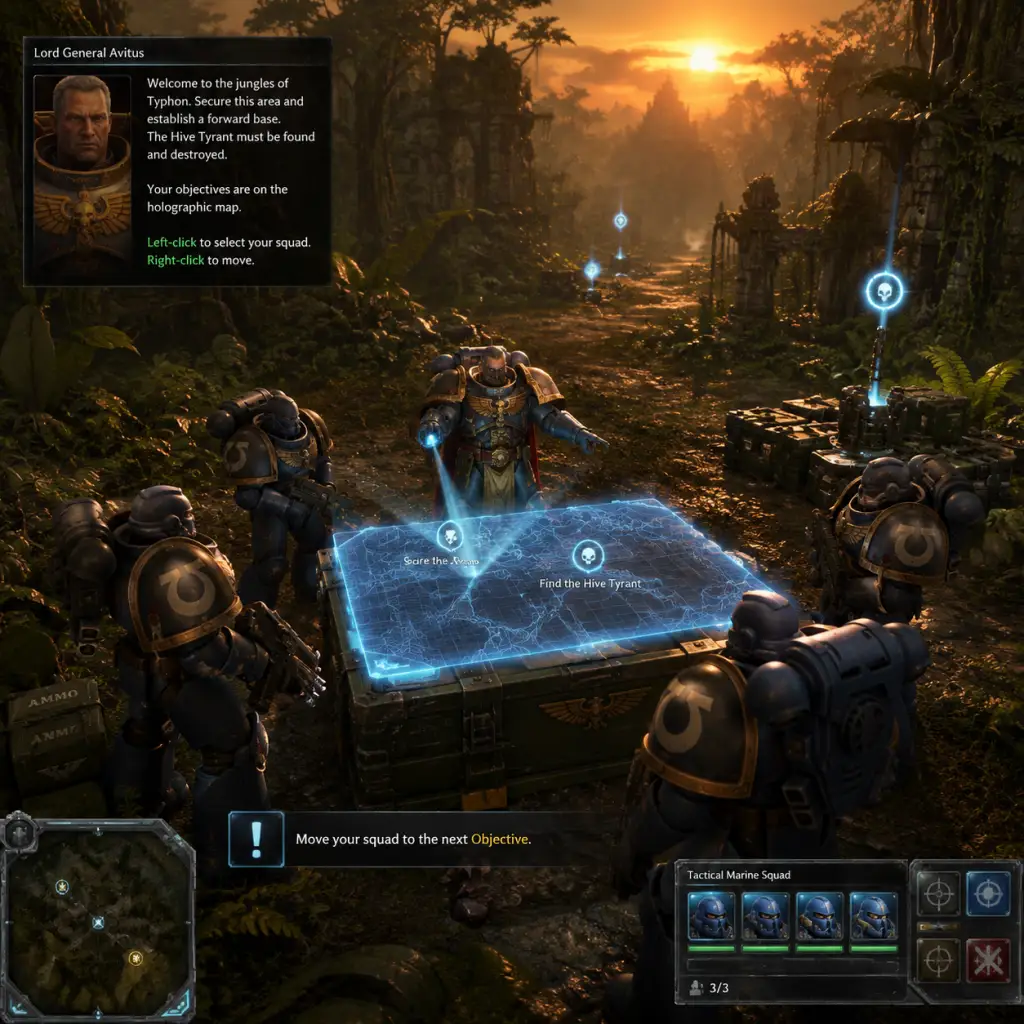
Getting Started
Overview
Welcome to Warhammer 40,000: Dawn of War II (2009, Relic Entertainment). This guide is designed to get you through the first hour with confidence. Unlike traditional RTS games, Dawn of War II focuses on small, tactical squads, cover mechanics, and hero-style progression. There are no base-building in the traditional sense; instead you capture and upgrade strategic points on the map. The game is PC only (Windows), played with keyboard and mouse.
First Hour Walkthrough
1. Launch the Game – After installation, start the campaign. You will see an introductory cinematic.
2. Tutorial Mission: The Battle of Angel Forge – This mission teaches the basics:
- Move camera: WASD or edge scrolling.
- Select units: Left-click to select, drag box for multiple.
- Move: Right-click on ground.
- Attack: Right-click on enemies.
- Cover system: Green icons show good cover (squares, walls), yellow is poor, red is out of cover. Always place units behind green cover.
- Suppression: Heavy weapons (e.g., Heavy Bolter) can suppress enemies, slowing them and making them unable to fire back.
- Build a Listening Post: Select a builder (Servitor) and right-click on a strategic point. This generates requisition.
3. After the tutorial, you arrive on the Battle Barge – your hub. Here you:
- Manage Wargear: Equip items found in missions to your Force Commander and squad leaders.
- Select Squad Leaders for the next mission (you start with Tarkus, Avitus, and Cyrus).
- Accept missions from the mission table.
4. First real mission: The Defense of Typhon – Similar mechanics. Focus on capturing points and using cover. You may face Orks. The mission will have side objectives (e.g., rescue survivors) – optional but rewarding.
Character Creation (or lack thereof)
There is no traditional character creation. You play as the Force Commander – a preset character. Customization comes later through:
- Wargear slots: Weapons, armor, accessories found in missions or won from challenges.
- Ability upgrades: Each squad leader (Tarkus, Avitus, Thaddeus, etc.) levels up and can unlock new active and passive abilities.
- Starting loadout: Before the first mission, you may choose the Force Commander’s initial wargear from a small selection (e.g., Bolter vs. Plasma Pistol). Choose what suits your playstyle; Bolter is balanced.
Controls (PC)
| Action | Default Key |
|---|---|
| Move Camera | WASD or Arrow Keys |
| Edge Scroll | Move mouse to screen edge |
| Select Unit | Left-click |
| Select Multiple | Drag box |
| Assign Group | Ctrl + 1-9 (then press number to select) |
| Move / Attack | Right-click |
| Attack Move | A + right-click (units attack while moving) |
| Stop | S |
| Hold Position | H |
| Use Ability | Click ability icon or press hotkey (1-6 for active abilities) |
| Pause Game | P |
| Select All Units (on screen) | Backspace |
| Rotate Camera | Hold middle mouse button and drag, or Q/E |
| Zoom | Mouse wheel |
UI Overview
- Top Bar:
- Bottom Bar: Unit portraits – health bars, ammo, abilities. Click to select a specific unit.
- Left Side: Objective tracker – main and secondary objectives. Complete them for experience and wargear.
- Right Side: Minimap – show enemy pings, friendly units, strategic points.
- Center Bottom: Action queue – shows queued moves/abilities for selected unit.
- Listen to all voiceovers – the tutorial is thorough.
- Save manually (F5 quick save, F9 quick load) before each mission.
- Use the pause button to issue complex orders.
- Equip wargear on the Battle Barge before deploying.
- Focus on main objectives – side objectives are secondary but reward extra loot.
- Ignoring cover – this is the #1 cause of squad wipeouts.
- Building too many units – population limit is strict early on. Prioritize upgrading existing squads.
- Neglecting abilities – each squad has unique active skills (e.g., Tarkus’ Frag Grenade, Avitus’ Melta Bomb). Use them.
- Running past enemy respawn points – enemies can reinforce from certain buildings; destroy them to stop waves.
- Requisition: Your main resource. Capture and upgrade strategic points to increase income. Spend on: squad reinforcements, wargear, and basic upgrades.
- Power: Harder to get early. Build power generators (available on some maps) or capture Power Nodes. Use for: advanced wargear, tech upgrades.
- Population: Start at 10. You can increase it by building the following on the Battle Barge:
- Not using retreat – when a squad is heavily damaged, press the retreat button (or click the icon) to make them run back to base. They regenerate health slowly.
- Splitting forces unnecessarily – keep your four squads together until you are comfortable.
- Forgetting to use Suppression – heavy weapons (e.g., Avitus’ Heavy Bolter) suppress enemies, making them easy targets.
- Ignoring the minimap – red dots indicate enemy movement. Use it to avoid ambushes.
- Overextending – do not chase enemies into unknown areas without scouting. Use Cyrus (Scout) to reveal stealth or place traps.
- Saving only once – use multiple save slots in case you get stuck.
- [ ] Complete the tutorial mission (Angel Forge).
- [ ] Accept and complete the first campaign mission (Defense of Typhon).
- [ ] Familiarize yourself with the Battle Barge UI (Wargear, Squad selection, mission table).
- [ ] Equip any wargear you found (e.g., a new bolter or armor).
- [ ] Learn to use the pause key (P) during battles.
- [ ] Set up custom control groups (Ctrl + 1, 2, etc.) for your squads.
- [ ] Understand the three resource types (Req, Power, Pop).
- [ ] Experiment with abilities on each squad leader (e.g., frag grenade, heavy bolter suppression).
- [ ] Save manually (F5) after each mission.
- [ ] If stuck, remember: cover is king, use retreat, and don’t skip the briefings.
- Requisition (green bar): Primary resource, gained from strategic points and passive income.
- Power (blue bar): Used for advanced units and upgrades. Gain from Power Nodes.
- Population (number): Unit cap. Starts at 10, increases with Barracks upgrades.
Essential Early Objectives
1. Complete the tutorial to unlock the Battle Barge.
2. Capture all strategic points on the first mission map to maximize requisition income.
3. Build at least two Listening Posts on captured points – they generate resources and provide defensive turrets.
4. Use cover – keep your units behind green shields. This reduces damage by ~50%.
5. Finish missions to gain experience and wargear. Do not linger unnecessarily; enemy waves can overwhelm.
What to Do First and What to Avoid
Do:
Avoid:
Early Resource Priorities
- Barracks: +5 pop (build early).
- Armory: Required for heavy wargear.
- Listen Posts: Not on Battle Barge; on maps, they provide income, not pop.
Priority Order:
1. Capture all strategic points.
2. Build one Listening Post on a central point.
3. If power nodes exist, capture them.
4. Upgrade your Force Commander’s wargear (e.g., better armor/weapon).
5. Build a Barracks to increase pop limit when needed.
Common Beginner Mistakes
Day-One Checklist
This foundation will carry you through the first few missions and set you up for the deeper tactical challenges ahead. The Emperor Protects!