Characters & Roles
Overview
In Angry Birds, each playable bird is a distinct character with a unique ability, personality, and strategic role. This guide covers every major bird across the franchise—focusing on the original classic, Angry Birds 2, and common spin-offs—detailing their background, strengths, weaknesses, playstyle, unlock conditions, and practical team synergy tips. While the classic game has no equipment system, later titles like Angry Birds 2 introduce power-ups and hats that can enhance abilities; these are noted where relevant.
---
Red (Red Bird)
- Background: The original leader of the flock. Red is short-tempered and determined, always ready to take charge.
- Strengths: Balanced all-rounder; direct hit damage on par with standard birds; predictable trajectory.
- Weaknesses: No special ability—he just impacts. Less effective against dense structures.
- Playstyle: Aim for direct hits on weak points (glass, exposed pigs) or toppling structures by hitting base supports. Use when you need a straightforward, reliable shot.
- Unlock Conditions: Available from the very first level (Poached Eggs, Level 1-1) in all versions. He is the default bird.
- Recommended Builds/Items: In Angry Birds 2, hats like “Red’s Helmet” add extra damage or splash. In classic, there are no items—focus on angle and power.
- Team Synergy: Red pairs well with Chuck (to speed up subsequent shots) or Bomb (to clear debris after Red destabilizes a structure). His simple physics make him a safe first bird in any lineup.
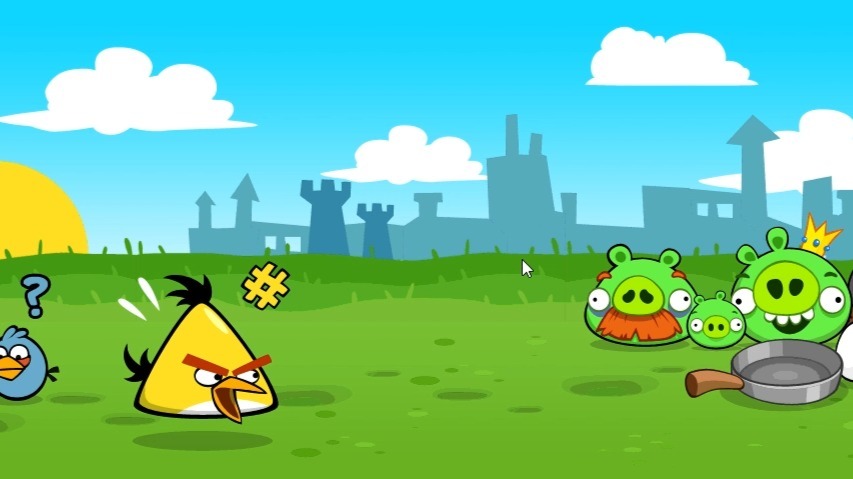
- Background: A hyperactive, competitive speedster. Chuck is the fastest bird in the flock and loves showing off.
- Strengths: Activating his ability mid-flight gives a burst of speed, increasing impact force and piercing through wood and stone. Excellent for long-distance snipes and penetrating layers.
- Weaknesses: Less effective at clearing wide areas; his speed boost can overshoot targets if not timed properly. Struggles against glass alone.
- Playstyle: Tap the screen after launch to activate speed burst. Use to break through wooden barriers or hit pigs hiding behind solid blocks. Ideal for levels where you need to reach a far-off target.
- Unlock Conditions: Classic: First appears in Poached Eggs Level 1-5 (or 1-6 depending on version). Angry Birds 2: unlocked early in the first chapter.
- Recommended Builds/Items: In Angry Birds 2, hats like “Chuck’s Racer” increase speed duration. Use with power-ups that boost angle accuracy.
- Team Synergy: Chuck works well after Red or Bomb have weakened a structure’s front—he can then pierce to core pigs. Pair with Blues for multi-target cleanup.
- Background: Explosive expert with a dark sense of humor. Bomb is reserved but delivers a big boom when provoked.
- Strengths: Area-of-effect explosion upon impact (or when tapped). Destroys large sections of wood, stone, and glass. Excellent for toppling large structures and killing multiple pigs at once.
- Weaknesses: Slow arc; heavy drop makes long-range shots tricky. Explosion can scatter blocks away from pigs, leaving some unscathed.
- Playstyle: Aim for the center of a structure, or near clusters of pigs. Tap just before impact to trigger the explosion at the desired moment (though in classic, explosion happens on contact). In Angry Birds 2, you can tap mid-flight to detonate early—use this to blast an area before hitting a block.
- Unlock Conditions: Classic: Unlocked in Poached Eggs Level 1-12 (or later). Angry Birds 2: unlocked in the second chapter.
- Recommended Builds/Items: In Angry Birds 2, hats like “Bomb’s Blast” increase blast radius. Use with “Birdquake” power-up for maximum destruction.
- Team Synergy: Bomb softens up heavily fortified areas for Red or Chuck to finish off survivors. Pair with Bubbles to create a chain of explosions.
- Background: The motherly, nurturing bird who lays explosive eggs. Matilda is calm but fierce when her friends are threatened.
- Strengths: Drops an explosive egg that detonates after a short delay—or if it hits a pig/block directly. The egg can also bounce off surfaces, allowing tricky angled shots. Good for destroying structures from above.
- Weaknesses: The bird itself does little damage; its value is in the egg. Requires careful aim and timing. Egg can roll away and miss targets.
- Playstyle: Launch Matilda high and tap to drop her egg directly over pig clusters or weak roofs. The egg’s explosion has a decent radius. In Angry Birds 2, you can also tap during the egg drop to trigger it early.
- Unlock Conditions: Classic: Introduced in Poached Eggs Level 1-16 (or Mighty Hoax). Angry Birds 2: unlocked in the third chapter.
- Recommended Builds/Items: In Angry Birds 2, hats like “Matilda’s Nest” increase egg count (two eggs). Use with “Double Bird” power-up for extra drops.
- Team Synergy: Matilda pairs well with Bomb or Bubbles to clear the resulting debris. Use her after Terence has cracked the main supports, then drop eggs into the interior.
- Background: The largest, strongest bird. Terence is a gentle giant who speaks only in grunts and hulks out when angry.
- Strengths: Massive size and weight; deals immense single-target damage and can smash through multiple thick layers. His impact can cause structural collapses through sheer momentum.
- Weaknesses: Extremely heavy—drops quickly and has a short range. Cannot be launched very far. No special ability (in classic); his sheer mass is the ability.
- Playstyle: Aim low and use max power to hit the base of structures or large clusters. Terence is best used as a battering ram against stone fortresses or to obliterate a single huge pig.
- Unlock Conditions: Classic: Appears in The Big Setup chapter (around level 5-1). Angry Birds 2: unlocked later in the mid-game.
- Recommended Builds/Items: In Angry Birds 2, hats like “Terence’s Strength” increase impact damage. Use with “Sling Scope” to fine-tune his steep trajectory.
- Team Synergy: Terence opens wide holes that smaller birds (Blues, Hal) can exploit. Follow with Matilda or Bomb to clear piggy survivors.
- Background: Three tiny, identical triplets with a mischievous streak. They act as one unit.
- Strengths: Split into three separate birds on tap, allowing coverage of a wide area or multiple weak points. Great for taking out exposed pigs and glass structures.
- Weaknesses: Each individual bird is very weak—can’t break stone or thick wood. Ineffective against heavy blocks.
- Playstyle: Launch the trio as one, then tap to split them. Aim to hit multiple pigs or fragile supports in one go. Best used when pigs are scattered or behind thin barriers.
- Unlock Conditions: Classic: Unlocked in Poached Eggs Level 1-10 (or similar). Angry Birds 2: available early on.
- Recommended Builds/Items: In Angry Birds 2, hats like “Blues’ Band” increase the splitting spread. Use with “Power Potion” to boost their impact.
- Team Synergy: The Blues excel as cleanup after a heavy hitter like Bomb or Terence has shattered the main structure. They can also be used first to strip away glass, revealing pig positions.
- Background: A laid-back bird with a curved beak and a fondness for boomerangs. Hal never goes straight.
- Strengths: After launch, tap to make him loop back and hit targets from behind. Excellent for reaching pigs hidden in enclosed spaces or behind layers of blocks.
- Weaknesses: Tricky to control; requires practice to time the loop correctly. Ineffective at direct, linear destroys.
- Playstyle: Launch with a straight trajectory, then tap to trigger a U-turn. Aim to hit pigs from the side or rear. Use when a direct shot is blocked by heavy structures.
- Unlock Conditions: Classic: Introduced in Danger Above (Chapter 2). Angry Birds 2: unlocked in the fourth chapter.
- Recommended Builds/Items: In Angry Birds 2, hats like “Hal’s Return” increase the loop radius. Use with “Slow Motion” to better time the turn.
- Team Synergy: Hal works after Bomb or Red have cleared a path; he can then loop around remaining cover. Pair with Bubbles to create confusion.
- Background: A hyper-inflatable bird who puffs up like a balloon. Bubbles is playful but explosive when inflated.
- Strengths: Upon tapping, Bubbles inflates to several times his size, then bursts, creating a shockwave that pushes blocks apart. Excellent for scattering structures and tossing pigs out of nests.
- Weaknesses: Inflation takes a moment; if he hits a pig directly before inflating, he does minimal damage. Ineffective against heavy stone that won’t move.
- Playstyle: Launch toward a stable structure, then tap just before impact to inflate. The burst will send blocks flying and often kill pigs by knocking them into walls or pits. Best used on precarious or top-heavy structures.
- Unlock Conditions: Classic: Appears in Ham ‘Em High (Chapter 4). Angry Birds 2: unlocked mid-game.
- Recommended Builds/Items: In Angry Birds 2, hats like “Bubbles’ Burst” increase the shockwave radius. Use with “Birdquake” to amplify displacement.
- Team Synergy: Bubbles pairs perfectly with Bomb or Matilda—after Bubbles scatters blocks, explosives can finish off exposed pigs. He also creates openings for Chuck or Hal to fly through.
- Background: Stylish and clever, Stella is the creative strategist of the flock. She loves bubbles and traps.
- Strengths: Creates sticky bubbles that envelop objects and lift them upward, removing pigs or blocks from the playing field. Great for eliminating pigs without direct damage.
- Weaknesses: Bubbles only affect a small area; if a pig is buried deep, the bubble may not reach. Bubbles can also lift debris that later falls on other pigs, causing accidental kills (can be good or bad).
- Playstyle: Aim at a pig or a key block, tap to release a bubble that encases it and floats it upward. Use to remove tough-to-reach pigs or to clear a path for subsequent birds. In levels where pigs are protected by roofs, lifting the roof can be effective.
- Unlock Conditions: Stella is the star of her own game (Angry Birds Stella) and appears in Angry Birds 2 as an unlockable bird (usually in the fifth chapter or via special events). Classic does not include Stella.
- Recommended Builds/Items: In Angry Birds 2, hats like “Stella’s Dream” increase bubble duration. Use with “Mighty Eagle” for extra destruction.
- Team Synergy: Stella can isolate dangerous pigs or remove obstacles before bringing in heavy hitters like Bomb or Terence. Works well with Hal for tricky angles.
- Background: A cheerful, energetic bird with a mechanical helmet. Silver loves gadgets and is the flock’s engineer.
- Strengths: After launch, tap to make Silver perform a dive-bomb maneuver, dropping straight down with immense force. Good for targeting pigs in pits or behind low walls.
- Weaknesses: Her ability only works if she’s at a high point in her arc—tap too early or too late and the dive is weak. Limited horizontal impact.
- Playstyle: Launch high, then tap as she reaches the top of her trajectory. She will dive vertically, smashing through blocks below. Ideal for deep bunkers or levels with overhead obstacles.
- Unlock Conditions: Silver first appears in Angry Birds 2 (introduced in the sixth chapter, or as a special event). She does not appear in the original classic.
- Recommended Builds/Items: In Angry Birds 2, hats like “Silver’s Drill” increase dive speed and damage. Use with “Power Potion” to maximize penetration.
- Team Synergy: Silver is a precision finisher. Use after Red or Bomb have cleared the top layers, then dive to the pig at the bottom. Pair with Bubbles to create a low path.
- Background: The legendary savior of the flock. Mighty Eagle is huge, powerful, and only appears when called upon.
- Strengths: Completely obliterates almost everything on screen with a single, massive strike. Can clear entire levels in one use.
- Weaknesses: Only usable as a power-up (limited uses or requires in-app purchase in many versions). Not a regular bird in the slingshot lineup. Cannot be aimed in detail—he sweeps across the level.
- Playstyle: Activate from the power-up menu (in Angry Birds 2 and classic remakes). He will fly across and swoop down on the strongest part of the structure. Use only when you’re stuck on a level and need a guaranteed clear.
- Unlock Conditions: Original classic: Unlocked after collecting all golden eggs or via an in-app purchase. Angry Birds 2: obtained through events or purchased. Some versions require completing a side challenge.
- Recommended Builds/Items: No equipment; his power is fixed. In Angry Birds 2, you can add “Mighty Eagle’s Hat” to slightly increase his area of effect.
- Team Synergy: Mighty Eagle is a self-contained nuke. Use him last when all other birds are exhausted, or after you’ve already cleared some space to maximize impact. He doesn’t need synergy—he is the synergy.
- Appears in: Angry Birds Seasons (e.g., “Frosty Feast”), Angry Birds 2 (as a special power-up).
- Ability: Freezes pigs and blocks in place, making them brittle. Frozen objects shatter on impact.
- Role: Debuff/Damage amplifier. Use before launching a heavy hitter.
- Unlock: Seasonal events or in-app purchase.
- Appears in: Angry Birds Friends (as a limited-time bird).
- Ability: Drops a giant weight or anvil on pigs.
- Role: Single-target elimination.
- Unlock: Special tournaments.
- Appears in: Angry Birds Transformers (crossover event in Angry Birds 2).
- Ability: Fires laser beams.
- Role: Precision damage.
---
Chuck (Yellow Bird)
---
Bomb (Black Bird)
---
Matilda (White Bird)
---
Terence (Big Red Bird)
---
The Blues (Jay, Jake, Jim)
---
Hal (Boomerang Bird)
---
Bubbles (Orange Bird)
---
Stella (Pink Bird)
---
Silver (Blueish Bird)
---
Mighty Eagle (Special Bird)
---
Other Notable Birds (Variant Appearances)
Ice Bird (Frozen/Blizzard)
Tony (Green Bird)
Luka (Purple Bird)
> Note: These variant birds are often confined to specific game modes or events and are not part of the main roster in the classic game. This guide focuses on the core playable birds.
---
Team Synergy & Strategy Template
| Bird Combination | Best Use Case | Example Level Type |
|---|---|---|
| Red → Chuck | Red weakens base, Chuck pierces to pigs behind | Levels with a single row of wooden blocks shielding a pig |
| Bomb → Blues | Bomb explodes main structure, Blues clean up scattered pigs | Large multi-block forts |
| Terence → Matilda | Terence cracks the roof, Matilda drops eggs inside | Stone bunkers with pigs in the cellar |
| Bubbles → Silver | Bubbles scatters blocks, Silver dive-bombs the leftover pig | Loose, unstable structures on a slope |
| Hal → Stella | Hal loops to a hidden pig, Stella bubbles it out | Levels with thick barriers and limited line of sight |
| Red → Chuck → Bomb → Matilda (all-rounder) | Tackles any level with balanced coverage | General progression |
---
Unlock Progression Summary (Classic Game)
| Bird | First Appearance (Classic) | Chapter & Level |
|---|---|---|
| Red | Tutorial | Poached Eggs 1-1 |
| Chuck | Poached Eggs 1-5 | Poached Eggs 1-5 |
| Blues | Poached Eggs 1-10 | Poached Eggs 1-10 |
| Bomb | Poached Eggs 1-12 | Poached Eggs 1-12 |
| Matilda | Poached Eggs 1-16 | Poached Eggs 1-16 |
| Hal | Danger Above 2-1 | Danger Above 2-1 |
| Bubbles | Ham ‘Em High 4-1 | Ham ‘Em High 4-1 |
| Terence | The Big Setup 5-1 | The Big Setup 5-1 |
| Mighty Eagle | After collecting golden eggs | N/A (special unlock) |
---
Final Tips
- Master each bird’s activation timing. In classic, some abilities activate on impact; in Angry Birds 2, you must tap mid-flight to trigger the ability.
- No bird is useless. Even Red can be the difference between one star and three stars if used precisely.
- Experiment with order. Sometimes using Bubbles first to rearrange blocks reveals a shortcut for Chuck or Blue.
- In Angry Birds 2, hats provide stat boosts. Use hats that complement the bird’s role—e.g., increase blast radius for Bomb, or speed for Chuck.
With this guide, you now understand every character’s role, how to unlock them, and how to combine them for maximum mayhem. Good luck, and happy bird-flinging!