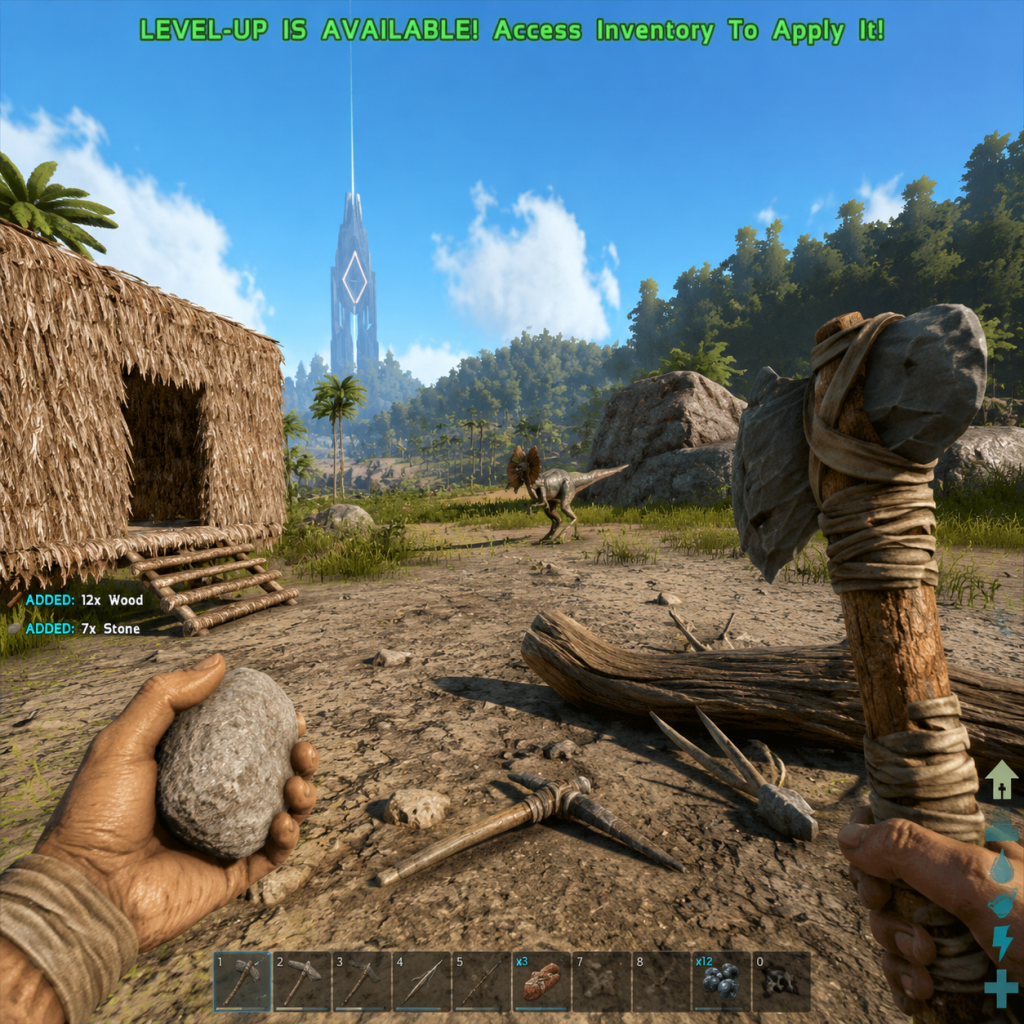
Getting Started
Overview
Welcome to ARK: Survival Evolved. This guide will walk you through your first hour in the game, explain the UI, controls, and early objectives, and help you avoid common mistakes. Whether you are on PC, Xbox, PlayStation, or Nintendo Switch, the core survival loop is the same: gather resources, build shelter, tame dinosaurs, and avoid becoming a meal.
Character Creation
Your journey begins on a beach. Before spawning, you can customize your character:
- Gender (Male/Female) – affects animations and model, no gameplay difference.
- Appearance – sliders for head shape, body build, hair, skin color, etc. These are purely cosmetic.
- Name – appears on your inventory and when interacting with others.
Note: You can change appearance later using a Mindwipe Tonic (unlocks at level 30), but it costs resources. Don't spend too long customizing – you will likely die and respawn quickly.
First 5 Minutes: Spawn Location & Immediate Actions
Spawn Selection
You can choose your spawn area from a map. For beginners, select Easy regions (South zones 1, 2, or 3) – marked with green icons. These have fewer aggressive dinosaurs and more resources.
Immediate Checklist (First 5 Minutes)
1. Look around – You are on a beach. Note the direction of the sun (east/west) to orient yourself.
2. Punch a tree – Approach any small tree or bush. Press the interact key/button to gather Thatch, Wood, and Fiber from bushes.
3. Pick up stones – Collect stones from the ground by looking at them and pressing pickup.
4. Check your inventory – Press Tab (PC), Menu button (console) to see what you have.
5. Craft your first tools:
- Pick (Thatch + Stone): Gathers flint and stone faster.
- Hatchet (Wood + Stone): Gathers wood and thatch faster.
- Spear (Wood + Stone + Fiber): Your first weapon.
6. Drink water – Find a river or coastline. Walk into shallow water and press the interact key to drink (or use the radial menu).
7. Eat berries – Pick Mejo Berries (blue) from bushes. Avoid Amarberry (red) until you need Narcotics; Azulberry (purple) gives water.
UI Overview
The Heads-Up Display (HUD) shows critical info:
| Element | Description |
|---|
| Stamina bar (blue) | Depletes when sprinting, jumping, attacking. Regenerates quickly when idle.
| Oxygen bar (white) | Drains underwater. Refills when you surface.
| Food bar (green) | Drains over time. Eat berries or meat to fill.
| Water bar (blue droplet) | Drains over time. Drink from water sources.
| Torpor (purple bar) | Builds up from being hit or drugged. If full, you fall unconscious. Avoid getting knocked out.
| Inventory weight (bottom-right) | Shows carried weight limit. Overencumbered = can't run.
| Hotbar (bottom center) | 0-9 slots for quick access items. Drag items from inventory to assign.
| Level & XP (bottom-left) | Yellow bar – gain XP by harvesting, killing, crafting. Level up to unlock engrams (blueprints).
Controls (All Platforms)
PC (Keyboard & Mouse)
- WASD – Move
- Left Mouse – Attack/Use
- Right Mouse – Zoom/Secondary use
- E – Interact/Pick up
- Tab – Inventory
- I – Player inventory
- F – Mount/Dismount
- C – Crouch
- X – Prone
- Space – Jump
- Shift – Sprint
- Ctrl – Walk
- 1-9 – Hotbar slots
- Q – Smart Remote (toggle tool)
- R – Reload/Alternate use
- T – Access inventory of targeted structure/dino
- Numpad – Whisper/Shout
- Print Screen – Screenshot
- Left Stick – Move
- Right Stick – Look
- A – Jump/Interact
- B – Crouch/Prone (hold)
- X – Use item
- Y – Access inventory
- RB – Eat/drink (while holding item)
- LB – Toggle inventory
- D-Pad Up – Mount/Dismount
- D-Pad Down – Flare/Whistle
- D-Pad Left/Right – Cycle targets
- Right Stick Click – Zoom
- Left Stick Click – Sprint
- Menu – Options
- View – Map
- Left Stick – Move
- Right Stick – Look
- Cross – Jump/Interact
- Circle – Crouch/Prone (hold)
- Square – Use item
- Triangle – Inventory
- R1 – Eat/drink (while holding item)
- L1 – Toggle inventory
- D-Pad Up – Mount/Dismount
- D-Pad Down – Flare/Whistle
- D-Pad Left/Right – Cycle targets
- Right Stick Click – Zoom
- Left Stick Click – Sprint
- Options – Menu
- Touchpad – Map
- Left Stick – Move
- Right Stick – Look
- B – Jump/Interact
- A – Pick up/Eat
- X – Inventory
- Y – Use item
- R – Eat/drink
- L – Toggle inventory
- ZR – Attack
- ZL – Zoom
- D-Pad Up – Mount/Dismount
- D-Pad Down – Whistle
- D-Pad Left/Right – Cycle
- Right Stick Click – Crouch
- Left Stick Click – Sprint
- + – Menu
- - – Map
- Fishing – Craft a fishing rod? Not yet. Instead: hunt small animals:
- Cook meat – Place Raw Meat in campfire with fuel (wood/thatch). Press Start Cooking.
- Water – Fill a waterskin (crafted from Hide/Stone? Actually Waterskin requires 4 Hide and 10 Fiber). Or just drink from rivers.
- Berries – Still good for food but less nutritious.
- Thatch Foundation – Cheap, but weak. Recommended: start with Wood.
- Wooden Walls, Doorway, Door – craft at least 4 walls, 1 doorframe, 1 door.
- Roof – Wooden ceiling.
- Place foundation – Use a hammer to align.
- Place walls, then doorframe, door, ceiling.
- Craft a Mortar and Pestle (requires 20 Stone, 5 Wood, 5 Fiber) – used later for narcotics.
- Craft a Small Chest (store extra items).
- Dodo or Lystrosaurus – Passive tame: put berries in last hotbar slot, approach cautiously, press E (interact). Do not hit them. They follow if you have food.
- Parasaur – Knockout tame: use slingshot or club on head until unconscious, then put Mejo Berries in its inventory. Wait for taming bar to fill. Protect it during taming.
- Don't attack a Raptor without a bola and spear. They are fast and kill you quickly.
- Don't swim in deep water – Megalodons (sharks) will eat you. Stay near shore.
- Don't stay in the open at night – temperatures drop, and dangerous predators like Raptors hunt. Stay near your campfire.
- Don't eat Narcoberries – they increase Torpor. You'll fall unconscious and die.
- Don't build on a spawn beach – other players might destroy your base (PvP servers) or it's too crowded. Move inland a bit.
- Don't ignore your water/food bars – death from dehydration/hunger is common.
- Don't punch a Trike – it will trample you.
- Don't litter the beach with structures – it's considered bad server etiquette, and you may get raided.
- Don't try to tame a high-level dino first – start with low-level dodos or parasaurs.
- Don't store all your resources in one box – if your base is raided, you lose everything. Spread out multiple small caches.
Xbox
PlayStation
Nintendo Switch
First Hour Walkthrough (Step-by-Step)
Step 1: Survive the First Night (0-20 minutes)
1. Gather 50 Thatch, 50 Wood, 50 Fiber, 30 Stone – use tools.
2. Craft a Campfire (requires 2 Stone, 20 Thatch, 12 Wood). Place it on safe ground.
3. Craft a Stone Pick and Stone Hatchet if not done.
4. Scout for a safe spot – near water but not too close to carnivores. Avoid the swamp and redwood forest.
5. Craft a Bed (requires 40 Thatch, 80 Wood, 15 Fiber, 10 Hide). Place inside a shelter. This is your respawn point. Without it, you respawn randomly.
6. Storage Box (make one) – Store extra resources.
Step 2: Get Food & Water (20-40 minutes)
- Dodo – Slow, easy to kill with a spear. Gives Raw Meat and Hide.
- Parasaur – Similar, but be careful not to aggro its herd.
Step 3: Build a Basic Base (40-60 minutes)
Optional Early Goal: Tame a Dino
What to Do First – Essential Early Objectives (Levels 1-10)
1. Craft tools – Pick, Hatchet, Spear, Campfire.
2. Find a safe location – Near water, with access to trees, rocks, and not near spawn points (to avoid griefing on PvP).
3. Build a small shelter – Even a 2x1 thatch hut with a bed.
4. Gather 100 Fiber – Needed for bola, clothes, and later items.
5. Craft a Bola (requires 3 Fiber, 5 Stone, 2 Thatch) – Can immobilize small dinos like Raptors for easy kills or taming.
6. Gather Hide – From dodos, dilos, and parasaurs. Craft Cloth Armor (3 pieces: shirt, pants, hat) for insulation.
7. Level up – Unlock engrams: Bola, Mortar and Pestle, Narcotics (level 10).
8. Craft a Narcotics: in mortar, 1 Spoiled Meat + 5 Narcoberries = 1 Narcotic. Used to keep unconscious dinos asleep during taming.
What to Avoid – Beginner Don'ts
Early Resource Priorities
| Resource | Use | How to Get | Priority |
|---|
| Wood | Stronger buildings, weapons | Hatchet on trees | High (first 2 hours)
| Stone | Tools, weapons, foundations | Pick on rocks | High (first hour)
| Fiber | Bola, cloth armor, ropes | Pick from bushes | High (immediate)
| Hide | Armor, bed, sleeping bag | Harvest from dead animals | Medium (first 3 hours)
| Flint | Sparkpowder (ammo for guns) | Pick on rocks | Low early game
| Metal | Advanced tools, structures | Pick on metal rocks (shiny) | Low (after level 20)
| Crystal | Spyglass, later tech | Pick from crystal nodes | Low early game
| Berries | Food, taming, narcotics | Pick from bushes | Constant
| Raw Meat | Food, taming carnivores | Hunt small animals | Constant
| Water | Survival | Rivers, ocean | Constant
Common Beginner Mistakes & How to Avoid Them
1. Running blindly – Always have a plan. Scout the area before exploring.
2. Not building a bed – You will die and lose progress.
3. Overburdening carry weight – Keep weight below 50% to sprint. Drop unnecessary items.
4. Not using the hotbar – Assign food, weapons, and tools to hotbar for quick access.
5. Ignoring torpor – If a dilophosaur spits on you, your torpor rises. Eat Stimberries (yellow) to reduce torpor.
6. Taming without a trap – For larger dinos, build a simple ramp and box trap to safely knock them out.
7. Wasting engram points – Don't unlock every primitive structure. Focus on tools, weapons, and taming-related engrams first.
8. Not cooking meat – Raw meat spoils quickly. Cook it to last longer.
9. Fighting in melee vs. Raptors – Use ranged weapons like a slingshot or bow from high ground.
10. Forgetting to repair tools – Carry extra tools or repair them at a smithy.
Day-One Checklist (Printable Summary)
Objectives for your first in-game day (approx 40 minutes real time):
- [ ] Choose Easy spawn (South zone)
- [ ] Gather 50 Thatch, 50 Wood, 50 Fiber, 30 Stone
- [ ] Craft Stone Pick + Stone Hatchet
- [ ] Craft Campfire (place it near water)
- [ ] Eat berries and drink water
- [ ] Craft a Bed (40 Thatch, 80 Wood, 15 Fiber, 10 Hide)
- [ ] Build a small shelter (foundation, 3 walls, doorframe, door, ceiling)
- [ ] Gather 100 Fiber for Bola
- [ ] Craft Bola + Spear
- [ ] Kill 3-4 dodos for Hide and Raw Meat
- [ ] Cook meat on campfire
- [ ] Craft Cloth Armor (shirt, pants, hat) – 20 Hide each
- [ ] Place a Storage Box inside shelter
- [ ] Level up to at least level 5 (crafting gives XP)
- [ ] Unlock engrams: Bola, Mortar and Pestle, Narcotics (at level 10)
- [ ] Tame a Dodo (optional – first day)
- [ ] Craft a Spyglass (requires Crystal, Metal, Hide – may skip if no Crystal)
- [ ] Sleep in bed to set spawn point
- Singleplayer – Adjust settings in Options: increase taming speed, resource gathering rate, and disable structure decay to learn without pressure.
- Official servers – Harsh. Consider unofficial PvE servers with boosted rates for a friendlier experience.
- Join a tribe – Safety in numbers. You can share resources and tames.
- Watch your surroundings – Listen for footsteps and roars. Use the ”Whistle” radial menu to command tamed dinos.
- Have fun – Dying is part of the learning curve. Each death teaches you something.
End of day one: You should have a shelter, bed, basic tools, cooked food, cloth armor, and a storage crate. You are ready for day two: taming a Parasaur, exploring further, and building a more secure base.