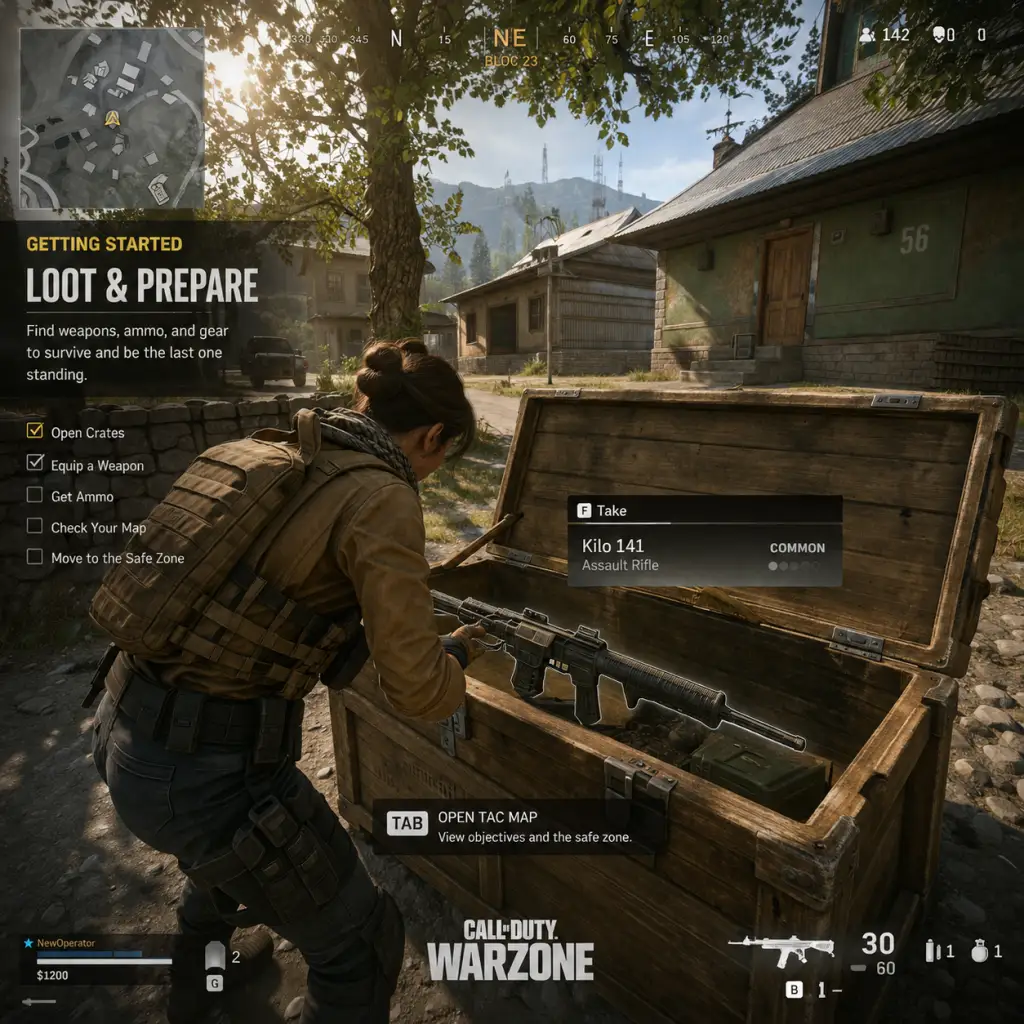
Getting Started
Getting Started
Your First Hour in Call of Duty: Warzone
Welcome to Call of Duty: Warzone 2.0. This guide will walk you through everything you need to survive your first hour, avoid common pitfalls, and start climbing the leaderboard.
#### 1. Character Creation (Operators)
Warzone doesn’t have a traditional character creation. Instead, you choose an Operator – predefined characters with unique skins and voice lines. You unlock operators by:
- Starting with a few default operators (e.g., Mil-Sim, König, Stiletto).
- Purchasing bundles from the Store (Cosmetic only, no gameplay advantage).
- Completing battle pass tiers (free and premium).
Tip: Pick an operator whose skin blends into the environment (e.g., dark shades for shadows, ghillie suits for bushes). Avoid bright or flashy skins early on.
#### 2. Platform-Specific Controls
Familiarize yourself with the default controls. You can customize them in Settings > Controller/Keyboard & Mouse.
| Action | PlayStation | Xbox | PC (Keyboard) |
|---|---|---|---|
| Move | Left Stick | Left Stick | W/A/S/D |
| Look | Right Stick | Right Stick | Mouse |
| Sprint | L3 (click L stick) | LS (click L stick) | Shift |
| Crouch | Circle (O) | B | Ctrl |
| Prone | Hold Circle | Hold B | Z (default) |
| Jump | X | A | Space |
| Interact/Pick Up | Square | X | F |
| Reload | Triangle | Y | R |
| Switch Weapon | R1 | RB | 1/2 or Mouse Wheel |
| Use Lethal | R1+Square | RB+X | 4 (default) |
| Use Tactical | L1 | LB | 3 (default) |
| Ping/Comm Rose | D-Pad Up | D-Pad Up | Alt or Middle Mouse |
| Plate Armor | Double-tap Right D-Pad | Double-tap Right D-Pad | 5 (default) |
| Map | Touchpad | View Button | M |
| Scoreboard | Touchpad | View Button (hold) | Tab |
#### 3. UI Overview (HUD)
When you enter a match, you’ll see:
- Health Bar (bottom center): White segments – full health. When damaged, segments turn red and slowly regenerate. Use Stim (Tactical) to heal faster.
- Armor Plates (below health): Up to 3 plates can be equipped. Yellow indicators show empty slots. Plates can be found on the ground or purchased.
- Cash Counter (top right): In-game currency used for Buy Stations (Killstreaks, Self-Revives, Loadout Drops). Start with $0, earn by looting, completing contracts, and killing enemies.
- Minimap (top left): Shows nearby enemies (red circles when they fire unsuppressed), teammates (blue/green dots), and points of interest.
- Compass (top center): Shows cardinal directions. Use for callouts (e.g., “Enemy at 270 degrees”).
- Active Contract (left side): Shows objective when you pick up a contract (e.g., Bounty, Most Wanted, Intel, Safecracker).
- Ammo & Equipment (bottom right): Current weapon, reserve ammo, lethal/tactical count, killstreak slot (e.g., UAV, Cluster Strike).
- Teammate Status (left side): Health bars, down indicators, and distance.
- Don’t hot drop (e.g., Al Mazrah City, Observatory) as a beginner. Land at off-center locations like small compounds, farms, or villages (e.g., Sawah Village, Oasis Gate, Cemetery). Use the Tac Map (M) to find unmarked buildings.
- Loot priority: Armor Plates (equip 3), a weapon (any, but AR/SMG preferred), Cash ($1000+ is good), Self-Revive, Gas Mask, and Killstreaks (UAV is best for beginners).
- Open every loot box (brown wooden crates) and search floor loot. Yellow boxes contain higher-tier items.
- If you find a Buy Station (marked with a dollar sign icon on map), you can purchase: Armor Plates ($500), Self-Revive ($4000), Gas Mask ($3000), UAV ($4000), Loadout Drop Marker ($10,000 – save for mid-game). Don’t buy early – loot first.
- Contracts are orange circles on your minimap. They give cash, XP, and reveal enemies.
- Best beginner contracts:
- Avoid the Most Wanted contract (marks you on map for everyone) until you understand rotations.
- Watch the Circle Timer (top left of minimap). When it shrinks, you must move inside the safe zone or take continuous damage from the gas.
- Always check your Gas Mask – it protects you from gas damage. Equip it from inventory (press Tab on PC, Up on D-pad to open backpack).
- Use vehicles (ATV, UTV, Truck) to rotate quickly. Be careful – vehicles are loud and attract enemies.
- Don’t stay in one building too long. The circle forces you to move; getting caught outside costs HP and plates.
- When you have $10,000, find a Buy Station and purchase a Loadout Drop Marker. Throw it in a safe area (inside the circle, behind cover). This drops your custom weapon classes (weapons, perks, equipment).
- Create a custom loadout in the main menu: Choose a primary weapon (e.g., M4, Kastov-74u), attachments for recoil control and ADS speed, and perks like Overkill (two primaries) or Ghost (invisible to UAVs). For beginners, use Overkill with an AR and a shotgun/SMG.
- If you can’t afford loadout, you can buy a personal UAV ($4000) to scout enemies.
- Looting for too long: Many beginners spend minutes looting every container. Loot only the first 30 seconds, then move toward the circle. You can loot dead enemies later.
- Engaging without full armor: Always equip 3 plates before a fight. Even one plate missing makes you easier to kill.
- Standing still in the open: Use cover constantly. Move from tree to rock, building to wall.
- Ignoring audio: Footsteps, gunshots, and vehicle sounds are critical. Use a headset. Lower your own movement (walk, crouch) when near enemies.
- Reviving teammates in open area: If a teammate goes down, throw smoke first, then revive. Don’t rush into a line of fire.
- Using killstreaks carelessly: UAV reveals you on minimap when you deploy it (but shows enemies). Cluster Strikes and Airstrikes have a long animation – don’t use them in close quarters.
- Dropping your cash: Always use a Buy Station before dying. Cash disappears on death.
#### 4. Essential Early Objectives (What to Do First)
Phase 1: Landing & Looting (First 2 minutes)
Phase 2: Complete a Contract (Minutes 3–10)
- Most Wanted (also called Bounty): Marks a random enemy player. Survive and kill them for big cash. Risky – skip until you’ve played a few matches.
- Safecracker: Crack safes. Easy cash and straightforward.
- Intel: Grab intel and upload. Low risk, good reward.
Phase 3: Survive the Circle (Mid-Game)
Phase 4: Buy a Loadout Drop (Late Early Game)
#### 5. What to Avoid (Beginner Traps)
#### 6. Early Resource Priorities
| Item | Priority | Why |
|---|---|---|
| Armor Plates | Critical | Without them, you die in 2-3 bullets. Always carry 3 in your plate carrier and 2-3 backup in backpack. |
| Self-Revive | High | Lets you get back up if downed. Always buy if you have $4000. |
| Gas Mask | High | The circle is deadly. A mask gives you 20 seconds extra in gas. |
| Cash | Medium | Needed for Buy Stations, but don’t hoard too much – dying wastes it. |
| Lethal (Frag, Semtex) | Medium | Useful for pushing enemies or clearing rooms. |
| Tactical (Stun, Smoke) | Medium | Smoke helps revives and rotations. Stuns/gas are good for fights. |
| Killstreak (UAV, Cluster Strike) | Medium | UAV for intel, Cluster for flushing campers. Don’t buy from Buy Station early – loot them. |
| Backpack Upgrades | Low | Larger backpacks help carry more plates and ammo, but not essential for first hours. |
- Not checking the minimap – you miss enemies, contracts, and circle position.
- Using the wrong weapon for range – SMGs at long range do little damage; snipers at close range are slow. Pair an AR/SMG or AR/Sniper.
- Reloading after every kill – This gets you killed. Reload only when safe or behind cover.
- Not pinging enemies – Use the ping system (D-pad Up on console, Alt on PC) to mark enemies, locations, or loot. Your team will thank you.
- Ignoring the gulag – When you die for the first time, you enter the Gulag (1v1 fight). Win it to redeploy. Practice there – it’s a free second chance.
- Buying everything at the Buy Station – Prioritize Self-Revive > Gas Mask > Armor Plates (if you have none) > UAV. Only buy Loadout when you have decent cash.
- [ ] Complete the tutorial (Main Menu > “Training” > “Warzone Basic Training”). This teaches looting, plating, contracts, and the gulag.
- [ ] Play 2–3 matches in “Plunder” mode (if available) – It’s a respawn mode with no elimination pressure. Great for learning map, looting, and weapon handling.
- [ ] Customize your controls – Adjust sensitivity (start at 5–7 on console, 800 DPI with 6–7 in-game on PC). Faster is better after you adapt.
- [ ] Create one custom loadout – Use a meta weapon (check [WarzoneMeta.com](https://wzstats.gg) for current meta). For example: Kastov-74u (similar to AK-47) with attachments for recoil, ADS, and magazine size.
- [ ] Open your first loot box and equip armor plates.
- [ ] Buy a Self-Revive from a Buy Station in your first match (you’ll likely die – but you’ll learn the location).
- [ ] Win your first Gulag fight – even if you lose, try to get a feel for the map and weapons.
- [ ] Watch the minimap for the first 5 minutes of every match. Force yourself to glance every few seconds.
- [ ] Play with a team (invite friends or use “Fill Squad” in options). Communication is key.
- [ ] Don’t get discouraged – Warzone has a steep learning curve. Focus on surviving until the final circles, not on kills.
#### 8. Day-One Checklist
Summary
Your first hour is about survival, not kills. Land somewhere quiet, loot fast, complete one contract, buy a Self-Revive, and stay inside the circle. Avoid hot drops and unnecessary fights. Use audio and pings. Learn from the Gulag. With this guide, you’ll be better equipped than 90% of new players. Good luck, soldier!