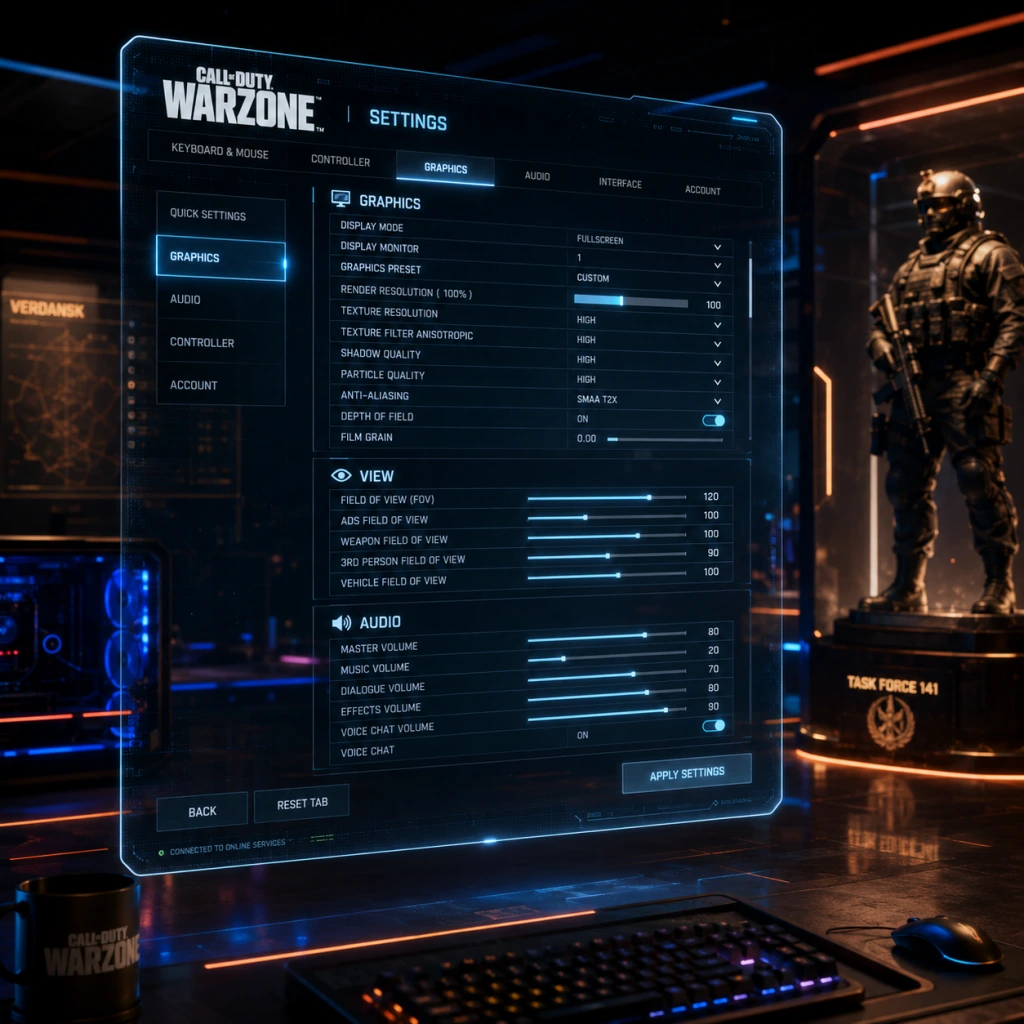
Game Settings
Overview
Call of Duty: Warzone 2.0 offers an extensive array of settings that drastically impact performance, visual quality, and competitive advantage. Properly configuring these settings can mean the difference between smooth gameplay and frustrating stutters, or between hearing a crucial footstep and missing it entirely. This guide covers every major settings category — Graphics, Audio, Controls, Accessibility, Language, Network, and Gameplay — with recommendations for low-end, mid-range, and high-end hardware (PC and console). Special attention is given to settings that are frequently misconfigured or overlooked.
---
Graphics Settings
Display & Resolution
- Display Mode: Fullscreen (exclusive) is best for performance; borderless windowed may cause extra input lag.
- Resolution: Native monitor resolution (e.g., 1920x1080, 2560x1440). Use Dynamic Resolution only if struggling to maintain FPS; target 100% resolution scale.
- Refresh Rate: Set to maximum monitor refresh rate (e.g., 144Hz, 240Hz).
- Field of View (FOV): 90–110° is the competitive sweet spot. Higher FOV increases peripheral vision but may reduce target size. Console players can access FOV on PS5 and Xbox Series X|S; set to 90–100.
Quality Presets & Detailed Settings
| Setting | Low-End (60 FPS target) | Mid-Range (100+ FPS) | High-End (144+ FPS) | Key Notes |
|---|---|---|---|---|
| Render Resolution | 100% | 100% | 100% | Never go below 100% unless desperate; causes heavy blur. |
| Upscaling / Sharpening | FidelityFX CAS (strength 50–75) | DLSS Quality (NVIDIA) / FSR Quality (AMD) | DLSS Quality / FSR Quality or Native | FidelityFX CAS is minimal overhead; AI upscalers give free performance. |
| Anti‑Aliasing | SMAA T2X | Filmic SMAA T2X | Filmic SMAA T2X | Filmic adds slight blur; disable for sharper edges (use CAS). |
| Texture Quality | Low | Normal | High / Ultra | Low reduces VRAM load; Ultra requires 8+ GB VRAM. |
| Texture Filter Anisotropic | Low | High | High | High improves distant texture clarity. |
| Shadow Quality | Low | Low | Medium | Shadows are expensive; low reduces distractions. |
| Spot Shadows | Low | Low | Low | Keep low for competitive edge (fewer hidden enemy shadows). |
| Particle Quality | Low | Low | Medium | Affects smoke and explosions; low reduces clutter. |
| Level of Detail (LOD) | Low | Normal | High | Higher LOD draws more distant objects, costing FPS. |
| Volumetric Quality | Low | Low | Low | Extremely performance‑hungry; keep low in BR. |
| Motion Blur | Disabled | Disabled | Disabled | Always disable for clarity and responsiveness. |
| Depth of Field | Disabled | Disabled | Disabled | Blurs distant objects, hindering spotting. |
| Weapon Motion Blur | Disabled | Disabled | Disabled | Same as above. |
| Film Grain | 0 | 0 | 0 | Adds noise; disable. |
| NVIDIA Reflex Low Latency | On + Boost | On + Boost | On + Boost | Reduces input lag; enable at all times. |
| VRAM Usage Target | 80% | 85% | 90% | Lower target prevents stutters; raise if you have surplus VRAM. |
| On‑Demand Texture Streaming | Disabled | Disabled | Disabled | Can cause hitching; disable for stable performance. |
Console‑Specific Graphics (PS5 / Xbox Series X|S)
- 120 Hz Mode: Enable if your TV supports it (requires HDMI 2.1). Provides smoother motion.
- FidelityFX CAS / Dynamic Resolution: Set to CAS for sharpness; dynamic resolution aim for balanced.
- Field of View: 90–100° is recommended; avoid max FOV as it may reduce performance.
- Render Resolution: Many players accidentally set it to 50% thinking it helps FPS, but it makes the game extremely blurry. Always keep at 100% and adjust other settings first.
- VRAM Target: Setting too low (50%) can cause stutters; too high (95%+) leads to crashes. 80–90% is safe.
- Dynamic Resolution: Enabling without a stable FPS target can cause constant resolution fluctuation. Better to manually set lower details.
- Upscaling: DLSS/FSR set to “Ultra Performance” makes image soft; use Quality or Balanced for best trade‑off.
Easy to Misconfigure (Graphics)
---
Audio Settings
Sound Modes & Volume Levels
| Setting | Casual / Immersion | Competitive | Notes |
|---|---|---|---|
| Audio Mix | Home Theatre | Headphones (Bass Boost or Stereo) | “Headphones” improves directional audio and footstep clarity. |
| Master Volume | 100 | 100 | Keep max, adjust system volume separately. |
| Music Volume | 50–70 | 0 | Music masks footsteps; set to 0 for competitive play. |
| SFX Volume | 100 | 100 | Crucial for hearing footsteps, gunfire, and plating. |
| Dialogue Volume | 100 | 70–80 | Unnecessary chatter can be lowered. |
| Hit Marker Sounds | On | On | Distinct hit marker tones help confirm damage. |
| Mono Audio | Off | Off | Stereo is essential for directional cues. |
| Dynamic Range | Cinematic | Compressed | Compressed boosts quieter sounds (footsteps) and limits loud peaks (explosions). Critical for competitive. |
Special Attention: Audio Preset
- “Headphones Bass Boost” is popular because it emphasizes low‑frequency sounds (footsteps, plating).
- Disable “Voice Chat Invert Mute” and “Mute Yourself When Not Speaking” (control options) to ensure clear team comms.
- Audio Mix: Setting to “Home Theatre” when using headset muffles footsteps. Always choose “Headphones” or “Headphones Bass Boost.”
- Dynamic Range: “Cinematic” compresses nothing, so footsteps remain quiet. Use “Compressed” to hear enemies more easily.
- Raw Input: Enable – bypasses OS acceleration for consistent aim.
- Mouse DPI: 800–1600 common; adjust in‑game sensitivity accordingly.
- Polling Rate: 1000 Hz (if mouse supports).
- Sensitivity: Horizontal sensitivity ~5–10 at 800 DPI; ADS sensitivity multiplier 0.7–1.0 (lower for precision).
- Vertical Sensitivity Ratio: 1.0 (disable separate vertical aim if not needed).
- Aim Down Sight Sensitivity Transition: Instant (gradual adds delay).
- Aim Assist (if using controller): Set to “Default” or “Precision” (stronger rotational assist but tighter window). Avoid “Standard” if you want more practice with stick aim.
- Button Layout: Tactical (slides/crouch with RS) is dominant; alternative: “Tactical Flopped” for easier bunny hops.
- Stick Layout: Default (left stick sprint, right stick look).
- Deadzone: Minimum deadzone = 0.05 (reduce if stick drifts; increase slightly to avoid drift).Left stick deadzone can be set to 0.10 to avoid accidental sprint stops.
- Response Curve: Dynamic (slower initial movement, faster twitch) or Steady (linear). Dynamic is most popular.
- Aim Assist Type: Standard (sticky near targets) vs. Precision (narrower activation). Experiment in firing range.
- ADS Sensitivity Multiplier: 0.8–1.0 (lower = more control up close).
- Vibration: Off – reduces distraction and battery drain.
- Slide / Prone: Bind to C (or toggle on controller) – many players rebind slide to a paddle or mouse button.
- Interact / Reload: Set “Contextual Tap” to On – tap to reload/interact, hold for loot. This speeds up looting but be careful not to reload in a fight accidentally.
- Ping: Bind to Middle Mouse or R1 – crucial for communication.
- Weapon Swap: Separate binds for primary/secondary; 1 and 2 keys are standard.
- Contextual Tap: Many players leave it off and suffer slow looting. Enable but test in Plunder – tapping when near a weapon will pick it up instead of reloading. Practice the difference.
- Aim Assist Type: “Focusing” can actually make it harder to track moving targets. Stick to Default or Precision.
- Controller Deadzone: Too high adds input lag; too low causes drift. Test by lightly moving stick; increase until drift stops.
- ADS Sensitivity Transition: “Gradual” causes a slight zoom delay; set to Instant.
- Subtitles: Enable with Large size for hearing‑impaired players.
- Colorblind Filter: Choose Deuteranopia, Protanopia, or Tritanopia based on your deficiency. Affects only UI elements (health, minimap, compass) – not player models or enemy outlines.
- High Contrast Settings: Turn on HUD Contrast and Outline Contrast for better visibility.
- Text Size: Increase to Large if needed.
- Controller Remapping: Use console accessibility remapping or Steam Input to reassign buttons for physical disabilities.
- Hold / Toggle Behavior: Set “Sprint” to Toggle (less thumb fatigue), “Prone” to Hold (easier drops).
- Colorblind Filters: They only change UI colors; players expecting in‑game operator colors to change will be disappointed. Use these purely for UI comfort.
- Subtitle Background: Ensure Background Opacity is set high enough to read over bright scenes.
- Audio Language: Set to your native language (usually English) for clarity.
- Text Language: Match your region – important for menu navigation.
- No major performance impact; just ensure consistency to avoid missing call‑outs.
Easy to Misconfigure
---
Controls
Keyboard & Mouse
Controller
Keybindings – Essential Customizations
Easy to Misconfigure
---
Accessibility
Easy to Misconfigure
---
Language Settings
---
Network Settings
Connection & Bandwidth
| Setting | Recommended Value | Notes |
|---|---|---|
| Bandwidth Limit | 0 (unlimited) | Allows full speed usage without artificial cap. |
| Texture Streaming | Minimal (or Standard if fast internet) | Minimal reduces stutter from streaming textures; Standard looks better but may cause hitching on slow connections. |
| On‑Demand Texture Streaming | Disabled | Prevents background downloads during gameplay that cause lag spikes. |
Telemetry (Overlay)
- FPS Counter: Enabled (corner of your choice).
- Packet Loss: Show to diagnose connection issues.
- Latency (Ping) : Display to monitor lag.
- Server Tick Rate: Not shown in game, but lower ping leads to smoother registration.
- Automatic Selection is usually fine, but you can manually pick a region with lowest ping (e.g., if you live in Europe, avoid US East).
- Check ping in main menu by opening the Social/Options menu? Not directly shown; use system network monitor or Warzone’s in‑game FPS counter shows latency.
- Texture Streaming – Setting to High demands constant internet bandwidth; if your connection drops, textures become blurry. Keep at Minimal for competition.
- Bandwidth Limit – Leaving it at 0.5Mbps throttles your connection, causing slow texture loads. Always set to 0.
- Minimap Shape: Square (shows more area) vs. Circle (rotates). Square is generally better for information density.
- Minimap Rotation: Compass (UTM grid) – helps communicate cardinal directions. Rotating can confuse your mental map.
- Minimap Zoom: Set to Medium (larger view) to spot enemies further.
- HUD Elements:
- Hit Marker Feedback: Full (Color and Sound) – necessary for confirming hits.
- Autosprint: Enable (reduces thumb fatigue). Combined with “Sprint / Tactical Sprint” on Double Tap or Tap (Double Tap is more control).
- Aim Down Sight Behaviour: Hold (more responsive) or Toggle (easier on fingers). Many top players use Hold.
- Weapon Mounting: Manual (press a key to mount) – prevents accidental mounting when shooting.
- Airborne Sway: Off – reduces camera shake while parachuting.
- Perk / Killstreak binding: Customize keys for quick use (e.g., dead silence on “X”).
- Cursor Behavior: Menu Cursor – ensure controller or mouse works properly in menus.
- Vehicle Control: Advanced (lean assist off) for more manual control.
- Ping Wheel Delay: Set to shortest (or disable) for faster marking.
- Contextual Tap: As mentioned earlier, failing to enable this slows looting significantly.
- Weapon Mount: If set to Mounting On Scope, you’ll accidentally mount every corner – change to Manual.
- Minimap Shape: Circle makes it harder to scan wider area; Switch to Square.
- Auto Sprint: Disabling forces you to press shift constantly, tiring your hand. Turn it on and adjust sprint behavior.
- Graphics: Disable motion blur, depth of field; use upscaling; set VRAM target correctly.
- Audio: Use Headphones Bass Boost and Compressed dynamic range.
- Controls: Enable raw input, contextual tap, and set ADS transition to instant.
- Network: Disable on‑demand texture streaming and set bandwidth unlimited.
Data Centers
Easy to Misconfigure
---
Gameplay Settings
Minimap & HUD
- Player Names: Always on (friendly team above heads).
- Kill Feed: Always on.
- Pickup Notifications: Off or minimal to reduce clutter.
Movement & Weapon Settings
General Gameplay Tweaks
Easy to Misconfigure
---
Conclusion
No single setting profile works for everyone, but the recommendations above serve as a strong baseline. Always test new settings in the Firing Range before jumping into a match. Pay special attention to:
Lastly, keep your graphics drivers updated and clear the shader cache (warzone will rebuild shaders after updates) to avoid stuttering. Good luck in Al Mazrah!