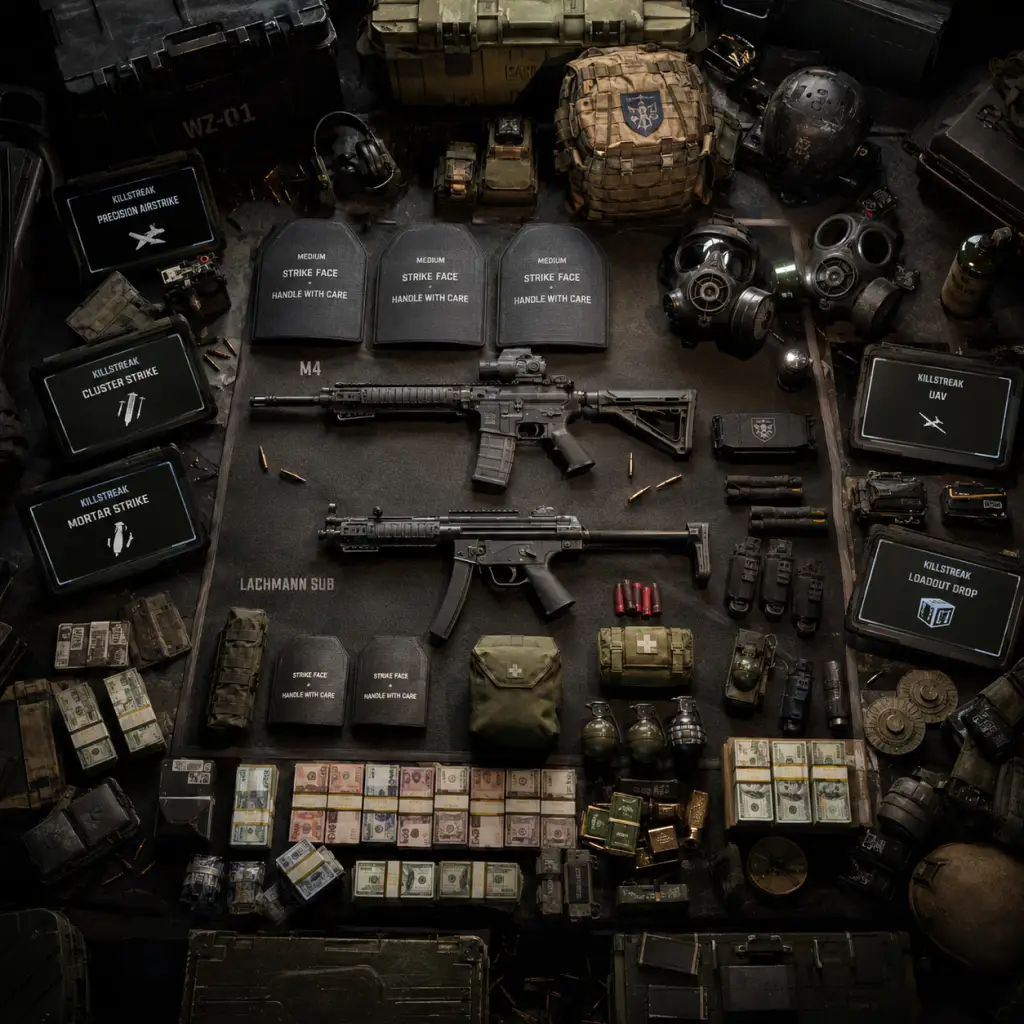
All Game Items
All Game Items in Call of Duty: Warzone 2.0
This guide covers every major item type in Call of Duty: Warzone 2.0 (Al Mazrah and other modes). Items are grouped logically: Weapons, Armor, Consumables, Field Upgrades, Killstreaks, Materials & Currencies, Collectibles, and Key Equipment. For each item, we explain its function, acquisition methods, optimal usage, and any important synergies or upgrades.
---
1. Weapons
Weapons are the primary means of combat. Warzone 2.0 uses a Gunsmith system with extensive attachments. Weapons are categorized by class.
1.1 Assault Rifles (ARs)
- Examples: M4, TAQ-56, Kastov 762, STB 556, M13B, Chimera
- Description: Versatile mid-range weapons, effective from close to medium range. Full-auto, moderate recoil.
- Obtaining: Found as floor loot, in loot crates, bought at Buy Stations, or brought in via custom loadout (if you have it unlocked).
- When Useful: Primary weapon for most engagements. Best at 20–50 meters. Pair with an SMG or sniper for other ranges.
- Synergies: Attachments like a suppressor for stealth, high-magazine for sustained fights. Combine with a red dot sight for close quarters.
- Examples: Lachmann Sub (MP5), Vaznev-9K, Fennec 45, PDSW 528, BAS-P
- Description: High fire rate, high mobility, low recoil at close range. Effective up to 20 meters.
- Obtaining: Same as ARs.
- When Useful: Room clearing, building fights, aggressive pushes. Great secondary for AR users.
- Synergies: Hip-fire accuracy attachments (Laser, Underbarrel) for sprint-to-fire speed. Dual-wield option for some pistols (not SMGs directly but note that dual-wield is only for pistols).
- Examples: RPK, RAAL MG, HCR 56, Sakin MG38
- Description: Large magazines (100+ rounds), high damage output, but slow mobility and long reload times.
- Obtaining: Floor loot, crates, Buy Station, loadout.
- When Useful: Suppression, holding down areas, taking out vehicles. Good for mid-range.
- Synergies: Use with a bipod for mounted accuracy. Pair with a pistol for mobility when repositioning.
- Marksman Rifles: EBR-14, Lockwood MK2, SPR-208, Tempus Torrent (semi-auto/DMR)
- Sniper Rifles: Victus XMR, MCPR-300, Signal 50, FJX Imperium
- Description: One-hit-kill potential to the head (sniper), high damage at long ranges. Marksman rifles are faster but less powerful.
- Obtaining: Same as above.
- When Useful: Long-range engagements, overwatch positions, counter-sniping.
- Synergies: Use a spotter scope to mark enemies. Pair with a close-range weapon (SMG or shotgun) for self-defense.
- Examples: Bryson 800 (pump), Expedite 12 (semi-auto), KV Broadside (full-auto)
- Description: Devastating at extremely close range (0–10 meters). High spread, low effective range.
- Obtaining: Floor loot, crates, etc.
- When Useful: Building interiors, tight corners, ambushes.
- Synergies: Dragons Breath rounds for incendiary damage. Use with flashbangs to disorient enemies before rushing.
- Examples: X12, P890, Basilisk (revolver)
- Description: Backup weapons. Fast swap speed, moderate damage.
- Obtaining: Often found as starting weapon in Gulag, floor loot.
- When Useful: When primary runs out of ammo, or in Gulag. The Basilisk can two-tap to the head.
- Synergies: Akimbo (dual wield) attachment for increased fire rate.
- Examples: PILA (lock-on), RPG-7 (unguided), Strela-P, JOKR
- Description: Anti-vehicle and crowd control. Lock-on launchers track vehicles and aircraft.
- Obtaining: Floor loot, crates.
- When Useful: Destroying vehicles, clearing clusters of enemies, taking down UAVs.
- Synergies: Use with Spotter perk to see enemy equipment through walls.
- Examples: Combat Knife, Baseball Bat, Tonfa, Sledgehammer
- Description: One-hit-kill up close. Fast movement speed when equipped.
- Obtaining: Loadout drops, found in rare loot crates.
- When Useful: Stealth executions, rushing in tight spaces, as a challenge weapon.
- Synergies: Use with smoke grenades to close distance. Pair with Tracker perk to see footprints.
- Types:
- Obtaining: Floor loot, loot crates, Buy Stations ($3000 per plate or $10000 for full set), enemy death bags.
- When Useful: Always needed. Steal enemy plates after kills. Prioritize plating before peak fights.
- Synergies: The Tempered plate vest is strong for aggressive players because you need to plate less often. Combining with stim shots can heal quickly.
- Description: Deployable case that dispenses 3 armor plates for you and teammates.
- Obtaining: Found as loot or bought at Buy Station for $5000.
- When Useful: When you and your team are low on plates mid-fight or after a loot run. Use during lulls.
- Synergies: Combine with restock perk to have two field upgrades.
- Bandages: (Warzone 2.0 removed – not present. Only Stim and Med Kits)
- Stim (Stimulant): Instant injection that heals 50 health over time (fast). Also removes tactical equipment slowdowns. Can be used while moving.
- Med Kit: Full heal (restores all health) over a few seconds. Slower than stim but heals fully.
- Obtaining: Floor loot, crates, Buy Stations (Stim $1000, Med Kit $2000).
- When Useful: Stim for quick combat heals, Med Kit for post-fight recovery.
- Synergies: Stim + Tempered plate vest for very fast recovery. Use before entering a fight for a health buffer.
- Flashbang: Blinds and deafens enemies. Effective through walls.
- Stun Grenade: Slows movement and aiming. Opponents have difficulty turning.
- Smoke Grenade: Creates a visual obstruction cloud. Can also be used to block thermal scopes.
- Snap Shot: Emits a pulse revealing enemies in a short radius through walls.
- Gas Grenade: Deploys cloud of poison gas that damages enemies and obscures vision.
- Stim Darts? Not present. Only stim injections.
- Obtaining: Floor loot, crates. Can be bought at Buy Stations (Smoke $500, Flash $750, etc.)
- When Useful: Flash/stun to disorient room defenders. Smoke for cover while reviving or crossing open areas. Snap Shot for quickly checking rooms.
- Synergies: Smoke + Thermal scope negates smoke's concealment for you. Gas grenade can block entrances.
- Frag Grenade: Cookable explosive. High damage, can be rolled.
- Semtex: Sticky explosive. Sticks to enemies or surfaces. Quick detonation.
- Throwing Knife: Silent kill if hits head. One-hit down. Retrievable from surfaces but not from bodies.
- Proximity Mine: Deploys a laser-triggered mine. One-hit down.
- Claymore: Directional mine. Must be placed facing enemies.
- Breacher Drone: Explosive drone that can be detonated manually.
- Obtaining: Floor loot, crates, Buy Stations ($2000-3000).
- When Useful: Frags for clearing rooms. Semtex for vehicles or sticky kills. Throwing knife for finishing downed enemies silently. Mines for area denial.
- Synergies: Use with Spotter perk to see enemy equipment through walls. Pair throwing knife with a suppressed pistol for stealth kills.
- Dead Silence: Silences footsteps and increases movement speed for a short duration.
- Overkill (via perk): Not a field upgrade. Overkill is a perk 2 slot that allows two primary weapons.
- Armor Box: Deployable crate for plates (described above).
- Munitions Box: Deployable crate that refills all ammo (including equipment) for you and teammates.
- Field Revive Pistol: Can revive a teammate from a distance (charging). Limited uses.
- Recon Drone: Controllable drone that pings enemies. Very useful for intel.
- Portable Radar: Deploys a radar that reveals nearby enemies on minimap.
- Deployable Cover: Instantly places a low wall for cover.
- Trophy System: Destroys incoming throwables (grenades, rockets).
- DDoS (Downed Drone Smoke?): Not a standard field upgrade. Actually there is a DDoS field upgrade that disables electronics nearby (enemy UAVs, trophy systems).
- Obtaining: Found in loot crates, Buy Stations ($4000-6000). Also can be looted from special locations.
- When Useful: Armor Box/Munitions Box after fights. Dead Silence for flanking. Recon Drone for scouting before push. Trophy System for defending camp spots.
- Synergies: Restock perk allows two field upgrades. Use Armor Box + Munitions Box for full sustain.
- UAV: Reveals all players within a radius on the minimap (solid dots). Can be countered by Ghost perk.
- Advance UAV: Sweeps the entire map, revealing player positions (arrow direction) even if Ghost is active.
- Precision Airstrike: Calls a line of bombs along a selected direction. Good for flushing out buildings.
- Cluster Strike: Drops multiple bomblets in an area over time. Lasts longer than airstrike.
- Mortar Strike: Continuous artillery barrage over a large radius.
- Counter UAV: Jams minimap for enemies. Can be shot down.
- Air Drop: Drops a loadout crate (random weapons) from the sky. Use to get your custom class or extra gear.
- Bomb Drone: A controllable drone that explodes on contact. One-shot kill.
- Shield Turret: Mountable heavy weapon with destructible shield.
- Obtaining: Found in special loot crates (orange crates), bought at Buy Stations (UAV $4000, Airstrike $6000, etc.), or looted from enemies.
- When Useful: Use UAV before pushing to check for enemies. Airstrike/Cluster to clear roofs. Bomb drone for precise kills.
- Synergies: Stack multiple UAVs for persistent intel. Use Counter UAV to hide from enemy UAVs. Combine airstrike with smoke to conceal origin.
- Description: Universal currency in Al Mazrah. Used at Buy Stations to purchase items (killstreaks, armor plates, self-revives, gas masks, loadout markers, etc.).
- Obtaining: Looted from cash piles, eliminated enemies, contracts (bounty, intel, etc.), completing scavenger events.
- When Useful: Always. Save $10,000 for a personal loadout marker. Buy armor boxes when low on plates.
- Synergies: Duos/triples should pool cash for a team UAV or loadout.
- Weapon Cases, Dog Tags, Mission Items: Not relevant for battle royale. Omitted.
- COD Points (CP): Premium currency earned via Battle Pass or purchased. Used to buy store bundles, Battle Pass tiers.
- Battle Pass Tokens: Earned by playing and used to unlock tiers in the seasonal Battle Pass.
- Not gameplay items per se, but they unlock blueprints and operators.
- Intel (Intelligence): White laptop items scattered around the map. Collecting them unlocks lore documents and sometimes XP.
- Redacted Documents: Similar to intel, often seasonal.
- Operator Dog Tags: Obtained from eliminated enemies (can be deposited for cash or used in challenges).
- Event Tokens: Earned during limited events (e.g., The Haunting, Siege of Al Mazrah) to unlock exclusive rewards.
- Weapon Blueprints: Rare weapon variants with unique attachments and skins. Often found as loot or rewards.
- Key cards? Not in standard BR. In DMZ, there are key cards for locked areas.
- Self-Revive Kit: Allows you to revive yourself when downed. Single use. Can be looted from enemies or bought at Buy Station for $4000. Very high priority.
- Gas Mask: Protects from the toxic circle gas. Reduces inhalation damage. Can be found around the map or bought. Breaks after taking 5-10 seconds of gas. Indispensable for late-game rotations.
- Durable Gas Mask: Has more health than standard gas mask. Rare.
- Armor Satchel: Increases the number of armor plates you can carry from 6 (in backpack) to 8? In Warzone 2.0, the backpack system is streamlined: you can carry up to 9 plates without a satchel (3 equipped + 6 in backpack). Actually, the Armor Satchel is not present in Warzone 2.0 BR. Instead, the backpack holds 6 plates max. There is a 'large backpack' in DMZ, but not for BR. So skip.
- Riot Shield: Secondary weapon that provides frontal ballistic protection. Can be used to block shots but leaves back exposed. Found as loot or in custom loadout (if unlocked). Synergizes with throwing knives.
- Deployable Shield: Field upgrade (covered above).
- Portable Buy Station: Extremely rare item that allows you to access a Buy Station anywhere. Very valuable for buying loadouts in the final circle.
- Gulag Entry Tokens: During WWII-themed events, tokens to re-enter Gulag after first death. Not permanent.
1.2 Submachine Guns (SMGs)
1.3 Light Machine Guns (LMGs)
1.4 Marksman Rifles & Sniper Rifles
1.5 Shotguns
1.6 Pistols
1.7 Launchers
1.8 Melee Weapons
---
2. Armor
Armor is essential for survival in Warzone 2.0. It comes in plates that reduce incoming damage.
2.1 Armor Plates
- 2-Plate Vest: Default, holds 2 plates. Provides 50 health from plates (total health 150 hp).
- 3-Plate Vest: Holds 3 plates. Provides 100 health from plates (total 200 hp). Standard for most players.
- Tempered Plate (2-Plate dupe): Holds only 2 plates but each plate absorbs 100 damage (total 200 hp). Faster to plate up because only 2 plates needed.
- Ghost Vest: (Warzone 2.0 limited-time) Allows stealth but fragile. Not permanent.
2.2 Armor Box (Field Upgrade)
---
3. Consumables
Consumables are single-use items that provide healing, buffs, or tactical advantages.
3.1 Medical Items
3.2 Tactical Equipment
3.3 Lethal Equipment
---
4. Field Upgrades
Field Upgrades are deployable gadgets with cooldowns or limited uses. Each player can carry one (or two with Restock perk).
---
5. Killstreaks
Killstreaks are powerful items you can call in for area damage or reconnaissance.
---
6. Materials & Currencies
Warzone 2.0 uses three main currencies and several crafting materials (in DMZ mode, but for Battle Royale, only Cash is universal).
6.1 Cash (Battle Royale)
6.2 In-Game Resources (DMZ specific – not in standard BR)
6.3 Battle Pass Tokens & COD Points (Real-money)
---
7. Collectibles
Warzone 2.0 has limited-time collectibles during seasons and events.
---
8. Key Equipment (Special Items)
These are unique items that provide significant tactical advantage.
---
Summary Table of Key Items
| Item Type | Examples | Acquisition | Best Use |
|---|---|---|---|
| Weapons | ARs, SMGs, Snipers | Floor loot, loadout | Primary combat |
| Armor Plates | 2/3 plate, Tempered | Loot, Buy Station | Survival |
| Stims / Med Kits | Stim, Med Kit | Loot, Buy Station | Healing |
| Killstreaks | UAV, Airstrike | Special crates, Buy | Intel/Area denial |
| Field Upgrades | Armor Box, Dead Silence | Loot, Buy Station | Utility |
| Self-Revive | Self-Revive Kit | Loot, Buy Station | Second chance |
| Gas Mask | Standard, Durable | Loot, Buy Station | Gas rotation |
Important Notes
- Gunsmith Attachments: While not listed as separate items, attachments modify weapon performance. Always customize your loadout to suit your playstyle (e.g., suppressors for stealth, long barrels for range).
- Backpack Inventory: In Warzone 2.0, you have a limited inventory (max 9 plates, 3 lethal, 3 tactical, 1 field upgrade, 1 killstreak). Manage items carefully.
- Death Loot: After eliminating an enemy, you can take all their items. Prioritize plates, weapons, and self-revives.
- Seasonal Variations: Some items may be removed or added each season. Always check patch notes.
This guide covers all major item categories in Call of Duty: Warzone 2.0. Use this knowledge to optimize your looting, loadout, and in-game decisions.