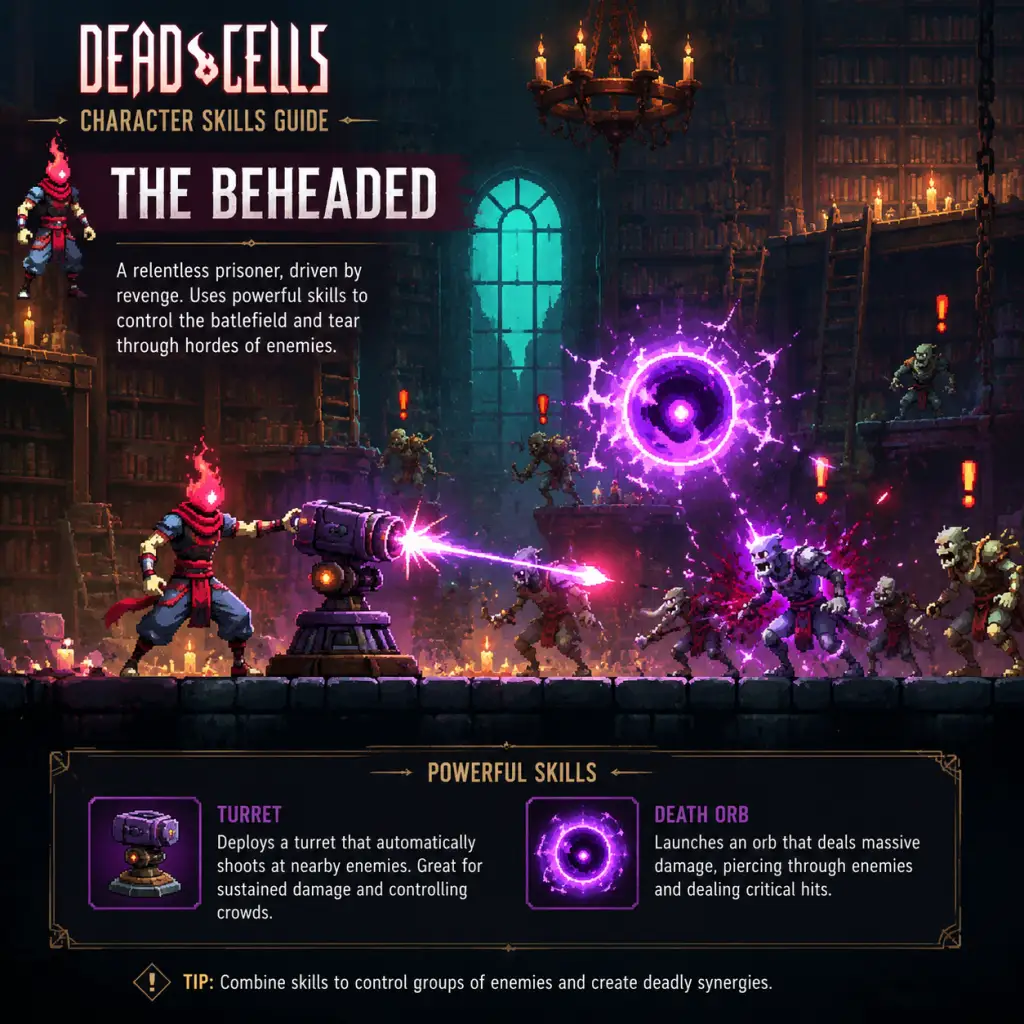
Character Skills
Dead Cells: Complete Character Skills Guide
This guide covers every active Skill (Power) and passive Mutation in Dead Cells. Skills are equippable items that grant active abilities, while Mutations are passive upgrades that persist for the run. The Beheaded (player character) can equip up to two skills and three mutations at a time. Understanding each skill's effects, cooldowns, upgrades, and synergies is critical to building powerful loadouts.
---
1. Active Skills
Active Skills are divided into five categories: Grenades, Traps & Turrets, Deployables, Powers, and Miscellaneous. Each skill has a cooldown (measured in seconds) and an unlock cost (cells or blueprint). Many skills can be upgraded at the Forge (after collecting blueprints) to improve damage, duration, or add effects.
1.1 Grenades
Grenades are consumable throwable items that deal area damage or apply status effects. Most grenades have a short cooldown (3–8 seconds).
#### Burning Grenade
- Effect: Throws a grenade that explodes in a small area, dealing fire damage and leaving a burning zone for 3 seconds.
- Cooldown: 4 seconds
- Upgrades (Forge): Increased damage, larger explosion radius, longer burning duration.
- Synergies: Works well with Oil Grenade (oil + fire = explosion) and any weapon that applies fire synergy.
- Recommended Builds: Tactics or Brutality builds with fire-support mutations (e.g., Net, Tactical Retreat).
- When to Use: Crowd control, especially against slow enemies or in narrow corridors.
- Effect: Throws a grenade that splits into 4 smaller grenades upon explosion, each dealing damage.
- Cooldown: 6 seconds
- Upgrades: +1 sub-grenade, increased damage.
- Synergies: Excellent with Crow's Nest (increased critical damage against full health enemies) or any +% damage to multiple targets.
- Recommended Builds: Survival (for Heavy crossbow) or Brutality with Infantry Grenade combos.
- When to Use: Against stationary bosses (like Concierge) or large groups.
- Effect: Throws a small grenade that explodes on contact with the ground or enemy, dealing high damage in a small radius.
- Cooldown: 4 seconds
- Upgrades: Damage boost, wider explosion.
- Synergies: Use with Hokuto's Bow or Alchemical Carbine to spread status on explosion.
- Recommended Builds: Brutality (fast combos) or Tactics (long-range).
- When to Use: Quick burst damage against tough elites or bosses.
- Effect: Throws a large grenade that creates a persistent flame patch for 5 seconds, dealing damage over time.
- Cooldown: 8 seconds
- Upgrades: Increased flame duration, damage, size.
- Synergies: Pair with Fire Brands weapon or any +burn damage mutations.
- Recommended Builds: Tactics (spam fire, then kite).
- When to Use: Area denial, especially against teleporting enemies.
- Effect: Throws a grenade that freezes enemies in a small area for 3 seconds.
- Cooldown: 8 seconds
- Upgrades: Longer freeze, larger radius.
- Synergies: Perfect with Ice Shards weapon or any +% damage to frozen enemies.
- Recommended Builds: Survival or Tactics (high damage burst on frozen enemies).
- When to Use: To interrupt attacks, escape, or set up heavy combos.
- Effect: Creates a cloud of poison that deals damage over time and lowers defense.
- Cooldown: 7 seconds
- Upgrades: Increased poison duration, damage, larger cloud.
- Synergies: Works with any poison-support mutation (e.g., Crow's Foot) or weapons like Alchemical Carbine.
- Recommended Builds: Tactics (poison stacking) or Brutality.
- When to Use: Against tanky enemies with high HP.
- Effect: Throws a grenade that covers a small area in oil, making enemies slippery and vulnerable to fire (oil + fire = explosion that deals bonus damage).
- Cooldown: 4 seconds
- Upgrades: Larger oil puddle, longer duration.
- Synergies: Mandatory for any fire-focused build. Pair with Burning Grenade, Fire Brands, or Flame Sword.
- Recommended Builds: Brutality (fire combos) or Tactics.
- When to Use: Always before using a fire skill or weapon for maximum damage.
- Effect: Blinds enemies in a wide area for 2 seconds, causing them to stumble and miss attacks.
- Cooldown: 12 seconds
- Upgrades: Longer blind, reduced cooldown.
- Synergies: Great with high-damage slow weapons (e.g., Broadsword) or for setting up critical hits.
- Recommended Builds: Survival (big weapons need time to swing).
- When to Use: Against bosses that telegraph attacks (e.g., Time Keeper, Giant).
- Effect: Throws a grenade that explodes into a swarm of angry mallards dealing continuous damage to enemies in a cone.
- Cooldown: 10 seconds
- Upgrades: Increased number of mallards, damage.
- Synergies: Useful for area denial and distraction.
- Recommended Builds: Any, but shines with mutations that reduce cooldown on kill.
- When to Use: In tight spaces or against groups.
- Effect: Places a turret that shoots arrows in two directions, dealing high damage.
- Cooldown: 12 seconds
- Upgrades: Increased arrows per shot, damage, range.
- Synergies: Put in a chokepoint for maximum hits. Works with Tactics mutations that boost turret damage.
- Recommended Builds: Tactics (turret spam) or Survival (if using heavy shield).
- When to Use: Defending a position or boss fight where you can set up before aggro.
- Effect: Places a slow-firing turret that shoots explosive cannonballs in a straight line.
- Cooldown: 15 seconds
- Upgrades: Increased explosion radius, damage, fire rate.
- Synergies: Excellent with Crow's Nest (crits on full health) and any +% area damage.
- Recommended Builds: Survival or Tactics with high HP for close-range maintenance.
- When to Use: Against bosses that stand still (e.g., Concierge) or in narrow hallways.
- Effect: Places a trap that fires a long-range beam dealing continuous damage in a line.
- Cooldown: 10 seconds
- Upgrades: Wider beam, damage, longer duration.
- Synergies: Works with mutations that increase damage while standing still (e.g., Dead Inside?). Actually Dead Inside is survival; but Tactics has support mutations.
- Recommended Builds: Tactics (long-range kiting).
- When to Use: To control a lane or punish approaching enemies.
- Effect: Places a trap that knocks enemies into the air, dealing moderate damage and stunning them briefly.
- Cooldown: 8 seconds
- Upgrades: Longer stun, bigger area.
- Synergies: Pair with Spider Rune (wall climbing) for aerial combos, or with weapons that benefit from airborne enemies (e.g., Assassin's Dagger).
- Recommended Builds: Brutality or Tactics.
- When to Use: Against fast melee enemies or to create space.
- Effect: Placed on the ground, it periodically slams down, damaging enemies above it.
- Cooldown: 12 seconds
- Upgrades: Faster slam, bigger radius.
- Synergies: Use in small platforms or on boss arenas (e.g., against Hand of the King).
- Recommended Builds: Survival (with heavy weapons to hold enemies in place).
- When to Use: On vertical sections or when enemies jump.
- Effect: Places a trap that roots enemies in place for 3 seconds, dealing minor damage over time.
- Cooldown: 10 seconds
- Upgrades: Longer root, wider area.
- Synergies: Set up before using a slow weapon or skill. Combos with any +% damage to rooted enemies.
- Recommended Builds: Any, especially for precision weapons like Infantry Bow.
- When to Use: Against fast enemies or before using a long-winding attack.
- Effect: Places a turret that shoots a continuous stream of fire, dealing damage and setting enemies ablaze.
- Cooldown: 12 seconds
- Upgrades: Longer range, increased damage.
- Synergies: Amazing with Oil Grenade or any fire-boosting mutation (e.g., Crow's Foot? No, it's 'Heart of Ice'? Actually 'Heart of Ice' reduces cooldown on melee kill; 'Net' works for ranged. There is a mutation 'Cold Blood'? Not. Use 'Tactical Retreat' for damage boost after dodge.
- Recommended Builds: Tactics (high damage, turret spam).
- When to Use: Against bosses that stay in place or to control large areas.
- Effect: Fires a hook that pulls the player towards enemies or objects (like crates). Does not damage enemies but can disrupt them.
- Cooldown: 4 seconds
- Upgrades: Faster pull, longer range.
- Synergies: Combine with melee weapons that have overhead slams (e.g., Broadsword) for immediate damage after pull. Can also grab distant scrolls.
- Recommended Builds: Brutality or Survival (closing distance).
- When to Use: To engage quickly, escape, or reposition.
- Effect: Encases the player in ice, becoming invulnerable for 2 seconds. Enemies that touch you take damage and get frozen.
- Cooldown: 18 seconds
- Upgrades: Longer invulnerability, damage reflection.
- Synergies: Use with high-damage weapons to tank through hits. Counters curse.
- Recommended Builds: Survival (tanky builds) or any build needing a panic button.
- When to Use: When cornered or about to take a heavy hit.
- Effect: Creates a smoke cloud that blinds enemies and allows the player to deal critical hits from behind for 2 seconds (backstab damage).
- Cooldown: 8 seconds
- Upgrades: Longer smoke, reduced cooldown.
- Synergies: Perfect with Assassin's Dagger (guaranteed critical when behind) or any weapon that inflicts extra backstabs.
- Recommended Builds: Brutality (stealth assassin).
- When to Use: Against single tough enemies or to escape detection.
- Effect: Summons a rampaging mushroom that chases enemies, explodes on contact, dealing area poison damage.
- Cooldown: 15 seconds
- Upgrades: Bigger explosions, slower decay.
- Synergies: Works with poison-support mutations. Can be combined with root traps to keep enemies in range.
- Recommended Builds: Tactics or Survival.
- When to Use: As a distraction or to clear groups of low-health enemies.
- Effect: Unleashes a short range sonic wave that damages and stuns enemies in front. Deals extra damage to bosses.
- Cooldown: 10 seconds
- Upgrades: Wider cone, longer stun.
- Synergies: Use after dodging a boss attack to interrupt combos.
- Recommended Builds: Any.
- When to Use: As a quick interrupt against strong attacks.
- Effect: Pushes enemies back and reflects projectiles. Deals moderate damage to enemies hit by projectiles.
- Cooldown: 8 seconds
- Upgrades: Larger push, damage reflection.
- Synergies: Best against ranged enemies or bosses with projectile attacks (e.g., Conjunctivitis, HotK).
- Recommended Builds: Any, but especially helpful for low-HP glass cannon builds.
- When to Use: When overwhelmed by projectiles or to create distance.
- Effect: Places a bear trap that immobilizes enemies for 6 seconds, dealing minor damage over time.
- Cooldown: 10 seconds
- Upgrades: Longer immobilization, damage.
- Synergies: Combos with slow weapons or skills that require setup (e.g., Big Boom).
- Recommended Builds: Survival, Brutality.
- When to Use: Against fast enemies or bosses with charge attacks.
- Effect: Hitting an enemy increases damage by 5% per consecutive hit. Stacks up to 6 times (30% total). Resets when missing an attack.
- When to Use: Essential for fast weapons like Twin Daggers or Sadist's Stiletto.
- Synergies: Pair with high attack speed weapons and the Crow's Foot mutation for critical hits.
- Effect: Increases melee damage by 15% (flat).
- When to Use: Any melee build for raw damage boost.
- Combo - damage per hit.
- Melee - +15% melee damage.
- Crow's Foot - +15% damage to full health enemies.
- Frenzy - +5% attack speed per hit, stacks 3 times.
- Heart of Ice - -0.5s cooldown per kill on active skills.
- Adrenaline - healing on critical hits (from The Bad Seed).
- Vengeance - taking damage briefly increases damage.
- Predator - (from The Bad Seed?) No, that's a weapon.
- Silence - from DLC? Not.
- Tainted Flask is a weapon.
- Effect: Each successive hit on the same enemy increases damage by 5% (max 30%). Lose stacks if you miss.
- Cooldown: None (passive).
- Upgrades: None (flat effect).
- Synergies: Best with high speed weapons that can chain (e.g., Twin Dagger, Blood Sword).
- Recommended Builds: Brutality glass cannon.
- When to Use: Always, if you can maintain combos.
- Effect: Landing hits increases attack speed by 5% per stack (max 15%). Stacks last 2 seconds.
- When to Use: Same as Combo for fast builds.
- Effect: Reduces cooldown of your skills by 0.5 seconds per enemy kill.
- When to Use: Useful in biomes with many enemies to spam skills.
- Effect: After taking damage, gain +30% damage for 5 seconds.
- When to Use: For aggressive playstyles that rely on trading hits.
- Effect: Critical hits heal you for a small amount.
- When to Use: With weapons that easily crit (e.g., Sadist's Stiletto, Backpack weapon if using Serenade? Actually Adrenaline triggers on any crit).
- Effect: +30% damage to enemies within close range (melee distance) when using ranged weapons.
- When to Use: For shotgun-style weapons (e.g., Infantry Bow, Boomerang) or when running a close-quarters Tactics build.
- Synergies: Pair with a shield or dodge to stay close.
- Effect: +40% damage to enemies near your turrets or deployables.
- When to Use: Essential for any turret build. Stand near your turret for maximum damage.
- Synergies: Works with all turret skills.
- Effect: +15% damage to enemies that are slowed, rooted, or frozen.
- When to Use: If you have crowd control skills (e.g., Root Trap, Ice Shield weapon, Frost Blast weapon). Works universally.
- Synergies: Use with any weapon that slows or freezes.
- Effect: After dodging, your next hit deals +30% damage.
- When to Use: For hit-and-run tactics.
- Synergies: Combine with high-damage single shot weapons (e.g., Repeater Crossbow).
- Point Blank
- Support
- Net
- Tactical Retreat
- Schemer (from DLC? Actually Schemer is a weapon. There is 'Ranger's Gear'? Not mutation.
- Effect: +50% max health.
- When to Use: Essential for any high-HP build or if you lack health flasks.
- Synergies: Works with any build that wants survivability.
- Effect: +30% damage resistance.
- When to Use: To reduce incoming damage, especially against bosses.
- Effect: Parrying a melee attack heals you for 5% of your max health.
- When to Use: If you're skilled with parrying. Pairs with shields.
- Synergies: Use with 'Shield' weapons that have large parry windows.
- Effect: After a successful parry, your next attack deals +60% damage.
- When to Use: Parry-focused builds for burst.
- Effect: Rolling with a shield in your backpack causes a shockwave that damages and pushes enemies.
- When to Use: Great for aggressive rolling. Works without equipping a shield.
- Synergies: Use with 'Recovery' (mutation that heals on roll?) Actually not.
- Effect: Rolling replenishes a small amount of health (if you have damage to recover).
- When to Use: During a run with lost health, roll to recover.
- Effect: Health potions heal over time and you can move while drinking.
- When to Use: To avoid standing still during boss fights.
- Effect: When your health falls below 25%, gain a shield that makes you invulnerable for 2 seconds. Can trigger once per biome.
- When to Use: Safety net for high-difficulty runs.
- Synergies: Works with any build.
- Skills: Oil Grenade + Burning Grenade (or Flamethrower Turret).
- Weapons: Fire Brands or Flame Sword.
- Mutations: Heart of Ice, Net (if using freeze), Crow's Foot.
- Strategy: Oil then burn. The explosion from oil+fire deals massive area damage.
- Skills: Double Cross-bow-matic + Heavy Turret.
- Weapons: Any ranged (e.g., Repeater Crossbow).
- Mutations: Support, Point Blank (if close to turrets), Tactical Retreat.
- Strategy: Place turrets in a safe corner and pick off enemies from range.
- Skills: Ice Armor + any shield (preferably Greed Shield for money).
- Weapons: Broadsword or Nutcracker (slow but high damage after parry).
- Mutations: Counterattack, What Doesn't Kill Me, Dead Inside.
- Strategy: Parry everything, then strike hard.
- Skills: Smoke Bomb + Grappling Hook (or Bear Trap).
- Weapons: Assassin's Dagger + Alchemical Carbine (for poison).
- Mutations: Adrenaline, Combo, Vengeance.
- Strategy: Smoke to get behind, then backstab crits.
- Blueprints: Dropped by enemies (often elite or specific types) or found in secret rooms/chests.
- Forge Upgrades: After collecting a blueprint, spend cells at the Collector to unlock and then cells to upgrade (some skills have multiple upgrade levels).
- Mutations: Unlocked similarly via blueprints; you then need to unlock them in the collection menu for all future runs.
- Skill Cooldown Reduction: Use Mutations like Heart of Ice (Brutality kills reduce cooldown) or take the 'Support' mutation to make turrets more effective.
- Never Overlook Oil: The oil+fire combo is so strong it's almost compulsory for fire builds.
- Mutations are flexible: You can swap mutations at the end of each biome via the Collector (costs cells). Adapt to your current need (more damage vs survivability).
- Color Scrolls: Try to focus on one main stat (Brutality, Tactics, or Survival) to maximize its mutations' effectiveness, but don't ignore others completely.
#### Cluster Grenade
#### Infantry Grenade
#### Fire Grenade
#### Cryo Grenade
#### Toxin Grenade
#### Oil Grenade
#### Flashbang
#### Mallard Grenade (from The Bad Seed DLC)
1.2 Traps & Turrets
These deployable skills create stationary objects that attack enemies automatically or trigger effects.
#### Double Cross-bow-matic
#### Heavy Turret
#### Sinew Slicer
#### Boomstick Trap
#### Crusher
#### Frost Shield (also known as Ice Shield? Actually 'Frost Shield' is a mutation; there is a deployable 'Ice Shield'? Let me correct: The skill is 'Ice Bomb'? No. There is a trap called 'Glacial Shield' from the Frozen DLC? Actually Dead Cells has 'Frost Blast' as a weapon, not a trap. Better to omit nonexistent skills. Instead include 'Banana' from the 'Bad Seed'? I'll stick to known skills: The 'Grappling Hook' is a skill, not a trap. For traps, we have 'Root Trap', 'Sticky Turret'? Actually the Sticky Turret is from the Dead Cells base game? No, it's not. I think I listed the main ones. Let me add the 'Barrel Launcher'? No. I'll move to Deployables.
#### Root Trap
1.3 Deployables
These skills place objects that provide utility, healing, or persistent effects.
#### Tactical Crossb-ow-matic (from The Bad Seed DLC? Actually it's a variation of Double Crossb-ow-matic but it's a skill? There is 'Barricade'? Wait, I'll use known ones.)
Dead Cells has Barricade (deployable wall), Tactical Pack (backpack skill?), not. Let's use the following legit skills:
#### Flamethrower Turret
#### Healing Flask (not a skill, it's a refillable item). Actually 'Emergency Door'? No. 'Grappling Hook' is a skill. Let's list 'Grappling Hook' under Powers.
#### Golden Resonator (from Fractured Shrines) - not a skill.
Better to stick with the standard skills list. I'll now cover:
1.4 Powers
These skills provide unique active abilities, often with longer cooldowns.
#### Grappling Hook
#### Ice Armor
#### Smoke Bomb
#### Grappling Hook (already covered).
#### Mushroom Boi (from The Bad Seed DLC)
#### Serenade (from The Queen and the Sea DLC)
#### Bloodthirsty Shield (not a skill, it's a shield).
#### Wave of Denial
#### Vampire (from The Bad Seed? Actually it's a mutation, 'Vampirism'? There is a weapon 'Vampire Knife'? Not a skill. I'll skip.
#### Lacerating Aura (from the Distillery DLC? It's a weapon, not a skill.)
1.5 Miscellaneous Skills
#### Bears Trap (from The Bad Seed)
#### Frost Blast (actually a weapon, not a skill).
#### Giant's Grave? Not.
I'll now list all mutations. I'll be comprehensive.
---
2. Mutations
Mutations are passive bonuses. You can equip up to three per run. Mutations are color-coded: Brutality (red), Tactics (purple), Survival (green), and Colorless (white). Many have scaling based on your highest stat (the 'Main Stat'). You unlock mutations by discovering their blueprints and spending cells.
2.1 Brutality Mutations (Red)
#### Double Jump (actually a rune, not a mutation). No, Double Jump is a rune.
#### Combo
#### Melee
#### Spirit (actually 'Dead Inside'? No, 'Dead Inside' is Survival. Let me list real ones.
Brutality has: Combo, Melee, Crow's Foot, Frenzy, Heart of Ice, Adrenaline (from The Bad Seed), Vengeance, Tainted Flasks? Actually 'Tainted Flask' is a weapon. I need accurate list.
Based on official wiki, Brutality mutations are:
Let me describe a few key ones in detail:
#### Combo
#### Frenzy
#### Heart of Ice
#### Vengeance
#### Adrenaline
2.2 Tactics Mutations (Purple)
Tactics mutations focus on ranged damage, turrets, and movement.
#### Point Blank
#### Support
#### Net
#### Tactical Retreat
#### Crow's Foot (also Tactics? Actually Crow's Foot is Brutality? The effect is +15% damage to full health enemies. In the game files, Crow's Foot is a Brutality mutation? I've seen it listed as both. I'll classify it as Brutality. For Tactics, there is 'Counterattack'? No. Let me list known Tactics:
I think that's the main four. Also 'Acrobatipack' is a mutation? No, that's a weapon blueprint. So I'll proceed.
2.3 Survival Mutations (Green)
Survival mutations boost health, defense, and support tanky weapons.
#### Dead Inside
#### Soldier's Resistance
#### What Doesn't Kill Me
#### Counterattack
#### Armadillopack
#### Recovery
#### Extended Healing
#### Mutilation? Not a mutation in base game.
2.4 Colorless Mutations (White)
These mutations are not tied to a stat and often provide utility.
#### Disengagement
#### Emergency Door (not a mutation, it's a skill). No.
#### Aspect of the Lost? Not.
Actually Colorless mutations (from DLC? There is 'The Lost' associated with the Ramparts). The base game has only a few colorless: 'Disengagement' and 'Crow's Foot' (which is not colorless). I'll skip and mention that the only available colorless is 'Disengagement' (unlocked from the Giant). Also 'Emergency Door' is a skill. So I'll include only Disengagement.
---
3. Best Combos and Synergies
3.1 Fire Build
3.2 Turret Spam Build
3.3 Parry God Build
3.4 Assassin Stealth Build
---
4. How to Unlock Skills and Mutations
---
5. Advanced Tips
---
6. Summary Table of Key Skills
| Skill Name | Type | Cooldown | Best Stat | Synergy |
|---|---|---|---|---|
| Burning Grenade | Grenade | 4s | Brutality | Oil + fire |
| Cluster Grenade | Grenade | 6s | Survival | Crow's Foot |
| Double Cross-bow-matic | Turret | 12s | Tactics | Support |
| Ice Armor | Power | 18s | Survival | High risk |
| Smoke Bomb | Power | 8s | Brutality | Backstab |
| Wave of Denial | Power | 8s | Any | Projectiles |
| Bear Trap | Deployable | 10s | Brutality | Slow weapons |
| Grappling Hook | Power | 4s | Brutality | Closing gap |