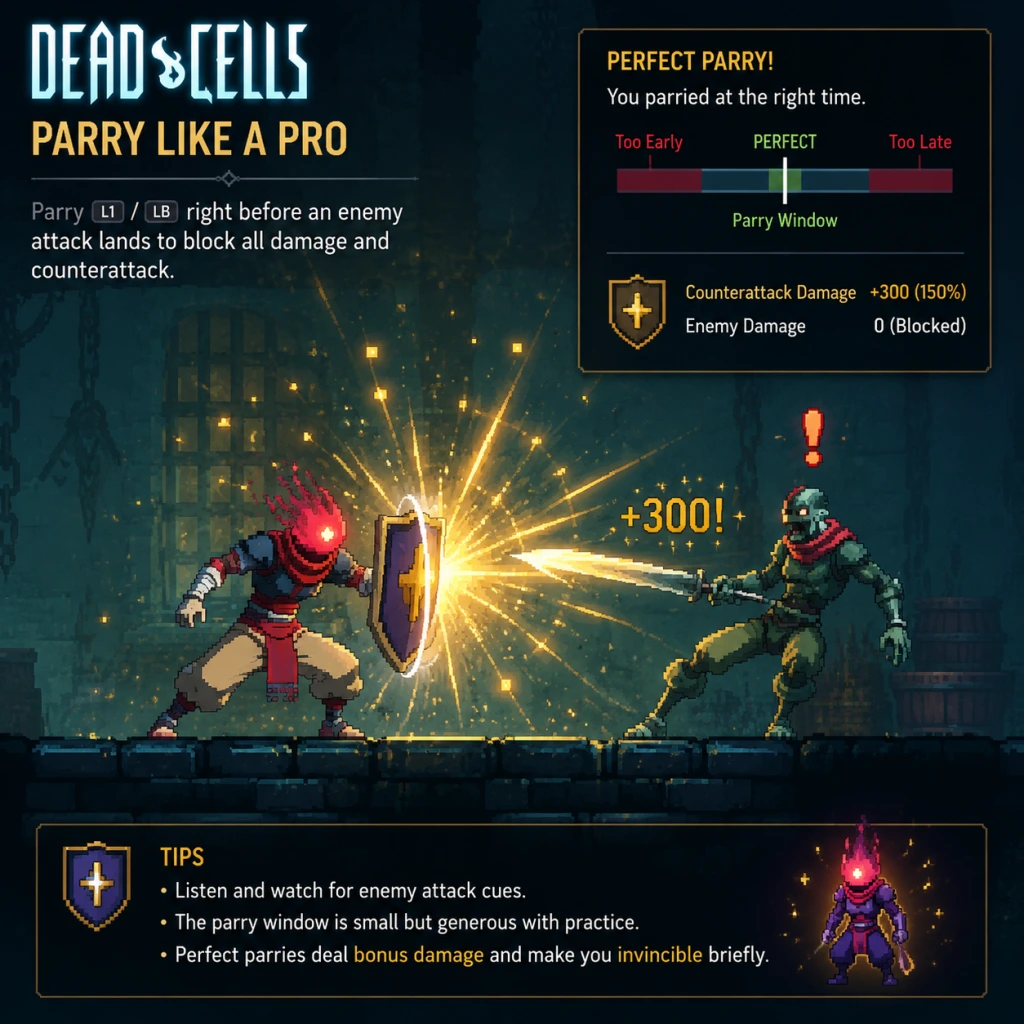
Game Tips
Dead Cells: Complete Game Tips Guide
This guide compiles essential tips for Dead Cells, categorized by gameplay focus. Tips are ordered from beginner-friendly to advanced optimizations. Use this reference to improve your runs, unlock secrets, and master the biomes.
---
1. Combat Tips
#### Beginner
- Master the Basics of Dodging and Parrying: Your dodge roll gives brief invincibility frames (i-frames). Use it to phase through enemy attacks, not just to reposition. Parrying (holding shield button just before hit) reflects projectiles and stuns melee enemies. Practice against the Shieldbearer enemies in the Prisoners' Quarters.
- Weapon Combo Timing: Most weapons have a 2- or 3-hit combo. The third hit often has a longer wind-up but deals bonus damage. Don't mash attack; time your strikes to land hits without getting hit back. For example, the Starter Sword's third hit knocks enemies back.
- Use the Environment: Break down walls to create escape routes, kick enemies into pits or spikes, and use elevation to avoid ground-based attacks. Many biomes have breakable floors leading to secret rooms.
- Stunlocking and Bouncing: Weapons like the Crowbar or Flint can stunlock smaller enemies indefinitely if you keep hitting them. Against larger enemies, use two hits then dodge to avoid counter-attacks. Bouncing enemies into walls with the Spartan Sandals or Hayabusa Boots can instantly kill them if they hit a cliff.
- Managing Multiple Enemies: Never stand still. Keep moving and use crowd-control items like Ice Grenade or Firebrands. Prioritize ranged enemies (e.g., Bombers, Inquisitors) first – they are the biggest threat. Use pillars or walls as cover from projectiles.
- The Critical Hit Mechanic: Many weapons have special conditions for critical hits. Examples:
- Animation Cancelling: You can cancel the recovery animation of most attacks by rolling or using a skill (e.g., grenade). This allows you to chain attacks faster or escape after a risky swing. Practice cancelling the third hit of a combo with a roll.
- Enemy Attack Patterns: Every enemy has telegraphed attacks. Learn the wind-up animations of all elites and bosses. The Time Keeper, for example, always does a triple slash before her spinning attack. Use this knowledge to parry or dodge perfectly.
- Weapon Synergies: Combine weapons with similar damage types or status effects. For example, a Spiked Shield (causes bleed on parry) + Blood Sword (critical on bleeding enemies) creates a devastating bleed combo. Or use Hokuto's Bow (marks enemies, then any damage to them also damages nearby marked enemies) with Throwing Knives (apply bleed) for massive area damage.
- Always Check Dead Ends: Dead ends often hide a secret room, a lore room with a scroll, or a timed door. If you see a wall that looks slightly different, hit it. Some breakable walls are marked by dangling chains or cracks.
- Memorize Biome Layouts: Biomes are procedurally generated but follow patterns. The Promenade of the Condemned always has an exit to the Ramparts and the Ossuary (if you unlock it). Use the map (press Tab on PC or select on controller) to plan your route.
- Timed Doors: These appear at the end of the first three biomes (Prisoners' Quarters, Promenade, Ramparts) and contain powerful weapons or scrolls. To reach them, you must complete the biome within 2 minutes (first door), 8 minutes (second), and 15 minutes (third). This requires speedrunning early biomes – skip unnecessary fights and use scrolls to increase damage.
- The Hunter's Grenade: Unlock this gadget from the Collector. It turns a single enemy of your choice into a living blueprint that, when killed, drops its blueprint. Use it to get blueprints for rare weapons. Save it for enemies you haven't unlocked yet (check the in-game blueprint list). Best used in early biomes where enemies are weaker.
- Secret Areas via Runes: As you progress, you unlock movement runes (e.g., Vine Rune, Teleportation Rune). Use them to access previously unreachable areas. For example, the Toxic Sewers require a wall jump (Spider Rune). Always explore every new biome thoroughly after you get a new rune – return to older biomes via the following areas: Prisoners' Quarters → Toxic Sewers (requires Teleportation Rune? Actually requires Vine Rune and Spider Rune).
- Biome Mutations: Each biome has a limited set of mutations (perks) that can be found in scrolls. If you need a specific mutation for your build (e.g., Vengeance for survival), plan your route to include biomes that drop survival scrolls. The Arboretum is good for survival scrolls, while the Fractured Shrines have many brutality scrolls.
- Speedrun Routes for Timed Doors: To consistently reach timed doors, memorize the optimal path in each biome. In Prisoners' Quarters, roll straight through the first few rooms, ignore gold, and use the elevator shortcut. In Promenade, jump over the first gap and take the upper path to avoid monsters. Practice these routes in custom runs.
- Exploit Elevators and Shortcuts: Many biomes have elevator shafts you can drop down to skip sections. For example, in the Slumbering Sanctuary, you can fall into the large pit to reach the exit faster, but beware of the awakening enemies. In the Derelict Distillery, use the vertical passage behind the first barricade to bypass a long hallway.
- The Forgotten Sepulcher Light Mechanic: In this biome, your lantern runs out of oil, leaving you in darkness with rapidly spawning enemies. Use the light sources on the ground to refill. Prioritize finding the exit. Do not linger – this biome is designed for quick traversal. Bring a shield for parrying because enemies attack from the dark.
- Gold: Spend gold on weapons and skills that fit your build, but save some for the next biome's shop. You can reroll shop items (costs gold) but that's risky early on. Always buy a health flask upgrade if you see it (costs 5000 gold) – that's more important than most weapons.
- Cells: Use cells to unlock items from the Collector. Do not spend cells on random items unless you have a surplus. Prioritize unlocking:
- Scrolls: Always pick up scrolls – they increase your stats (Brutality, Tactics, Survival). Choose the color that matches your main weapon. If a scroll has two stats, pick the one that benefits your build (e.g., if you are playing Brutality, pick Brutality over Survival). If a scroll offers three stats, always pick the one that is not your main if your main is not presented – but generally, increase a secondary stat for health (which scales with Survival).
- Synergizing Stats with Mutations: Mutations have color requirements. For example, Vengeance (Survival) reduces damage after taking a hit. If you are playing Tactics (which has low health), picking a survival mutation gives you a safety net. Plan your scroll distribution to unlock both your weapon stat and a defensive mutation. Use the Mercenary mutation (Brutality) for extra damage when you are at full health.
- Sacred Bones and Legendary Forge: After defeating the Hand of the King (first boss), you unlock the Legendary Forge. Use cells here to increase the quality of weapons you find. Spend cells on the forge after you have unlocked essential gear – the + quality upgrade makes a huge difference. Focus on the first tier (++ upgrades) before moving to S tier.
- Gold Efficiency: In late biomes, rerolling item affixes becomes expensive (1500 gold per reroll). Only reroll if the item's affixes are crucial for your build (e.g., you have a bleed build and need affixes that cause bleeding on hit). Otherwise, save gold for healing flasks or a backup weapon.
- The Smith and the Forge: At the start of a run, you visit the Collector's room where you can upgrade your starting weapon to ++ quality using cells. This costs 300 cells, but it guarantees that your starting weapon will be ++ in every run. Do this early – it's the best use of cells after unlocking health flasks.
- Using the Recycling Tube: After unlocking the Recycling Tube gadget, you can break down unwanted weapons and skills for cells. This is excellent for farming cells late in a run when you have extra gear. Use it on weapons that don't fit your build to get extra cells for the forge.
- Blueprint Exploits: Some blueprints require specific conditions. For example, the Boomerang blueprint drops from the Builder (an elite enemy) only if you kill it with a melee weapon. The Nerves of Steel blueprint requires you to parry the Hand of the King's attack 3 times without taking damage. Use the Hunter's Grenade as described earlier to guarantee the enemy spawn.
- Brutality Starter Build: Grab a fast melee weapon (e.g., Balanced Blade, Twin Daggers) and a shield (Rampart or the Cudgel). Use the mutation Vengeance (Survival) for safety and Combo (Brutality) for attack speed. This build is straightforward: dodge, parry, and slash.
- Tactics Starter Build: Pick a bow (e.g., Crossbow, Infantry Bow) and a trap skill (e.g., Sinew Slicer, Ice Arrow). Use mutation Support (Tactics) which reduces damage from enemies you are not targeting (since you will be at range). Stay mobile and prioritize taking down enemies before they reach you.
- Survival Starter Build: Use a heavy weapon like the Nutcracker (critical on stunned enemies) or War Hammer, paired with a shield. Mutation YOLO (Survival) gives you a one-time revive. This build is slower but very tanky. Parry everything and then crush enemies.
- Bleed Build: Requires Blood Sword or Throwing Knife + Spiked Shield. Affixes that cause bleed on hit or on parry. Mutations: Open Wounds (Brutality) – melee attacks cause bleed; Dead Inside (Survival) for health. This build melts bosses because bleed stacks and you can parry to apply more stacks.
- Fire Build: Use Firebrands or Alchemical Carbine + Pyrotechnics skill. Affixes that cause burning. Mutation Instinct of the Master of Arms (Tactics) reduces cooldowns on crits. The key is to set enemies on fire, then use Hokuto's Bow to spread damage. This is great for clearing crowds.
- Shield-Only Build: Use a shield as your main weapon (e.g., Spiked Shield or Punishment). Pair with Counterattack mutation (Survival) which increases damage after a parry. This is a high-risk, high-reward build – you must parry perfectly. It works best against enemies with telegraphed attacks (e.g., Inquisitors, Bombers).
- Cooldown Reduction Build: Focus on Tactics with Instinct of the Master of Arms (reduces skill cooldowns on critical hits) and items with fast cooldowns (e.g., Tonic – gives temporary health and cooldown reduction). Use a weapon that crits often (e.g., Hattori's Katana, War Spear). This allows you to spam powerful skills like Lacerating Aura or Shockwave. Combine with Giant's Ring (reduces cooldowns further) for near-constant skill uptime.
- Survival Spite Build: Use Crowbar (critical on stunned enemies) + Rampart (shield gives invincibility on parry) + mutation Vengeance (damage and protection after being hit) + Soldier's Resistance (extra health). The idea is to take damage intentionally to trigger Vengeance, then stun enemies and smash them. This works best with high health and damage reduction. Activate Spite mutation (Survival) for extra damage when hit. Because you are tanky, you can trade blows safely.
- Infinite Ammo Build: For Tactics, combine Hokuto's Bow with Ricochet skill (arrows bounce between enemies). Ensure Hokuto's Bow has the affix "arrows pierce all enemies." With Instinct of the Master of Arms, every crit reduces cooldowns, and Ricochet can bounce infinitely, clearing entire rooms. This is the core of many speedrun strategies.
- Sell Unwanted Items: You can sell weapons, skills, and gadgets at the shopkeeper for gold. Early game, sell anything that doesn't match your build to get gold for scrolls or flasks. But don't sell your only weapon – keep a backup.
- Gold Resets per Biome: When you move to a new biome, your gold carries over, but the shop inventory resets. So before entering a new biome, spend all your gold on items or rerolls – the gold will be gone anyway if you die. But if you survive, you keep the items. So it's better to buy something than hoard.
- Health Flask Costs: Refilling a health flask at a shop costs 1000 gold per charge. Always try to fill your flasks before a boss. In biomes without shops, you may find food or health fountains – use them only if you are low; otherwise, save them.
- Blood Shards and Blueprints: Some blueprints must be purchased with cells. To farm cells efficiently, play on the highest difficulty you can handle. Also, use the Gastronomy mutation (Survival) which gives food items – you can sell excess food for gold. Not directly economy, but helps sustain.
- The Bank Biome: Unlock the Bank (Entrance appears after collecting 10,000+ gold in a run? Actually, the Bank requires the Bank Key blueprint from the Collector for 150 cells). Once inside, you can deposit gold to earn interest. Depositing 500 gold gives 10% return – deposit as much as you can before leaving. The Bank also has a shop with exclusive items and a safe that requires a key. Prioritize depositing all spare gold.
- Recycling Economy: Use the Recycling Tube to break down weapons into cells. Cells are more valuable than gold late-game because they upgrade the Legendary Forge. In late biomes, swap your lower-tier weapons for better ones, then recycle the old ones. The tube also gives you a small amount of gold for broken items, but cells are better.
- The Gambler's Gamble: The Gambler's Blade (Tactics) deals random damage, sometimes very high. It also has a chance to drop gold on kill. In early biomes, you can generate unlimited gold by luring small enemies near a pit, then using the blade to kill them repeatedly? Actually, enemies don't respawn, but you can use it in the Prisoners' Quarters to get extra gold. Not consistent, but can be exploited if you get the blueprint.
- Legendary Forge Investment: The Legendary Forge can be upgraded to S quality for weapons. This costs thousands of cells. The most efficient way to farm cells is to play 4 Boss Stem Cells difficulty (4BC), where every enemy drops cells frequently, but you die in two hits. Use a survival build with Dead Inside to increase health. Farm the early biomes, then kill yourself in the next biome (or exit through the door) to reset – but you lose cells if you die. Better: do a full run and dump all cells into the forge.
- Trading with the Collector: Some blueprints can be exchanged with the Collector for exclusive items. For example, giving him 30 cells unlocks the Cursed Sword blueprint. But usually, it's better to unlock weapons you use. Don't trade random blueprints unless you have duplicates.
- Custom Mode: After beating the game once, unlock Custom Mode. Use it to disable weapons you don't like, thus forcing the game to drop only the ones you want. This dramatically improves build consistency. For example, disable all shields if you prefer dual-wielding. Be careful: disabling too many items may disable achievements.
- Speedrun Techniques: For fast clears, learn to wall jump into rolling to maintain momentum. Use the Momentum mutation (Tactics) which increases movement speed after a kill. Combine with Spider Rune to climb walls quickly. Practice the following: roll -> jump -> wall jump -> double jump -> roll again. This covers gaps quickly.
- Boss Killing Orders: Learn boss attack patterns to avoid damage. The Concierge's room fire attack is easy to dodge by rolling through him. The Time Keeper's machine-gun attacks can be parried. The Hand of the King's phase 2 shockwave can be jumped over. For the Giant, stay behind him and avoid the eye lasers.
- Emergency Escape Tools: Always carry at least one skill that can save you when cornered, such as Ice Grenade, Frost Blast, or Spartan Sandals (knocks back). Use them to create space.
- Stat Priority: In general, for any build, after you have at least one scroll in your main stat, invest all subsequent scrolls into Survival for health. This is because health scales multiplicatively with Survival scrolls, and damage scales linearly. On higher difficulties, survivability is key. Exception: if your build relies on a secondary stat for a mutation (e.g., Tactics for Instinct), keep that stat high.
- PC (Keyboard & Mouse): Remap your keys for comfortable rolling (e.g., Space for roll, Shift for dodge). Use the mouse for aiming bows – it allows precise aim. The controller on PC is also good, but keyboard offers faster switch between weapons and skills.
- Nintendo Switch: The game runs at 60fps in handheld and TV mode. Use the Pro Controller. The Joy-Con's input lag can be noticeable during parrying; enable the "Reduce Input Lag" option in settings. Use the right analog stick for aiming, but many players prefer the D-pad for movement.
- Mobile (iOS/Android): The mobile port has touch controls. Use auto-aim for bows (it works decently) and activate the "always show the jump button" option. You can also connect a Bluetooth controller. Mobile has exclusive content (The Blood Sword mobile skin) but the core gameplay is identical.
- Console (PS4/PS5, Xbox): The R1/RB button is roll by default – this is fine. Use L2 for shield. Enable vibration for parry feedback. The game supports 4K on PS4 Pro and PS5, but the framerate is stable 60fps on all consoles.
#### Intermediate
- Twin Daggers: Critical hit if you attack from behind.
- War Spear: Critical hit against burning enemies.
- Tentacle: Critical hit if you hit from a long distance.
Learn these conditions to maximize DPS.
#### Advanced
---
2. Exploration Tips
#### Beginner
#### Intermediate
#### Advanced
---
3. Resource Management Tips
#### Beginner
1. Health potion upgrades (max potions)
2. Useful mutations (e.g., Vengeance, Dead Inside)
3. Weapons you enjoy using (e.g., Twin Daggers, Ice Bow)
Avoid unlocking all items immediately because it dilutes the drop pool.
#### Intermediate
#### Advanced
---
4. Builds and Synergies
#### Beginner
#### Intermediate
#### Advanced
---
5. Economy Tips
#### Beginner
#### Intermediate
#### Advanced
---
6. Advanced Optimizations
---
7. Platform-Specific Tips
---
Final Words
Dead Cells rewards practice, experimentation, and knowledge. Apply these tips gradually. Focus on one category at a time: first learn combat basics, then exploration routes, then build synergies. Over time, you will consistently reach higher difficulties and eventually beat 5BC. Good luck, Beheaded!