Overview
In
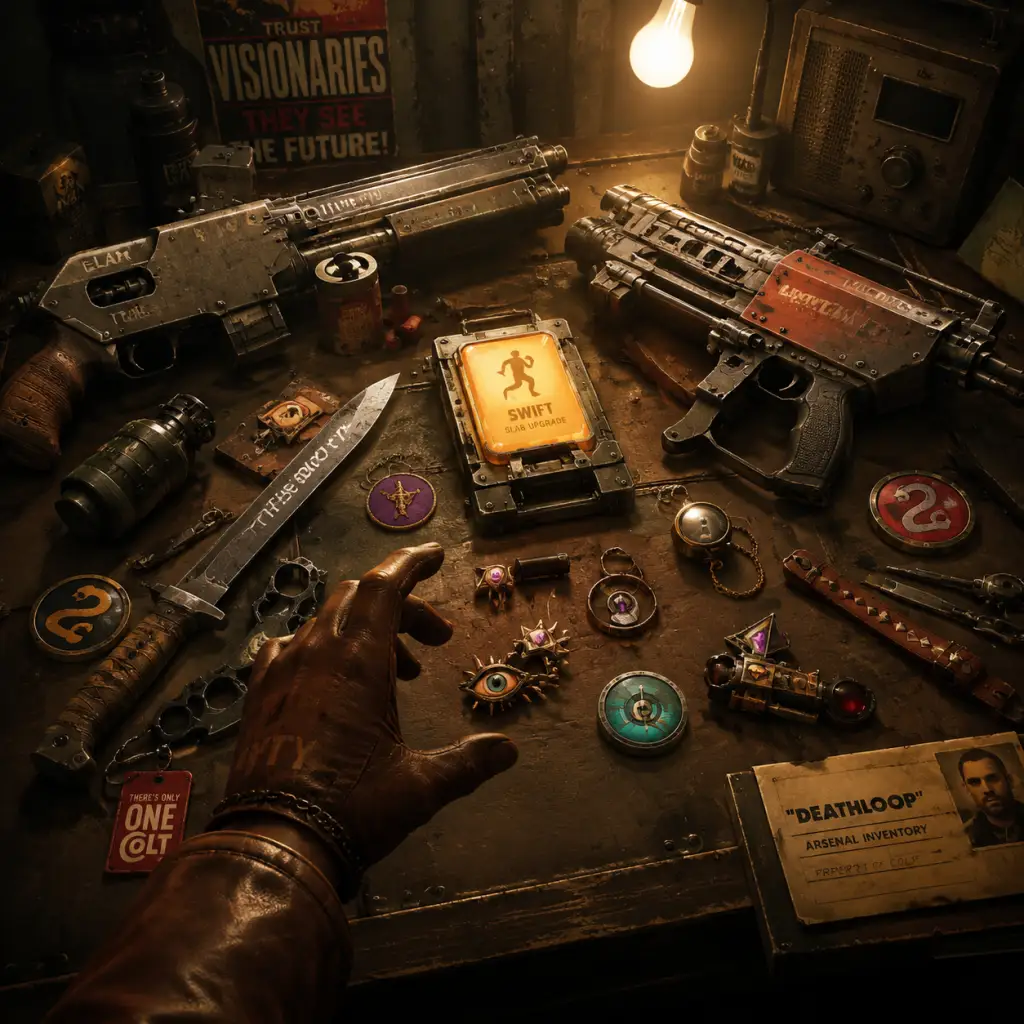
Deathloop, items are the tools of your trade as Colt, the eternal assassin trapped on Blackreef. The island is littered with guns, trinkets, consumables, and collectibles, all of which can be used to break the time loop. Because the day resets at midnight, most items are lost each loop — unless you
Infuse them using
Residuum, a special currency that allows you to permanently keep weapons and trinkets across resets. This guide covers every major item category, including detailed stats, acquisition methods, optimal usage, and important synergies.
---
1. Weapons
Weapons in
Deathloop fall into several classes: melee, pistols, submachine guns (SMGs), shotguns, rifles, and unique special weapons. Each weapon has standard rarity (grey, blue, purple, orange) indicated by color, but more importantly, weapons can also carry
perks (special bonuses) that drastically change their performance. You can loot weapons from enemies, find them scattered around levels, or unlock them permanently by Infusing.
1.1 Melee Weapons
| Weapon | Description | How to Obtain | Notes |
|---|
| Machete | Standard melee weapon. Quick slashes, can one-hit kill unalerted enemies. | Default equipment; always spawns in your loadout. | No perk variants. Can be thrown for a short-range silent kill. Use when out of ammo or for stealth takedowns. |
1.2 Pistols
| Weapon | Description | Perk Examples | How to Obtain |
|---|
| Tribunal | Semi-automatic pistol. High accuracy, moderate damage, low ammo capacity (8 rounds). | Snap Shot (increased hip-fire accuracy), Wrecking Ball (bonus damage against objectives) | Common drop from Eternalists; found in weapon crates. |
| MG-1 Constable | Full-auto pistol. Fast fire rate but worse accuracy. 15-round magazine. | Juiced Up (increased movement while firing), Lightning Strike (faster reload after kill) | Drops from Eternalists, especially in Updaam. |
| Sepulchra Breteira | Unique silenced pistol. Extremely quiet, high damage, but slow rate of fire. | None (fixed stats) | Unlock by completing Egor Serling's questline (kill him in the Complex and loot his body). Best stealth weapon. |
1.3 Submachine Guns (SMGs)
| Weapon | Description | Perk Examples | How to Obtain |
|---|
| Strelak Verso | Special SMG that can be split into dual-wielded pistols. Full auto when combined, rapid fire when split. | None (unique mechanic) | Obtain by defeating Charlie Montague in his party at Updaam (evening). Loot from his body. |
| Kubrik | Standard SMG. High rate of fire, low damage per shot. Large magazine (30 rounds). | Shockwave (bullets slow enemies), Shadow Strike (silenced bullets, rare) | Common drop; found in weapon lockers. |
| Vopat | SMG with a drum magazine (50 rounds). Less accurate but good for suppressive fire. | Deep Impact (penetrates walls slightly), Quickdraw (faster weapon swap) | Drops from heavy Eternalists. |
1.4 Shotguns
| Weapon | Description | Perk Examples | How to Obtain |
|---|
| Heritage Shotgun | Powerful double-barrel shotgun. Slow reload but immense damage up close. | Sundance (increased range), High Rolling (critical chance on headshots) | Found on weapon racks; dropped by Juliana. |
| Ripper | Semi-automatic shotgun. Faster fire rate but lower damage per shot. 6-round tube magazine. | Scattergun (wider pellet spread), Shell Game (chance to not consume ammo) | Drop from Visionary guards. |
1.5 Rifles
| Weapon | Description | Perk Examples | How to Obtain |
|---|
| LIM-10 | Lightweight assault rifle. Full-auto, good accuracy and damage. 30-round magazine. | Juiced Up, Lightning Strike | Common drop; also sold by Wenjie (if you hack her delivery). |
| PT-6 Spiker | Semi-automatic rifle with very high damage per shot. 6-round magazine. Best for mid-range precision. | Mind Leech (empty enemy slab energy), Soul Survivor (heal on kill) | Loot from Wenjie's labs or her personal guard. |
1.6 Special Weapons (Unique)
| Weapon | Description | How to Obtain | Notes |
|---|
| Strelak Verso (also listed above) | Two-in-one SMG. Press Y/Triangle to switch between combined and dual-wielded modes. | Charlie Montague (Updaam evening) | Extremely versatile; use dual pistols for close-range, combined for mid-range. |
| Harriet's Poison Blade | A knife that applies lethal poison on hit. One hit kills anything. | Harriet Morse’s bunker (Complex afternoon) | Silent, but requires careful timing. Poison will spread to nearby enemies. |
| Egor's Ray Gun | A laser pistol that fires energy beams. Inaccurate but ignores armor. | Egor Serling’s lab (Complex morning) | Good against Juliana because it staggers. |
---
2. Trinkets
Trinkets are equippable items that grant passive bonuses or activate special abilities. There are two types:
Slab Abilities (active powers) and
Personal Trinkets (passive upgrades). Both can be Infused.
2.1 Slab Abilities (Active Powers)
| Slab | Description (Base) | Upgrade Path (Sacrifice duplicates) | How to Obtain | Usage Tips |
|---|
| Reprise | Revive twice per loop. | — (upgraded via story) | Default power. Always active. | Essential for survival. Save revives for emergencies. |
| Aether | Turn invisible for a short time. | Ghost: No movement speed penalty while invisible. Flicker: Faster activation. | Harriet Morse (Complex, afternoon) | Use for stealth through heavily guarded areas. Combine with Kunai for silent kills. |
| Havoc | Become a tank – reduce damage taken and increase damage dealt. | Wrecking Ball: Enemy melee attacks knock them down. Persona: Enemies fear you. | Charlie Montague (Updaam, evening) | Activate before charging into groups. Pairs well with shotgun. |
| Karnesis | Telekinetic push or pull enemies. | Suspension: Hold enemies in mid-air. Impact: Enemies explode on walls. | Egor Serling (Complex, morning) | Great for environmental kills (push off cliffs) or to disable Juliana. |
| Shift | Short-range teleport (blink). | Range: Increased distance. Airborne: Can teleport mid-jump. | Frank Spicer (Karl’s Bay, noon – party) | The best mobility power. Use to bypass obstacles or escape combat. |
| Nexus | Link multiple enemies; damage spreads. | Pairing: Link without line of sight. Mimicry: Enemies linked to you will act as decoys. | Wenjie Evans (Complex, afternoon – lab) | Powerful for crowd control. Shoot one linked enemy to kill all. |
: You can upgrade each Slab by sacrificing the same Slab from another Visionary (e.g., kill Harriet twice to upgrade Aether). Upgraded versions of Slabs are permanent once infused.
2.2 Personal Trinkets
Personal Trinkets provide passive bonuses to Colt’s attributes. Each trinket has a
cost (number of bars), and your limit is 3 bars (later increased to 5 via
Hackamajig upgrades).
| Trinket | Effect | Cost | How to Obtain | Synergies |
|---|
| Spring Heeled | Double jump. | 1 | Loot from Eternalists; found in certain lockers. | Combine with Shift for extreme verticality. |
| Wingsuit | Slow fall after dropping from height. | 1 | Updaam, on roof of Charlie’s mansion. | Use with Karnesis to float over gaps. |
| Bomb Lance | Explosive throwing knives (replaces standard kunai). | 2 | Karl’s Bay, in Frank’s bunker (afternoon). | Synergizes with Karnesis (push enemies into bombs). |
| Turtle Shell | Take reduced damage when not moving. | 2 | Complex, on storage container near Wenjie’s lab. | Useful when tanking with Havoc. |
| Energist | Increased slab energy regeneration. | 1 | Drop from Juliana or Visionary guards. | Essential for heavy Slab users. |
| Unstoppable Force | Immune to enemy Karnesis pushes while sprinting. | 1 | Loot from a specific Eternalist in Updaam (evening). | Counter Juliana’s push. |
| Juiced Up | Move faster while firing. | 2 | Found in various lockers. | Pairs with SMGs or shotguns for aggressive play. |
| Steel Sight | Hold breath longer while aiming (rifles). | 1 | Loot from sniper Eternalists. | Useful with PT-6 Spiker or LIM-10. |
| Glass Cannon | Take double damage but deal double damage. | 1 | Hidden in the Complex, behind a painted wall. | High risk/reward; use only if confident in avoiding hits. |
| Sprinter | Sprint for longer duration. | 2 | Common drop. | Good for traversal. |
---
3. Consumables
Consumables are single-use items that provide immediate benefits. They are never infused — you craft or pick them up fresh each loop.
| Item | Effect | How to Obtain | When to Use |
|---|
| Health Injector | Instantly heal 50 HP. | Crafted (2 scrap metal + 1 residuum), looted from enemies. | After taking heavy damage. Can hold up to 3. |
| Shield Injector | Temporarily makes you invulnerable for 4 seconds. | Crafted (2 scrap metal + 1 residuum), looted from Juliana. | Before engaging multiple enemies. Combos with Havoc for extreme tanking. |
| Focus Injector | Restores some Slab energy. | Crafted (2 scrap metal + 1 residuum), found in some offices. | When using Slab abilities heavily. |
| Grenade (Frag) | Standard explosive; L2 to toss. | Looted from Eternalists, weapon lockers. | Crowd control or clearing rooms. |
| Proximity Mine | Stick to walls; detonates when enemies are near. | Crafted (1 scrap metal + 1 residuum), looted from traps. | Set ambushes, block doorways. |
| Sprinkler | Area-of-effect gas that makes enemies dizzy and vulnerable. | Looted from Harriet’s area. | Non-lethal option for stealth. |
| Turret | Deployable auto-turret. Fires at enemies. | Crafted (2 scrap metal + 1 residuum), found in Charlie’s mansion. | Distract or cover flanks. |
| Nullifier | Creates a field that disables enemy Slabs (including Juliana’s). | Looted from Wenjie’s lab. | Essential for fighting Visionaries with powerful slabs. |
requires a recipe which you unlock by finding the respective
Recipe Note in the world. Once unlocked, you can craft at any
Fabricator machine.
---
4. Materials & Currencies
| Name | Description | Use | How to Obtain | Notes |
|---|
| Residuum | Purple glowing substance. Primary currency. | Infuse items (weapons, trinkets) to keep them permanently. | Killing Visionaries, recycling infused items, looting from residuum deposits. | The only thing that persists across loops. Do not waste on low-tier items. |
| Scrap Metal | Grey metal chunks. | Craft consumables, update items at Fabricators. | Looting containers, weapons disassembly (via ‘Recycle’ option). | Abundant; always gather. |
| Trinket Dust | From dismantling unwanted trinkets. | Used to craft trinkets at Fabricators (requires recipe). | Recycled from trinkets you don’t want. | Save dust for rare trinkets. |
| Keycards | Various colored cards (green, blue, purple, gold). | Open locked doors and safes. | Loot from Eternalists, Visionaries, or found in specific locations. | Keep them; some doors require multiple cards. |
| Documents | Lore items – no in-game benefit. | Provide story background and puzzle clues. | Scattered across maps. | Essential for solving the Visionary sequence puzzle. |
| Audio Logs | Audio recordings. | Play from inventory for story. | Same as documents. | No gameplay effect. |
---
5. Key Equipment & Tools
| Item | Function | How to Obtain | Notes |
|---|
| Hackamajig | Multitool for hacking turrets, doors, traps. Default equipment. | Given at start of first loop. | Upgradable via trinket slots (find Hackamajig Upgrades throughout Blackreef). |
| 2-BIT | Hackable radio; provides code for one safe per loop. | Pick up at various radio towers. | Only works once per loop. Use with the safe codes you find. |
| RADIO (tower) | Gives current map and time. | Built into UI. | Not an item. |
| Antenna | Used to communicate with Visionaries or trigger events. | Found in mission areas. | Example: to call a rocket. |
---
6. Collectibles (For Trophy/Achievement Hunting)
| Category | Description | Count | Reward | Notes |
|---|
| Documents | All lore papers. | 12 | Trophy: “Full Deck” | Missable if you don’t pick up before certain events. |
| Audio Logs | Recordings. | 9 | Trophy: “Sound and Fury” | Generally well-hidden. Use maps. |
| Weapon & Trinket Collection | All weapon types and all trinkets. | 12 weapons, 15 trinkets | Trophy: “All for One” | Must Infuse at least one of each. |
| Slab Upgrades | All fully upgraded Slabs. | 6 Slabs × 2 upgrades each | Trophy: “Nowhere to Hide” | Requires killing Visionaries multiple times. |
| Foci of the Loop | Destroy all eight Visionaries in one loop. | 8 | Trophy: “Golden Loop” | The final objective. |
---
7. Infusion System
Infusion is the core mechanism allowing you to keep items after a loop reset.
Only Residuum can be used.
- How to Infuse: Pause menu → Infusion tab → select item → spend Residuum.
- Cost: Depends on rarity: Grey (5), Blue (10), Purple (20), Orange (30).
- Strategy: Prioritize infusing Orange weapons with great perks and key Slab upgrades. Low-tier items are easy to re-loot.
- Bonus: Killing Juliana (the invading Colt) yields a massive Residuum drop (300-500). Always hunt her for quick infusion capital.
---
8. Important Synergies & Upgrades
- Shift + Spring Heeled: Unmatched mobility; triple-jump style traversal.
- Nexus + PT-6 Spiker: Link enemies, then shoot one. The high damage spreads to all linked, wiping a room.
- Havoc + Bomb Lance: Activate Havoc, run in, throw Bomb Lance at your feet. Enemies cluster and die, you survive due to damage reduction.
- Aether + Sepulchra Breteira: Perfect silent assassination tool. Invisibility makes you untargetable while you line up headshots.
- Karnesis + Proximity Mine: Push enemies onto mines for hilarious kills.
- Energist + any Slab: Faster regen lets you spam abilities more.
This guide covers every item you'll encounter. Use the Infusion system wisely, experiment with trinkets, and always have a backup plan for loop failure. Blackreef is your playground — now break the loop.