Game Tips
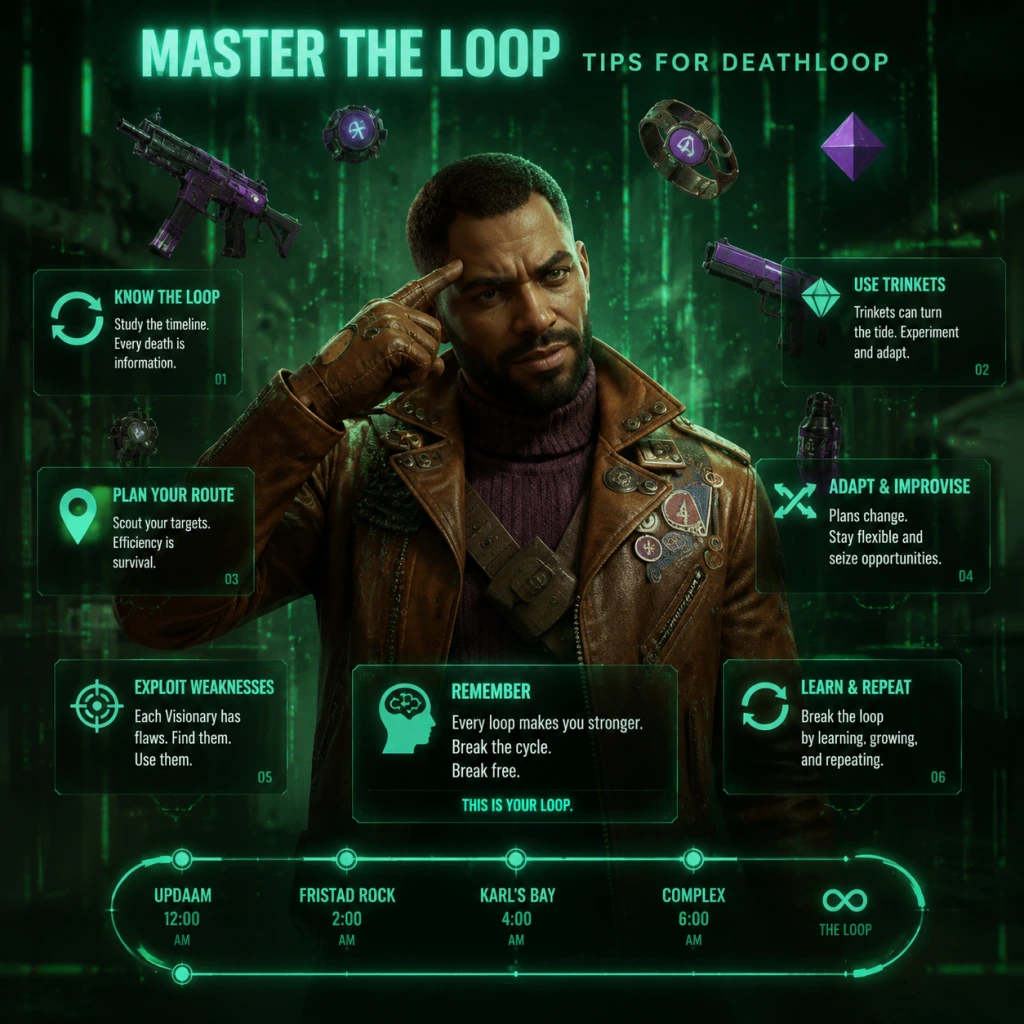
Game Tips: Deathloop – Master the Loop
This guide covers everything from essential beginner advice to advanced optimizations, grouped by category. Tips are practical, game-specific, and include deeper analysis on why they work.
---
General / Foundation
#### 1. Always Save Infused Gear Before Ending a Loop
- Explanation: You can only keep items permanently by infusing them with Residuum at the end of a loop (after killing Wenjie or using the infusion machine). If you don’t infuse a weapon, slab, or trinket, it’s gone next loop.
- Why it works: Early on, you’ll find many versions of the same gun. Only the one you infuse stays. Prioritize infusing one reliable weapon (e.g., the LIMP-10 or Tribunal) and then focus on slabs (Shift is top priority).
- When to use: Every loop before resetting—check your loadout and infuse anything you’ve used repeatedly and liked.
- Explanation: If you die and have no Reprise charges left, you can respawn once per loop at the cost of losing all unpicked loot from that area. This is controlled by a slider in Gameplay settings.
- Why it works: Avoid relying on this crutch. Losing loot slows progression. Better to save and restart from the last safe area (e.g., a hidden tunnel) or use Reprise charges wisely.
- When to use: Only toggle on when you’re farming a specific item in a dangerous area and accept the risk of losing items.
- Explanation: The day is split into Morning, Noon, and Afternoon. Each area (The Complex, Karl’s Bay, Fristad Rock, Updaam) has its own schedule of events and enemy density. You can change time at the map menu before entering a zone.
- Why it works: Some visionaries only appear at certain times. For example, Harriet Morse is always in the Complex at Noon. Planning your route by time saves hours of aimless wandering.
- When to use: Before each mission, check the map for the “Lead” icon indicating a visionary’s location. Reschedule if needed.
- Explanation: Throughout Blackreef, you can overhear Julianna’s broadcasts and conversations between Eternalists. These often provide direct clues to slab locations, shortcuts, or visionary weaknesses.
- Why it works: The game hides information in audio logs. Missing one can lock you out of an easier assassination path. For example, Julianna might mention that Wenjie’s clone ritual makes her vulnerable.
- When to use: Whenever you see a radio or a group talking, stop and wait. Use headphones for positional audio hints.
- Explanation: Havoc grants short-term invulnerability and health regeneration while dealing damage to nearby enemies. It’s acquired from Egor Serling in The Complex (Morning) after completing his lead.
- Why it works: Acts as a panic button—pop it when you’re overwhelmed by multiple Eternalists or during a visionary fight. The health regen lets you tank hits and continue offense.
- When to use: Any situation where you’re outnumbered or facing a tough enemy like a Juliana invasion. Combine with a shotgun for devastating rush tactics.
- Explanation: Nexus links enemies together. Damage one, and all linked take the same damage. Killing one linked enemy kills all linked ones.
- Why it works: Effectively clears groups of 3+ Eternalists with a single headshot. Saves ammo and time. Also pairs with emotional state (e.g., confuse) to spread status effects.
- When to use: In areas with clumped enemies (e.g., Charlie’s gambling hall in Updaam, Noon). Link three or more, then fire one bullet.
- Explanation: Headshots deal 2x damage with most weapons (and 3x with sniper rifles). Eternalists and visionaries die much faster.
- Why it works: Many enemies can survive multiple body shots. A single headshot with a silenced Tribunal pistol will kill most standard Eternalists while they’re unaware. Conserves ammo and keeps stealth.
- When to use: Always try to aim for the head, especially when initiating an attack or using a sniper from distance.
- Explanation: A kick (R3 on controller, V on PC) pushes enemies back and staggers them for a moment. You can follow up with a headshot or a machete kill.
- Why it works: Breaks their attack and creates an opening. Useful when an Eternalist gets too close or when your gun is empty.
- When to use: When outnumbered and need to create distance, or to execute a “machete finisher” (one-hit kill from behind).
- Explanation: Each area has multiple hidden tunnels (marked by green glowing vents) that serve as fast travel points across the map. Unlocking them allows instant movement between sections.
- Why it works: Saves walking time and avoids dangerous areas. For example, in Updaam, the tunnel near the library takes you directly to Charlie’s casino.
- When to use: In early loops, prioritize finding tunnels in each zone. Use the map to spot closed vents (showing a lock icon).
- Explanation: Reprise (the respawn ability) gives you two extra lives per loop (unless you’re invaded). Each death costs one charge and resets your position to where you last used a safe area (bed, tunnel, or certain doors).
- Why it works: If you lose both charges, you die for real and lose all uninfused loot. So use safe areas frequently—especially after clearing a tough room or looting valuable items.
- When to use: After each major fight, find a safe spot (e.g., a locked room, tunnel interior) to “save” your progress. Then continue exploring.
- Explanation: The map shows small icons (like a detective’s magnifying glass) that indicate active leads—clues that progress a visionary’s assassination plan. Following leads is the main way to unlock shortcuts and new gadgetry.
- Why it works: Completing a lead often reveals a weakness (e.g., “Wenjie will be alone if you sabotage her machine”) or grants access to a new area.
- When to use: Before each loop, check the map and select the lead you want to pursue. This prevents aimless roaming.
- Explanation: Shift allows short-range teleportation (like Blink from Dishonored). Upgrades add distance and the ability to teleport through thin walls.
- Why it works: Reaching elevated ledges, crossing gaps, or escaping combat quickly. Excellent for stealth—skip ground-level enemies entirely.
- When to use: Always equip Shift. It’s the most versatile movement slab. Use to reach sniper perches, to flank visionaries, or to escape grenades.
- Explanation: Residuum is the resource used to infuse items. It appears as glowing purple wisps from dead enemies (especially visionaries) and from special containers.
- Why it works: A single visionary can drop 100–200 Residuum. Without infusion, you lose all your gear. Prioritize collecting Residuum in every area, especially when you plan to end the loop early.
- When to use: After every fight, scan the ground for purple particles. Use the “Harvest” trinket (increases Residuum pick-up range) if you can.
- Explanation: The Hackamajig is a handheld device that lets you hack turrets, trip mines, and security cameras. It can be upgraded to disable alarms and turn turrets friendly.
- Why it works: Turbets are lethal; allies (friendly turrets) can win fights for you. Hacking cameras stops alerts. Very useful in The Complex (heavy security).
- When to use: As soon as you find the Hackamajig blueprint (from a lead in Karl’s Bay), infuse it and upgrade it. Use it to bypass entire security rooms.
- Explanation: Trinkets are permanent stat boosts (increased health, ammo capacity, etc.) that you can socket into your loadout. There are four slots (two for Colt, one for weapon + one for weapon).
- Why it works: A good trinket (e.g., “Kickback” for faster weapon swap) benefits every loop. Weapons become more effective with trinkets, but a single well-trinketed weapon is better than three bad ones.
- When to use: Once you have a decent primary weapon (e.g., LIMP-10 with silencer), infuse utility trinkets like “Spring Heeled” (more jump height) or “Ravenous” (health on kill).
- Explanation: The “Double Jump” trinket (actually called “Second Chance” – no, it’s “Double Jump” from a specific chest) is hidden in Updaam (Morning) inside a locked room above the library. You need to hack a door or use Shift to get it.
- Why it works: Double jump opens many shortcuts and makes vertical movement much easier without needing Shift. frees up a slab slot for combat slabs.
- When to use: As soon as you can, grab this trinket and infuse it. It’s a game-changer for exploration.
- Weapon: Silenced Tribunal pistol + Machete (or suppressed SMG).
- Slabs: Shift (teleport) + Nexus (link enemies) + Aether (invisibility).
- Trinkets: Sprint silently, faster crouch walking, increased awareness range.
- Why it works: Allows you to kill entire rooms without ever being detected. Aether + Shift makes you untouchable. Nexus lets you kill groups silently with one headshot.
- When to use: Ideal for clearing visionaries with minimal alarms, especially in areas with many Eternalists like Fristad Rock (Noon).
- Weapon: Suppressed LIMP-10 with large magazine + Heritage Shotgun.
- Slabs: Havoc (invincibility) + Shift (utility) + Karnesis (push enemies).
- Trinkets: Increased health, reduced Havoc energy cost, faster health regen.
- Why it works: Havoc reduces damage by 90% and heals on kill. You can run into a group of Eternalists, blast them with shotgun, tank machine gun fire, and survive. Karnesis lets you throw enemies off ledges.
- When to use: When you want to brawl openly, deal with Juliana invasions, or in missions where stealth is impossible (e.g., after triggering alarms).
- Weapon: Three Shotgun (EVERY time) + Mind Leech assault rifle.
- Slabs: Nexus + Shift or Havoc.
- Trinkets: Extra grenade capacity, increased explosion radius, grenade arc trajectory.
- Why it works: Grenades are abundant. With increased radius and capacity, you can clear a room with one well-placed explosive. Nexus links enemies so one grenade can kill a group.
- When to use: Against clustered visionary fights or for fun chaos. But be careful: explosives can hurt you too.
- Explanation: At the infusion station, you can break down any weapon, slab, or trinket you own into Residuum. The amount is roughly 1/3 of its infusion cost.
- Why it works: Rather than let duplicates accumulate (you can only infuse one of each unique item), break them down for raw currency to buy other items.
- When to use: End of every loop, before infusion. Check your inventory and scrap anything you have a better version of (e.g., two LIMP-10s; keep the one with best stat roll).
- Explanation: Slabs unlock new abilities (Shift, Nexus, Havoc, Aether, Karnesis). Losing a slab resets your build potential. Weapons can be replaced more easily.
- Why it works: Once you have all slabs, you can create many builds. Shift and Nexus are especially critical for efficient play.
- When to use: First four loops: focus on getting and infusing each slab. Then start infusing weapons.
- Explanation: The Fourpounder is a fast-firing pistol that appears in Updaam (evening) from a specific Eternalist. It has a high fire rate and decent damage.
- Why it works: Excellent for cleaning up headshots after knockdowns. Its high rate of fire helps against multiple approaching enemies.
- When to use: As a backup to a slower primary (like a sniper or shotgun). Infuse a purple or gold version with a good perk (like ‘Hurry Up’ for fast reload).
- Explanation: Walking (not sprinting) reduces noise. Crouching eliminates footsteps completely but slows you down.
- Why it works: Eternalists can hear you sprint from a room away. Crouching and moving deliberately prevents alerting groups before you can set up kills.
- When to use: In tight corridors or when approaching a patrol pattern. Combine with Aether for ghost-like movement.
- Explanation: Visionaries have unique protection (e.g., Charlie is always with his gang; Harriet has a gas mask). Entering their arenas without a plan triggers a full-scale fight.
- Why it works: Direct confrontation is dangerous and wastes time. Instead, use the leads to find weaknesses (e.g., sabotage Charlie’s machine so his gang leaves).
- When to use: For every visionary except possibly Egor (who is weak alone). Always complete at least one lead before attacking.
- Explanation: Cameras go to “alerted” status if you walk into their cone. Turrets fire on sight unless you hack them. But Shift teleport can pass through their line of sight instantly.
- Why it works: You don’t need to hack everything; just teleport past trigger points. Saves time and avoids alarms.
- When to use: In security-heavy zones like The Complex (especially at Noon). Teleport from one shadow to another.
- Explanation: To break the loop, you must kill all eight visionaries in one day. The order matters because some become inaccessible if you don’t follow a lead chain. For example, Wenjie’s clones disintegrate if you destroy her machine in the morning.
- Why it works: A common route: Morning → Updaam (kill Charlie and possibly Fia), Noon → The Complex (Harriet, sometimes Wenjie), Afternoon → Fristad Rock (Egor, then Alex), Evening → Karl’s Bay (Wenjie again or others). This minimizes back-and-forth.
- When to use: When you’re ready to attempt the final blow. Practice repeatedly before the real run.
- Explanation: Dying in a loop (if you have Reprise charges) does not end the game; you respawn at the last safe area. This lets you explore dangerous areas risk-free as long as you keep safe points.
- Why it works: Great for learning enemy patterns and visionary weaknesses without losing your gear (since deaths don’t cost infusion materials unless True Death).
- When to use: Early loops: explore every corner, trigger alarms, learn combat. It’s okay to die; you keep all knowledge.
- Explanation: Many Eternalists are optional. Killing them yields minimal Residuum and wastes time. Focus on visionaries and specific patrols that block your path.
- Why it works: Stealth ghost builds let you skip 90% of enemies. Saves time for completing multiple leads per loop.
- When to use: Once you have decent movement slaps, avoid fights unless you need Residuum or loot.
- Explanation: The machete (found in Karl’s Bay, Noon in a certain bandit leader’s stash) can one-shot any Eternalist or even a distracted visionary when attacking from behind.
- Why it works: Silent, no ammo cost, immediate. Great for stealth cleans. Combine with Shift to close distance on a target.
- When to use: For isolated visionaries (e.g., Egor alone in his lab) or to quickly silence a single guard.
- Explanation: Several visionaries rely on machines: Wenjie’s cloning machine, Charlie’s gambling machines, Harriet’s gas control, etc. Hacking these can weaken or kill them indirectly.
- Why it works: Instead of a direct fight, you can set up a trap that does the work. For example, hacking Harriet’s gas valve makes her room fill with poison, killing her.
- When to use: For any visionary whose lead involves a device. Always fully investigate leads before engaging.
- Explanation: You can equip multiple trinkets of the same category (e.g., two “Increased Health” trinkets). Their effects stack multiplicatively.
- Why it works: Two +50% health trinkets = +125% health (1.5 x 1.5 = 2.25). You can become incredibly tanky or have huge magazine capacity.
- When to use: For a tank build, equip two health trinkets and two resistances. For ammo hogs, use two ammo capacity trinkets.
- Explanation: Aether makes you invisible, but movement and actions break invisibility. Upgrades allow you to remain invisible while moving slowly or while holding breath.
- Why it works: Perfect for repositioning in the middle of a fight. Pop Aether when enemies are searching after you kill someone. They lose sight and return to routine.
- When to use: After a loud kill, immediately use Aether and move to a new shadow. Also great for crossing open areas.
- Explanation: When you attempt to leave after killing all eight, Julianna confronts you with extreme aggression. She uses all slabs (Havoc, Aether, etc.) and is relentless.
- Why it works: Kill her first (while she’s in the reactor room) or use the environment. After the fight, you have a chance to extract—do not delay.
- When to use: During the final loop, save a Havoc charge for her. Try to shoot her from distance; avoid melee.
- PlayStation 5: Use DualSense adaptive triggers for weapon feedback—pulling the trigger fully on a pistol gives a satisfying click. Enable gyro aiming in settings for extra precision (good for sniping).
- PC: Rebind Shift to a side mouse button for easier teleportation. Lower mouse sensitivity to 2-3 for accurate headshots. Use the ‘Hold to Crouch’ setting for quicker cover slides.
- Xbox Series X|S: Quick Resume works well—you can jump back into a loop instantly. Use the d-pad shortcuts for weapon switching.
#### 2. Use the “Revenant” Respawn Ability Minimally (if enabled)
#### 3. Understand the Three Timelines
#### 4. Listen to Radio Eavesdrop Conversations
---
Combat
#### 5. Master the “Havoc” Slab for Aggressive Plays
#### 6. Use the “Nexus” Slab for Crowd Control
#### 7. Headshots Are Critical
#### 8. Stagger Enemies with Melee (Kick) to Set Up Kills
---
Exploration & Navigation
#### 9. Discover All Tunnel Entrances Early
#### 10. Use the Reprise Charge Wisely
#### 11. Look for “Lead” Icons on the Map
#### 12. Use the “Shift” Slab for Verticality
---
Resources & Upgrades
#### 13. Collect All Residuum from Body Piles
#### 14. Upgrade the “Hackamajig” Early
#### 15. Prioritize Infusing “Trinkets” Over Duplicate Weapons
#### 16. Learn the “Double-Jump” Trinket Locations
---
Builds & Loadouts
#### 17. The “Stealth Ghost” Loadout
#### 18. The “Havoc Tank” Loadout
#### 19. The “Grenadier” Loadout
---
Economy & Infusion
#### 20. Always Break Down Duplicate Items into Residuum
#### 21. Prioritize Infusing “Slabs” Over Weapons in Early Loops
#### 22. Use the “Gold-Gun” (Example: Fourpounder) as a Reliable Secondary
---
Stealth & Movement
#### 23. Use “Cautious Stride” to Slow Down Alert Recruiting
#### 24. The “Golden Rule” of Deathloop: Never Engage a Visionary Directly Until You Have a Plan
#### 25. Use “Shift” to Bypass Security Cameras and Turrets
---
Time Loop Manipulation
#### 26. Plan Your “Perfect Day” Route
#### 27. Use the “Reprise” Mechanic to Practice Without Penalty
#### 28. Ignore “Kill Every Eternalist” Mentality
---
Advanced Strategies
#### 29. Use the “Machete” for Instant Kills from Behind
#### 30. Exploit the “Hacking” Weakness on Visionaries with Devices
#### 31. Trinket Stacking for ‘Godlike’ Combos
#### 32. The “Aether” Slab: How to Use Effectively
#### 33. Final Boss Tip: Julianna’s “Final Stand”
---
Platform-Specific Tips
---
These tips should elevate your Deathloop experience from confused first-looper to a loop-breaking assassin. Remember: knowledge persists even when loot does not. Every loop teaches you something new. Good luck on Blackreef!