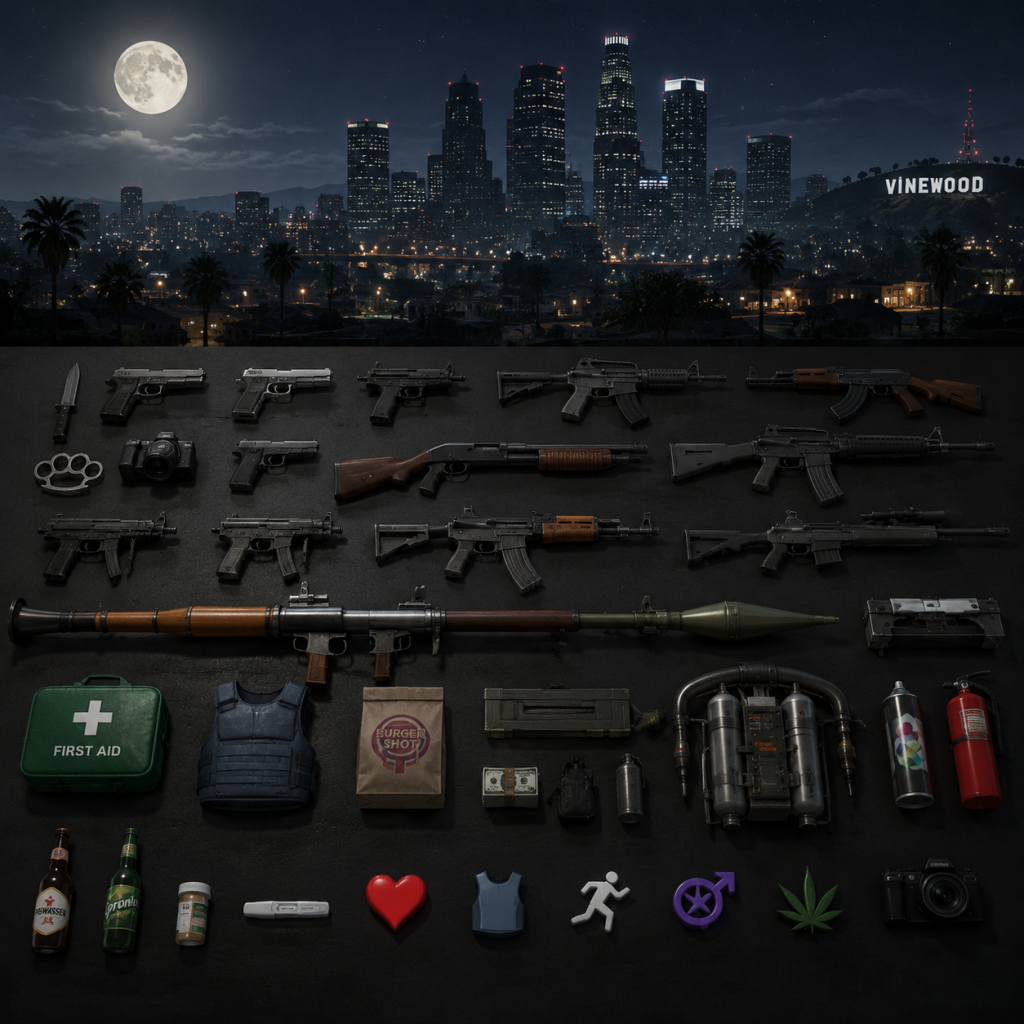
All Game Items
All Game Items in Grand Theft Auto: San Andreas
This guide covers every major item in GTA: San Andreas, including weapons, armor, consumables, currencies, collectibles, and key equipment. Items are grouped logically with descriptions, acquisition methods, practical uses, and notable synergies or upgrades.
---
1. Weapons
Weapons are divided into categories: Melee, Handguns, Submachine Guns, Shotguns, Assault Rifles, Rifles, Heavy Weapons, Thrown, and Special. All weapons can be picked up from the ground, stored at safehouses after collecting, or purchased from Ammu-Nation stores (once unlocked). Weapon skills improve with use, affecting accuracy, damage, and reload speed.
#### Melee Weapons
| Weapon | Damage | Notes | Location Examples |
|---|---|---|---|
| Fists | Low | Default unarmed combat; can be upgraded via gym training. | Always available. |
| Brass Knuckles | Medium | Fast, causes bleeding. | Found in Los Santos: near the beach, behind a house in Jefferson. |
| Knife | Medium | Silent, good for stealth attacks. | Found in Los Santos: behind a house in Idlewood. |
| Baseball Bat | Medium | Good knockback. | Found near Los Santos stadium, also at Ammu-Nation. |
| Shovel | Medium | Slower but decent reach. | Found in the countryside, e.g., at a farm in Flint County. |
| Pool Cue | Medium | Similar to bat, slightly faster. | Found in bars and pool halls in Los Santos. |
| Katana | High | Very fast, high damage, can decapitate. | Found in San Fierro: behind a house in Doherty, also at the martial arts dojo. |
| Chainsaw | Very High | Slow but devastating; use for crowd control. | Found in Los Santos: in a backyard in East Beach, or purchased after “The Green Sabre”. |
---
#### Handguns
| Weapon | Damage | Ammo Type | Location Examples |
|---|---|---|---|
| 9mm Pistol | Medium | 9mm | Found everywhere: police officers, gang members, Ammu-Nation (after first purchase). |
| Silenced 9mm | Medium | 9mm | Obtained from the mission “Madd Dogg's Rhymes” or found at the San Fierro police station roof. |
| Desert Eagle | High | .50 | Found in Las Venturas: on top of a hotel, or purchased after “Yay Ka-Boom-Boom”. |
---
#### Submachine Guns
| Weapon | Damage | Ammo Type | Location Examples |
|---|---|---|---|
| Micro SMG (Uzi) | Low-Medium | 9mm | Common from gangsters, also at Ammu-Nation. |
| SMG (MP5) | Medium | 9mm | Found at certain police stations, or purchased after “Reuniting the Families”. |
---
#### Shotguns
| Weapon | Damage | Ammo Type | Location Examples |
|---|---|---|---|
| Shotgun | Medium-High | Shotgun shells | From police, or Ammu-Nation. |
| Sawn-off Shotgun | High | Shotgun shells | Drop from certain gang members, or found in a barn in Flint County. |
| Combat Shotgun (SPAS-12) | Very High | Shotgun shells | Purchased after “Are You Going to San Fierro?”, or found at Area 51. |
---
#### Assault Rifles
| Weapon | Damage | Ammo Type | Location Examples |
|---|---|---|---|
| AK-47 | Medium-High | 7.62mm | Found in gang hideouts, or purchased after “First Date”. |
| M4 | High | 5.56mm | Purchased after “The Da Nang Thang”, or found at the San Fierro army base. |
---
#### Rifles (Sniper)
| Weapon | Damage | Ammo Type | Location Examples |
|---|---|---|---|
| Hunting Rifle | High | Rifle | Found in the countryside, e.g., at the hill near Palomino Creek. |
| Sniper Rifle | Very High | Sniper | Purchased after “Farewell, My Love...”, or found atop a building in Las Venturas. |
---
#### Heavy Weapons
| Weapon | Damage | Notes | Location Examples |
|---|---|---|---|
| Rocket Launcher | Very High | One shot can destroy vehicles. | Found at the San Fierro airport hangar, or purchased after “Black Project”. |
| Heat Seeking Rocket Launcher | Very High | Locks onto aircraft/lasers. | Found at Area 69 (during “Black Project”). |
| Flamethrower | Medium (fire) | Sets enemies on fire; good crowd control. | Found in a shed in the countryside, or at the “Supply Lines” mission. |
| Minigun | Very High | Spins up; devastating vs. vehicles and groups. | Found at the top of Mount Chiliad (requires parachute), or after “Vertical Bird”. |
---
#### Thrown Weapons
| Weapon | Damage | Notes | Location Examples |
|---|---|---|---|
| Grenades | High | Explodes after timer. | Found on police, or purchased from Ammu-Nation after “The Green Sabre”. |
| Tear Gas | Low (stun) | Blinds and damages over time. | Found in some interiors, or purchased after “First Date”. |
| Molotov Cocktails | High (fire) | Sets area on fire. | Found at certain gas stations, or by completing “Burning Desire” (mission reward). |
| Satchel Charges | Very High | Placeable remote explosive. | Obtained during “Black Project” or found at the Panopticon after completing that mission. |
---
#### Special Weapons
| Weapon | Description | Obtained | Notes |
|---|---|---|---|
| Parachute | Allows safe descent from heights. | Found on top of the Sherman Dam, or at the Los Santos helipad, or purchased from Ammu-Nation after flying school. | Essential for base jumping missions. |
| Night Vision Goggles | See in dark, green tint. | Inside Area 69 (during “Black Project”). | Useful for night missions. |
| Thermal Goggles | See heat signatures. | Same location as Night Vision (Area 69). | Detects enemies through smoke or darkness. |
| Camera | Takes photos for missions. | Obtained from the mission “Photo Opportunity” (given by The Truth). | Needed for snapshot collectibles and some side missions. |
| Spray Can | Used to tag gang territories (graffiti). | Found in Los Santos: behind the house in East Beach (starting area). | Required for territory wars: spray over rival tags. |
2. Armor
Body Armor (also called Kevlar Vest) is the only armor item. It absorbs a portion of damage before health is affected.
- Effect: Reduces damage taken by 50% until depleted. Armor depletes before health. Can be refilled.
- How to Obtain:
- Usefulness: Vital for difficult missions, drive-bys, and gang wars. Always equip before major combat.
- Synergies: None, but combines with health pickups.
- Pick up from the ground (e.g., at the police station in Los Santos, behind the hospital in Idlewood).
- Purchase from Ammu-Nation after completing “The Green Sabre” (requires weapon license).
- Find on dead enemies (e.g., police officers).
---
3. Consumables & Pickups
These are temporary items that appear on the map, usually as glowing icons. They respawn after a period of time.
| Item | Effect | How to Obtain | Notes |
|---|---|---|---|
| Health Pickup | Restores 25 HP (small) or 100 HP (large). | Found in hospitals, burger joints, and scattered across map. | Large health pickups are rare; use food from restaurants if needed. |
| Armor Pickup | Restores 50 armor. | Found at police stations, barbershops? Actually near armor icon locations. | Same as purchasing; respawns. |
| Bribe | Reduces wanted level by 2 stars. | Found in police station parking lots, or as a reward from hidden packages? Actually found as a yellow briefcase icon. | Use when escaping police; also appears after certain events. |
| Adrenaline Pill | Temporarily increases speed, damage resistance, and health regeneration for about 30 seconds. | Found in abandoned buildings, e.g., under the bridge in Los Santos. | Great for tough melee fights or quick escapes. Only one pill per location, respawns later. |
4. Currencies
- Money (Dollars): The primary currency. Used to buy weapons, ammo, properties, vehicles, food, clothes, and pay bribes. Earned through missions, property income, robberies, gambling, and side hustles. Max cap: $999,999,999 (practically unlimited).
- Respect: Not a currency but a gauge. Max respect (1000) unlocks gang followers and bonuses. Increased by completing gang wars, missions, and side activities.
- Effect: Each oyster increases your lung capacity (underwater breathing) by a small amount. Collect all 50 to gain a huge lung capacity boost (can stay underwater indefinitely).
- Location: Sunken underwater across all three cities and the countryside. Use a boat or submersible vehicle; some require diving gear from missions.
- Usefulness: Essential for underwater missions (e.g., “The Da Nang Thang”) and exploring submerged areas. Also increases swimming speed slightly.
- Effect: Increases luck, which affects gambling outcomes (slot machines, horse betting, blackjack) and probably random loot drops. Collect all 50 to unlock a reward: SMG (MP5) spawned at The Four Dragons Casino? Actually the reward is a weapon drop at the casino. Also improves gambling odds.
- Location: All 50 are hidden in Las Venturas (the desert city). Most are on rooftops, in alleys, or inside buildings. Use a helicopter or plane to reach high ones.
- Effect: Taking photos of specific landmarks with the Camera. Each snapshot gives a small reward (money and sometimes a new weapon spawn). Completing all 50 unlocks a Hunter attack helicopter at the Verdant Meadows aircraft s ? Actually the reward is a Hydra jet or Hunter? In the original game, it's a Hunter at the Verdant Meadows hangar. Also provides money.
- Location: Marked on the map after you obtain the Camera (from “Photo Opportunity” mission). You must stand at specific spots and take a picture. Landmarks include statues, buildings, and bridges.
---
5. Collectibles
Collectibles are hidden items that provide permanent stat boosts or rewards when collected.
#### Oysters (50 total)
#### Horseshoes (50 total)
#### Snapshots (50 total) — also called “Photo Opportunities”
---
6. Key Equipment
These are story-progress items that are essential for certain missions but not carried permanently in the inventory (except on foot).
| Item | Purpose | How to Obtain | Notes |
|---|---|---|---|
| Camera | Used to take photos for the Snapshot collectibles and for certain missions (e.g., photograhing drug deals). | Given by The Truth after “Photo Opportunity”. | Stores unlimited photos; accessible from weapon wheel (special). |
| Spray Can | Used to tag gang territories (graffiti). | Found behind CJ's house in East Los Santos at the start. | Must have it to start territory wars; can buy more later? No, one spray can lasts forever. |
| Parachute | Allows skydiving from heights. | Found at helicopter pads or purchased from Ammu-Nation after flight school. | Can be opened and closed; used in missions like “Stowaway” and “Freefall”. |
| Night Vision Goggles | See in the dark. | Inside Area 69 during “Black Project”. | Useful in dark interiors; gives green tint. |
| Thermal Goggles | See heat signatures. | Same location as Night Vision. | Highlights enemies through walls? Only in certain missions; limited range. |
| Bank Card (mission item) | Used to open the bank vault in “Breaking the Bank at Caligula's”. | Received during that mission. | Not usable outside the mission. |
| GPS Device | Used in “The Da Nang Thang” to tag boat? | Not a standalone item. | Many mission-specific items exist but are not kept after mission completion. |
7. Synergies & Upgrades
- Weapon Skill Levels: Each weapon category (pistols, SMG, etc.) has three skill levels: Poor, Average, and High. Higher skill increases accuracy, damage, fire rate, and magazine capacity. Max skill unlocks for the SMG (two guns akimbo) and assault rifles. Level by using the weapon repeatedly.
- Clothing: Some clothing items provide stat buffs (e.g., “Eris” tracksuit increases sex appeal, but no direct item effect). Not considered items.
- Gym Training: Increases strength (melee damage) and stamina. Not items but important for melee weapon effectiveness.
- Gang Territory Weapons: Successfully capturing gang territories may spawn weapons at safehouses.
---
8. Summary Table of All Pickups
| Pickup Type | Map Icon | Example Locations | Respawn Time |
|---|---|---|---|
| Health (small) | Red cross | Behind hospitals, fast food joints | ~5 minutes |
| Health (large) | Red cross (big) | Some hospitals, grove street safehouse | ~15 minutes |
| Armor | Blue vest | Police stations, certain streets | ~10 minutes |
| Bribe | Yellow briefcase | Police station parking lots | ~10 minutes |
| Adrenaline | Yellow pill | Under bridges, abandoned buildings | ~30 minutes |
9. Notes
- All weapons and armor can be stored at any safehouse weapon locker (appears after you buy or unlock a property). You can store multiple copies, but limited by the game's slot system (max 8 weapon types? Actually each category holds one weapon, but you can swap).
- Ammo can be purchased from Ammu-Nation after buying the respective weapon. Some weapons also appear as special spawns after completing certain missions (e.g., “Desert Eagle” at the top of a building).
- The Jetpack is a vehicle, not an item. It can be obtained after the “Black Project” mission and stored in the Verdant Meadows hangar.
- The Bribe icon only appears when you are wanted; it disappears after use.
---
This guide covers all major items in GTA: San Andreas. Use the map and collectible guides to find every item. For more details on mission-specific items, see the Mission Walkthrough guides.