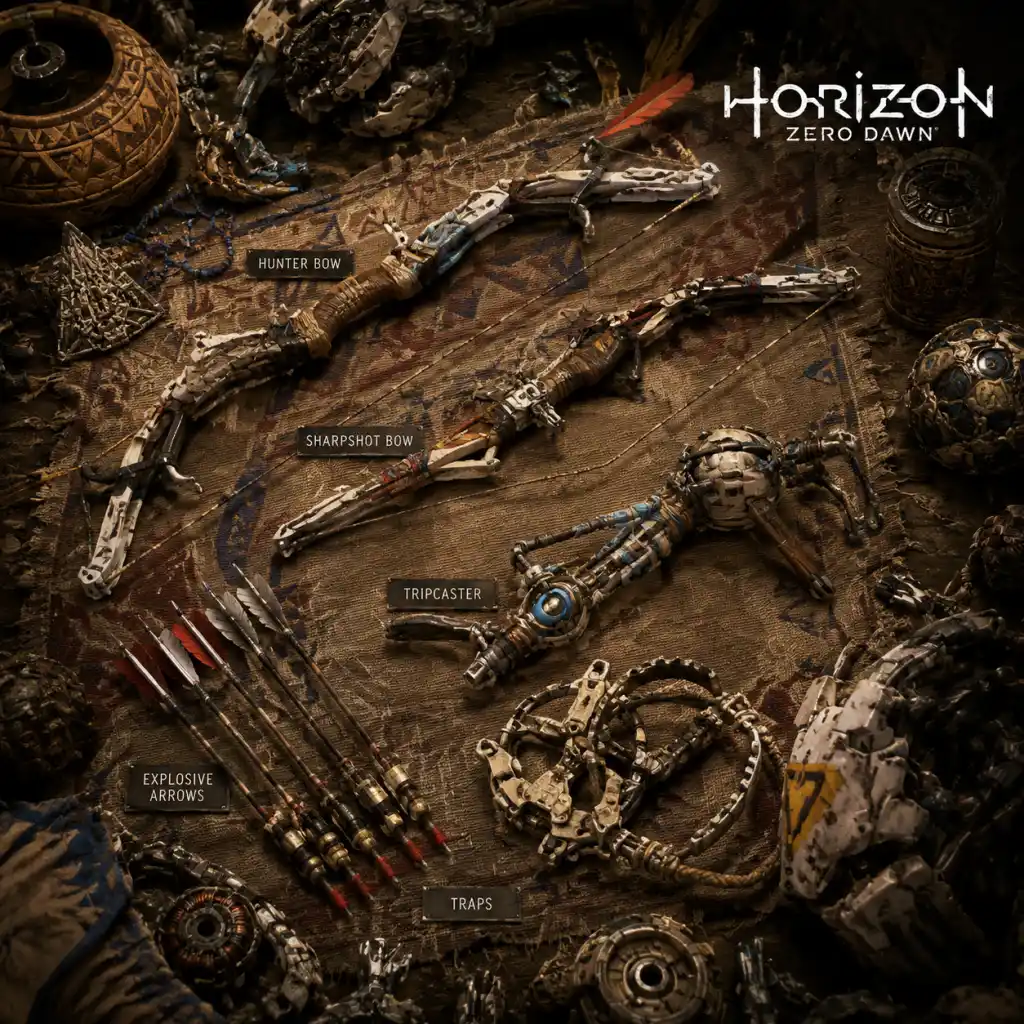
All Game Items
All Game Items: Horizon Zero Dawn
This guide catalogs every major item in Horizon Zero Dawn, including weapons, armor, consumables, materials, currencies, collectibles, and key equipment. Items are grouped logically with explanations on acquisition, usage, synergies, and upgrades.
---
Weapons
Weapons in Horizon Zero Dawn are divided into categories based on their primary function. Most can be purchased from merchants, acquired through side quests, or found in ancient boxes. Higher-tier versions (Shadow, Carja, Banuk) offer better stats and more modification slots.
Hunting Bows
- Standard Hunter Bow (Nora): Basic bow. Fires arrows (Hunter, Hardpoint, Fire). Purchase from early merchants.
- Carja Hunter Bow (Carja): Improved handling and damage. Available from Carja merchants after reaching Meridian.
- Shadow Hunter Bow (Shadow): Best tier; 3 modification slots. Deals high tear and damage. Purchase from Shadow merchants or found in late-game loot.
- Sharpshot Bow (Nora): High damage, long range. Fires Precision, Tearblast, and Harvest arrows.
- Carja Sharpshot Bow: Better stats. Obtained after main quest "The City of the Sun".
- Shadow Sharpshot Bow: Top tier. Best for sniping machine components.
- War Bow (Nora): Fires elemental arrows (Shock, Freeze, Corruption). Useful for applying status effects.
- Carja War Bow: Improved elemental buildup.
- Shadow War Bow: Best for elemental damage; 3 slots.
- Sling (Nora): Throws elemental bombs (Fire, Freeze, Shock). Area effect.
- Carja Sling: Longer range, faster reload.
- Shadow Sling: Highest elemental damage. Purchase from Shadow merchants.
- Ropecaster (Nora): Fires ropes to tie down machines. Upgrades reduce time. Essential for overriding.
- Carja Ropecaster: Ties faster.
- Shadow Ropecaster: Best; 3 slots. Buy from Meridian.
- Tripcaster (Nora): Sets wire traps (Blast, Shock, Fire). Good for ambushes.
- Carja Tripcaster: Deploys faster.
- Shadow Tripcaster: Highest damage traps.
- Blast Sling (Nora): Throws explosive bombs (Blast, Proximity). High damage.
- Carja Blast Sling: Larger blast radius.
- Shadow Blast Sling: Best explosive damage.
- Rattler (Nora): Rapid-fire close-range weapon. Uses Rattler Ammo.
- Carja Rattler: Higher fire rate.
- Shadow Rattler: Best for DPS; 3 slots.
- Tearblaster (Unique): Uses Blaze canisters. Extreme tear damage; ideal for ripping off armor. Obtained from side quest "Hunter's Blind".
- Lodge War Bow & Lodge Ropecaster: Rewards from Hunter’s Lodge quests. Unique stat lines; no modifications but built-in perks.
- Banuk Striker Bow: Charged shots deal extra damage. Bluegleam purchase.
- Banuk Powershot Bow: High damage per charged shot. Best for one-shot builds.
- Banuk Ice Rail: Freeze beam + explosive. Versatile.
- Banuk Stormslinger: Shocks and AoE lightning. Dangerous but powerful.
- Banuk Icerail: Long-range freeze launcher. Ammo efficient.
- Banuk Forgefire: Flamethrower with explosive rounds. Excellent against clustered enemies.
- Nora Brave (starting): Low stats. Free.
- Nora Protector: Higher melee and ranged resist. Purchase in Mother’s Heart.
- Nora Silent Hunter: Stealth boost. Purchase from merchants.
- Carja Blazon: Fire resistance. Good for fighting Fire Bellowbacks.
- Carja Silks: Stealth and corruption resistance. Available in Meridian.
- Carja Trader: Melee resistance, moderate.
- Shadow Stalwart: All-round resistances, 3 slots. Best early-mid game.
- Shadow Carja: Specialized; available from Shadow merchants.
- Banuk Chieftain: High freeze and shock resistance. Bluegleam.
- Banuk Ice Hunter: Excellent freeze protection.
- Banuk Fireclaw Armor: Fire resistance and handling boost.
- Shield-Weaver Armor: Unique “shielding” outfit that absorbs damage until depleted. Requires 5 Power Cells. Best for survivability. See Key Equipment.
- Oseram Sparkler: Shock resistance. Reward from side quest.
- Nora Survivor: Boosted healing and resistances. Purchase late game.
- Handling Coil: Increases reload speed and draw speed.
- Damage Coil: Increases physical damage.
- Tear Coil: Increases tear damage.
- Elemental Coil: Increases elemental buildup.
- Shock/Freeze/Fire Coils: Specific elemental. Rare.
- Purple (Legendary) Coils: Best stats. Found in ancient ruins, DLC, hunters lodge rewards.
- Melee Resist​: Reduces physical melee damage.
- Ranged Resist​: Reduces projectile damage.
- Fire Resist​: Reduces fire damage.
- Freeze Resist​: Reduces freeze buildup.
- Shock Resist​: Reduces shock damage.
- Corruption Resist​: Reduces corruption buildup.
- Stealth Weave: Increases stealth.
- Health Weave: Increases health? (Actually improves healing rate).
- Purple Weaves: Highest percentages.
- Hunter Arrow: Crafted with Ridge-Wood + Shards. Basic damage.
- Hardpoint Arrow: Ridge-Wood + Metal Vessel. High tear/damage.
- Fire Arrow: Ridge-Wood + Blaze + Sparker. Ignites enemies.
- Precision Arrow: Ridge-Wood + 2× Wire. Long range, high damage.
- Tearblast Arrow: Ridge-Wood + Blaze + Metal Vessel. Massive tear.
- Harvest Arrow: Ridge-Wood + Wire. Harvests components without destroying them.
- Shock Arrow: Ridge-Wood + Sparker + Chillwater. Paralyzes.
- Freeze Arrow: Ridge-Wood + Chillwater + Metal Vessel. Freezes.
- Corruption Arrow: Ridge-Wood + Blaze + Chillwater. Turns machines hostile.
- Blast Trap: Blaze + Metal Vessel. Explosive.
- Shock Trap: Sparker + Metal Vessel. Stuns.
- Fire Trap: Blaze + Sparker. AoE fire.
- Frost Trap: Chillwater + Metal Vessel. Freeze AoE.
- Fire Bomb: Blaze + Metal Vessel.
- Freeze Bomb: Chillwater + Metal Vessel.
- Shock Bomb: Sparker + Metal Vessel.
- Rattler Rounds: Ridge-Wood + Metal Shards.
- Rope: Wire + Ridge-Wood.
- Blast Wire: Blaze + Wire.
- Shock Wire: Sparker + Wire.
- Fire Wire: Blaze + Sparker.
- Health Potion: +150 HP. Craft with Medicinal + Desert Glass. Essential.
- Full Health Potion: +300 HP. Requires 2× Medicinal + 2× Desert Glass.
- Fire Resist Potion: 50% fire resistance 60s. Craft with Medicinal + Blaze.
- Freeze Resist Potion: 50% freeze resistance. Medicinal + Chillwater.
- Shock Resist Potion: 50% shock resist. Medicinal + Sparker.
- Corruption Resist Potion: 50% corruption resist. Medicinal + Metal Vessel.
- Scavenger Meat: +15 HP. Common.
- Wild Meat: +25 HP.
- Hearty Meat: +50 HP.
- Fresh Meat: Cooked; provides bonuses (e.g., extra damage). Sold by cooks.
- Fast Travel Pack: Allows fast travel to discovered campfires. Craft with Metal Vessel + 10 Shards.
- Golden Fast Travel Pack: Unlimited fast travel. Buy from Meridian.
- Trap Lure: Lures machines to traps. Craft with Sparker + Medicinal.
- Fire Arrow Potion: (DLC) Temporary fire arrow buff.
- Blaze: Common from Fire Bellowbacks, Strider. Used for fire ammo.
- Chillwater: Frozen machines (Glinthawks, Snapmaws). Freeze ammo.
- Sparker: Shock machines (Stalkers, Stormbirds). Shock ammo.
- Metal Vessel: Drop from most large machines. Crafting ammo.
- Metal Shards: Currency, also used for crafting. Loot and trade.
- Wire: From Scrappers, Longlegs. Ropes and traps.
- Lens: Machine-specific (e.g., Watcher Lens). Required for some purchases.
- Heart: Machine-specific (e.g., Thunderjaw Heart). Used for purple upgrades.
- Braiding: From Tallnecks, Behemoths. Rare.
- Sac Webbing: From machines; sensitive; used for health/potions.
- Echo Shell: From Shell-Walkers. Used for some ammo?
- Ancient Vessel: Rare from ancient boxes. Sold for shards.
- Blastpaste: From Watchers etc. Used for explosive ammo.
- Bones (small, medium, large): From boars, foxes, etc. Used for pouch upgrades.
- Skins (small, medium, large): From same animals. Pouch upgrades.
- Rare Fish: Not used much except in DLC for odd quest.
- Medicinal: Found in plains. Craft potions.
- Ridge-Wood: Shrubs. Arrow crafting. Buy cheap.
- Desert Glass: Craft health potions.
- Woods: For arrows (shards buy).
- Bluegleam: DLC currency. Found in deposit boxes and quests.
- Metal Shards: Primary currency. Loot, trade, sell.
- Bluegleam (DLC): Used to buy Banuk weapons and armor. Obtain from quests and treasure boxes in The Cut.
- Merchant Tokens: Not present; instead, trading uses shards and machine parts as barter.
- Special Tokens: None; but Hunter’s Lodge uses Hunt tokens? Actually, Hunter’s Lodge uses Metal Shards and gives unique weapons, no special currency.
- 30 total. Spherical metal structures emitting hum. Collect to unlock Cauldron Omicron? Actually, they unlock a flower box in Meridian. No major gameplay benefit but trophy.
- Located in the wild; use Focus to see glow.
- 6 wooden figurines. Collect to unlock a Banuk merchant’s best items (including Shield-Weaver-like outfit? No, special weapons). Follow quest "The Survivor".
- 12 datapoints from pre-apocalypse. Listen to audio logs and view scenes. No gameplay reward but world-building.
- Over 70 scattered texts/audio. No ability to collect; they auto-add to notebook. No reward.
- 15 ceramic pots. Return to Meridian for shards. Not required for 100%.
- Not collectible; just for trial.
- Focus: Acquired in childhood. Allows scanning machines, highlighting tracks, hacking. Can be upgraded with mods? Not; but essential.
- Basic Spear: Starting melee weapon. Override unlocked after main quest.
- Upgraded Spear: After main quest, dealt more damage. No modifications.
- Shield-Weaver: Crafted from 5 Power Cells found in ancient ruins. Provides energy shield that regenerates. Best armor for late game. Must complete the "Ancient Armory" side quest.
- Five cells needed for Shield-Weaver. Locations: Ruins near Mother’s Heart, Ruins by Nora lands, Maker’s End, Grave-Hoard, The Mountain. Missable? Yes, some later become inaccessible if not grabbed before final mission.
- Unlock override for machine types by completing Cauldrons (Sigma, Rho, Xi, Zeta). Not items but key abilities.
- Unique weapon from side quest. See weapons section.
- Weapon + Coils: Apply damage coils to Sharpshot bows for one-shot kills; tear coils for removing armor; handling coils for fast ropecasting.
- Armor + Weaves: Stack stealth weaves for ghost-like approach; stack fire resist vs Fire Bellowbacks.
- Ammo + Status: Freeze + Hardpoint arrows deal massive damage; Shock + Blast works well.
- Potions + Environments: Use frost resist in high cold zones.
- Skills: Unlock skills like Double Shot, Triple Shot, elementals to boost item effectiveness.
- All weapons and armor can be sold but not retrieved; avoid selling unique items.
- DLC items (Banuk gear) are locked until The Frozen Wilds is installed.
- Trading with merchants can yield rare coils; check their inventory after each story progression.
- Crafting ammo from resources is cheaper than buying.
- Always carry Ridge-Wood and Medicinal for basic needs.
Sharpshot Bows
Warbows
Slings
Ropecaster
Tripcaster
Blast Sling
Rattler
Tearblaster
Lodge Weapons
Banuk Weapons (The Frozen Wilds DLC)
---
Armor (Outfits)
Outfits provide protection and resistances. Upgrade via modification slots. Purchase from merchants, reward from quests, or discover in the world.
Nora Outfits
Carja Outfits
Shadow Outfits
Banuk Outfits (DLC)
Special Armor
---
Weapon/Outfit Modifications
Weapon Coils
Outfit Weaves
---
Ammo & Crafting Components
Most ammo is crafted from machine parts and plants. Always gather resources.
Arrow Types
Trap Ammo
Sling Ammo
Rattler Ammo
Ropecaster Ammo
Tripcaster Ammo
---
Consumables
Potions
Food (The Frozen Wilds)
Utility Items
---
Materials
Machine Parts
Animal Parts
Plants and Other
---
Currencies
---
Collectibles
Metal Flowers
Banuk Figures (The Frozen Wilds)
Vantage Points
World Datapoints
Ancient Vessels (Vases)
Training Dummies
---
Key Equipment & Special Items
Focus
Spear
Shield-Weaver Armor
Power Cells
Override Modules
Tearblaster Weapon
---
Synergies & Upgrades
---