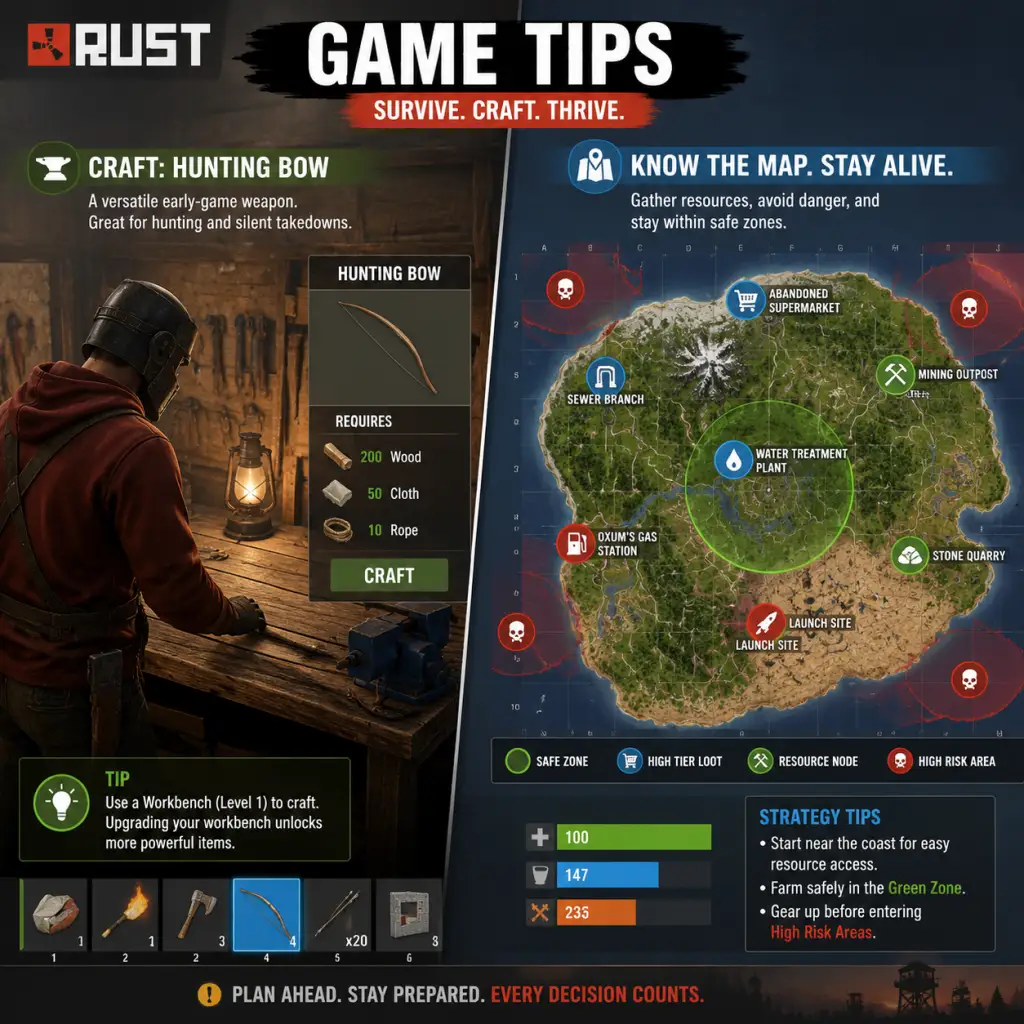
Game Tips
Game Tips for Rust
A comprehensive collection of tips for survival, progression, and dominance, organized by category and skill level.
---
Combat
1. Master recoil control – Every weapon has a unique spray pattern. Practicing on a static target (or in an aim train server) builds muscle memory. Use the "recoil compensation" technique: gently pull down and slightly to the side. Why it works: The game’s recoil is fixed; consistent practice lets you land headshots with full-auto sprays instead of tap-firing. When to use: Always in close-to-mid range engagements with SMGs (Thompson, MP5) or assault rifles (AK-47, LR-300).
2. Peeker’s advantage – When strafing out of cover, you see your enemy slightly before they see you due to latency. Use this by quick-peeking corners to gather info or bait shots. Why it works: Server netcode favors the mover. Rush enemies after they miss. When to use: Holding tight angles in monuments or base defense.
3. Aim for the head (but not always) – Headshots deal 2x damage, but the AK-47’s recoil makes them hard. Body shots are more reliable at range. Why it works: Consistency beats RNG. Land two body shots before attempting a headshot. When to use: Mid-range vs. geared players; close-range spray headshots.
4. Armor matters – Full metal facemask and chestplate reduce bullet damage by ~40%. Always prioritize these over clothing. Deep analysis: Even a cheap road sign jacket + coffee can helmet offers significant protection. Run with at least that before engaging geared players.
5. Use doors for cover – In a base raid or compound fight, open and close doors to peek corners. You can shoot through the gap while the door blocks return fire. Why it works: Doors are bulletproof and fast; you control the timing. When to use: Base defense or pushing into an enemy base.
---
Exploration
1. Know the map – Each server has a procedurally generated map (typically 3000-4000 size). Learn monument locations (Launch Site, Military Tunnels, Airfield) and their loot tables. Why it works: Efficient monument runs yield high-tier loot (guns, armor, components). When to use: Early game head to satellite dish or sewer branch for green card; late game focus on cargo ship or oil rig.
2. Radiation protection – Use hazmat suits or wooden armor + anti-rad pills. Radiation zones (nuclear reactor, sewers) require minimum protection. Deep analysis: Hazmat gives 100% radiation protection but low bullet defense; combine with a helmet if you expect PvP. The tier of radiation pills (red/blue) stack with gear.
3. The loot path – Follow a route that loops back to home. Example: Desert Road → junkyard → satellite → airfield. Avoid backtracking. Why it works: Minimizes travel time and risk of being caught on open roads. When to use: Every farming run; mark checkpoints on your map.
4. Listen for cues – Footsteps, gunshots, and raiding sounds give position info. Turn your audio up (Windows sound settings > loudness equalization off). Why it works: You can avoid fights or ambush others. When to use: Always; sound design is critical.
---
Resources
1. Tool efficiency – Use the right tool: Icepick (stone), Salvaged Sword (wood), Pickaxe (ore), Hatchet (trees). Also, pick up a chainsaw for rapid wood gathering (fuel expensive but fast). Why it works: Higher harvesting rate = faster node depletion. Each tool has optimal hit patterns.
2. Recycling – Never throw away components. A sign of an experienced player: they recycle everything they don’t need for scrap and raw materials. Deep analysis: A single sheet metal door gives 5 metal frags and 2 wood; accumulate for base upgrades. Use the recycler at monuments (Bandit Camp, Outpost) for safe recycling.
3. Farming routes – Mark all sulfur and metal nodes near your base. Go to snow biomes for more ore (rich nodes). Why it works: Sulfur is used for gunpowder; metal for armor and base walls. Snow biomes have denser node spawns.
4. Component spawns – Green card rooms (satellite, power plant) contain components like tech trash, coils, sewing kits. Use a green card + fuse + blue card for high-tier loot. When to use: After you have a workbench level 2, start monument runs for SAR, MP5, and armor.
---
Builds (Base Design)
1. The starter 2x1 – Stone walls, sheet metal door, airlock (double door). Honeycomb later with triangle foundations. Why it works: Easy to upgrade to metal, resistant to door raiding. The airlock prevents door campers from rushing you. When to use: First night.
2. External Tool Cupboards (TC) – Build a 1x1 stone bunker with a TC outside your main base, but within the TC radius. Deep analysis: This prevents others from building near you (including raid towers) and protects your main TC from being destroyed. Place them around your compound.
3. Honeycombing – Add layers of walls (usually triangles) around your core loot room. Each layer adds 250 HP for stone, 500 for metal. Why it works: Raiders must break through each layer, buying time for you to counter-raid or log in. When to use: After your core is stone, invest in honeycomb before upgrading to armored.
4. Raiding defenses – Use shotgun traps, turrets, and auto-turrets (requires electricity and ammo). Place traps inside loot rooms and hallways. Why it works: Most raiders skip shotgun traps if not expecting them; Auto-turrets scan for hostile players. When to use: Once you have electricity and scrap to craft.
5. The roof trap – Build a fake loot room on the third floor with cheap items; the real loot is in a hidden compartment near the ground floor. Deep analysis: Raiders often hit the highest floor first thinking loot is there. Bait them and defend from below.
---
Economy (Scrap & Trading)
1. Prioritize scrap – Scrap is the currency for research, workbenches, and buying items at outpost. Focus on farming roads for components (recycling gives scrap) and running monuments. Why it works: Without scrap you cannot progress past primitive stage.
2. Sell components – Bandit Camp and Outpost have vending machines where players sell items. Post your own shop for common items (explosive ammo, meds). Deep analysis: You can make profit by recycling cheap components and selling high-tier ones. Use the trade system to get items you lack without PvP.
3. Workbench upgrades – Spend scrap wisely: Level 1 - 75 scrap, Level 2 - 500 scrap, Level 3 - 3000 scrap. Focus on Level 2 first for SAR and semi-automatic pistol. Why it works: Level 2 unlocks the most used weapons and tools. Level 3 is endgame.
4. Tech Tree vs. Research – Researching an item costs 100% of its scrap value (up to 500); the tech tree costs a fixed route. For rare items (C4, rockets), the tech tree is cheaper. When to use: Tech tree for endgame; research for common items you find.
---
Progression (Blueprint & Workbench)
1. The first 30 minutes – Gather 500 wood, 200 stone, 1000 cloth (from hemp). Build a sleeping bag, tool cupboard, and stone base. Deep analysis: The sooner you claim a location with TC, the harder it is for others to build nearby. Place bag inside or hidden.
2. Blueprint tier progression – Typical order: Wooden spear → bow → crossbow → revolver → Python → SAR. Skip the pipe shotgun (inefficient). Why it works: Each tier gives you better range and damage. Crossbow + hand-made shells is a cheap door camper build.
3. Workbench library – Leave your workbench accessible (no walls obstructing) so you can craft and research. A 1x1 room with TC and workbench is sufficient early on. When to use: At all times.
4. Learn explosives early – Research explosive ammo (420 scrap) or C4 (2200) via tech tree. Explosive ammo is cheaper for door raiding. Deep analysis: Even if you don't raid, knowing the recipe allows you to defend against raiders (you can craft it if you find sulfur). When to use: After getting Level 2 workbench.
---
Survival
1. Manage temperature – Desert biomes cause heat; snow biomes cause cold. Carry a water jug in desert, and a hazmat (or fur clothing + wood) in snow. Why it works: Temperature damage drains health quickly; even a small thermal change reduces your max HP.
2. Base food sources – Plant corn, pumpkin, or hemp near your base. Hemp gives cloth for sleeping bags and clothing. Also, fish in rivers (use a spear or fishing rod). Why it works: Self-sustained food reduces need to travel for food, keeping you safe near base.
3. Medical supplies – Craft med syringes (125 scrap research) or find them in crates. Use bandages in a pinch (2 cloth each). Deep analysis: Syringes heal 30 HP instantly; bandages heal over time. Always carry at least two syringes in combat gear.
4. Water is critical – You dehydrate faster while running (shift). Fill water bottles at rivers or use a purifier. Why it works: Dehydration causes heavy blur and damage, making you useless in fights.
---
Raiding Tips
1. Offline vs Online – Offline raiding (when players are asleep) is safer but less rewarding. Online raiding (during active defending) is risky but yields more loot and thrill. Deep analysis: For solo/duo, offline is recommended; for clans, online can be coordinated.
2. Door raiding with explosive ammo – 4 explosive ammo destroy a sheet metal door (cost: 200 sulfur per ammo). Aim for the lock (the lock has less HP). Why it works: Cheaper than C4 (which is 4 satchel charges or 2 rockets). When to use: Against small wooden/stone bases.
3. Rockets vs C4 – Rockets (2 rockets = 1 door) require 1400 sulfur each; C4 (1 piece) is 2200 sulfur. Rockets are more resource-efficient for walls; C4 is better for doors (no splash). Deep analysis: Rockets also break walls behind the target, so use carefully near your own loot.
4. Ladder hatches and bunkers – Bunker bases use half-height walls and ladder hatches to prevent raiders from jumping down. Place a ladder hatch on the roof to escape quickly. When to use: For secure loot rooms; raid them by breaking floor tiles from below.
---
Advanced Optimizations
1. Electricity automation – Use solar panels + batteries for auto-turrets. Connect a timer switch to a Tesla coil for base defense. Deep analysis: Power is finite; build multiple solar panels to run turrets through the night. A small battery lasts 4 hours with one turret.
2. Farming efficiency – Use a jackhammer for stone/ore (fast mining), but it consumes low-grade fuel. Alternative: use a pickaxe (slower but no fuel cost). Why it works: Jackhammer gives 3x ore per node compared to hand tools. Best used when you have fuel.
3. Monument rushing on wipe day – On servers that wipe monthly, rush Launch Site or Military Tunnels within first hour. Loot high-tier spawns before others get guns. Deep analysis: Early dominance sets the tone for the wipe. Bring a crossbow and burlap clothing; you might get an MP5 or AK.
4. Using the Outpost safe zone – Outpost has a safe zone (no PvP allowed). Use recyclers, research tables, and vending machines there without risk. When to use: Take all your scrap-yielding components there and recycle under guard; trade with other players for useful items.
---
General Tips
1. Sleeping bag placement – Place bags near monuments (hidden in bushes or inside rubble) for respawns. Have at least one bag inside your base and one outside (1 km away). Why it works: If you die near a monument, you can respawn nearby and loot your body before others.
2. Team coordination – Use voice chat (TeamSpeak or Discord) or in-game voice. Call out enemy positions, loot, and raiding timings. Deep analysis: A team of 3-4 with good coordination can defeat a disorganized group of 6+.
3. Base naming conventions – Name your bases with signs or use the map marker system. Helps for large compounds with multiple entry points.
4. Preparation for raid night – If you expect to be raided, store your most valuable items in multiple small stashes (buried) outside your base, or in a secondary hidden base. Why it works: If raiders break into your main base, they might miss hidden stashes, saving your best loot.
5. Server selection – Choose servers with active admins (official Facepunch servers can have high cheater count). Community servers often have better rules (no cheating, team limit). Why it works: Fair gameplay reduces frustration.
---
This guide covers from the first rock swing to dominating the server. Apply these tips step by step, adapt to your playstyle, and remember: everything you have can be lost — adapt and overcome.