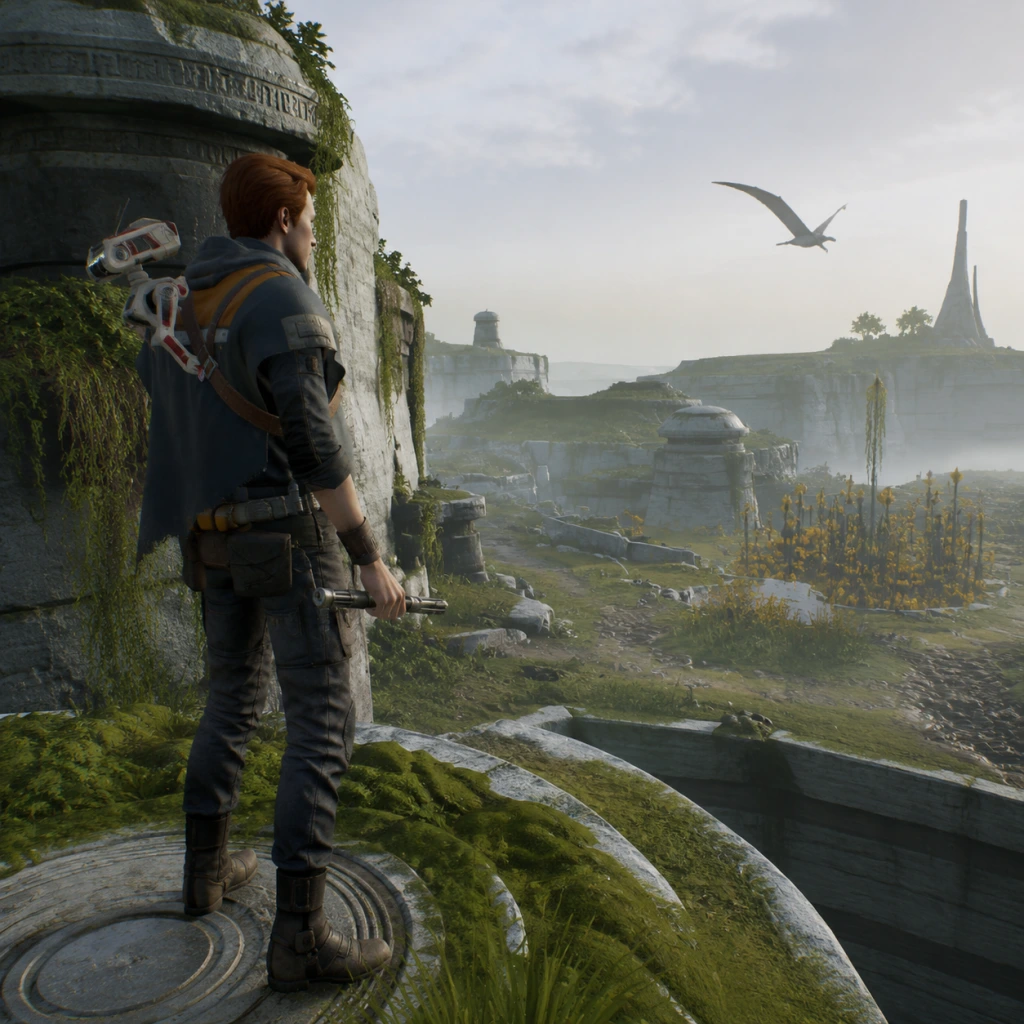
Getting Started
Overview
Star Wars Jedi: Fallen Order is a single-player action-adventure game that combines linear storytelling with Metroidvania-style exploration. You play as Cal Kestis, a young Jedi Padawan in hiding after Order 66. The game features no character creation — Cal’s appearance and abilities are fixed. Your journey begins on the scrapyard planet Bracca and quickly takes you to the mysterious world of Bogano. This guide will help you survive your first hour, understand the core systems, and avoid frustrating mistakes.
---
First Hour Walkthrough
Prologue (Approx. 5–10 minutes)
- The game opens with a flashback on the venator-class Star Destroyer. You play as young Cal during Order 66. Follow the linear path; you cannot die in this section (it’s a scripted event).
- After the flashback, you wake up 5 years later on Bracca. You are a scrapper working for the Guild. The tutorial teaches basic movement: run (hold A/X/Shift), climb, wall-run.
- Key moment: When you slip and hang from a high crane, press the indicated button to pull yourself up — many new players panic and miss the prompt.
- After a cutscene, the Inquisitor (Second Sister) attacks. You enter your first real combat tutorial. Do not try to fight her — you are meant to lose. Survive long enough until a scripted event.
- You are rescued by Prauf (a fellow scrapper) but he is killed. This triggers the Force. Press the button shown on screen to use a Force push for the first time.
- Next, you meet Greez Dritus and board the Stinger Mantis (your ship). This is your hub. Walk around, but don’t spend too much time — you’ll return later.
- You land on Bogano, a lush planet with ruins. Do not rush. This area is designed to teach you exploration and the game’s mechanics.
- Meditation Points: Green glowing circles on the ground. Activate them to save, refill health/Force, and unlock skill trees. Always activate any you see.
- BD-1: Your droid companion. He scans objects, unlocks chests, and gives you hints. Use the scan often (tap L1/LB/Q) — highlighted objects reveal lore, shortcuts, or secrets.
- First objective: Find the Vault. Follow the golden waypoint path but feel free to deviate. The vault is unopenable yet; you must return later. Focus on learning wall-running, climbing vines, and sliding.
- Combat tutorial: You encounter Scazz (creatures) and Probe Droids. Learn: block (L2/LT/Right Mouse), dodge (circle/B/Space), and parry (tap block just before hit). Parrying is key.
Bracca – Escape (Approx. 20–25 minutes)
Bogano – First Real Exploration (Approx. 30–40 minutes)
---
Controls (All Platforms)
| Action | PlayStation | Xbox | PC (Mouse & Keyboard) |
|---|---|---|---|
| Move | Left Stick | Left Stick | WASD |
| Camera | Right Stick | Right Stick | Mouse |
| Jump | X | A | Space |
| Double Jump (unlock) | X (press again) | A (press again) | Space (press again) |
| Wall Run | Hold X/Run while jumping to wall | Hold A while jumping to wall | Hold Shift + Space into wall |
| Attack | Square | X | Left Mouse |
| Heavy Attack | Hold Square | Hold X | Hold Left Mouse |
| Block | L1 | LB | Right Mouse (hold) |
| Parry | Tap L1 just before hit | Tap LB just before hit | Tap Right Mouse just before hit |
| Dodge | Circle | B | Space (while grounded) |
| Force Push | L1 + Square | LB + X | R + Left Mouse |
| Force Slow (early unlock) | L1 + Triangle | LB + Y | R + Q |
| BD-1 Scan | R1 | RB | Q |
| Stim (Heal) | R2 | RT | E (or Middle Mouse) |
| Map | Touchpad (PS) | View button | M |
| Communication (comlink) | Options | Menu | Esc |
---
UI Overview
HUD Elements (Screen corners)
- Top-left: Health bar (green) and Force bar (blue). Force recharges quickly when not using it.
- Bottom-left: Stim canister count (number inside circle). You start with 1 or 2. Using a Stim refills health but leaves you vulnerable.
- Bottom-right: BD-1’s scan indicator (appears when scanning). Also shows conversation prompts.
- Center: Temporary prompts for interactions (open, climb, etc.) and enemy lock-on (when you aim with block).
- Press Touchpad/View/M to open the holomap. It’s 3D and can be rotated. Shortcuts, elevators, and unlocked doors are marked. Use R3/RS/click and drag to rotate.
- Orange icons = current objective (golden path). Blue icons = meditation points. White dots = collectibles or secrets.
- Common beginner mistake: Not checking the map to find alternate routes. If stuck, open the map and look for pathways you haven’t taken.
- Explore every nook during your first visit to each planet. Many areas are locked but mark them on your map.
- Talk to your crew (Cere, Greez, BD-1) at the Mantis between missions. They provide lore and sometimes unlock dialogue options.
- Invest skill points early into split saber attacks (if you want more combat options) or Force abilities (e.g., Force Push upgrade). Avoid spending on cosmetic-only skill tree nodes early.
- Use BD-1’s scan constantly. It reveals hidden pathways, shortcuts, and lore that enrich the story.
- Fighting every enemy. Some encounters are optional. Running is often smarter than fighting groups — especially on Dathomir (later planet).
- Ignoring meditation points. If you die, you respawn at the last meditation point you activated. Without saving, you could lose 30 minutes of progress.
- Mashing attack buttons. This game punishes spam. Enemies have combos and will parry you. Wait for openings.
- Skipping the tutorial text. Read prompts carefully; they teach parry timing, wall-run jump height, and Stim usage.
- You earn XP from combat and exploration. Upon death, you lose unbanked XP (represented by a green bar until you reach a skill point). Always meditate to bank points.
- Best early skills:
- First priority: Find upgrades to carry more Stims. On Bogano, look for a broken door near the first meditation point — you’ll need Force Slow to open it. Inside is a Stim upgrade.
- Use Stims wisely: Don’t heal when at 90% health. Save for when you’re in the red. Also, each Stim restores one charge (not full health).
- Echoes: Blue shards. Scan them for lore and Force XP. Can be found everywhere.
- Secrets: Often hidden behind waterfalls, under debris, or on ledges. Opening them gives cosmetic items but also the satisfaction of completion.
- [ ] Activate at least 3 meditation points (Bogano has 4 before the Vault).
- [ ] Found and opened the first Stim upgrade (if you missed it, go back).
- [ ] Unlocked Force Slow (mandatory story progression).
- [ ] Opened at least 2 chests (get used to the scanning/opening mechanic).
- [ ] Spent your first skill point (recommend Dodge Slice or Force Slow Duration).
- [ ] Talked to Cere and Greez on the Mantis (they give context and sometimes map updates).
- [ ] Scanned all echoes in the starting area of Bogano (3–4 total).
- [ ] Practiced parrying against a probe droid (if you didn’t, return to the first Bogano meditation point and find one nearby).
- [ ] Saved the game by meditating at the final meditation point before quitting (do not assume auto-save covers entire progress).
- Exploration is rewarded: Always take the path less traveled. There are secrets in every corner.
- Death is not a failure: You respawn at the last point and can try again. No game over screens — just keep learning.
- Listen to BD-1: He beeps when near secrets. If he chirps, stop and scan.
- Don’t rush the story: The game is as much about the journey as the destination. Enjoy the planets, the lore, and the struggle of a young Jedi finding his way.
Map Screen
---
Essential Early Objectives
1. Activate Meditation Points. Every one you find adds a fast-travel node and saves the game. Always meditate to restore resources.
2. Learn the Force Slow ability. You unlock it on Bogano after sliding down a specific slope. Use it to freeze enemies and bypass certain puzzles.
3. Find your first Stims. On Bogano, explore the caves near the landing zone — you’ll find an upgrade that increases your Stim count. More Stims = less frustration.
4. Open all chests and secrets on Bogano before leaving (returnable later but early upgrades help). Chests contain poncho skins (cosmetic) and lightsaber parts (cosmetic) but also BD-1 skins and data entries. None are permanent stat boosts, but they build your collection.
5. Practice wall-running and climbing. The game requires precise platforming. Spend 5 minutes on Bogano’s cliffs to get comfortable.
---
What to Do First vs What to Avoid
✅ Do First
❌ Avoid
---
Early Resource Priorities
Skill Points
- Dodge Slice (lightsaber tree): Attack after dodge to stagger enemies.
- Evasive Kick (lightsaber tree): Knock down shield enemies.
- Force Slow Duration (Force tree): Makes slow last longer — essential for puzzles and combat.
- Survival Skills (survival tree): Increased health/Force recharge — but prioritize combat skills first.
Stim Canisters
Collectibles
---
Common Beginner Mistakes
1. Not parrying – Many players rely only on dodging. Parrying breaks enemy guards and leaves them vulnerable. Practice on training probes on the Mantis.
2. Ignoring the Stance Switch (later unlock) – Early game you only have single-blade. But remember that holding attack charges a heavy strike — useful against shielded enemies.
3. Running into groups – Aggro one enemy at a time using the pull ability (unlocked later). For now, use Force Slow and pick off isolated foes.
4. Forgetting to scan – Missing a scan might lock you out of a new route. Scan every suspicious pile of rubble or glowing object.
5. Over-relying on the golden path – The waypoint leads you to the main objective, but many shortcuts and upgrades are off the beaten path. Check the map for unexplained dotted lines.
6. Dying with unbanked XP – If you die before reaching a meditation point, you lose all XP you earned since the last bank. Always meditate after a tough fight.
---
Day-One Checklist
Before leaving the first session (within ~90 minutes), ensure you have done the following:
---
Final Tips
May the Force be with you, always.