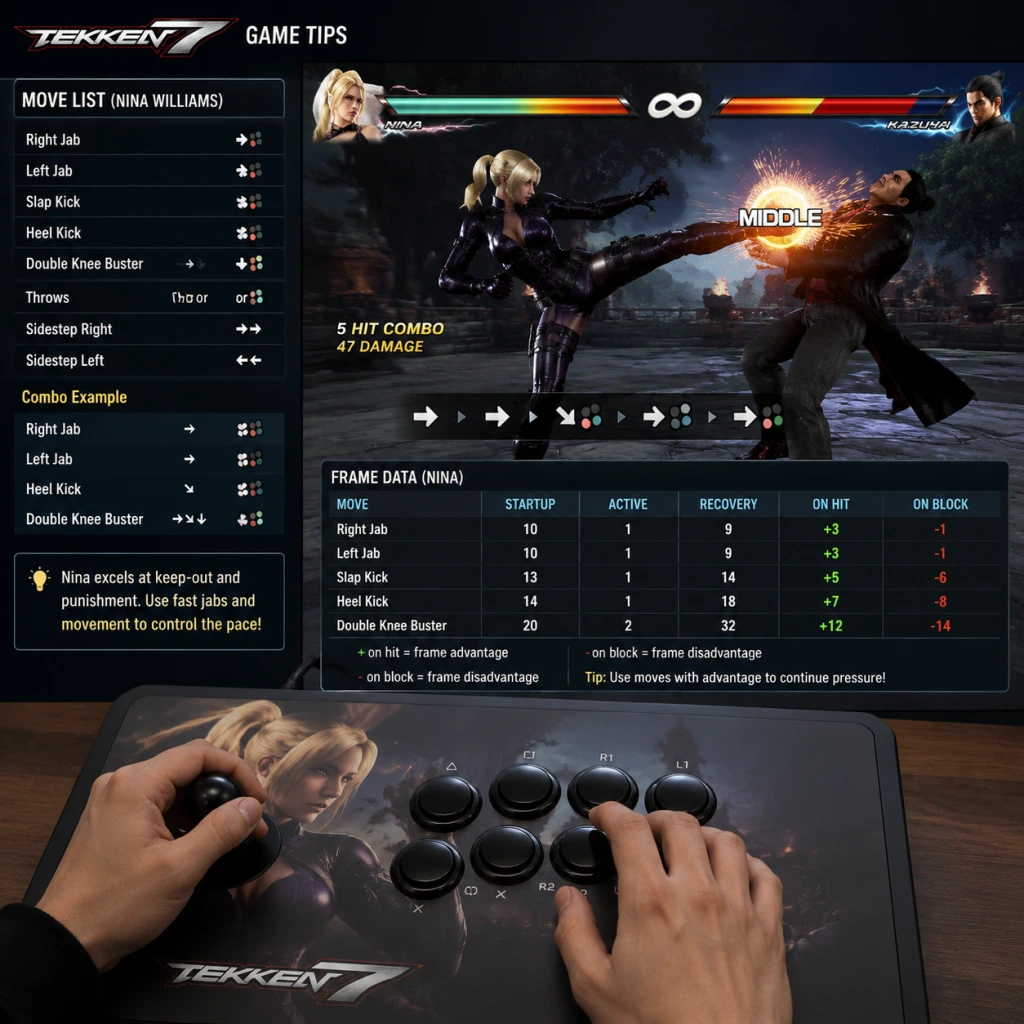
Game Tips
Game Tips: Tekken 7
Below is a comprehensive collection of practical tips to improve your performance in Tekken 7. These strategies are grouped by category and range from beginner basics to advanced optimizations.
---
Beginner Tips
#### 1. Master the Basic Movement
- Backdash and Sidestep: Hold back to backdash; tap up/down to sidestep. Practice canceling a backdash with a quick sidestep (Korean Backdash – see Advanced). Use movement to create whiffs and punish.
- Why it works: Moving unpredictably makes you harder to hit and forces opponents to whiff, giving you a safe opening.
- Learn one bread-and-butter combo that works from your character’s most common launcher (e.g., for Kazuya: EWGF → f+3,1 → d/b+2 → 3,1,2). Practice until it’s muscle memory.
- Why it works: A consistent combo converts a single hit into 50-70 damage, turning small wins into match-winning leads.
- When in doubt, hold down-back (d/b) to block low. This blocks most low attacks and all mids. Only release block to punish or interrupt.
- Why it works: Beginners tend to stand block and eat low pokes. Holding d/b protects you from sweep launchers (e.g., Dragunov’s d+2) and keeps you safe.
- In practice mode, set the AI to do unsafe moves (e.g., -10 on block). Confirm that your character has a 10-frame punish (e.g., jabbing) and a 15-frame launcher (e.g., hopkick).
- Why it works: Knowing when to safely retaliate turns blocked attacks into big damage opportunities.
- Frames: Every move has startup, active, and recovery frames. Blocking a move places both players in frame advantage/disadvantage. Download a frame data app or use the in-game movelist.
- When to use: If your move is +5 on block, you can press a button before the opponent can; if -10, you’re vulnerable to a 10-frame punish. Use positive frames to continue pressure.
- When an opponent misses a move, immediately use your character’s fastest mid (e.g., 1,1 or f+2) or a launcher if you have time.
- Why it works: Whiff punishment is the highest-damage opportunity in the game. Fast moves ensure you hit before they recover.
- Moves like Kazuya’s f+4, Shaheen’s d/f+1, or Hwoarang’s b+3 control mid range. Throw them out to check your opponent.
- Why it works: Pokes interrupt opponent’s approach, chip health, and often leave you at advantage if blocked.
- After being knocked down, you have several get-up options: quick rise, side roll, back roll, stay down, or spring kick. Vary them to avoid being launched on wake-up.
- When to use: If the opponent always expects a quick rise, stay down and block. If they do a low, punish with a downed kick or wake-up attack.
- Execution: Backdash, cancel the backdash with a quick down-back, then repeat. On Pad: f, b, d/b (hold), b, f, b, d/b... Practice until fluid.
- Why it works: It’s faster than regular backdash, lets you create distance safely, and baits whiff punishes. Essential for intermediate play.
- Many moves (like jabs) are linear. Sidestep left or right after your move to dodge retaliation.
- When to use: After a safe poke (+1 to +3), sidestep to avoid a follow-up. Also against strings that end with a high (e.g., Paul’s f,f+2,1 – sidestep after the first hit).
- Alternate between backdash and forward dash to keep opponent guessing. Use forward dash to close in for a throw or low, then backdash to reset.
- Why it works: Unpredictable movement makes your offense harder to counter. Beginners often stand still; use movement to control the pace.
- Stand alone throws (1+3 or 2+4) breakable with 1 or 2. Command throws (e.g., King’s giant swing) are unbreakable. Mix in throws after a few pokes.
- When to use: When the opponent blocks everything. Throws force them to guess or risk taking 40+ damage.
- A simple mix: low poke (e.g., d+4) → mid launcher (e.g., hopkick) → throw. Alternate between them.
- Why it works: Humans cannot react to all three options simultaneously; you exploit their mental stack.
- A move that leaves you +4 to +7 on block allows you to press a mid that beats their jab. Example: Paul’s b+1,2 is +7 on block; follow with d/f+1 to beat jabs.
- When to use: After a successful frame trap, you can continue pressure or cancel into a mix-up. Practice identifying your character’s plus-on-block moves.
- At close range, many characters have a powerful low sweep and a mid launcher. Example: Law’s d+2,3 (low) vs 4,3 (mid). Use these after a knockdown.
- Why it works: Correct guess deals huge damage; wrong guess takes chip but keeps you safe if you block.
- Many strings (e.g., Kazuya’s 1,2,2) have a gap. Unless you know the gap, block all hits. Then punish the final move if it’s unsafe.
- Why it works: Trying to interrupt a string often gets you counter-hit. Patience leads to bigger punishes.
- If you see a high attack (e.g., hopkick), duck immediately to avoid it and launch punish. This requires practice but is essential.
- When to use: Against characters with strong high launchers (Hwoarang’s b+3, Paul’s deathfist). Ducking also avoids grab break attempts.
- When you anticipate a low that is not a slide, press d/f just before the low hit connects (timing varies). If successful, you get a full combo.
- When to use: Against opponents who spam low pokes (e.g., Eddy’s b+1). Not safe on reaction; use as a read.
- At point-blank: 10-frame jab (1,1) is universal. At range 1: use a 12-frame mid. At range 2: use a long-range punish like Kazuya’s f+2.
- Why it works: Maximizing punish damage ensures you make opponents pay for risky moves.
- When health is 25% or less, you get Rage. You can activate Rage Art (RA) – a cinematic super – once per round. RA has invincibility during start-up and high damage (50-60).
- When to use: As a reversal when opponent is attacking, or to steal a round you would lose. Be careful: RA is unsafe if blocked (full launch punish).
- Rage Drives (RDs) are enhanced versions of normal moves (e.g., Kazuya’s f,F+2). They cost Rage but are safe on block and can extend combos or add pressure.
- When to use: Use RD to close out a match or to break through defense. Some RDs have armor (e.g., Dragunov’s qcf+2), great for absorbing hits.
- Always confirm that your RA will hit. If the opponent backdashes, you waste it and are vulnerable. Better to use RD for safe pressure.
- Why it works: Saving RA for guaranteed situations (e.g., after a launch) maximizes its value.
- Each character has 5-10 essential moves. For example, Dragunov: d+2 (low launcher), b+1+2 (armor), WR+2 (power mid), f,f+3 (slide). Focus on these first.
- Why it works: Depth comes from mastering a handful of strong tools, not hundreds of situational moves.
- Against King: break throws by pressing 1 (left punch throws) or 2 (right punch throws). Against Hwoarang: duck when he enters Flamingo stance. Against Yoshimitsu: watch for his low dashes.
- How to learn: Use practice mode record function to set up common sequences from top characters.
- Zafina’s azure stance and Akuma’s fireballs (2D mechanics) require different reactions. Learn to lab their unique gimmicks.
- Why it works: These characters break normal Tekken rules; familiarity counters cheese.
- Execution: f, n, d, d/f+2 within 1 frame. On Hitbox: slide f then d, d/f+2. On pad: use d/f+2 as a just frame. Practice until consistent (70%+).
- Why it works: EWGF gives +5 on block, launches on hit, and is safe. It’s the cornerstone of Mishima pressure.
- Sequence: b, d/b, b (hold back) → repeat. The d/b cancel removes the backdash’s recovery. Can also mix in sidesteps between backdashes.
- When to use: Constantly in neutral to create whiffs. Essential for characters like Kazuya, Jin, and Paul.
- Execution: From crouch, press d/f quickly then a move (e.g., d/f+1). This gives access to while-standing moves from a crouch cancel.
- Use case: iWS+3 from Kazuya gives a low launcher. Practice connecting a WS move after a low poke for frame traps.
- Examples: Kazuya’s 1+2 (Peakaboo stance), Bryan’s b+1 (a ch launch). These require precise timing (e.g., press buttons on the same frame).
- How to practice: Use training mode’s frame display. Repeat until you get the just frame 9 times out of 10.
- After knocking an opponent down, you can do a “safe jump” by jumping over and landing with a mid (e.g., a jump-in punch). This beats their wake-up low or throw.
- When to use: After any knockdown that leaves you close. Safe jumps limit opponent’s options for 50/50 setups.
- Treasure Battle mode lets you fight AI opponents repeatedly. Use it to practice combos and movement without pressure. The AI won’t punish your mistakes, but it helps with execution.
- Why it works: Repetition builds automaticity. Play 30 minutes of Treasure Battle daily to cement new techniques.
- Set the dummy to record common opponent actions: block strings, punish after backdash, etc. Then practice countering each scenario.
- Best practice: Spend 10 minutes per session on one defensive situation (e.g., punishing a hopkick).
- Save your online matches and review them. Look for moments you got hit or whiffed. Note what you could have done differently.
- Why it works: Self-review reveals bad habits (e.g., always wake-up attacking) that you don’t notice during the match.
- In online settings, restrict matchmaking to 5-bar connections. This reduces lag and makes execution consistent.
- Why it works: Fighting game inputs are frame-perfect; even 1 frame of lag can ruin electrics and punishes.
- After a loss, accept a rematch and change your strategy. If you lost to a gimmick, block it. If you got pressured, sidestep more.
- When to use: Bo5 sets are common in ranked. Use each round to gather data; don’t quit after one loss.
- If the connection is slightly laggy, use simpler combos (no just frames) and rely on pokes. Delay your punishes slightly because of input lag.
- Why it works: Trying complex execution in lag leads to dropped combos and missed punishes.
- Fight Money (G) is earned from matches and Treasure Battle. Prioritize buying new characters (if you don’t have the Season Pass) and items that directly improve your gameplay (e.g., extra stage unlocks).
- Avoid: Spending G on cosmetic items that don’t affect gameplay unless you have excess.
- Some costume items (e.g., glowing accessories) make your character’s hitbox easier to read. Avoid overly flashy costumes that might distract you.
- Why it works: Seeing your opponent’s moves clearly helps reaction times. Stick to muted colors for yourself if you prefer.
#### 2. Use a Simple BnB Combo
#### 3. Block Low Often
#### 4. Learn Your Punishment
---
Combat Fundamentals
#### 5. Understand Frame Data Basics
#### 6. Punish Whiffs with Fast Moves
#### 7. Use Simple Pokes to Control Space
#### 8. Mix Up Your Downed Options
---
Movement & Spacing
#### 9. Master the Korean Backdash (KBD)
#### 10. Use Sidestep to Avoid Linear Attacks
#### 11. Space with Backdash & Forward Dash
---
Offense & Mix-ups
#### 12. Use Throws to Open Stubborn Defense
#### 13. Create Low/Mid/Throw Mix-ups
#### 14. Use Frame Traps After Plus Moves
#### 15. Understand the 50/50 Game
---
Defense & Punishment
#### 16. Block Strings Completely Before Punishing
#### 17. Duck Highs on Reaction
#### 18. Use Low Parry on Read
#### 19. Know Your Character’s Best Punish for Each Range
---
Rage System & Rage Arts
#### 20. Use Rage as a Comeback Tool
#### 21. Learn Rage Drive Cancels
#### 22. Don’t Waste Rage Art on Whiff
---
Character Tips & Matchups
#### 23. Learn Your Character’s Key Moves
#### 24. Study Common Matchup Knowledge
#### 25. Practice Against Zafina & Akuma Separately
---
Advanced Techniques
#### 26. Electric Wind God Fist (EWGF)
#### 27. Korean Backdash (Advanced)
#### 28. Instant While Standing (iWS)
#### 29. Perfect Frame (Just Frame) Inputs
#### 30. Guard Break & Safe Jump-ins
---
Practice & Training
#### 31. Use Treasure Battle for Muscle Memory
#### 32. Lab Specific Situations in Practice Mode
#### 33. Watch Replays to Identify Patterns
---
Online Play Tips
#### 34. Set Connection Filter to 5 Bars Only
#### 35. Use the Rematch Option to Adapt
#### 36. Learn to Deal with Lag Tactics
---
Economy & Customization
#### 37. Spend Fight Money Wisely
#### 38. Use Customization for Visual Clarity
---
Conclusion
Mastering Tekken 7 requires patience, consistent practice, and applying the tips above. Start with the beginner fundamentals (movement, simple combos, blocking low) and gradually incorporate intermediate strategies (frame traps, punishes, KBD). Finally, challenge yourself with advanced techniques (EWGF, safe jumps) as you climb the ranks. Remember: every loss is a lesson. Use training mode, study matchups, and always keep improving.
---
Last updated: 2023-12-01