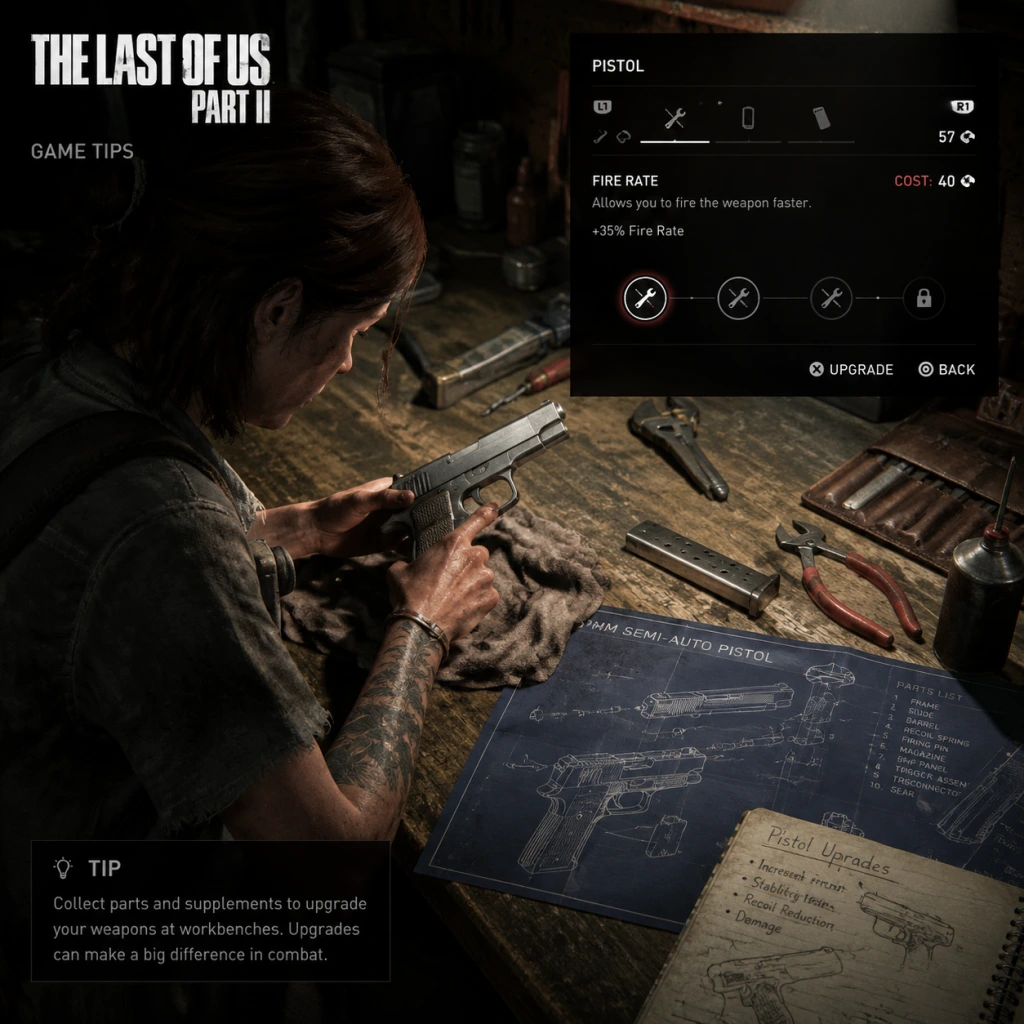
Game Tips
Overview
This guide provides a comprehensive set of tips for The Last of Us Part II, covering everything from your first hours to late-game optimization. The tips are grouped by category (Combat, Exploration, Resources, Crafting & Upgrades, Stealth, Economy, and General Strategies) and include beginner, intermediate, and advanced advice. Each tip explains why it works and when to apply it.
---
Combat Tips
Beginner: Use Listen Mode Religiously
- What: Hold R1 to briefly highlight enemies (including infected) through walls, showing their position and movement.
- Why: It prevents you from walking into ambushes and helps you plan your approach. The game is designed around this mechanic; ignoring it makes encounters much harder.
- When: Use constantly when you suspect enemies are nearby, especially in forests, buildings, and dark areas. Note that infected runners will appear as dots that move erratically.
- What: After stunning an enemy with a thrown brick or bottle, immediately rush in for a melee kill (press square).
- Why: The stun gives you a guaranteed one-hit kill on most human enemies and some infected (excluding bloaters). This conserves ammo and is faster than shooting.
- When: Use when you have a brick or bottle and are within 10-15 meters of a single enemy. Perfect for eliminating isolated patrols.
- What: Sprint and slide (press circle while sprinting) under tables, through windows, or behind cars to break line-of-sight.
- Why: Enemies (especially infected) have limited pathfinding and will take longer to follow through tight spaces. This buys you time to heal, reload, or reposition for a stealth kill.
- When: Whenever you are detected in a room or corridor with cover. Also use before crafting if you are in a hurry.
- What: Human enemies often have unique animations when calling out to allies, reloading, or inspecting a disturbance. These moments often leave them stationary for a second.
- Why: Headshots are instant kills on most human enemies (except heavily armored ones). Waiting for these pauses guarantees an easy kill.
- When: Observe enemy behavior from stealth for a few seconds before engaging. Also use when you have a rifle or revolver with good precision.
- What: Craft explosive arrows (requires arrow + canister) and fire them into enemies that are stationary or charging at you.
- Why: The explosion staggers even the largest enemies, giving you time to follow up with shotgun blasts or heavy melee. The Rat King boss fight is much easier with a few explosive arrows.
- When: Save explosive arrows for boss-tier enemies or groups of 3+ infected. Use them when you are outnumbered and need a quick crowd control.
- What: Use R2 to open drawers, cabinets, lockers, and even trash piles. Most contain resources (scissors, alcohol, rags, binding) that are essential for crafting.
- Why: Resources are scarce, especially on harder difficulties. Missing just one drawer might mean not having enough parts to craft a health kit or silencer.
- When: Always fully clear a room before moving on. Listen for the sound of a drawer opening—if it doesn't make that sound, it's probably empty.
- What: The game often places collectible notes, coins, and artifacts near workbenches or safe zones. These also indicate areas with high resource density.
- Why: The developers designed levels so that important items are usually found along the critical path or in rooms with a notable landmark (like a dead body or a glowing light).
- When: After any major encounter, look for a workbench or a safe (combination via notes). The supplements (Pill capacity) nearby are often hidden behind breakable walls or locked doors.
- What: Pause the game and enter Photo Mode (press both sticks). You can free-roam the camera without time limit.
- Why: This allows you to see around corners, locate enemies, and spot lootable objects without risking detection. It is completely safe and does not alert AI.
- When: Use in any area where you suspect traps or multiple enemies. Particularly useful in the hotel and subway sections of Seattle Day 1.
- What: Some walls have white cracks or are marked with graffiti. Attacking them with a melee weapon (like an axe) or a bomb will destroy them, revealing hidden rooms.
- Why: These rooms often contain safes, workbenches, or rare crafting resources like gunpowder and scrap metal.
- When: If you see a suspicious wall in an alley or basement, always try to break it. Note that you may need a heavy melee weapon (e.g., pipe, hammer) to do it efficiently.
- What: If you have a bow and arrows, you can silently kill infected from a distance without raising alarms. The bodies will disappear (despawn) after a while.
- Why: This allows you to thin out groups before you even enter a combat zone, making the stealth approach trivial. On harder difficulties, this saves a ton of resources.
- When: At the start of any encounter with infected (e.g., the bank, the school gym), take high ground and pick off runners. Save arrows for helmeted enemies later.
- What: The first priority with alcohol and rags should always be a health kit. You can carry up to 3.
- Why: Health is the most precious resource. Without a kit, a single hit from a runner can kill you on Survivor+ difficulty. Always have at least two kits.
- When: Craft immediately when you have the ingredients, unless you are full. After taking damage, top up your stock.
- What: Silencers are consumable and break after a few shots. They are best used on the 9mm pistol or the hunting pistol. However, the game gives you a crafted silencer only after you find the silencer schematic (which is quite late).
- Why: Early game, it's better to use bricks and bottles for stealth. Crafting silencers early wastes alcohol that you could use for molotovs or health kits. Save silencers for long-range stealth kills.
- When: Only craft silencers after you have the hunting pistol or a rifle, and you are in a section with many human enemies (e.g., Hillcrest).
- What: When you pick up a weapon from a dead enemy or find it on the ground, its parts are automatically added to your inventory (you don't need to manually loot them).
- Why: Parts are used to upgrade weapons at workbenches. More parts means faster upgrades. Enemies often drop weapons with parts that you cannot see otherwise.
- When: After a fight, walk over all dropped weapons even if they are duplicates; you automatically collect their parts.
- What: There are several training manuals hidden throughout the game (e.g., the one in the bank vault). Each manual unlocks a new recipe or improves crafting efficiency (e.g., 2 molotovs from 1 alcohol).
- Why: These manuals dramatically reduce resource consumption. For example, the first manual reduces the alcohol needed for molotovs from 2 to 1. This is a game-changer.
- When: Seek out these manuals as early as possible. They are often in optional areas. The bank vault manual is available during Seattle Day 1 (Ellie) in the downtown bank.
- What: Gunpowder and scissors are used for making ammo (pistol ammo, rifle ammo, etc.) and also for upgraded melee weapons (with binding). However, ammo is plentiful on Normal but scarce on higher difficulties.
- Why: On Survivor and Grounded, melee weapons with binding are very durable and can one-hit kill most enemies. It's better to use melee than waste bullets. Reserve gunpowder for explosive arrows or shotgun shells against bosses.
- When: On harder difficulties, avoid crafting handgun ammo unless you have no melee weapon. Instead, pick up ammo from enemies or use the bow.
- What: At the earliest workbench (usually after arriving at the open world hub in Seattle Day 1), put your first parts into the 9mm pistol's reload speed.
- Why: Faster reload means you can get back into the fight quicker. The pistol is your most-used weapon throughout the game. The reload speed upgrade makes a noticeable difference in firefights.
- When: As soon as you have 60 parts (cost for early upgrade). Do this before damage upgrades, because more damage is wasted if you can't reload fast enough.
- What: The hunting pistol's scope upgrade (available later) turns it into a medium-range sniper. Put parts into stability and zoom.
- Why: This weapon can one-shot headshot most human enemies and even some special infected (like stalkers) if you hit the head. The scope makes it viable for long-range stealth.
- When: Prioritize after you find the hunting pistol (around Seattle Day 2, Ellie). It becomes your primary stealth weapon.
- What: Upgrade the pipe bomb to have a longer fuse or a remote trigger (via training manual). Then throw it near a group of enemies and wait for them to cluster.
- Why: This allows you to wipe out entire patrols in one explosion. The remote trigger version lets you detonate precisely when enemies are grouped, saving you from premature detonations.
- When: Use in tight corridors or when you hear enemy chatter about searching for you. Position yourself behind cover and time the explosion for maximum damage.
- What: Hold L1 to crouch and move slowly (or press L1 to toggle). Even when you think you're safe, crouch-walk to minimize noise.
- Why: Enemies (especially infected) can hear your footsteps if you run. Crouch-walking makes you completely silent unless you step on glass or metal.
- When: Always, unless you are sprinting away from danger. In tall grass, you can even stand up slowly (press L1 again) without being seen.
- What: Throw a bottle or brick at a hard surface (like a wall or metal container) away from you. Enemies will investigate the sound.
- Why: This allows you to isolate a single enemy from a group, then kill them silently. On Survival difficulty, this is essential because enemies are more aware.
- When: When you see a patrol of 2-3 enemies, throw a brick far to one side, then take out the last guard who comes to check.
- What: Human enemies have a narrow cone of vision (about 120 degrees) and are nearly blind in extreme darkness. Infected have better hearing but still poor peripheral vision.
- Why: You can crouch-walk directly behind an enemy if you stay outside their vision cone. Use this to move through crowded rooms without detection.
- When: When the enemy is facing away and you are within 10 meters, slowly approach from behind. If you are in tall grass, you can even stand up and shank them.
- What: Each brick and bottle counts as a weapon slot (you can carry up to 3). They are reusable if you pick them up after throwing, but you can always find more.
- Why: They are infinite non-lethal resources that don't use ammo. You can stun enemies, break doors, and distract dogs. Always keep your inventory full.
- When: After any encounter, scavenge for bricks/bottles on the ground. If you have room, pick them up.
- What: Supplements increase your maximum health (Pill capacity). Buy two upgrades early to get to 150% health, then stop.
- Why: The early health upgrades give you a significant survivability boost, but later upgrades become expensive and reduce the number of supplements you need for other skills like Listen Mode range.
- When: Prioritize health until you have 150% (two upgrades). Then invest in Listen Mode distance or crafting speed depending on your playstyle.
- What: Some safes contain currency (coins, silver bars) that you can exchange at certain traders? Wait, The Last of Us Part II does not have a currency system—scrap and supplements are the only resources. There is no trading. So this tip is invalid. Instead:
- What: You can only hold 3 of each craftable item (except ammo which is unlimited). Avoid crafting a fourth pipe bomb or molotov until you use one.
- Why: Resources are wasted if you craft an item you cannot pick up. The game automatically drops extras? No, it prevents you from crafting. So watch your inventory.
- When: Check your inventory before crafting. If you have 3 health kits, do not craft another unless you are about to use one.
- What: If a fight becomes overwhelming, sprint away and find a hiding spot (like a locker or a high grass field). Enemies will search but eventually give up.
- Why: You can then re-engage on your terms. This is particularly useful against the Rat King boss, where you can circle back to heal.
- When: Use whenever your health drops below 30% or you are surrounded.
- What: Stalkers are infected that hide and ambush you. The hunting pistol's high damage and scope allow you to spot and kill them before they get close.
- Why: Stalkers are immune to headshots from weaker weapons? Actually, they are vulnerable to headshots but have high HP. The hunting pistol one-shots them with a headshot.
- When: In areas like the hotel basement or the school gym, equip the hunting pistol and listen for their growls. When you see one, aim carefully.
- What: The WLF dogs can sniff you out. Listen mode shows their location as a moving dot. They can detect you even in tall grass if you move.
- Why: To avoid dogs, stay still when they are close. Use a bottle to distract them. Listen mode pulses every 3 seconds; use those intervals to plan your movement.
- When: In any area with dogs (e.g., Hillcrest, Santa Barbara), constantly use Listen Mode and stay crouched. If a dog is coming your way, throw a bottle away from your hiding spot.
- What: If you read a note with a safe combination, the safe will remain unlocked for that playthrough even if you die and reload. You don't need to memorize the code.
- Why: If you die after reading the note but before opening the safe, the code is still known. So you can safely save and proceed without fear of losing the data.
- When: Always read notes/comics with safe codes. They are stored in your Journal under the Collectibles tab.
Intermediate: Combine Melee with a Brick/Bottle
Intermediate: Use the Environment to Create Distance
Advanced: Exploit Enemy Animations for Headshots
Advanced: Use Explosive Arrows on Bloaters and the Rat King
---
Exploration Tips
Beginner: Search Every Single Drawer and Cabinet
Beginner: Follow the Trail of Currency (Scrap and Supplements)
Intermediate: Use the Photo Mode to Scout
Intermediate: Break Breakable Walls with Melee or Explosives
Advanced: Use the Bow to Permanently Clear Areas Early
---
Resources and Crafting
Beginner: Prioritize Crafting Health Kits
Beginner: Never Craft Silencers Until You Have a Pistol with a Scope
Intermediate: Scavenge Every Weapon for Parts
Intermediate: Use the Training Manual for Efficient Crafting
Advanced: Save Gunpowder and Scissors for Last Resort
---
Weapon Upgrades and Build
Beginner: First Upgrade the Pistol's Reload Speed
Intermediate: Max Out the Hunting Pistol's Scope
Advanced: Use the Pipe Bomb with Trigger Upgrade
---
Stealth and Enemy AI
Beginner: CrouchWalk Everywhere
Intermediate: Use Bricks and Bottles to Lure Enemies into Killzones
Advanced: Exploit the AI's Cone of Vision
---
Economy and Resource Management
Beginner: Always Carry Three Bricks/Bottles
Intermediate: Use the Pill Capacity Upgrade Wisely
Advanced: Sell Old Collectibles for Scrap
Advanced: Minimize Crafting Duplicates
---
General Advanced Strategies
Beginner: Don't Be Afraid to Run Away
Intermediate: Use the Hunting Pistol Against Stalkers
Advanced: Time Your Listen Mode Pulses Against Dogs
Advanced: The Safe Combination Documents Are Not Permaworld
---
Conclusion
The Last of Us Part II rewards careful planning and resource management. Use these tips to master its combat, exploration, and crafting systems, regardless of difficulty. Remember that there is no single 'correct' build—experiment with different weapon upgrades and crafting recipes to find what suits your playstyle. Most importantly, enjoy the story.