Getting Started
First Hour Walkthrough
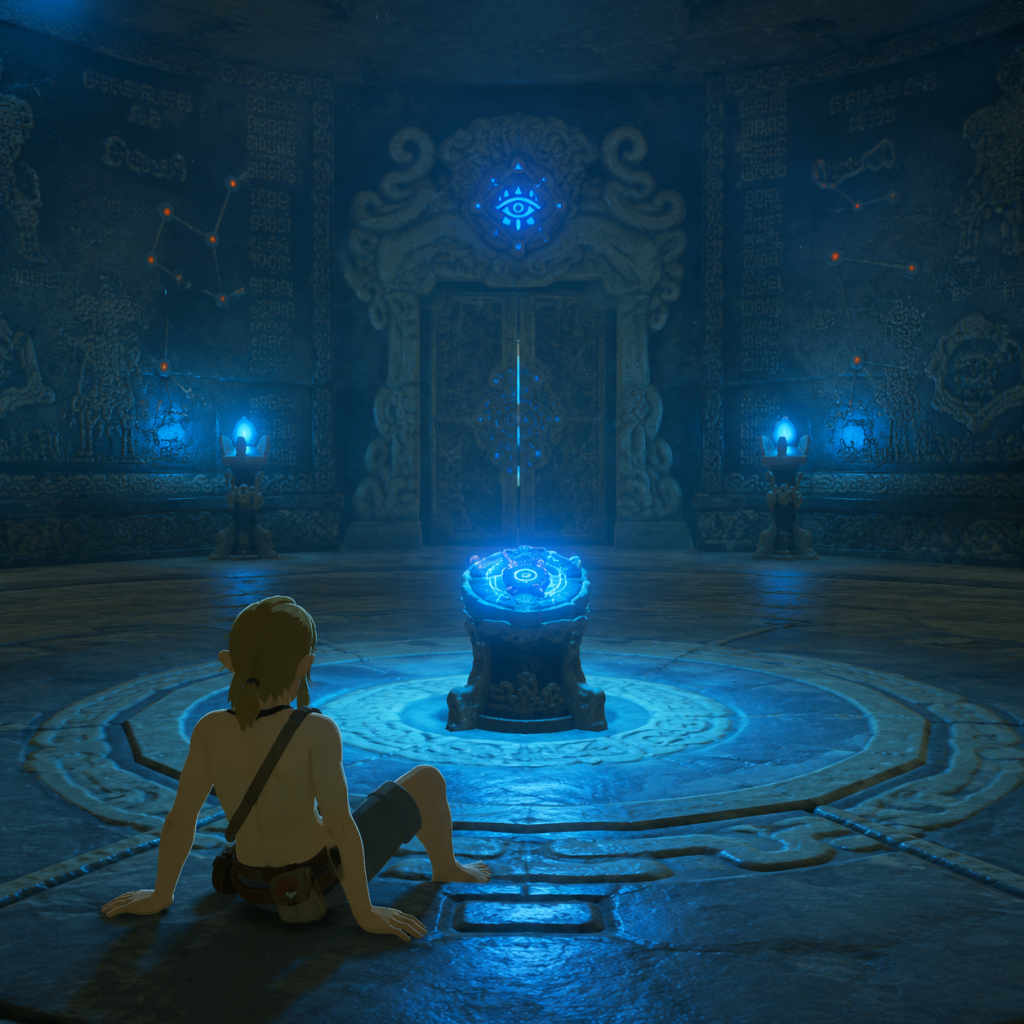
When you first start the game, you'll wake up in the Shrine of Resurrection on the Great Plateau. This is the tutorial area and you cannot leave until you complete it.
Step-by-Step:
1. Wake up – You'll see a short cutscene. After that, grab the Sheikah Slate from the pedestal in the room. This is your main tool.
2. Exit the shrine – Walk outside and follow the path. You'll meet an Old Man near a campfire. Talk to him (press A). He gives basic survival tips.
3. Activate the first tower – Head to the glowing orange tower in the distance. Climb it (press B to jump, hold B to climb faster). At the top, interact with the terminal to unlock the map of the Great Plateau.
4. Complete the four shrines – The Old Man mentions four shrines that activate the paraglider. They are located on the plateau: Oman Au (Magnesis), Ja Baij (Bomb), Owa Daim (Stasis), and Keh Namut (Cryonis). Find each, solve the puzzle, and claim the Spirit Orbs.
5. Get the Warm Doublet – Before or after the shrines, climb to the top of Mount Hylia. The Old Man will give you the Warm Doublet if you cook him a Spicy Meat and Seafood Fry (recipe: Raw Meat + Hyrule Bass + Spicy Pepper). Or you can buy it from the Hateno Village shop later. Alternatively, you can tough out the cold with food/elixirs.
6. Return to the Temple of Time – After finishing all four shrines, go back to the Temple of Time. The Old Man reveals himself as King Rhoam and gives you the Paraglider. Now you can leave the Great Plateau.
Tip: Avoid combat with the Stone Talus or skeletons at night – just run. Focus on exploring and completing shrines.
Character Creation
No character creation exists. You play as Link, a male Hylian. You cannot change gender, appearance, or name. However, you can:
- Change clothing and armor (e.g., Hylian Tunic, Stealth Set).
- Use Amiibo to unlock cosmetic armor (e.g., Twilight Cap).
- Later dye armor at the Kochi Dye Shop in Hateno Village.
Link starts with 3 hearts and one full stamina wheel (green). You can upgrade these using Spirit Orbs at Goddess Statues.
Controls (Nintendo Switch & Wii U)
The controls are nearly identical on both platforms. The table below maps button functions:
| Button | Action |
|---|---|
| A | Interact, talk, pick up, read, accept prompt |
| B | Jump (tap), climb faster (hold), cancel |
| X | Attack (swing weapon) |
| Y | Use Rune (press to equip Sheikah Slate rune, hold to use) |
| L | Hold to ZR-target (lock on), or press to throw weapon |
| ZL | Hold to Z-target an enemy, then use L stick to strafe |
| ZR | Hold to crouch (stealth), press while holding ZL to parry |
| R | Use map (go to map view). However, on Switch, - opens the main menu (map/inventory). On Wii U, - (minus) does the same. |
| Right Stick (R3) | Press to crouch (same as ZR hold? Actually ZR is shield/parry. For crouch: press Right Stick) |
| Left Stick (L3) | Press to sprint (hold while moving) |
| D-Pad Up | Quick slot: select weapon (hold to open inventory) |
| D-Pad Down | Quick slot: select shield |
| D-Pad Left | Quick slot: select bow and arrows |
| D-Pad Right | Quick slot: select shields (same as down?) Actually, D-pad Right selects items (food, elixirs) |
| + (Start) | Pause menu (quests, album, system) |
| - (Select) | Open map (Sheikah Slate map view) |
| Motion Controls | Used for aiming bows (gyro aiming). You can disable this in Options -> Controls -> Motion Controls -> Off. |
| Touch Screen (Switch only) | Navigate map, zoom, place markers. Not required. |
| Wii U GamePad | Off-TV play supported; touch screen works for map. |
UI Overview
- Top Left: Hearts (green), stamina wheel (green circle), temperature gauge (blue/red arrows). If temperature is too cold/hot, a warning icon appears.
- Top Center: Stealth indicator – when crouching, an eye icon shows how visible you are (closed eye = hidden, open = spotted).
- Top Right: Noise meter – a wave icon appears when you make noise (walking, running, sliding); yellow arrows = loud.
- Bottom Right: Weapon/Bow/Shield slots showing current equipment and durability (faint outline = near breaking). Below that, runes (Magnesis, Bomb, Stasis, Cryonis) – press Y to cycle.
- Minimap (bottom left): Shows terrain, icons for shrines (orange), towers (blue), towns (star), and waypoints you set. You can place custom map pins (press A on map screen).
- Pause Menu: Press + to access:
- Heart containers – each full heart=4 quarters. Lose hearts = damage. Eat food to recover.
- Stamina wheel – depletes when sprinting, climbing, swimming, or using charged attacks. Wait or eat stamina food to refill. If it runs out, you'll pause and can't climb/sprint.
- Rune slot – shows which rune is active (e.g., Magnesis icon). Hold Y to activate, then press A to use (e.g., lift metal object).
- Arrow count – visible on the bow icon when you open quick menu with D-pad Left.
- Explore – The world is full of secrets, shrines, and koroks. Check every hill and ruin.
- Talk to NPCs – They give quests, tips, and lore.
- Complete shrines – They reward Spirit Orbs (permanent upgrades) and often teach combat techniques or puzzles.
- Climb high places – Activate towers to reveal map regions. Use scope (press R-stick while aiming bow or map) to mark interesting spots.
- Collect resources – Wood, flint, ore, apples, mushrooms, meat. Cook them.
- Save often – Manual saves (press + -> System -> Save). Autosave triggers often but manual is safer.
- Fighting Guardians – The spider-like robots with laser beams. They one-shot early players. Avoid them until you have strong weapons and good dodge timing. On the Great Plateau, there's one near the Temple of Time – just stealth around.
- Fighting Lynels – Centaur-like monsters in open fields. They are endgame content. Run away or avoid.
- Wasting weapons on breakable objects – Don't use your best sword on crates or ore deposits. Use bombs or a hammer from Bokoblins.
- Ignoring temperature – If you're cold, you'll lose hearts over time. Equip warm clothes, cook spicy food, or carry a lit torch (hold R to use as a heat source). Similarly, extreme heat requires cooling potions or Gerudo Voe set.
- Rushing main quests without exploring – The game encourages wandering. You'll miss valuable equipment and upgrades.
- Not marking the map – Use the scope (while on a tower or high ground) to tag shrines, towers, and interesting places. Press A to place a pin. This helps navigation.
- Trying to fight every encampment – Stealth is more effective. Sneak around or use bombs to scatter enemies.
- Not using runes in combat – Stasis locks enemies, bombs knock them off cliffs, Magnesis can throw metal boxes.
- Not cooking before a fight – Always eat a meal with attack up or defense up before a tough battle.
- Falling from heights – Use Paraglider (gotten after Great Plateau) to glide down. Press B while in air to open it.
- Ignoring the scope – You can mark targets from far away. Helps avoid running into danger.
- Not saving before challenging areas – If you die, you lose progress since last save.
- Selling ancient materials – Ancient Screws, Gears, Shafts are needed for upgrades; save them until you know what to do.
- Breaking weapons on stone – Use bombs on ore deposits, not weapons.
- Not upgrading the Sheikah Slate – Get camera rune early from Hateno Lab – it helps with sidequests and finding hidden items.
- Map (Sheikah Slate view, full map with zoom)
- Inventory – weapons, bows, arrows, shields, materials, food, key items. Each item has durability (weapons/shields) and description.
- Adventure Log – quests (main, side, shrine).
- Album – photos taken with the Sheikah Slate camera rune.
- System – save, load, options, amiibo.
HUD Elements:
Essential Early Objectives
1. Get off the Great Plateau – Complete the four shrines and obtain the Paraglider (see First Hour walkthrough). This opens the entire world.
2. Head to Kakariko Village – After leaving the plateau, follow the main quest marker east. This village introduces the story, gives you the Sheikah Slate + Camera Rune, and starts the main quest "Seek Out Impa".
3. Visit Hateno Ancient Tech Lab – After meeting Impa, she'll direct you to Hateno Village. This unlocks the Sheikah Slate upgrades (camera, album, ancient tech). You'll also get the Paraglider fabric if you didn't get it earlier? No that's DLC. But you get the camera and ability to track shrines.
4. Complete the first Divine Beast (Vah Ruta) – Located in Lanayru region. This is the recommended first giant dungeon. But you can choose any order.
5. Upgrade Stamina and Hearts – Find Goddess Statues (e.g., in Temple of Time, Hateno Village, Great Plateau). Use 4 Spirit Orbs for one upgrade. A good balance: 2-3 stamina upgrades first for climbing, then hearts.
6. Learn to cook – Cooking is critical. Combine ingredients in a cooking pot (found near stables/villages). Experiment: raw meat+apples = dubious food; proper recipes like spicy peppers+meat = cold resistance. Always cook to maximize effects.
7. Use Runes – Magnesis (move metal), Bombs (break rocks, defeat enemies), Stasis (freeze objects/enemies temporarily), Cryonis (create ice pillars on water). Practice on the Great Plateau.
What to Do First vs. What to Avoid
Do:
Avoid:
Early Resource Priorities
1. Food & Elixirs:
- Apples (common, heal 1/2 heart).
- Hearty ingredients (e.g., Hearty Radish, Hearty Salmon) – cook alone for full recovery + temporary hearts.
- Spicy Peppers – for cold resistance.
- Endura ingredients – for stamina replenish (e.g., Endura Carrot, Staminoka Bass).
- Mushrooms (e.g., Stamella Shroom) – stamina recovery.
- Meat (Raw Meat, Raw Bird Drumstick) – cook for hearty meals.
2. Materials for Upgrades:
- Wood (trees) – needed for many side quests and cooking fires.
- Flint (break ore deposits with sledgehammer) – used with wood to create fire.
- Ore (Amber, Opal, Ruby, Sapphire) – sell for rupees or upgrade armor. Early game: sell Amber for quick cash.
- Monster parts (Bokoblin fangs, horns) – used in elixirs (combine with critter + monster part)
3. Rupees:
- Sell gemstones (Amber, Opal) to merchants. Don't sell rare ones (Ruby, Diamond) until you know armor upgrades.
- Complete side quests (e.g., "Find the Missing Sheikah Heirloom" in Hateno).
4. Weapons:
- Always carry a torch (from campfires) – useful for lighting torches, burning grass, melting ice.
- Korok Leaf – found in trees near water; lets you blow small rafts.
- Bows – early game find Boko Bows from enemies. Use them to hunt animals (deer, birds) for meat.
- Shields – Pot Lid is weak but can parry. Upgrade to Boko Shield from enemies.
5. Stamina vs. Hearts:
- First few upgrades: put 1-2 into stamina to climb more. Then hearts to survive battles.
Common Beginner Mistakes
Day-One Checklist
On your first day of playing (real-world time or first few hours), aim to complete:
1. ⌛ Exit Shrine of Resurrection – Sheikah Slate acquired.
2. ⌛ Meet the Old Man – Get introduction.
3. ⌛ Activate the Great Plateau Tower – Map revealed.
4. ⌛ Complete all four shrines – Get Spirit Orbs.
- Oman Au (Magnesis)
- Ja Baij (Bombs)
- Owa Daim (Stasis)
- Keh Namut (Cryonis)
5. ⌛ Obtain the Warm Doublet – Either by cooking Spicy Meat and Seafood Fry or by buying later.
6. ⌛ Return to Temple of Time – Get Paraglider from King Rhoam.
7. ⌛ Glide off the Great Plateau – Head southeast toward the Dueling Peaks stable.
8. ⌛ Visit the first stable – Register a horse (if you find one), and get a free Warm Doublet? No, that's later. But you can buy a stamina potion from Beedle.
9. ⌛ Reach Kakariko Village – Main quest marker. Talk to Impa to advance story and get camera rune hint.
10. ⌛ Craft one hearty meal – For safety.
11. ⌛ Save your game – Manual save after every major milestone.
Bonus optional: Mark nearby shrines from tower tops. Gather 5-10 apples and mushrooms. Cook everything you can to learn recipes.
Remember: The world is yours to explore. Don't be afraid to wander off the beaten path – that’s where the magic happens.