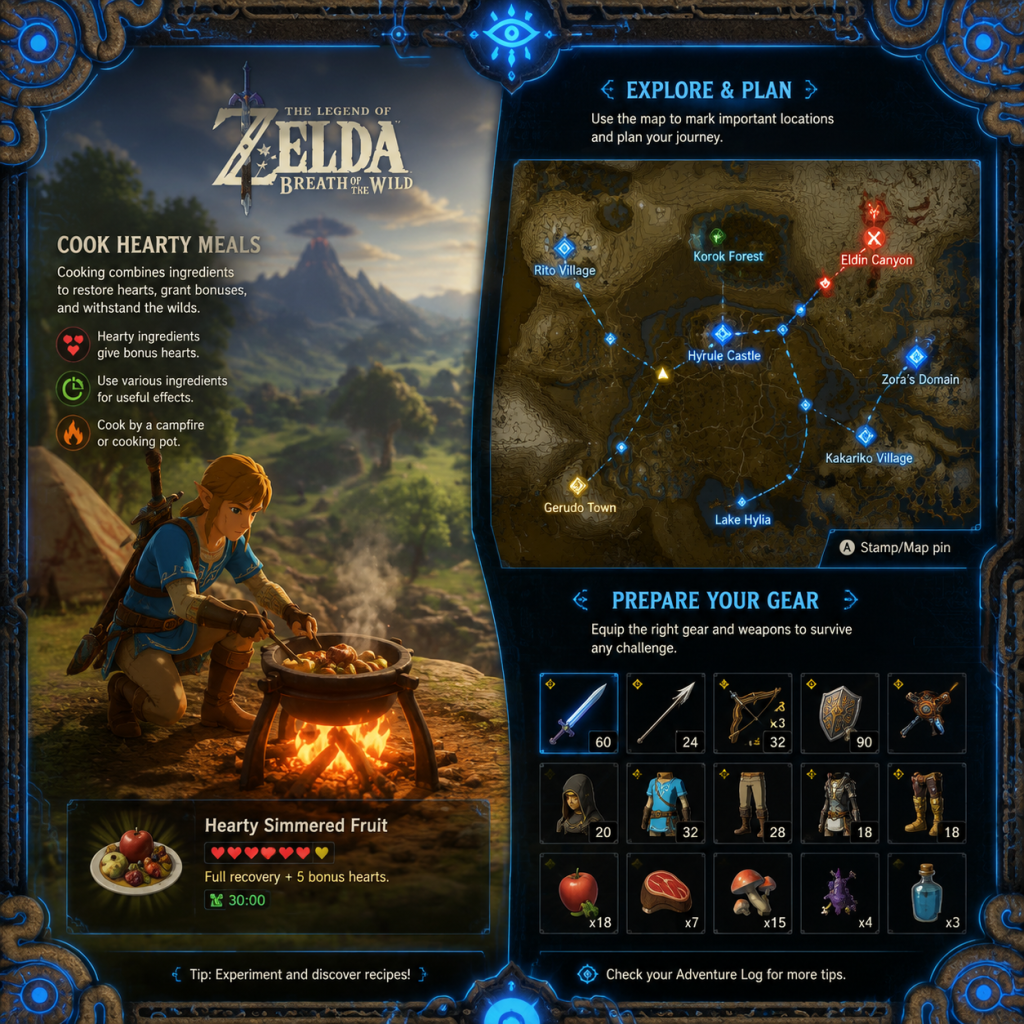
Game Tips: The Legend of Zelda: Breath of the Wild\n\nThis comprehensive tips guide covers everything from your first steps on the Great Plateau to endgame optimization. Each tip includes the what, why, and when to use it, grouped by category.\n\n---\n\n### Beginner Tips\n\n#### 1. Pick Up EVERYTHING – Especially Korok Seeds and Items\n- Explanation: Every collectible in the world has a use. Korok Seeds are found by solving small puzzles (e.g., lifting a rock, chasing a light, completing a circle of stones). They can be traded to Hestu for expanding your weapon, bow, and shield inventory.\n- Why it works: More inventory means you can carry more durability-heavy weapons, reducing the need to constantly swap or break items. Early expansion is critical.\n- When: From the moment you leave the Great Plateau, always be on the lookout. Hestu first appears near Kakariko Village, but you can also find him at a few stables after the first meeting.\n\n#### 2. Cook Health and Stamina Recovery Meals Immediately\n- Explanation: Combine any edible ingredient (apple, mushroom, herbs) with a piece of meat or fish to create a meal. Using a cooking pot (found at stables, towns, and some camps) allows you to combine up to five ingredients.\n- Why it works: Raw ingredients heal very little. Cooked meals provide massive HP recovery and temporary buffs (e.g., extra hearts, stamina, attack up, defense up). Always cook before heading into dangerous areas.\n- When: Use as soon as you get a cooking pot and ingredients. Prioritize Hearty ingredients (hearty radish, hearty bass) for full recovery + extra yellow hearts.\n\n#### 3. Talk to Everyone – Especially the Old Man on the Great Plateau\n- Explanation: NPCs give crucial hints, side quests, and lore. The Old Man (who later reveals himself as King Rhoam) teaches you about cooking, paraglider, and the four shrines that unlock your exit.\n- Why it works: Many tips in the game are not in the pause menu. For example, he tells you to cook a specific meal (spicy meat and seafood fry) to get the warm doublet for cold resistance.\n- When: Do this immediately on the Great Plateau. In the open world, always talk to travelers and stable owners for rumors of shrines and side quests.\n\n#### 4. Mark the Map Liberally with Stamps\n- Explanation: The Sheikah Slate allows you to place stamps (star, skull, leaf, etc.) on the map. Use them to mark locations of interest: Lynels, dragon spawn points, treasure chests, cooking pots, ore deposits, and Korok puzzles you can't solve yet.\n- Why it works: The world is huge and easy to forget where a useful spot is. Stamps reduce backtracking and help plan routes.\n- When: Start on the Great Plateau. Whenever you see something you want to return to, stamp it. Later, you can also use the Hero's Path mode (DLC) to see your movement history.\n\n---\n\n### Combat Tips\n\n#### 5. Master Perfect Dodge and Flurry Rush\n- Explanation: Press ZR (hold) to lock onto an enemy, then backflip (backward on left stick + X) when the enemy attacks horizontally, or side hop (left/right + X) for vertical attacks. Successful timing triggers a slow-motion window where you can unleash a flurry of strikes with Y.\n- Why it works: Flurry Rush deals massive damage and fully stops the enemy's attack chain. It also makes you invulnerable during the animation. Against fast enemies (Lizalfos, Lynels), it's the safest damage option.\n- When: Practice on Bokoblins and Moblin first. Use against any enemy with telegraphed attacks. Perfect for Lynels (their charge and slam attacks).\n\n#### 6. Parry with Your Shield – For Instant Kills\n- Explanation: Hold ZR to raise shield, then press A just before an enemy's melee or projectile hits. If timed correctly, you deflect the attack, stunning the enemy and opening them to a critical hit (press Y while they are stunned). Guardians' laser beams can be reflected back to kill them instantly.\n- Why it works: Parrying costs no durability on the shield, and against Guardians it's the only reliable early-game method to destroy them (one perfect parry sends the beam back, killing them instantly).\n- When: Use against Guardians, Hinoxes when they throw rocks, and any one-handed sword enemy. For beginners, practice on Bokoblins in the Great Plateau.\n\n#### 7. Utilize Elemental Weaknesses\n- Explanation: Elements in the game (Fire, Ice, Lightning) cause extra effects:\n - Fire: Melts ice, keeps you warm, deals burn damage over time.\n - Ice: Freezes enemies, shattering them on hit or allowing a one-hit kill.\n - Lightning: Stuns enemies; metal weapons attract lightning during storms (can be used to your advantage by dropping metal weapons near enemies).\n - Shock: Disarms enemies (they drop weapon) and stuns.\n- Why it works: Freezing an enemy and then hitting with a strong weapon (e.g., claymore) instantly shatters them for massive damage. Shock weapons make fights trivial because enemies fumble. Lightning during storms can clear whole camps.\n- When: Use elemental weapons based on environment. Fire against ice enemies (like ice Lizalfos), ice against fire enemies. Lightning against any group of enemies.\n\n#### 8. Stealth Attacks Multiply Damage\n- Explanation: Sneak up behind an unaware enemy and press Y for a stealth strike. This deals 8x damage (or instant kill for smaller enemies). Use Sheikah armor set (upgradeable) to increase stealth.\n- Why it works: One stealth kill removes a threat without alerting others. It saves weapon durability and time.\n- When: Always approach camps from above or the side. Use at night when monsters sleep. Works great on Guardian Stalkers? No, they detect via sight. But on all humanoid monsters.\n\n#### 9. Use Bullet Time with Bows\n- Explanation: While in midair (from a jump, gliding, or climbing), draw your bow by holding ZR and you'll enter slow-motion (Bullet Time). This slows time drastically, allowing precise shots.\n- Why it works: Easy headshots on moving enemies, or hitting distant targets. Also, while paragliding, you can rain arrows from above safely.\n- When: Use when jumping off a cliff, diving off a horse, or leaping from a wall. Best combo: use Revali's Gale (Champion ability) to get airborne, then Bullet Time for multiple shots.\n\n#### 10. Shield Surfing for Mobility and Combat\n- Explanation: Hold ZR to raise shield, then press A while in a run to surf down slopes. This conserves stamina and increases speed. You can also shield surf into enemies to knock them down.\n- Why it works: Fast travel downhill without stamina drain. Can be used to escape combat or set up attacks.\n- When: Use on any grassy or rocky slope. Great for crossing Hyrule Field quickly. Also, surfing on sand with the Sand Seal shield (DLC) is essential in the Gerudo region.\n\n---\n\n### Exploration Tips\n\n#### 11. Always Have a Paraglider\n- Explanation: You cannot leave the Great Plateau without the Paraglider (given by the Old Man after completing the four shrines). It is the most essential tool for exploration.\n- Why it works: Enables gliding over gaps, descending safely from high places, and using updrafts to gain height.\n- When: Use whenever you need to cross ravines, descend from towers, or escape combat. Upgrade stamina early to maximize glide distance.\n\n#### 12. Climb in the Rain – Use Anti-Slip Potions or Gear\n- Explanation: Rain makes surfaces slippery, causing you to slide. Wear the full Climbing Gear set (upgrade bonus: climb speed) or drink a Hasty Sauce (speed boost) to mitigate. But rain still reduces grip.\n- Why it works: Some areas (e.g., Zora's Domain approach) force you to climb in rain. Using the set bonus reduces slip frequency.\n- When: Always keep climbing gear upgraded. If you lack it, use a Rain Dance (no, not that one) – just wait under a tree or build a fire to pass time until the rain stops.\n\n#### 13. Use the Sheikah Sensor+ to Find Shrines\n- Explanation: After completing the Hateno Ancient Tech Lab upgrade, you can activate the Sensor+ to locate shrines (set to "Shrine"). The slate will beep and the controller vibrates as you get closer.\n- Why it works: Many shrines are hidden underground or behind breakable walls. The sensor guides you exactly.\n- When: Unlock as soon as you reach Hateno Village (after leaving Great Plateau). Essential for completionists.\n\n#### 14. Paragliding + Updrafts = Infinite Glide\n- Explanation: Enemies, torches, and certain plants (e.g., Fireproof lizards) create updrafts. You can also create your own by lighting a campfire or using a flame sword. Glide into the wind to gain altitude.\n- Why it works: Extends travel distance without touching the ground. In Hebra and Death Mountain, updrafts are abundant.\n- When: Use Revali's Gale (Champion ability) for a quick updraft. Also, when exploring mountains, look for smoke columns.\n\n#### 15. Fast Travel via Shrines and Towers\n- Explanation: Every activated shrine and tower becomes a fast travel point. Activate them early to build a network.\n- Why it works: Saves immense travel time. Even if you cannot complete a shrine, just touch the pedestal to register the teleport point.\n- When: As soon as you see a new tower or shrine, run to it. Climb the Sheikah Towers for map data and points.\n\n#### 16. Use the Map to Identify Landmarks\n- Explanation: The in-game map shows terrain, towns, stables, and towers. Zoom in to see trees and small details. Use the scope (hold R) to mark visible shrines and points of interest.\n- Why it works: Better navigation. You can spot shrines from far away by looking for orange glow.\n- When: Any time you're on a high point (tower, mountain). Extremely useful for planning routes.\n\n---\n\n### Resource Management & Economy\n\n#### 17. Sell Gems Only When Necessary – They Are Needed for Upgrades\n- Explanation: Gems (ruby, sapphire, diamond, topaz, amber, opal, luminous stone) are used to upgrade armor at Great Fairy Fountains. Each fairy needs specific gems.\n- Why it works: Spending gems on rupees early may hinder your ability to max out armor. Instead, sell cooked meals and monster parts for rupees, as they have less upgrade value.\n- When: Save gems until you have maxed all armor sets. The Diamond Circlet requires diamonds, so keep at least 10 of each.\n\n#### 18. Cook Five Different Ingredients for Max Buff Duration\n- Explanation: Cooking with five distinct ingredients of the same effect type (e.g., five ironshrooms for defense up) yields a dish with the highest possible duration (30 minutes) and strong effect level. Mixing different effects cancels them out.\n- Why it works: Longer buffs mean you don't need to eat repeatedly during exploration. Most importantly, you can stack a food buff with armor bonuses (but not double food buffs).\n- When: Plan ahead: cook a 30-minute defense meal before a tough boss, or an attack meal before farming Lynels.\n\n#### 19. Monster Parts Are More Valuable Than You Think\n- Explanation: Bokoblin fangs, Lizalfos tails, Moblin guts, etc., can be sold for rupees or used in elixirs. Also, the Kilton shop in Skull Lake buys many monster parts at high prices.\n- Why it works: Monster parts are abundant. Selling extra parts (especially from Hinoxes and Lynels) yields thousands of rupees.\n- When: Keep 10-20 of each for armor upgrades (e.g., stealth armor requires Bokoblin parts). Sell the rest to Kilton or Beedle.\n\n#### 20. Ore Deposits Are Random Respawns – Mark Them\n- Explanation: Luminous stone deposits (blue ore) and other ore nodes respawn after a Blood Moon (every ~2 hours of play). Mark them on your map to farm regularly.\n- Why it works: You need luminous stones for the Zora set and diamonds for repairs. Farming a consistent route yields steady income.\n- When: After each Blood Moon, revisit your marked ore spots. Use a sword with high durability (e.g., Royal Broadsword) to break them.\n\n#### 21. Use the Master Sword for Mining and Tree Cutting\n- Explanation: The Master Sword never breaks (it only runs out of energy and recharges after 10 minutes). You can use it to mine ore, cut trees, and break crates without worrying about durability.\n- Why it works: Saves your other weapons for combat. Also, the sword glows near Guardians and Malice, tripling its damage.\n- When: After acquiring the Master Sword (13 hearts required). Immediately equip it as your main tool.\n\n---\n\n### Cooking & Elixir Guide\n\n#### 22. The Five-Cardinal Cooking Principle\n- Explanation: Every cooking effect (hearty, energizing, tough, etc.) is determined by the first ingredient's primary effect. Adding multiple of the same effect strengthens it. There are five effect tiers: none, tiny, small, medium, large, plus duration.\n- Why it works: To get maximum effect, use 4-5 of the same ingredient with the desired effect. For example, 5 mighty bananas = level 3 attack up for 10 minutes. Add a dragon part (horn, claw, scale) or star fragment to extend duration to 30 minutes.\n- When: Always use dragon parts for long-lasting buffs before big fights. Farm Farosh (at Lake Hylia) for easy horn shards.\n\n#### 23. Hearty, Enduring, and Energizing Meals Are Instant Full Heals\n- Explanation: Ingredients with "Hearty" (e.g., hearty radish) or "Enduring" (e.g., enduring carrot) in the name produce a meal that fully restores HP and adds temporary yellow hearts/endurance. Energizing meals restore some stamina but not full.\n- Why it works: You don't need to carry many healing items. One hearty meal can bring you from 1 heart to full 20 hearts plus 5 yellow ones. This saves inventory space.\n- When: Keep a stack of hearty meals for emergency healing. They are especially helpful against Lynels and bosses.\n\n#### 24. Elixirs Are for Buffs That Don't Interfere with Armor\n- Explanation: Elixirs (made with monster parts + critters) offer buffs just like food, but they are separate from meals – you cannot have both a food buff and an elixir buff active simultaneously. The most recent one overrides the previous.\n- Why it works: Elixirs are often cheaper to make than meals if you have monster parts. They also provide different effects like heat resistance (fireproof lizard) or cold resistance (warm darner).\n- When: Use elixirs for environmental resistance (heat, cold, electricity) because you might need that armor slot for other bonuses. Also, use them for speed or stealth boosts.\n\n---\n\n### Upgrades & Progression\n\n#### 25. Prioritize Stamina Over Hearts Initially\n- Explanation: You can exchange Spirit Orbs (from shrines) for a heart or a stamina vessel at the Goddess Statues. Focus on stamina first (up to two full wheels) because climbing, gliding, and swimming rely on stamina. Hearts can be supplemented with food.\n- Why it works: You can always cook hearty meals for temporary hearts, but you cannot circumvent stamina limits. A full stamina wheel enables you to climb longer mountains and glide across large gaps.\n- When: Get 10-13 hearts first to pull the Master Sword (13 needed), then switch to stamina. For intermediate players, aim for full stamina before max hearts.\n\n#### 26. Upgrade Armor at Great Fairy Fountains\n- Explanation: There are four Great Fairy Fountains scattered across Hyrule (outskirts of Kakariko, behind Dueling Peaks stable, near Tabantha Bridge stable, and in the desert above the Great Fairy's fountain). Each requires rupees to unlock. Once unlocked, you can upgrade armor sets using materials.\n- Why it works: Upgraded armor grants set bonuses (e.g., full Climbing Gear gives climb speed x2, full Sheikah gives stealth). Higher defense reduces damage taken drastically.\n- When: Unlock all four fountains as soon as possible. Upgrade the Soldier's Armor (bought in Hateno) for early defense, and the Ancient Armor (from Akkala Tech Lab) later for Guardian resistance.\n\n#### 27. Complete All 120 Shrines for Full Hearts + Stamina\n- Explanation: There are 120 shrines in the base game (plus 16 in DLC). Each gives one Spirit Orb. You need 4 orbs for one heart/stamina upgrade. With 120 orbs, you can max out both hearts and stamina (30 hearts, 3 full stamina wheels) – actually you can trade orbs for hearts/stamina up to max, but you cannot have both max due to limited orbs. Plan accordingly.\n- Why it works: Max hearts make you nearly invincible; max stamina makes climbing/gliding effortless. Endgame content like the Trial of the Sword becomes manageable.\n- When: Make a list of shrine locations and complete them in any order. Use the Sensor+ to find missed ones.\n\n---\n\n### Economy & Rupee Farming\n\n#### 28. Snowball Bowling in Hebra\n- Explanation: Near the Hebra Mountains, there is a mini-game (Pondo's Snowball Bowling). You roll a snowball down a hill to knock down pins. Hitting all ten gives 300 rupees each time. It's the fastest rupee farm in the game.\n- Why it works: After a few attempts, you can consistently hit all pins. 300 rupees per minute or more. It's mind-numbing but efficient.\n- When: Use when you need a lump sum (e.g., for Great Fairy upgrades). Requires no combat or resources.\n\n#### 29. Hunting in the Great Plateau for Meat\n- Explanation: The Great Plateau has abundant wildlife (boar, deer, birds). Hunt them with arrows or bombs, cook the meat (plain or with herbs) and sell it. Each prime meat sells for 30-60 rupees cooked.\n- Why it works: Easy, safe, and renewable. Good for early game.\n- When: On the Great Plateau before leaving. Also revisit after Blood Moons.\n\n#### 30. Sell Rare Gems Only After Maxing Armor\n- Explanation: Rubies, sapphires, and diamonds are needed for specific armor upgrades (e.g., Ruby Circlet requires 2 rubies per upgrade, Diamond Circlet requires diamonds). Selling them early is a mistake.\n- Why it works: You might need 15 of each gem to fully upgrade the jewelry sets. Farm them instead via ore nodes and Talus fights.\n- When: Once you have 20+ of a gem, consider selling surplus for 500+ rupees each.\n\n---\n\n### Advanced Techniques & Optimizations\n\n#### 31. Wind Bomb (Flying Glitch) for Fast Travel\n- Explanation: This is an advanced exploit: while gliding, press B (cancel paraglider) and immediately throw a round bomb, then detonate it behind you. The explosion propels you forward at high speed. Repeat to cross large distances.\n- Why it works: Much faster than running or horse riding. Requires precise timing and stamina management.\n- When: Use only after mastering basic movement. Good for speedrunning or reaching far locations quickly.\n\n#### 32. Shield Surf on Sand in Gerudo Desert\n- Explanation: In the desert, you can use a Sand Seal (the creature) to surf on sand. You need to shoot one with an arrow, then mount it and ride to surf across dunes. Alternatively, use the Sand Seal Shield (DLC) to surf without a seal.\n- Why it works: Extremely fast travel in desert where walking is slow.\n- When: Essential for completing the Gerudo region. Use to reach the Yiga Hideout and Vah Naboris.\n\n#### 33. Use Bomb Arrows in Rain – They Are Always Lit\n- Explanation: In rain, fire arrows and bomb arrows become useless because they are extinguished. But bomb arrows still detonate on impact because they are mechanical, not fire-based. Rain also boosts electric attacks (metal weapons attract lightning).\n- Why it works: Bomb arrows can be used in rain for AoE damage, while other arrows fail.\n- When: During thunderstorms or rain, switch to bomb arrows or electric arrows.\n\n#### 34. The Thunder Helm – Immunity to Lightning\n- Explanation: Complete the Gerudo main questline to obtain the Thunder Helm (as Riju's heirloom). It makes you immune to lightning strikes. You must earn it by completing all 7 side quests in Gerudo Town.\n- Why it works: Lightning can instantly kill you if you're holding metal weapons. With this helm, you can ignore storms entirely. Also helps in the Yiga Hideout.\n- When: Get it as soon as you reach Gerudo Town. Essential for the Divine Beast Vah Naboris fight.\n\n#### 35. Use the Bow of Light vs Ganon\n- Explanation: During the final boss fight against Calamity Ganon and Dark Beast Ganon, you receive the Bow of Light (infinite arrows, special light arrows). Use it exclusively for the final phases.\n- Why it works: It deals massive damage and is the only weapon that can hit Dark Beast Ganon's weak points effectively.\n- When: Save your strongest weapons for the earlier phases; rely on the Bow of Light for the dark beast.\n\n---\n\n### Divine Beasts & Main Quests\n\n#### 36. Complete the Four Divine Beasts Before Facing Ganon\n- Explanation: Each Divine Beast (Vah Ruta, Vah Rudania, Vah Medoh, Vah Naboris) gives you a Champion Ability (Revali's Gale, Mipha's Grace, Daruk's Protection, Urbosa's Fury). They also weaken Calamity Ganon by reducing his HP.\n- Why it works: Without them, Ganon has 8000 HP; with all four, he has 2000 HP (in the first phase). The abilities are game-changing: Mipha's Grace revives you from death (once per 20 min), Revali's Gale lifts you into the air, Daruk's Protection blocks attacks, Urbosa's Fury stuns enemies.\n- When: Tackle them in any order. Recommended order: Vah Ruta (water blight) → Vah Rudania (fireblight) → Vah Medoh (windblight) → Vah Naboris (thunderblight). Thunderblight is hardest, so leave it last.\n\n#### 37. Champion's Ballad (DLC) Gives Extra Abilities\n- Explanation: The DLC adds a new questline that upgrades each Champion Ability to a short cooldown version (approx. 3-4 minutes instead of 9-24 minutes). Also provides the Master Cycle Zero (a motorcycle).\n- Why it works: Quick cooldowns allow spamming abilities. The motorcycle is faster than horses and can drive on any terrain.\n- When: Do this after completing all four Divine Beasts (mid to late game).\n\n---\n\n### Miscellaneous Pro Tips\n\n- Sneakstrike Chains: If you backflip after a sneakstrike and stay hidden, enemies will investigate the sound, allowing consecutive sneakstrikes for unlimited damage.\n- Throw Weapons for Quick Finishes: Press R to throw a weapon; this deals double damage and is useful when weapon durability is low or to finish off an enemy.\n- Use Magnesis to Identify Treasure Chests: Metal chests are common underwater or underground. Magnesis (Sheikah module) highlights them, and you can lift them to open or grab.\n- Stasis to Stop Enemies Temporarily: Stasis+ upgrade allows you to freeze enemies for a few seconds, giving free hits. Great for Lynels.\n- Bombs Break Ore and Crates Without Weapon Durability: Use remote bombs to break ore deposits and wooden crates. Saves weapon wear.\n- Fairy Fountains Are Not Just for Upgrades: They also restore your health to full when you pray at them (plus they offer a free heal before battle).\n- Lynels Are Terrifying But Farmable: Best strategy: upgrade Stasis to +, freeze Lynel, shoot it in the face with an arrow (staggers), mount it and hit with a strong weapon (no durability loss while mounted). Repeat.\n- Elephant Statues in Zora's Domain: You can offer luminous stones to get Mipha's grace upgrade? No, that's not a thing. But you can trade 10 luminous stones for a diamond by Zora's domain? Actually, a Zora near the symbol offers a diamond trade for 10 luminous stones. Use this to get diamonds for repairs.\n- Eat Time-Shortening Meals During Boss Fights: If you are in combat, you can't cook, but you can eat from your inventory. Pause and eat a hearty meal if low on health.\n- Hero's Path Mode (DLC) shows your last 200 hours of travel. Use it to find unexplored areas and missed chests.\n\n---\n\n### Final Words\nBreath of the Wild rewards creativity and experimentation. The tips above cover the core strategies but the game has countless interactions (like using magnesis to drop metal boxes on enemies). Always try unconventional approaches – the physics engine is your playground.\n\nHappy adventuring, Link!