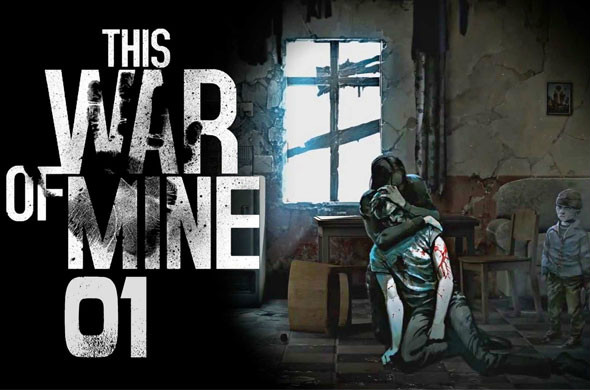
Game Tips
Game Tips: This War of Mine
Below is a categorized collection of survival tips ranging from beginner essentials to advanced optimizations. Each tip includes an explanation and deeper analysis to help you endure the siege.
---
Beginner Tips
#### 1. Stay Hidden at Night During the First Few Nights
- Explanation: In the early game, your characters are weak and unarmed. Sneaking around and avoiding hostile NPCs prevents injuries and deaths. Use shadows, crouch, and move slowly. Prioritize scavenging empty rooms first.
- Why it works: Hostile scavengers and soldiers can kill an unarmed character in one or two hits. Staying hidden preserves your group’s strength for when you have weapons.
- When to use: Always at night during Days 1-5, or until you have a firearm and decent melee weapon.
- Explanation: The Workbench unlocks all crafting options. Start with a basic Workbench (Level 1) using components and wood. Then craft a Crowbar to open locked doors and containers.
- Why it works: A Crowbar gives access to more loot per scavenging run. Without it, you miss valuable supplies behind locked doors.
- When to use: First day after setting up shelter – gather materials during the day if needed.
- Explanation: Beds significantly improve rest quality. Without a bed, characters regain energy slowly and remain tired, increasing their chance of illness and depression.
- Why it works: Tired characters move slower, scavenge less efficiently, and are more prone to combat mistakes. Build one bed per two occupants initially, then upgrade to soft beds later.
- When to use: As soon as you have 4 Wood and 2 Parts – it’s a top priority.
- Explanation: Raw food (vegetables, meat, canned food) can be cooked into meals using a stove or fire source. Cooked meals restore more hunger and provide a mood boost. Spoiled food is worthless and can cause sickness.
- Why it works: Cooking stretches your food supply and improves morale. One raw vegetable + one water = two portions of cooked meal (if you have enough fuel).
- When to use: When you have at least 3 raw food and a stove built. Don’t hoard raw food – cook it before Day 3 to avoid spoilage.
- Explanation: During nighttime raids, you can assign one character to guard. They will wake up and defend if a thief enters. Without a guard, all sleeping characters are vulnerable and may get injured or lose items.
- Why it works: A guard increases the chance of fighting off intruders and reduces loot loss. Even a weak character with a knife is better than no guard.
- When to use: Every night once you have at least two people. The guard gets less sleep but can rest the next day.
- Explanation: The game gives a brief description of each location before you visit. Read carefully – some areas are dangerous (military outposts), some are quiet (empty houses). Take note of which locations have high loot density vs. high danger.
- Why it works: Daytime scavenging is not possible, but you can plan your route. Visiting a dangerous location unprepared wastes a night or gets someone killed.
- When to use: After the first night, unlock new locations by exploring the map. Prioritize safe, high-loot areas like the Quiet House or the Garage.
- Explanation: Always carry a Crowbar, Shovel, and Lockpick set (if you have them). Crowbar opens metal doors and crates; Shovel digs through rubble piles; Lockpick opens locked cabinets and some safes. Not bringing them means missing loot.
- Why it works: Each tool unlocks specific loot nodes. For example, a Garage location has a locked safe that requires a crowbar or lockpick. Without it, you lose valuable items like weapon parts or jewelry.
- When to use: Before leaving home, check the location type. If it says "abandoned house," bring crowbar and lockpick. If "military outpost," bring weapons and bandages.
- Explanation: Some items are more valuable per inventory slot: Weapons Parts, Electronics, Meds, Bandages, Pure Alcohol, and Jewelry. Wood and Parts are bulk but essential. Always grab components over raw food later in the game.
- Why it works: Inventory space is limited (usually 17 slots). You can’t carry everything. Grabbing a single meds (4 slots) is better than 4 pieces of wood (1 slot each) only if you need meds urgently. Balance based on current shelter needs.
- When to use: Quick decision: if you have excess wood at home, skip wood and take components. If low on food, take canned food.
- Explanation: When you finish looting a container, you can choose to “Empty” (take all) or “Scavenge” (search thoroughly for extra items). Scavenging takes additional time but sometimes yields hidden items.
- Why it works: Some containers have hidden compartments that only appear on a successful scavenge. This can yield rare items like Gun Parts or Diamonds.
- When to use: Only when you have plenty of night time left (e.g., early in the night). Do not scavenge if you are running out of time because you need to escape before dawn.
- Explanation: This War of Mine is not a shooter. Engaging hostile NPCs often leads to injuries, trauma, or death. Crouch and sneak to avoid detection. If forced into combat, use hit-and-run tactics.
- Why it works: Even with a gun, combat is risky because enemies can land lucky shots. Injuries consume limited medical supplies and reduce scavenging efficiency. Stealth is safer.
- When to use: At all times, unless you have overwhelming firepower and no other way to secure essential loot (e.g., the Military Outpost).
- Explanation: Suppressed pistol (Silenced Pistol) or Crossbow are quiet. They allow you to eliminate lone enemies without alerting others. Unsuppressed shots attract attention from nearby NPCs.
- Why it works: In locations with multiple enemies, a single unsuppressed shot brings the whole group. Suppressed weapons let you thin them out gradually.
- When to use: When you need to clear a location with patrols (e.g., the Construction Site). Build a Suppressor at the Workbench with Weapons Parts and Metal.
- Explanation: Knives, Shovels (as weapons), and Hatchets can one-hit-kill an enemy from behind if you sneak up. This is silent and prevents retaliation.
- Why it works: A stealth kill removes an enemy instantly, saving ammo and health. Characters with higher physical strength are more effective.
- When to use: When you find an isolated enemy (e.g., a soldier guarding a corner). Approach from behind, press attack while hidden.
- Explanation: Armor reduces damage taken from bullets and melee. Even a makeshift armor (e.g., Riot Armor crafted with Leather and Components) can save a character from death.
- Why it works: One bullet can kill an unarmored character. Armor gives you a second chance, which is critical in late-game combat.
- When to use: Equip armor on any character going to combat-heavy locations like the Military Outpost or the Sniper Junction.
- Explanation: Wood is needed for fuel, repairs, and building. Parts are needed for tools and upgrades. You can never have too many. In the first week, wood and parts are scarce; grab them whenever you see them.
- Why it works: Without fuel, you can’t cook or heat. Without parts, you can’t fix cracked walls or craft advanced items. A shelter with 30+ wood and 20+ parts is comfortable.
- When to use: During Day 1-10, every scavenging run should bring back a mix of wood and parts. Later, you can be more selective.
- Explanation: Water is critical for cooking, crafting alcohol, and drinking. Build a Rainwater Collector early (requires Parts and Wood). Use filters (made from Components) to turn rainwater into clean water. Dirty water causes sickness.
- Why it works: The Collector produces water every day. It reduces the need to trade for water or scavenge it. One filter cleans 4 units.
- When to use: Build within first 5 days. Always have at least 2-3 filters in stock.
- Explanation: Nighttime is the only time you can leave the shelter. During day you can craft, upgrade, rest, or trade (if visited by a civilian). Do not waste daytime on scavenging – it’s not allowed. Use daytime to manage home.
- Why it works: The game forces night exploration. Attempting to leave during day (if you have a car? No) is impossible. Stick to the schedule.
- When to use: Every night send at least one character to scavenge. Keep one or two awake to guard/home.
- Explanation: Rubble piles often contain hidden items like food, materials, or tools. Without a shovel, you can’t clear them efficiently. A Shovel also serves as a weapon.
- Why it works: Each rubble pile yields 2-4 items, often including rare ones like Electronics or Coffee. Shovels are light (2 slots) and worth carrying.
- When to use: When visiting locations with rubble (e.g., the Ruined House). Craft a shovel at Workbench Level 2.
- Explanation: Occasionally, a trader (e.g., Franko) visits your shelter during the day. They offer items in exchange for goods. Best to trade for Weapons Parts, Meds, or Jewelry, as these are always in demand.
- Why it works: Trading is more efficient than scavenging for rare items. For example, you can trade 4 Cigarettes for 1 Bandage – which is cheap if you have excess cigarettes.
- When to use: When you have excess common items (Wood, Components) that you can spare. Keep a stock of trade goods: Cigarettes, Coffee, Booze, Jewelry.
- Explanation: Build a Moonshine Still (requires Workbench Level 2, Sugar, Water, and Components). Turn Sugar and Water into Moonshine. Booze is a high-value trade item and can be used as antiseptic (though not recommended).
- Why it works: Moonshine sells for 4-5 components or 1 meds easily. It’s a reliable source of income if you have extra sugar.
- When to use: Once you have a stable food source and enough water. Build the still around Day 8-12.
- Explanation: Some locations have NPCs who will trade with you. For example, at the Garage, a mechanic will exchange parts for wood or other materials.
- Why it works: These trades are often better than general merchants because they ask for specific materials you may have plenty of.
- When to use: When you visit those locations, bring trade goods. The Garage is excellent for getting Weapon Parts.
- Explanation: Workbench Level 3 unlocks advanced crafting: Improved Tools, Weapons (Shotgun, Assault Rifle), First Aid Kits, and more. This is essential for late-game survival and defense.
- Why it works: Advanced weapons allow you to clear dangerous locations. First Aid Kits can heal trauma. Without Level 3, you are stuck with makeshift items.
- When to use: After securing food and beds (around Day 5-7). Prioritize gathering Electronics and Components.
- Explanation: Upgrading the main door to a reinforced metal door reduces break-in chance. Barricading windows costs wood but makes it harder for thieves to enter.
- Why it works: A reinforced door + barricaded windows means fewer raids, saving you from injuries and loot loss. The decrease in raids is significant.
- When to use: As soon as you have 5 Wood and 5 Parts for the door. Barricade windows after that – one per night if needed.
- Explanation: Build a Garden (requires Workbench Level 2, Soil, Seeds, and Components). You can grow vegetables (e.g., Cabbage) which provide raw food. With rain collector for water, you can sustain food indefinitely.
- Why it works: Once established, the garden produces food every few days without needing trade. This is key for long-term survival (40+ days).
- When to use: Around Day 10-15, when you have spare materials and water source. Plant immediately after building.
- Explanation: Build a Radio from Components and Electronics. Tune it for news about ceasefires, new locations, or trader schedules. It also provides minor morale boost.
- Why it works: News can alert you to upcoming winter or ceasefires, which affect resource needs. Also, you may learn about a valuable new location.
- When to use: Early game (Day 3-5) – it’s cheap to build.
- Explanation: Bandages are essential for treating moderate wounds. Recipe: 2 Components + 1 Alcohol = 2 Bandages. Always keep a stack of 5+.
- Why it works: Without bandages, wounds can become infected, leading to death. Crafting bandages is cheaper than trading for them.
- When to use: As soon as you have a Workbench Level 1 and spare components. Always have at least 3 bandages in stock.
- Explanation: First Aid Kits (Workbench Level 2) cure severe wounds and trauma. They require Bandages, Alcohol, and Components. Use them when a character has severe bleeding or infection.
- Why it works: First Aid Kits are the only way to heal a character that is near death from wounds. One kit can save a life.
- When to use: When a character has red health bar or “Sick” status from wounds. Do not waste on minor cuts.
- Explanation: Silencer (Suppressor) can be crafted at Workbench Level 2 with 3 Weapons Parts + 2 Metal. Attach to pistol for stealth attacks.
- Why it works: As mentioned in combat, silenced weapons allow safe clearing of large groups.
- When to use: Once you have a pistol and spare weapons parts (at least 6 total for all attachments). Prioritize this over a second gun.
- Explanation: Use Weapons Parts and Components to upgrade Crowbar, Shovel, and Hatchet to Improved versions. Improved Crowbar opens doors faster and does more damage; Improved Shovel dig faster.
- Why it works: Faster actions mean you can loot more in one night. Improved combat tools also deal more damage.
- When to use: After Workbench Level 2, if you have extra weapons parts (4 each). Good investment for mid-game.
- Explanation: Feed characters when they are “Hungry” (symbol with fork). Overfeeding when they are “Content” wastes food. Each character eats 2 portions per day (or less if starving).
- Why it works: Managing hunger prevents depression and sickness. But food is scarce – don’t feed unnecessarily. Use “Group Meal” option to save food.
- When to use: Feed when hunger icon appears. If you have excess food, can feed early to boost mood.
- Explanation: Characters who witness violence or get injured may become “Broken” or “Depressed.” These statuses reduce efficiency and can lead to suicide. Treat them with Tobacco, Coffee, or by talking to other survivors (unique event). Also, building a comfortable home helps.
- Why it works: A depressed character may refuse to scavenge or work. Medical care (e.g., sleeping pills) can temporarily fix, but long term, keep shelter clean and warm.
- When to use: When a character shows sad face. Give them tobacco or coffee immediately. Upgrade bed quality and fix holes to improve mood.
- Explanation: Don’t send the same character scavenging every night. Rotate so each person gets a full night’s sleep. Fatigue leads to slower movement and higher injury chance.
- Why it works: A rested character can carry more and fight better. Tired characters have reduced capacity.
- When to use: If you have 3+ survivors, assign one as primary guard (sleeps during day), one as scout, one as crafter. Rotate every 2 days.
- Explanation: Minor scratches can be ignored, but if a character has multiple wounds, treat quickly. Use Bandages for bleeding wounds, Herbal Remedies for minor infections.
- Why it works: Ignoring injuries leads to infection and eventually death. Health problems cascade: sick characters can’t work, which worsens food shortage.
- When to use: As soon as you see a red wound icon, treat with appropriate item.
- Explanation: If you have a character with high “Physical” and “Sneak” stats (e.g., Bruno or Roman), make them your primary night runner. Equip them with the best weapons, armor, and lockpicks. Others stay home to craft and guard.
- Why it works: High-phys characters move faster, carry more, and fight better. Specialization maximizes loot per night and reduces risk.
- When to use: From Day 3 onward, identify your best fighter. Give them all upgrades first.
- Explanation: Games like This War of Mine have a permadeath and auto-save. However, if you Alt+F4 or force quit before the night ends, you can restart the night. This is considered fair because the game is brutally hard.
- Why it works: Allows you to retry a failed stealth attempt or a bad trade. Use it sparingly to learn patterns, not to cheat every mistake.
- When to use: Only when a character dies because of a glitch or an unavoidable mistake (like missing a dodge). Frequent use cheapens the experience.
- Explanation: The game has multiple scenarios (e.g., The Last Broadcast, The Desolate Pans). Each has unique win conditions (survive 40 days, help certain NPCs, etc.). Read the scenario description and plan accordingly.
- Why it works: Different scenarios emphasize different resources. For example, “The Last Broadcast” requires you to gather many electronics to repair a radio station. Focus on electronics.
- When to use: When starting a new game, choose a scenario that matches your playstyle. If you like combat, pick a military-heavy scenario.
- Explanation: Herbal Remedies (crafted at Workbench Level 1 with Herbs and Water) cure light sickness (common cold) and have no side effects. Save Meds for serious infections.
- Why it works: Meds are rare and expensive. Herbs can be found in gardens or traded. Use freely.
- When to use: When a character has a sniffle icon.
- PC: Use quick-save (F5) before dangerous nights. Keyboard shortcuts (1-9 for item slots) speed up combat.
- Console (PS4/Xbox One): Use Analog stick for stealth – moving slightly slower is quieter. The UI has radial menus – practice to reduce lag.
- Mobile (iOS/Android): Warning: The controls are touch-based. Use single-tap to move (no double-tap). Night scavenging is more difficult due to screen size – zoom in frequently. The mobile version has all DLC included.
- Nintendo Switch: Similar to console, but also includes touch screen in handheld mode. Use touch for inventory management – it’s faster.
#### 2. Build the Workbench Immediately (Day 1)
#### 3. Never Let Characters Sleep on the Floor
#### 4. Cook Food Before it Spoils
#### 5. Guard One Entrance at Night While Sleeping
---
Exploration Tips
#### 1. Scout Locations During the Day to Plan Night Runs
#### 2. Bring the Right Tools for the Job
#### 3. Loot Everything, but Prioritize High-Value Items
#### 4. Use the “Scavenge” Option for Extra Time
---
Combat Tips
#### 1. Avoid Combat Whenever Possible
#### 2. Use Suppressed Weapons for Nighttime Clearing
#### 3. Melee Combat: Use Bladed Weapons for Stealth Kills
#### 4. Always Carry a Riot Armor or Bulletproof Vest
---
Resource Gathering & Scavenging
#### 1. Prioritize Collecting Wood and Parts Early
#### 2. Collect Rainwater with Filters
#### 3. Scavenge at Night, Not During Day
#### 4. Dig Through Rubble with a Shovel
---
Economy & Trading
#### 1. Trade with Visiting Merchants for High-Value Items
#### 2. Produce Alcohol for Trading
#### 3. Barter with Other Survivors (Unique Locations)
---
Base Building & Upgrades
#### 1. Upgrade Your Workbench to Level 3 as Soon as Possible
#### 2. Build a Reinforced Door and Barricade Windows
#### 3. Set Up a Vegetable Garden for Infinite Food
#### 4. Install a Radio for Information
---
Crafting & Technology
#### 1. Craft Bandages from Components and Alcohol
#### 2. Create First Aid Kits for Serious Injuries
#### 3. Craft a Silencer for Your Pistol
#### 4. Upgrade Tools to “Improved” Versions
---
Character Management
#### 1. Keep Characters Fed but Not Overfed
#### 2. Treat Trauma and Depression with Medical Care
#### 3. Rotate Roles to Avoid Fatigue
#### 4. Heal Injuries Before They Become Critical
---
Advanced Strategies
#### 1. Create a Dedicated “Scavenger” Character
#### 2. Save Scum at Night is Allowed (If You Want)
#### 3. Complete Scenarios for Golden Ending Conditions
#### 4. Use Herbal Remedies for Minor Illnesses
---
Platform-Specific Tips
---
Common Mistakes to Avoid
| Mistake | Why It’s Bad | Solution |
|---|---|---|
| Sending multiple people to the same location at night | Wastes potential scavenging capacity. Each location can be visited by only one character per night. | Send each character to a different location. |
| Building too many things at once | Drains materials without completing upgrades. | Focus on one essential upgrade at a time (Workbench, then Beds, then Garden). |
| Ignoring mood until it’s critical | Depressed characters may refuse to work or run away. | Check mood icons daily and give gifts (tobacco, coffee) or repair broken things. |
| Trading away all weapons parts | Weapons parts are needed for advanced weapons and tool upgrades. | Keep at least 10 weapons parts in reserve at all times. |
| Fighting with low health characters | One hit can kill. | If health is below 50%, avoid combat entirely. Use stealth and run away. |
Conclusion
Mastering This War of Mine requires careful planning, resource management, and emotional resilience. Use these tips as a guide, but remember: every playthrough is different. Adapt to your group’s strengths and the world’s randomized events. Good luck staying alive.
— Written by a survivor who lost three playthroughs before learning these lessons.