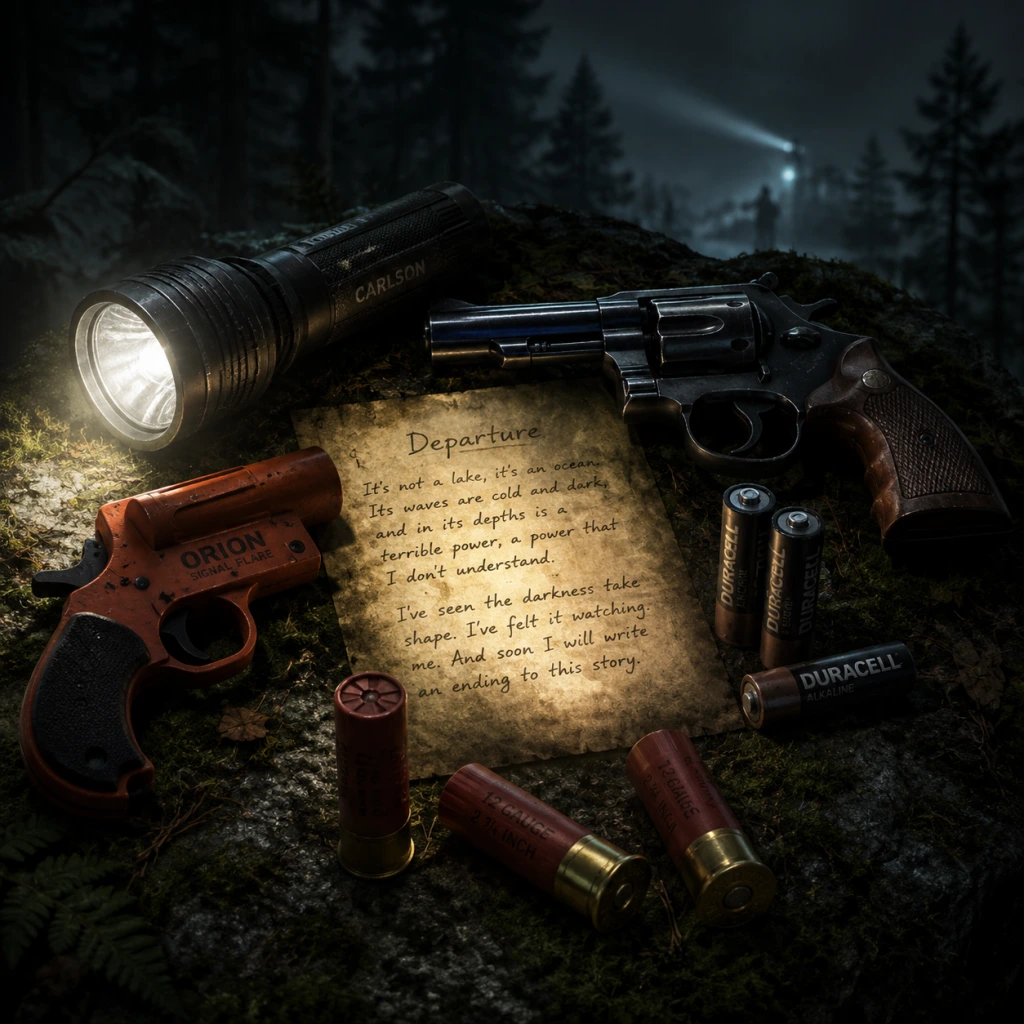
All Game Items
All Game Items Guide for Alan Wake
This guide covers every obtainable item in Alan Wake (original 2010 and Remastered editions). Items are grouped by category: Weapons, Ammo & Tools, Consumables, Key Items, Collectibles, and Upgrades. Each entry explains what the item does, how to obtain it, optimal use cases, and any important synergies (e.g., light + weapons). Note that Alan Wake has no armor or currency system; all items are either found in levels or unlocked through story progression.
---
Weapons
Weapons require ammo and are used to destroy Taken after removing their darkness shield with light. Most weapons are found in specific story moments and cannot be purchased.
#### 1. Flashlight (Primary Tool)
- Description: Your constant companion. Emits a beam of light that can be focused to burn away the darkness shield of Taken. The harder you press the focus button, the faster the battery drains.
- How to Obtain: Always equipped from the start. Can be upgraded later (see Upgrades).
- When Useful: Essential for every encounter. Use focused light to strip shields quickly, then switch to a firearm. Also lights up dark areas and reveals hidden items.
- Synergies: Works with all weapons. Upgraded beam (after obtaining the focus upgrade) makes shield removal much faster.
- Description: A six-shooter pistol. Reliable, decent damage, moderate fire rate. Holds 6 rounds; reloads instantly.
- How to Obtain: Found early in Episode 1 (after escaping the car crash). Ammo is common throughout the game.
- When Useful: All-purpose weapon. Effective against most Taken from mid-range. Weak against bosses without upgrades.
- Synergies: Quick to aim; pairs well with flashlight focus. Use headshots for extra damage.
- Description: Pump-action shotgun. Devastating at close range but slow fire rate and long reload. Holds 8 shells.
- How to Obtain: First found in Episode 2 (at the construction site). Appears regularly afterward.
- When Useful: Ideal for close-quarters combat, especially indoors or tight corridors. One shot can stagger multiple Taken.
- Synergies: Combine with flashbangs to stun groups, then blast them. The spread makes headshots less critical.
- Description: Bolt-action rifle with high damage and excellent range. Holds 5 rounds; reloads slowly.
- How to Obtain: First acquired in Episode 3 (at the Anderson Farm). Ammo is scarce.
- When Useful: Best for sniping Taken at long range or taking down shielded tough enemies (e.g., Clutch Cutter enemies). Save ammo for bosses.
- Synergies: Use with focused flashlight for a quick kill. A single headshot often kills unshielded Taken.
- Description: Single-shot pistol that fires a bright flare. The flare sticks to surfaces and creates a temporary light zone. The projectile itself can damage Taken if it hits.
- How to Obtain: Found in Episode 4 (at the lumberyard). One-time use per pickup; extra flares are found sparingly.
- When Useful: Excellent for emergency crowd control. Fire into a group of Taken to blind them and buy time. Can also ignite environmental hazards (e.g., gas leaks).
- Synergies: After a flare lands, you can safely run past enemies or focus fire on one target. Pairs with Molotov-like environmental traps.
- Description: Throwable explosive that creates a brilliant flash of light, stunning all Taken in radius and instantly removing their darkness shields.
- How to Obtain: Found rarely in levels, often in toolboxes. Can be crafted? No, only found.
- When Useful: Lifesaver in overwhelming situations. Use when surrounded to stun enemies and then quickly dispatch them. Also useful to blind a boss momentarily.
- Synergies: After a flashbang, Switch to shotgun for quick kills. Avoid use near explosive barrels if you want to conserve them.
- Description: Recharge your flashlight battery to full instantly. Cannot be carried; used automatically when picked up if battery is not full.
- How to Obtain: Found everywhere—on tables, in drawers, dropped by Taken. Very common.
- When Useful: Always useful. Keep an eye on the battery meter; pick up batteries to stay mobile. If full, you cannot pick them up (they stay for later).
- Synergies: The upgraded flashlight drains battery faster, so batteries become even more critical.
- Description: Heal Alan instantly when used. Restores a moderate amount of health (about 1/3 of the health bar). Can be carried in inventory (max of 3 or 5 depending on difficulty).
- How to Obtain: Found in bathrooms, kitchens, and medical kits. Also dropped by Taken occasionally.
- When Useful: Use when health is low, especially before a difficult combat. Because health does not regenerate, painkillers are your only healing.
- Synergies: Save them for boss fights or long stretches without checkpoints.
- Description: Not a consumable but a collectible. See Collectibles section.
- Description: Not a consumable but a collectible. See Collectibles section.
- Description: A small device that emits a distinct clicking sound. Used to turn off lights (including neon signs) and later to defeat the Dark Presence. Essentially a sonic distraction. Also used to solve light-related puzzles.
- How to Obtain: Given by Alice’s sister in Episode 1. Used throughout the story.
- When Useful: Essential for advancing plot. In combat, clicking can distract Taken for a brief moment (they pause). Not a primary weapon.
- Synergies: Combine with stealth—click to lure Taken away from doors.
- Description: Single-use key items that unlock specific doors or vehicles. Appear in episodic order.
- How to Obtain: Found in scripted locations. Each key is used immediately after acquisition.
- When Useful: They are mandatory for progress.
#### 2. Revolver
#### 3. Shotgun
#### 4. Hunting Rifle
#### 5. Flare Gun
#### 6. Flashbang
---
Ammo & Tools (Consumables)
These items are consumed on use and are essential for survival. They are found as pickups throughout the environment.
#### 1. Flashlight Batteries
#### 2. Painkillers
#### 3. Coffee Thermoses
#### 4. Manuscript Pages
---
Key Items
These are plot-related items with specific uses. They cannot be dropped or lost.
#### 1. The Clicker
#### 2. Car Keys / Gate Keys / Various Keys
#### 3. Battery (for the lighthouse?)Not a distinct item.; the game has no battery item beyond flashlights.
---
Collectibles
Collectibles are optional but unlock achievements, provide backstory, and enhance the narrative. They are persistent across saves.
#### 1. Manuscript Pages
Description: Pages from Alan’s novel “Departure” (his new manuscript). Collecting them reveals the story ahead and offers gameplay tips. There are 105 pages in total.
How to Obtain: Scattered throughout the environment, often in open drawers, on benches, or behind objects. Some are only obtainable on first playthrough; New Game+ does not reset them.
When Useful: Purely narrative and achievement. They do not affect gameplay directly but give insight into upcoming events.
Synergies: None. Full collection unlocks the “Collector’s Edition” achievement or trophy.
#### 2. Coffee Thermoses
Description: Thermos flasks that represent the game’s “hidden collectible” (like audio logs). There are 15 Coffee Thermoses total. Collecting them unlocks an achievement/trophy and a video about the making of the game.
How to Obtain: Hidden in every episode. Usually in out-of-way places. There are no hints; use guides.
When Useful: Optional. No in-game reward beyond the secret video.
#### 3. TV Shows (Bright Falls / Night Springs)
Description: Televisions that play short episodes of a fictional show (Night Springs) or news broadcasts. Viewing them provides comic relief and lore.
How to Obtain: Found in houses, trailers, and stores. Interact with them to watch. Number varies by game version.
When Useful: Purely for atmosphere. Some provide clues about the story.
#### 4. Radios
Description: Radios that broadcast a local talk show with Pat Maine. Each radio has a unique segment that fleshes out the town.
How to Obtain: Found in vehicles and buildings. Interact to listen. There are 8 radios in the original game.
When Useful: Same as TVs – flavor content.
#### 5. Signs / Posters
Description: Various environmental signs that are interactive (e.g., “Keep Off the Grass,” “Caution,” etc.). Interacting with them plays a short voice line from Alan—usually humorous or insightful.
How to Obtain: Throughout the world. There are over 50 signs in total. They are not tracked in-game but count toward an achievement.
When Useful: For the “Read ’em and Weep” achievement. Also adds personality to the game.
#### 6. Weapon Parts (Upgrade Components)
Description: Caches containing weapon mods. Found after defeating Taken or in secret areas. There are 10 upgrades available (see Upgrades section).
How to Obtain: In specific locations, often locked behind optional paths.
When Useful: Each part permanently improves the flashlight or a weapon.
---
Upgrades
Upgrades are permanent enhancements that improve the flashlight or weapons. They are discovered as plot-related items or collectibles.
#### 1. Flashlight Focus Upgrade
Description: A lens attachment that allows the flashlight to focus its beam into a concentrated point, burning darkness shields much faster.
How to Obtain: Found in Episode 2 at the Rusty Nail trailer park (in a trailer). Mandatory for progression? Not strictly, but very helpful.
When Useful: Unlocks the ability to press the right mouse button (or controller trigger) to focus. Use it to strip shields quickly. Essential for efficient combat.
#### 2. Revolver Upgrades (Parts)
Description: Four parts scattered across episodes (e.g., laser sight, speed loader, etc. – exact effects vary by version). In Remastered, upgrades are collected as “Weapon Parts” that permanently increase damage, fire rate, or reload speed.
How to Obtain: Found in hidden locations (e.g., behind breakable walls, in locked rooms). Specific to each weapon type.
When Useful: Makes weapons more effective against tougher Taken. Prioritize revolver upgrades early because you use it most.
Synergies: A fully upgraded revolver can kill weaker Taken in one headshot.
#### 3. Shotgun Upgrades (Parts)
Description: Two or three parts that increase damage, range, or reload speed.
How to Obtain: Similarly hidden. One common upgrade is in the flooded area of Episode 3.
When Useful: Improves crowd control.
#### 4. Hunting Rifle Upgrades (Parts)
Description: Two parts that improve damage and reduce recoil.
How to Obtain: One in Episode 4, another in Episode 5.
When Useful: Makes the rifle a one-shot kill on most Taken (if headshot).
Note:** Upgrades are not mandatory but highly recommended for higher difficulty settings. There are exactly 10 upgrades total across all weapons. The flashlight focus is the only non-weapon upgrade.
---
Summary Table
| Category | Item | Purpose | Rarity |
|---|---|---|---|
| Weapon | Revovler | General combat | Common |
| Weapon | Shotgun | Close-range damage | Common |
| Weapon | Hunting Rifle | Long-range sniping | Uncommon |
| Weapon | Flare Gun | Area denial + light zone | Rare |
| Weapon | Flashbang | Stuns all enemies in radius | Very Rare |
| Tool | Flashlight | Primary light source | Always |
| Consumable | Batteries | Recharge flashlight | Abundant |
| Consumable | Painkillers | Healing | Common |
| Key Item | Clicker | Puzzle solving, story progression | Unique |
| Key Item | Keys | Unlock specific doors | Single-use |
| Collectible | Manuscript Pages | Lore and achievements | 105 total |
| Collectible | Coffee Thermoses | Secret video unlock | 15 total |
| Collectible | TV Shows | Flavor | Episodic |
| Collectible | Radios | Flavor | 8 |
| Collectible | Signs | Achievement (“Read ’em and Weep”) | 50+ |
| Upgrade | Flashlight Focus | Faster shield removal | Story |
| Upgrade | Weapon Parts | Permanently improve weapons | 10 total |
Important Notes
- No inventory system: Alan can carry unlimited items? Actually, you can hold a finite number of ammo and consumables: max 3-5 painkillers, 12 revolver rounds (inventory display), etc. But you pick up items automatically within capacity.
- Ammo conservation: On higher difficulties, prioritize flashlight and melee-like attacks? There is no melee weapon; only firearm attacks after shield removal.
- Batteries: Always top off your flashlight when you see them. A dead flashlight in combat is deadly.
- Flashbang crafting: Not a feature in the original or Remastered. All items are static finds.
For exact locations of every collectible and upgrade, refer to the individual episode guides or walkthroughs. This guide covers all item types to prepare you for the darkness of Bright Falls.