Game Tips
Game Tips for Assassin's Creed Valhalla
This guide compiles the most effective tips across all aspects of the game, from combat and exploration to builds and economy. Tips are categorized by playstyle and progression level.
---
Combat Tips
#### Beginner: Master the Basics
- Learn the Parry Timing – Press L1/LB just before an enemy's attack hits. A successful parry stuns the enemy, leaving them open for a heavy attack or a finisher. Practice against low-level guards in Norway; the timing window is generous but narrows in late game.
- Use Adrenaline Slots Wisely – You start with one slot and can earn up to three. Spend adrenaline only on high-impact abilities like Harpoon Impalement (throws enemies into walls/fire) or Viking Salute (AoE damage). Recharge adrenaline by landing hits and performing finishers.
- Switch Weapons for Different Foes – Light shields work well against archers (fast blocks), while heavy shields break guards. If an enemy is blocking, use a heavy attack or the Heavy Shield Bash ability to break their defense.
- Dodge, Don't Just Block – Some attacks (red runes) are unblockable. Practice dodging sideways or backward, then counter with a light attack combo.
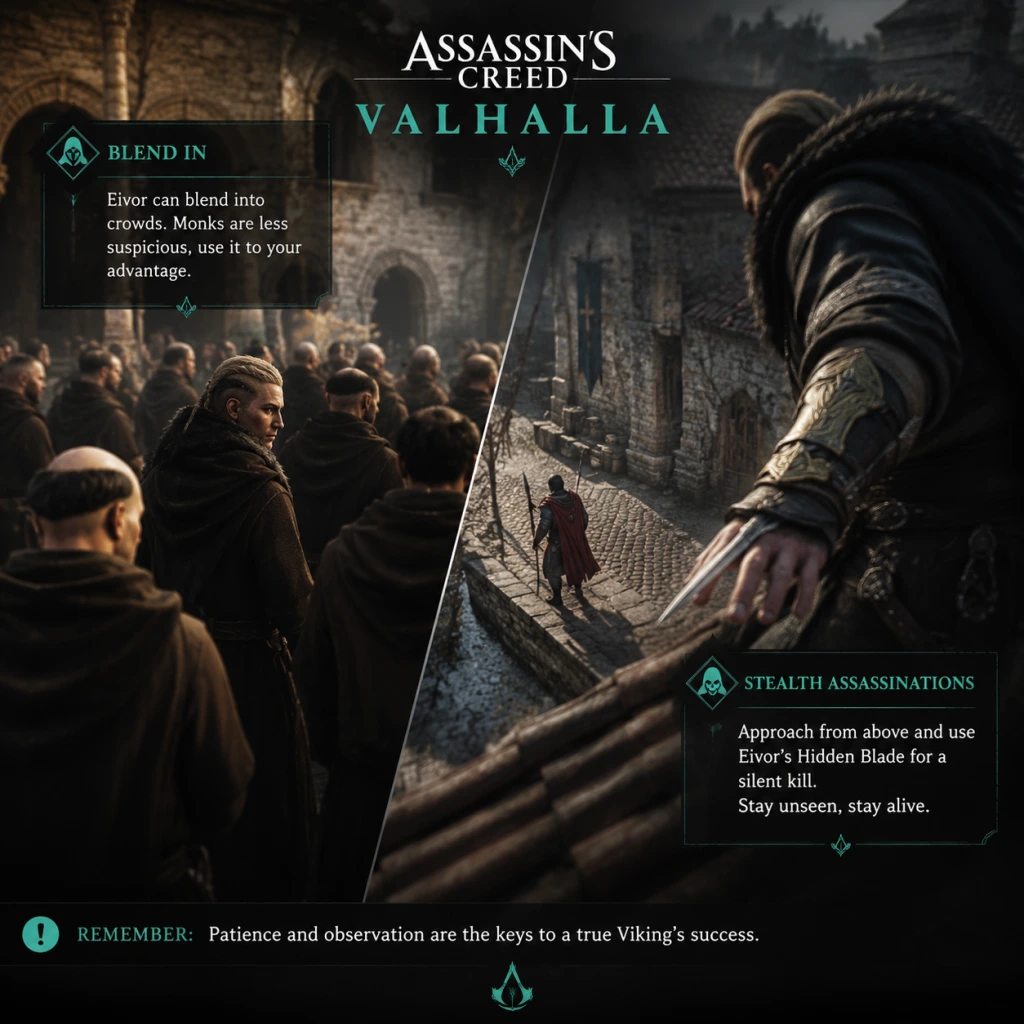
- Use Your Hidden Blade for Assassination – Even if an enemy is higher level, you can one-hit assassinate from stealth by pressing R1/RB. If they resist, use the Assassination skill from the Raven tree to perform a quick-time event (QTE) for a guaranteed kill.
- Chain Abilities with Light Attacks – The Harpoon Impalement can drag an enemy closer, then follow up with the Blinding Rush ability to disorient them. Or use Vorpal Edge (a heavy axe throw) to knock down multiple foes.
- Use the Environment – Kicking enemies off cliffs, into fire pits, or through breakable walls deals massive damage. The Kick of Tyr ability is excellent for this.
- Stun Attack Timing – After landing enough hits on a stunned enemy (white ring on health bar), you can perform a Stun Attack (press R3/RS). This instantly kills most grunts and deals heavy damage to elites. Prioritize stun damage on gear (e.g., from the Bear skill tree).
- Switch Stances – Light stance (single weapon) is fast but low damage; heavy stance (dual-wielding or two-handed weapons) is slow but high power. Use light stance against quick enemies, heavy stance against slow, shielded foes.
- Exploit Elemental Weaknesses – Fire damage ticks after the initial hit, good for DoT against health. Poison reduces enemy armor and slows movement. Combine both on a single weapon set using runes or the Toxic Flame ability.
- Critical Chance Builds – Stack crit chance (from Warrior skill tree) and crit damage (from Raven skill tree). Use weapons with high base crit (e.g., daggers, spears). In late game, the Candle of the Dead skill (from the Wolf tree) increases crit chance when low on health.
- Dual-Wield Heavy Weapons – Unlock the Dual-Wield perk from the Bear skill tree to equip two hammers or two axes. This triggers massive stun and heavy damage per hit but leaves you vulnerable. Combine with the Heavy Dual-Wield skill for even slower but stronger attacks.
- Use Grit and Health Regen – The Grit skill (Bear tree) restores health on hit after taking damage. Pair it with the Critical Health Bonus runes to stay alive in tough fights.
- Perfect Dodge – Time a dodge perfectly (just before the attack lands) to slow time and land a guaranteed critical hit. This is essential against endgame bosses and zealots.
- Synchronize All Viewpoints – They reveal the surrounding area and act as fast travel points. Always climb to the top immediately upon entering a new region.
- Use Synin's Tag Feature – When flying with Synin, press R3/RS to tag enemies, chests, and secrets. This permanently marks them on your compass and map until you interact with them. Always tag before landing.
- Look for Glowing Objects – Wealth (golden chests), Mysteries (mysterious icons), and Artifacts (blue runes) are always worth pursuing. Wealth gives gear upgrades, Mysteries give skill points or abilities, Artifacts complete collections.
- Follow Roads and Rivers – Most quests and secrets are near roads or water bodies. Riverbanks often lead to caves or abandoned camps with loot.
- Breakable Walls and Obstacles – Many secret rooms are behind weak wooden planks or stone walls. Use your heavy weapon or the Break the Wall ability (from the Bear tree) to smash through. Listen for the creaking sound.
- World Events Instead of Side Quests – These are small, self-contained stories that often reward skill points, gear, or unique items. They appear as glowing dots on the map and are worth completing for XP and lore.
- Use Your Horse to Cross Rivers – The horse can swim. Hold sprint and the horse will automatically swim across short distances. This saves time finding bridges.
- Save in Safe Spots – Manual saves are allowed anywhere, but autosaves only happen after major events. During exploration, before opening a high-level treasure (locked by summons), manually save.
- Climbing Techniques – Hold R2/RT while climbing to jump further. Angle yourself diagonally to scale sheer cliffs. Use the Falling Grace skill (Raven tree) to negate fall damage from any height.
- Rainbow Gear Locations – The Isle of Skye DLC has unique gear sets. Each piece is behind a puzzle (often involving light reflections). Look for glowing pedestals.
- The Hidden One's Armor – Obtain this by completing the Legacy of the First Blade DLC. It boosts assassination damage significantly. To get it early, prioritize this storyline after power level 90.
- Leather and Iron – Essential for upgrading armor and weapons. You'll need hundreds of each. Always loot from every rack, barrel, or slain animal. Leather comes from animals and loot crates; iron from ore nodes and chests.
- Fabric – Rare material needed to upgrade the quiver and ration pouch. Only found in small blue chests (wealth chests) and some mysteries. Never sell or dismantle fabric.
- Titanium – For high-level upgrades (quality levels silver and above). Found in metal ore nodes in higher-level regions (power 160+). Also from some river raids.
- River Raids for Materials – Unlock the River Raids feature after building the Ravenstown. These are separate areas with abundant leather, iron, and fabric. Fastest way to gather bulk materials.
- Dismantle vs Sell – Early game: dismantle common gear (white/green) for leather and iron. Late game: sell rare gear (blue/purple) for silver, as upgrade materials become abundant from raids.
- Upgrade Priority: First upgrade the quiver (more arrows), then ration pouch (healing), then hidden blade (distance for assassination), then your favorite weapon to get perks.
- Fabric Respawn Exploit – After clearing a region, fabric from blue chests does not respawn. But river raid areas reset every 2-3 raids. Use river raids to farm fabric infinitely.
- Skill Point Farming – The Cannibalism skill (Wolf tree) gives you health from dead enemies, reducing reliance on rations. Combine with Field Rations skill to double ration effectiveness.
- Use the Taker Skill – (Bear tree) Increases resources dropped from enemies. Activate during raids or at bandit camps for extra leather and iron.
- Loot Everything – Even common items like animal bones, ingots, and silver coins. Sell them at the merchant in Ravensthorpe or any settlement trader.
- Complete Contracts – At the Alliance Map in Ravensthorpe, choose contracts (shield icons) for extra silver and resources. These are repeatable.
- Sell Excess Gear – Once you have a full set of armor and a few weapons you like, sell duplicate or lower-level gear. Check the merchant's Sell tab.
- Upgrade the Trading Post – Build the Trading Post in Ravensthorpe to gain passive silver income and access to rare materials for purchase.
- Buy Resources from Merchants – Check merchants for leather, iron, and fabric. If silver is plentiful, buy them to speed upgrades. The Merchant upgrade in Ravensthorpe reduces prices.
- Sell Runes You Don't Use – Each rune can be sold for 20-50 silver. Keep only those that match your build (e.g., crit chance, stun, poison).
- Invest in the Dock and Shipyard – These unlock river raids (which yield rare materials). The rewards are worth the initial silver cost.
- Use the Sell All Feature Carefully – It automatically sells all items of a certain category. Set favorite items (press R3/RS in inventory) to prevent accidental sale of gear you want to keep.
- Trade with Other Settlements – Each settlement has unique items. For instance, in Francia (DLC) you can buy special gear. Always check new regions for exclusive merchandise.
- Spread Early Points – Put first 10 points into each tree: Raven (assassination), Wolf (ranged), Bear (melee). Unlock Assassination in Raven, Bow Focus in Wolf, and Stun in Bear. This gives flexibility for early missions.
- Must-Have Skills in the First 20 Levels: Guided Arrow (Wolf), Viking Salute (Raven), Grit (Bear). These three improve survivability and combat fluidity.
- Assassin Stealth Build – Max Raven tree. Focus on Assassination, Chain Assassination, Critical Sneak (stealth attacks crit), Instinct (increased assassination range). Gear: Hidden Ones Armor (DLC) or Mentor Set from main game. Weapons: Daggers (fast, high crit). Runes: Increased assassination damage, movement speed while crouching.
- Berserker Melee Build – Max Bear tree. Berserker's Charge, Stun Attack Mastery, Heavy Dual-Wield, Unbreakable Shield. Gear: Bear Armor (best melee defense). Weapons: Two-handed hammers or battle axes. Use Harpoon Impalement to pull enemies and Kick of Tyr for crowd control.
- Ranged Archer Build – Max Wolf tree. Arrow of Death, Guided Arrow, Bow Focus, Critical Shot. Gear: Hunter Set (bonus to headshots). Weapons: Predator Bow (long-range) and Light Bow (rapid fire). Runes: Increase bow damage, damage after kill.
- Fire Poison Crit Build – Combine Toxic Flame ability with Critical Chance runes. Level Raven for crit, Bear for stun, Wolf for poison duration. Gear: The Death-Speaker Set (gives poison on crit). Use a fast dual-wield combo (light sword + dagger). This triggers multiple elemental effects per second.
- Perfect Parry/Stun Lock Build – Max Bear's stun damage, Raven's parry window, Wolf's attack speed after parry. Gear: Jotunheim's Armor (increases stun after parry). Use a heavy shield and a light spear. Parry, then immediately heavy attack for stun lock.
- Glass Cannon Speed Build – No health upgrades, full crit and speed. Use Nodding's Spear (when at full health, all attacks are crits) from the River Raids. Pair with Candle of the Dead (crit chance when low health) – keep health at 50% for constant high crit. This is risky but devastating.
- Avoid building Church or Trading Post until after you have the core four.
- Raids Refresh – After completing a river raid area, leave the region and return; the area resets with new loot after a few in-game days.
- Bring a Jomsviking Party – Recruit a full crew (5-6) from the Barracks before raiding. They help clear camps and carry loot.
- Focus on Purple Chests – River raid chests are color-coded. Purple (rare) contain fabric and titanium; gold contain gear; blue contain leather and iron. Prioritize purple.
- Use the Longship Ram – Upgrade the ship's ram to break through stone walls in river raid areas. This opens shortcuts.
- Maximize Workers – Assign workers to the Farm (food for rations), Hunter's Hut (leather), and Mine (iron). The Mint (silver) is optional until late game.
- Send Jomsvikings on Hunts – From the Barracks, send them on missions for resources. They return after a few hours of real time. This is passive income.
- Unlock the Seer's Hut – Allows access to the Norse mythic realm (Asgard, Jotunheim) for unique skill points and gear. Build it early if you enjoy mystical storylines.
- Complete Mystery Locations – Each mystery (blue dot) gives one skill point. This is the fastest way to level in early game. Focus on regions labeled Power 20-90 first.
- Do Main Story Arcs – Each story arc (e.g., Sævine in Norway) significantly boosts power. Complete the arc's final mission to get a large XP reward.
- Avoid High-Level Regions – If an area is marked Power 200+ and you are at 50, you will one-shot enemies. Explore lower-level zones first (Grantebridgescire, Ledecestrescire).
- Wealth Chests Give Gear – Not XP. But gear upgrades increase power. Open them when you have materials to upgrade.
- Use the Synergistic Skill Bonuses – Leveling up gives one point. But some skill nodes give +1 to all attributes (e.g., Way of the Raven). Prioritize those early for a broad power boost.
- Complete World Events – Many give skill points directly. They are short and more interesting than repetitive side quests.
- Reach Power 50 before Leaving Norway – You get a Valkyrie mission that rewards a major skill point. Also, all gear found in Norway is low-tier; save upgrades for England.
- Unlock Way of the Wolf Skill – This node gives +1 to all stats and becomes accessible at level ∼120. After that, your power curve accelerates.
- Do the DLCs Early – The Siege of Paris requires around power 200, but you can enter earlier with good gear. The loot there is endgame-quality, helping you through the main story.
- Manual Save Before Boss Fights – Some boss fights have no autosave mid-combat. Save just outside the arena to reload immediately if you die.
- Use Odin's Sight (-TAB/-Option) Frequently – Press R3/RS to highlight interactable objects, enemies, and loot in a large radius. This is essential for not missing hidden paths.
- Fast Travel via Map – Unlock viewpoints to reduce travel time. You can also fast travel to your settlement and the docks.
- Adjust Difficulty Settings – In Options, you can change combat difficulty, stealth difficulty, and enemy level scaling. If you get frustrated, lower one aspect rather than quitting.
- Viking Rap Battles (Flying) Are Worth It – They award charisma points. High charisma unlocks dialogue options for better rewards in quests. You can practice at any Drink and Fly location.
- Upgrade the Ration Pouch to Max – This increases how many rations you can carry (up to 8). Rations are your only healing item, so more is always better.
- Use Fast Travel from Anywhere – Open the map and select a viewpoint or settlement. You can do this even while in combat (though you may get hit before the timer finishes).
- Complete the Tartan Collection (Cassius's Fish) – Finding all fish unlocks a special mount. The fishing method: use the Fishing Spots (ripples) at dawn/dusk for rare fish.
#### Intermediate: Combine Abilities and Stun
#### Advanced: Optimize Damage and Survivability
---
Exploration Tips
#### Beginner: Efficient Mapping
#### Intermediate: Hidden Secrets and Shortcuts
#### Advanced: Speedruns and Rare Loot
---
Resource Management
#### Beginner: What to Hoard
#### Intermediate: Farm Efficiently
#### Advanced: Max Efficiency
---
Economy & Trading
#### Beginner: Earning Silver
#### Intermediate: Best Investments
#### Advanced: Maximizing Profit
---
Builds & Skill Trees
#### Beginner: Balanced Starting Build
#### Intermediate: Theme Builds
#### Advanced: Min-Maxed Hybrid Builds
---
Settlement & Raids
#### Beginner: Build Order
1. Blacksmith – Allows gear upgrades (quality levels). Needed to progress from Silver to Gold quality.
2. Stable – Unlocks horse upgrade (speed, stamina). Essential for exploration.
3. Shipyard – Unlocks river raids and ship upgrades (ram, armor). Second priority.
4. Cattle Farm – Passive food income (rations). Helpful but not urgent.
5. Barracks – Allows recruiting Jomsvikings for defense and raids. Useful mid-game.
#### Intermediate: River Raid Strategies
#### Advanced: Settlement Efficiency
---
Progression & Leveling
#### Beginner: Power Level Tips
#### Intermediate: Efficient Skill Point Gain
#### Advanced: Power Spikes
---
General Tips
---
Summary Table: Essential Early Skills
| Skill Name | Tree | Effect | Why Get It |
|---|---|---|---|
| Assassination | Raven | Adds QTE for one-hit stealth kill | Required for stealth |
| Guided Arrow | Wolf | Switch bow to guided mode | Can hit weak spots from cover |
| Grit | Bear | Restore health on hit after taking damage | Survivability |
| Viking Salute | Raven | AoE shout that stuns enemies | Crowd control |
| Heavy Dual-Wield | Bear | Equip two heavy weapons | Massive damage potential |
| Falling Grace | Raven | Ignore fall damage | No worry about high platforms |
This guide covers everything from your first hour to endgame optimization. Use these tips to conquer England and beyond as a legendary Viking.