Getting Started
Getting Started
First Hour Walkthrough
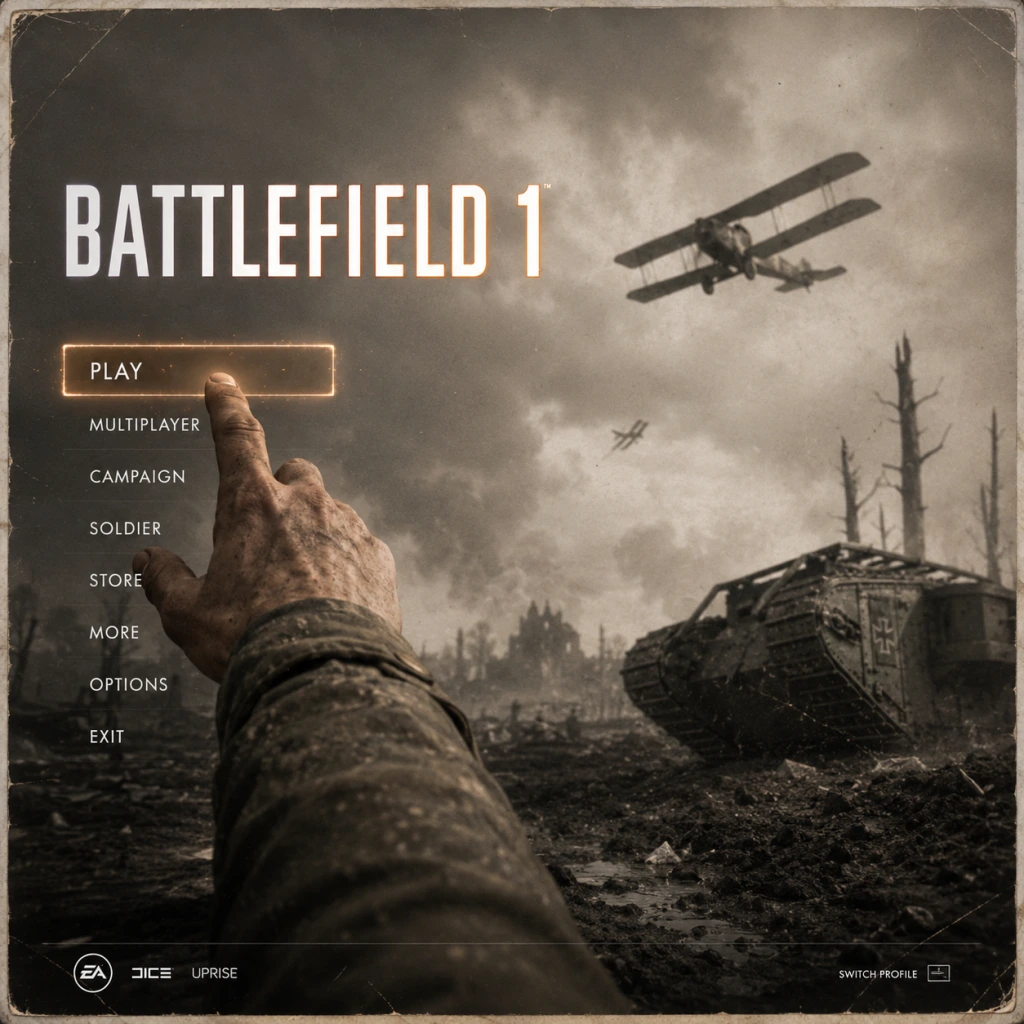
1. Launch the Game – After installation, you’ll see the main menu. Your first screen is the "Battlefield 1" logo; press any key/button to proceed.
2. Initial Setup – The game may ask you to select your language and configure audio/video settings. Stick to default for now – you can tweak later.
3. Main Menu Overview – You’ll see options: Campaign, Multiplayer, Options, Store (in-game purchases), and Extras (like War Stories). For the first hour, focus on Campaign.
4. Jump into the Prologue – Select Campaign → War Stories → Play Prologue: Steel on Steel (a short tutorial mission). This teaches basic movement, shooting, and vehicle use.
5. Complete the Prologue (approx. 10-15 minutes) – Learn to sprint (Shift on PC / L3 on console), aim down sights, reload, and use grenades.
6. Choose Your First War Story – After the prologue, you can pick any of the five stories. "Through Mud and Blood" (tanks) or "Nothing is Written" (Bedouin warrior) are good for beginners. Play the first mission to get a feel for the setting.
7. First Hour Goal – Finish at least one full mission from a War Story. This gives you a solid understanding of core mechanics (cover, health, reviving teammates, weapon handling).
Character Creation
Battlefield 1 does not have a character creation system. You play as predefined soldiers in the campaign (each story has a fixed protagonist). In multiplayer, your character’s appearance is determined by your class (Assault, Medic, Support, Scout) and the faction you’re fighting for. You can customize your soldier’s skin, uniform, and headgear via the Soldier tab in the main menu (unlocked through progression or purchased with War Bonds). Early on, just use default skins.
Controls on All Platforms
#### PC (Keyboard + Mouse) – Default Keybinds
| Action | Key |
|---|---|
| Move | W/A/S/D |
| Sprint | Left Shift |
| Crouch | Left Ctrl |
| Prone | Z |
| Jump | Space |
| Reload | R |
| Melee | F |
| Aim Down Sights | Right Mouse Button |
| Fire | Left Mouse Button |
| Switch Weapon | 1 (primary), 2 (pistol), 3 (melee/gadget) |
| Throw Grenade | G |
| Use Gadget | 3 (depends on class) |
| Spot | Q (press to mark enemy) |
| Interact / Enter Vehicle | E |
| Map | M |
| Action | Button |
|---|---|
| Move | Left Stick |
| Sprint | Click Left Stick |
| Crouch / Slide (hold) | Circle |
| Prone | Hold Circle |
| Jump | X |
| Reload | Square |
| Melee | R3 (click right stick) |
| Aim Down Sights | L2 |
| Fire | R2 |
| Switch Weapon | Triangle (tap to cycle, hold for weapon wheel) |
| Throw Grenade | L1 |
| Use Gadget | R1 |
| Spot | R1 on foot (double-tap to ask for ammo/health) |
| Interact / Enter Vehicle | Square |
| Map / Scoreboard | Touchpad (swipe up for map) |
| Action | Button |
|---|---|
| Move | Left Stick |
| Sprint | Click Left Stick |
| Crouch / Slide | B |
| Prone | Hold B |
| Jump | A |
| Reload | X |
| Melee | R3 (click right stick) |
| Aim Down Sights | LT |
| Fire | RT |
| Switch Weapon | Y (tap to cycle, hold for weapon wheel) |
| Throw Grenade | LB |
| Use Gadget | RB |
| Spot | RB on foot (double-tap for context) |
| Interact / Enter Vehicle | X |
| Map / Scoreboard | View button (two overlapping squares) |
UI Overview
The HUD in Battlefield 1 includes:
- Minimap (bottom-left corner): Shows terrain, teammate locations (blue triangles), enemy spots (red indicators), objectives, and your direction. Use it constantly.
- Health/Ammo (bottom-center): A health bar; if you see a cross icon, you can request a medic. Ammo count is displayed below for your current weapon.
- Objective Tracker (top-center): In campaign or multiplayer, shows mission objectives or flag capture points (e.g., A, B, C).
- Ammo/Equipment (bottom-right): Gadgets (e.g., bandages for medic, tripwire for scout) and grenade type.
- Score/XP (top-right): In multiplayer, shows your personal score, kills/deaths, and progress toward next rank.
- Kill Feed (top-left): Shows recent kills (enemy killed you, you killed someone, etc.).
- Dialogue/Subtitle (bottom): Subtitles and voice communications in campaign.
- Vehicle Interface: When piloting a tank or plane, a separate overlay appears showing speed, hull damage, and turret controls.
- Adjust settings: In Options → Video, set Field of View (FOV) to 90° for better peripheral awareness. On console, increase stick sensitivity slightly.
- Run the tutorial (Prologue) – skip only if you're already familiar with FPS basics.
- Play Campaign first – No stress, learn maps, vehicles, and weapons.
- Use headphones – Audio cues (footsteps, vehicle engines, bullets) are crucial.
- Bind Spot to an easy button (PC: side mouse button; console: double-tap RB/R1).
- Jumping into multiplayer without campaign – You’ll be overwhelmed by map layouts, vehicle handling, and objective flow.
- Rushing alone in multiplayer – Stick with your squad; lone wolves die quickly.
- Ignoring your class role – If you’re a Medic, heal and revive. Support, drop ammo. Don’t just kill.
- Using vehicles without practice – In campaign, try driving the Mark V tank or flying a plane in the "Over Yonder" mission first.
- Spending War Bonds immediately – Save them until you’ve unlocked Level 2-3 to see which weapon fits your playstyle.
- Standing in open areas – Use cover (walls, trenches, smoke grenades). Prone helps behind low walls.
- War Bonds – Earned via leveling up (50 per level). Spend on unlocking weapons for each class. Prioritize weapons you saw in campaign that felt good.
- Scrap – Earned by completing Daily Orders (multiplayer) or opening Battlepacks. Scrap is used to buy Battlepacks or customize weapon skins. For now, save scrap until you know what skins you like.
- XP – Use XP boosts if you have them (some earned via Battlepacks). Double XP weekends are common; activate boosts then.
- Class Rank – Playing a class earns class-specific XP. Level up Medic first (to unlock quicker revives and healing pouches).
- Assault: Unlock the M1907 SL Sweeper (rank 1, very forgiving) or Hellriegel 1915 (rank 3, but requires War Bonds).
- Medic: Unlock Selbstlader M1916 (rank 2) – reliable semi-auto.
- Support: Unlock BAR M1918 (rank 2) – low recoil, great for mid-range.
- Scout: Unlock SMLE MKIII Carbine (rank 2) – good iron sights.
- [ ] Install Battlefield 1 and any updates (check for patches).
- [ ] Run the game and complete the Prologue tutorial.
- [ ] Play at least one War Story mission (e.g., "Through Mud and Blood").
- [ ] Adjust FOV to 90° (PC) or set controller sensitivity to ~30% (console).
- [ ] Remap Spot button to an easier key/button (if desired).
- [ ] Join a squad in multiplayer (or use quick match for Conquest).
- [ ] Complete the Daily Orders in multiplayer to earn scrap.
- [ ] Unlock your first weapon for your preferred class (e.g., Hellriegel for Assault, Selbstlader for Medic).
- [ ] Learn the minimap – practice checking it every few seconds.
- [ ] Play at least three full multiplayer matches (Objective-based: Conquest or Operations).
- [ ] Review your deaths in the kill cam – note how you died and adapt.
Beginner Tip: Press M (PC) or Touchpad/View button (console) to open the full-screen map. Use it to plan routes and see enemy movements (if spotted).
Essential Early Objectives
1. Complete the Prologue and at least one War Story mission – This teaches you the fundamentals without pressure from other players.
2. Learn to Spot Enemies – Press Q (PC) or RB (Xbox) / R1 (PlayStation) to mark visible enemies. This helps your team and gives you bonus XP. Make it a habit.
3. Understand Class Roles – In multiplayer, the four main classes are:
- Assault: Anti-vehicle (rocket launcher, mines), close-range weapons.
- Medic: Healing/reviving, mid-range rifles.
- Support: Ammo resupply, light machine guns, repair vehicles.
- Scout: Snipers, spotting flares, tripwire traps.
- Start with Medic or Support – they help the team and earn points faster.
4. Play the Objective – In Conquest or Operations mode, always move toward flags (capture points). Defending or capturing earns team points and personal score.
5. Stick with Squadmates – Join a squad (default by pressing Squad menu key/button). Spawn on them and follow their lead. Solo play is much harder.
What to Do First – What to Avoid
#### ✅ Do First
#### ❌ What to Avoid
Early Resource Priorities
Resources in Battlefield 1 are:
First investments:
Avoid buying the expensive level 10 weapons until you’re comfortable.
Common Beginner Mistakes
1. Not Spotting – The number one mistake. Always spot before shooting; it helps your team and gives you assist points.
2. Over-reviving – As a Medic, don’t revive someone in open fire; throw a smoke grenade first or wait for safety. You’ll both die otherwise.
3. Standing still – Keep moving, strafing, and sliding. Snipers love stationary targets.
4. Ignoring sound – Footprints? Someone’s close. Vehicle engine? Look for tanks. Turn up volume.
5. Firing full-auto at medium range – Tap-fire or burst; recoil makes full-auto inaccurate.
6. Not using grenades – Frag grenades can clear buildings; smoke provides cover for revives or objectives. Use them often.
7. Spawning on a squadmate under fire – Check if your squadmate is in combat before spawning. You’ll die instantly.
Day-One Checklist
Bonus Tip: Watch a beginner-friendly YouTube guide by "TheBrokenMachine" or "Jackfrags" – they explain map tactics clearly.
Conclusion
Battlefield 1 rewards teamwork, situational awareness, and patience. Take your first hour to absorb the controls and atmosphere through the campaign, then step into multiplayer with a focus on supporting your squad. Avoid rushing, learn from deaths, and soon you’ll be capturing flags and calling in artillery strikes like a veteran. Good luck, soldier!