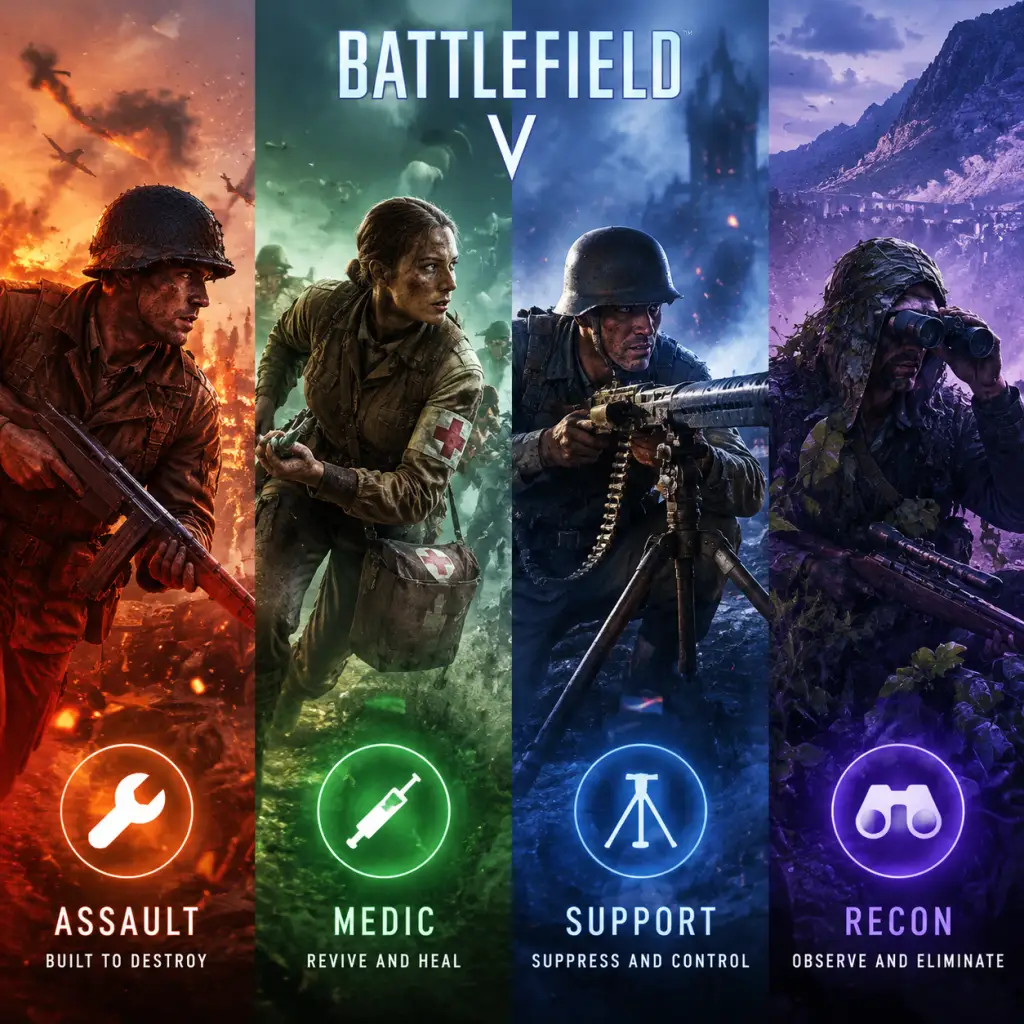
Character Skills
Character Skills Guide for Battlefield V
Battlefield V does not feature traditional RPG-style characters with unique skill trees. Instead, progression and customization come from four distinct Classes, each with a variety of Combat Roles (subclasses), Gadgets, Weapons, and Vehicle Specializations. This guide covers every class, its Combat Roles, all available gadgets, weapon specializations (the closest equivalent to active skills), vehicle abilities, and how to use them effectively.
---
Class Overview
Each class has two primary Combat Roles that alter your playstyle. You can swap Combat Roles in the Deploy screen by clicking on the class icon. Gadgets and weapons are unlocked via class rank progression and Company Coin purchases.
---
Assault Class
Role: Anti-vehicle and aggressive infantry.
#### Combat Roles
1. Vehicle Buster
- Passive Effect: Increased damage against vehicles (all weapons and gadgets deal +X% extra damage to vehicles – exact multiplier varies by patch, roughly 15-20%).
- Recommended Use: When the enemy has strong armor presence. Prioritize using the PIAT or Panzerfaust.
- Vehicle Buster: +25% explosive damage resistance when near enemy vehicles; +20% reload speed on anti-vehicle gadgets.
- Assault: Hipfire spread reduced by 30%; movement speed while crouched increased by 15%.
- Effect: Single-shot, high-damage anti-tank launcher. Fires a rocket that deals massive damage to vehicles and can destroy light fortifications.
- Cooldown: Gadget resupplies from Supply Stations or Support players; no cooldown per se but limited ammo (1 rocket per life unless resupplied).
- Upgrades: None.
- Combos: Use with AT Grenade for a quick vehicle kill. Fire Panzerfaust, then immediately throw AT Grenade to finish a tank.
- Synergies: Vehicle Buster role speeds up reload; Team up with Support for ammo crates.
- Recommended Build: Always carry both Panzerfaust and AT Grenade for a devastating anti-armor combo.
- When to Use: Engage medium to heavy tanks; avoid using on infantry due to low splash damage.
- Effect: Shoulder-fired spigot mortar that fires a high-explosive bomb. Can be fired indirectly over cover. Less velocity than Panzerfaust but more splash and area damage.
- Cooldown: Same – one shot, resupply.
- Combos: Use to bombard enemy infantry in buildings or behind cover.
- Synergies: None specific.
- When to Use: Against infantry groups or to clear fortified positions; less effective vs. tanks than Panzerfaust.
- Effect: Thrown anti-tank grenade. Sticks to vehicles. Deals heavy damage. Can also be used against infantry with moderate blast.
- Cooldown: One throw – resupply again.
- Combos: Panzerfaust then AT Grenade for instant vehicle kill on medium tanks.
- When to Use: After disabling a vehicle or for ambushes.
- Effect: Melee weapon that explodes on contact with vehicles. Extremely high damage (can one-shot light tanks). You must sprint and lunge.
- Cooldown: Consumable; one per life.
- Combos: Use with smoke to close distance.
- When to Use: Surprise attacks on tanks when you are close.
- StG 44:
- Synergies: Choose based on playstyle. For aggressive assault, pick hipfire and reload. For ranged, pick recoil reduction and bullet velocity.
- Recommended Build: For StG 44: Quick Aim (T1), Recoil Buffer (T2), Extended Magazine (T3).
- Combat Medic: +40% faster revive speed; can revive squad mates with full health; +20% faster bandage usage.
- Field Medic: +15% faster movement while healing; +20% increased range on medical syringe; +50% faster heal-on-revive (allies revived get 50 health).
- Effect: Revive downed teammates instantly to 50 health (or 100 with Combat Medic). Also can self-heal if you have bandages.
- Cooldown: No cooldown, but limited by bandages.
- Combos: Use after deploying smoke grenade to safely revive.
- Synergies: Pair with Medical Crate for team healing.
- When to Use: Always when near downed ally.
- Effect: Throwable healing item that heals one teammate over time (restores up to 100 health). Also heals yourself if thrown at your feet.
- Cooldown: Refills from ammo crates or Support; 2 pouches per resupply.
- Combos: Toss to an ally before engaging.
- When to Use: To heal teammates without getting close.
- Effect: Self-heal to 100 health over time; also used with syringe for self-revive? No – only revive others. Bandages are for self-heal.
- Cooldown: 2 bandages per life; resupplied by Support.
- When to Use: After taking damage.
- Example: MP40
- Recommended Build: Hipfire (T1), Extended Mag (T2), Light Bolt (T3) for close combat.
- Engineer: +20% faster repair tool; +20% faster building of fortifications; +1 extra explosive gadget.
- Machine Gunner: +30% faster recoil recovery on MGs; +20% suppression duration; bipod deploys 50% faster.
- Effect: Deployable crate that resupplies all gadgets and weapons (including grenades) for allies. Slowly resupplies over time.
- Cooldown: One crate; destroyed if you place another.
- Combos: Place near chokepoints.
- When to Use: At squad objectives.
- Effect: Throwable pouch that immediately gives limited ammo to one ally (one use).
- Cooldown: 2 pouches.
- Combos: Toss to a teammate in a firefight.
- When to Use: Quick resupply during combat.
- Effect: Repairs friendly vehicles and damages enemy vehicles (slow). Also rebuilds fortifications.
- Cooldown: Continuous use while equipped.
- Combos: Repair tank while it moves.
- When to Use: Always near damaged vehicles.
- Effect: Bouncing Betty antipersonnel mine. Activates when an enemy is within 3m, jumps up, and explodes.
- Cooldown: 2 mines maximum placed.
- Combos: Place near ammo crates or objectives.
- When to Use: Defending flag points.
- Vickers K, M2 Flamethrower, etc. – build on fortifications.
- T1: Quick Aim vs. Faster Reload
- T2: Extended Belt (250 rounds) vs. Light Barrel (faster fire rate)
- T3: Reduced Recoil vs. Improved ADS movement
- Recommended Build: Quick Aim, Extended Belt, Reduced Recoil for sustained suppression.
- Sniper: +30% faster bolt-action cycle; +20% decreased scope sway; +1 extra flare.
- Pathfinder: +20% faster movement while scoped; +20% longer spotting duration; can spawn on squad leaders' beacons.
- Effect: Place a beacon anywhere; squad mates can spawn on it.
- Cooldown: One beacon; destroyed after one spawn or if enemy finds it.
- Combos: Use with smoke to hide placement.
- When to Use: Flanking behind enemy lines.
- Effect: Fires a flare that reveals all enemies in a large area on the minimap. Two flares total.
- Cooldown: Resupply from Support.
- Combos: Fire before pushing objective.
- When to Use: To spot enemies in buildings or foliage.
- Effect: Deployable dummy that looks like a sniper when you are elsewhere. Not effective.
- When to Use: Rarely; can distract briefly.
- Effect: Binoculars that mark enemies for your team; can see through smoke and foliage on scope.
- Cooldown: Continuous.
- Combos: Use to designate targets for bombers.
- When to Use: From a safe vantage point.
- Ammo type that explodes on impact; limited to 1.
- T1: Quick Scope vs. Iron Sights Efficiency
- T2: Bayonet vs. Sling (faster weapon swap)
- T3: Variable Zoom vs. Faster Bullet Velocity
- Recommended Build: Quick Scope, Bayonet, Variable Zoom for aggressive sniping.
- Quick Repair: Instantly repairs 25 health; cooldown 60 seconds.
- Emergency Repair: Same as Quick Repair but auto-triggers at 10% health?
- Siren: Scare infantry; no effect.
- Smoke Launcher: Fires smoke screen.
- Case Round (HE): High explosive shell for anti-infantry.
- AP Round: Armor-piercing for anti-tank.
- Coaxial MG: Additional machine gun.
- Thermal Optics: Highlight enemies.
- Radar: Spot enemies.
- Rocket: Fire unguided rockets.
- Bombs: 250lb, 500lb.
- Nose Gun: Improved or different cannon.
- Repair: Quick repair.
- Smoke: Release smoke trail.
- Combos: Fighter planes use rockets to strafe ground targets; bombers use bombs.
- Recommended Build: For fighters: radar + rockets; for bombers: improved bombs + rear gunner (if available).
- Assault + Support: Support gives ammo; Assault uses Panzerfaust and AT Grenade combo to destroy tanks.
- Medic + Recon: Medic revives downed Recon who spots enemies from distance.
- Support + Medic: Support places ammo/health crates together for sustained defense.
- Vehicle Buster (Assault) + Engineer (Support): Assault disables vehicle; Support repairs friendly vehicle while placing mines.
- Aggressive Infantry: Assault with StG 44 (hipfire spec), Panzerfaust, AT Grenade, Smoke grenade. Combat Role: Assault (hipfire).
- Frontline Healer: Medic with MP40 (hipfire + extended mag), Medical Crate, Smoke Grenades. Combat Role: Combat Medic for fast revives.
- Suppression Machine: Support with MG 42 (extended belt + recoil), Ammo Crate, AP Mines. Combat Role: Machine Gunner.
- Counter-Sniper: Recon with Kar98k (scope spec), Flare Gun, Spotting Scope. Combat Role: Sniper for faster bolt.
- Panzerfaust: As soon as you see a tank; prioritize engine hits to slow it.
- Medical Syringe: Revive squad mates immediately; use smoke first.
- Repair Tool: Repair every friendly tank you encounter; repair while they shoot.
- Flare Gun: Before entering a flag zone to spot enemies.
- Quick Repair: Use when tank health is below 50%.
2. Tank Buster (no separate role in BFV – actually the default Assault has anti-vehicle gadgets; there is no separate role selection for Assault – but the class itself is the vehicle buster. Correction: In BFV, Assault does not have selectable Combat Roles; it's a single role with access to anti-vehicle gadgets. All classes have roles, but Assault’s role is fixed. Actually: Assault has two Combat Roles: Vehicle Buster and Assault (the standard). Wait – BFV class roles: Each class has two specializations? No: Each class has one class-specific gadget and then two combat roles (per class) that change passive abilities. Let me correct: In BFV, each class has two Combat Roles that you can choose in the deploy screen. Assault’s roles are:
- Vehicle Buster: Passive: increased explosive resistance; faster reload on anti-vehicle weapons.
- Assault: Passive: increased hipfire accuracy; faster movement while crouched.
But the official in-game names: "Vehicle Buster" and "Assault" – let’s list them properly.
#### Combat Roles (Assault)
#### Gadgets
1. Panzerfaust 100
2. PIAT
3. AT Grenade
4. Lunge Mine (Tides of War unlock)
#### Weapon Specializations (Assault Weapons)
Assault weapons (e.g., StG 44, M1 Garand, Turner SMLE) have Specialization Trees that act like skill upgrades. Each weapon has two to three tiers with two choices each. Example:
- Tier 1: Reduced recoil (Quick Aim) vs. Faster reload (Lightened Stock)
- Tier 2: Hipfire accuracy (Quick ADS) vs. Improved burst (Recoil Buffer)
- Tier 3: Extended mag (Extended Magazine) vs. Faster bullet velocity (Custom Stock)
---
Medic Class
Role: Healing and reviving teammates.
#### Combat Roles
#### Gadgets
1. Medical Syringe
2. Medical Pouch
3. Bandages
#### Weapon Specializations (Medic Weapons)
Medic weapons (SMGs like MP40, Sten, Thompson) have specializations:
- Tier 1: Quick Aim vs. Hipfire Accuracy
- Tier 2: Extended Mag vs. Faster Reload
- Tier 3: Reduced Recoil vs. Light Bolt (faster fire rate)
---
Support Class
Role: Suppressive fire, ammo resupply, and repairing vehicles.
#### Combat Roles
#### Gadgets
1. Ammo Crate
2. Ammo Pouch
3. Repair Tool
4. AP Mine
5. Fixed Weapons (buildable)
#### Weapon Specializations (LMG/MMG)
Example: MG 42
---
Recon Class
Role: Long-range scouting and headshots, spotting.
#### Combat Roles
#### Gadgets
1. Spawn Beacon
2. Flare Gun
3. Sniper Decoy
4. Spotting Scope
5. Rifle Grenade (for Self-Loading Rifles)*
#### Weapon Specializations (Sniper Rifles & SLRs)
Example: Kar98k
---
Vehicle Specializations
Tanks, Planes, and Transport vehicles have specialization trees with active abilities. Below are key ones.
#### Tank Specializations (e.g., Panzer IV, Sherman)
#### Plane Specializations (e.g., Spitfire, Bf 109)
---
Synergies & Combos
Recommended Builds by Playstyle
When to Use Each Skill
---
Conclusion
Battlefield V's skill system is deeply integrated into class gadgets, combat roles, and weapon/vehicle specializations. There are no multiple characters with unique spells – instead, your loadout defines your skill set. Master the gadgets and specialization trees to dominate the battlefield. Always adapt your role to the team's needs.