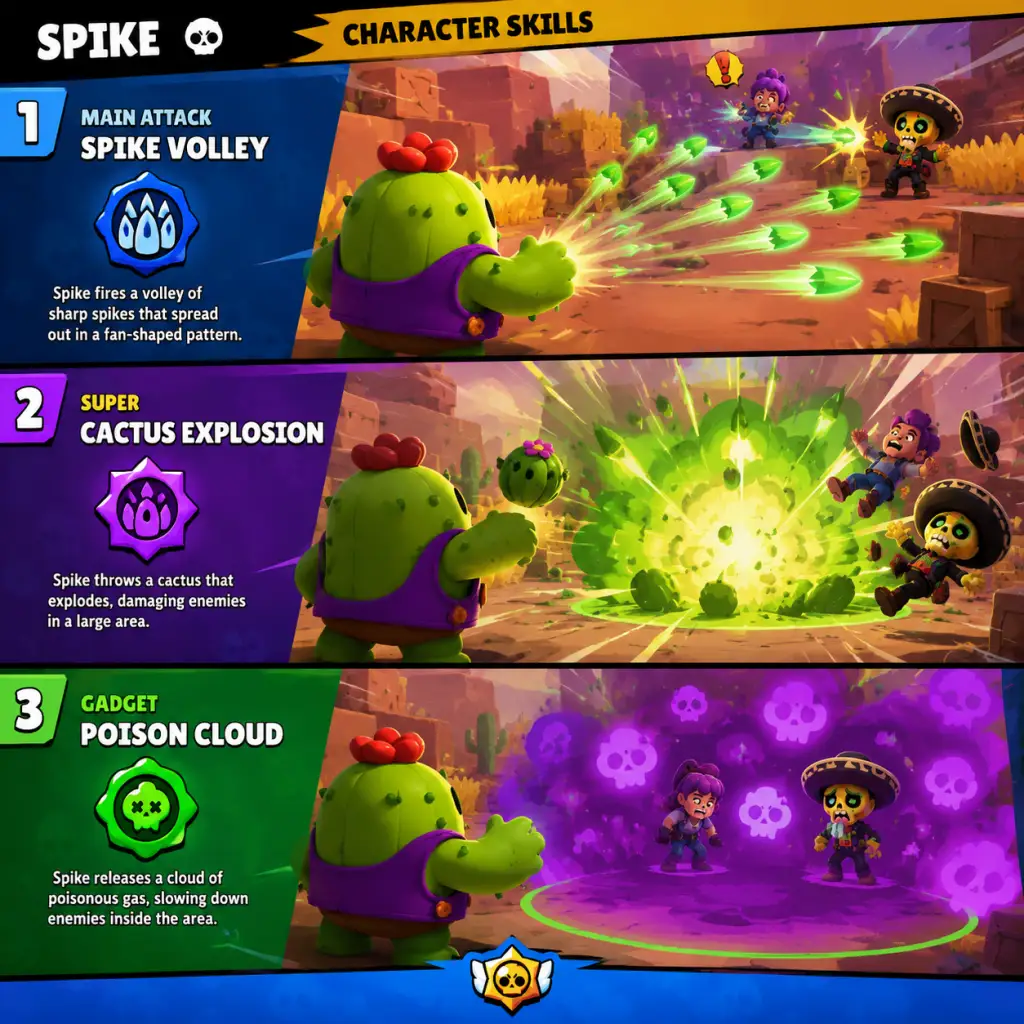
Character Skills
Character Skills Overview
In Brawl Stars, each brawler possesses a unique set of skills: a main Attack, a Super ability, two Gadgets (unlocked at Power 7), two Star Powers (unlocked at Power 9), and a Hypercharge (unlocked at Power 11, requires a Hypercharge drop). Skills define a brawler’s role, playstyle, and effectiveness in battle. This guide covers all playable brawlers as of early 2025, detailing every skill, its effects, cooldowns, upgrades, combos, synergies, and recommended builds.
Skill Types
- Attack: Primary way to deal damage. Each brawler has a distinct attack pattern (projectile, melee, area, etc.).
- Super: Charged by dealing/receiving damage or collecting Super orbs. Often has special effects (knockback, heal, area denial).
- Gadget: Active item with limited uses (3 per match). Provides utility (dash, heal, trap, etc.).
- Star Power: Passive ability that modifies attack or super, or grants a new effect.
- Hypercharge: Ultimate ability that supercharges the Super for a duration, adding extra effects like increased damage, speed, or shield.
- Level 1-6: Increase damage and health.
- Level 7: Unlock Gadgets (choose one of two).
- Level 9: Unlock Star Powers (choose one of two).
- Level 11: Equip Gears (up to 2) and unlock Hypercharge.
Upgrades
Brawler Skills Reference Table
| Brawler | Role | Attack Description | Super Description | Gadgets | Star Powers | Hypercharge | Best Build (Gadget+SP+Gear) |
|---|---|---|---|---|---|---|---|
| Shelly | Damage Dealer | Fires a spread of pellets (close range powerhouse). | Super Shell: knocks back enemies and destroys walls. | 1. Fast Forward (dash forward) 2. Clay Pigeons (next attack extends range). | 1. Shell Shock (Super slows enemies) 2. Band-Aid (heals 1800 when health < 40%). | Hypercharge: Super charges faster, deals 25% more damage, and reduces enemy speed. | Clay Pigeons + Band-Aid + Damage/Shield Gears |
| Colt | Marksman | Fires a burst of 6 bullets in a line (long range). | Super: fires a longer burst of 12 bullets that break walls. | 1. Speed Loader (reloads 2 ammo instantly) 2. Silver Bullet (next attack passes through enemies and breaks walls). | 1. Slick Boots (movement speed boost for 3s after Super) 2. Magnum Special (bullet range +11%). | Hypercharge: Super gains +20% damage and +10% bullet width. | Silver Bullet + Magnum Special + Damage/Load Gears |
| Brock | Marksman | Fires a rocket that explodes on impact (high damage, long range). | Super: fires 4 rockets in a rhythm pattern (area denial). | 1. Rocket Laces (jump to a location) 2. Rocket Fuel (Super leaves fire for 4s). | 1. More Rockets! (Super fires 6 rockets instead of 4) 2. Rocket No. 4 (attack rockets travel faster). | Hypercharge: Super rockets deal +30% damage and create larger explosions. | Rocket Fuel + More Rockets! + Damage/Gear |
| Bull | Tank | Fires a short-range shotgun spread. | Super: charges forward, damaging and stunning enemies. | 1. Stomper (stops Super and creates a shockwave) 2. T-Bone Injector (heals 1500 over 2s). | 1. Berserker (reloads faster when health < 50%) 2. Tough Guy (shield when Super is used). | Hypercharge: Super charge gains shield and damage reduction. | Stomper + Tough Guy + Shield/Health Gears |
| Jessie | Controller | Fires an orb that bounces between enemies. | Super: deploys a turret that shoots at enemies. | 1. Energize (heals turret 2000 HP) 2. Recoil Spring (turret shoots faster for 3s). | 1. Shocky (turret shots slow enemies) 2. Energize (Super turret spawns with 2000 extra HP). | Hypercharge: Super turret shoots 2 bullets at once. | Energize + Shocky + Damage/Health Gears |
| Poco | Support | Fires a wide sound wave (pierces enemies, heals allies). | Super: heals all allies in a large radius. | 1. Tuning Fork (heals allies around you for 5s) 2. Protective Tunes (removes debuffs from allies). | 1. Da Capo (attack heals allies) 2. Screeching Solo (Super deals damage to enemies). | Hypercharge: Super heals more and gives temporary shield. | Protective Tunes + Da Capo + Health/Heal Gears |
| Dynamike | Thrower | Throws two sticks of dynamite in an arc (area damage). | Super: throws a massive barrel that stuns and destroys walls. | 1. Fidget Spinner (spins and attacks nearby enemies) 2. Satchel Charge (places a bomb that detonates after time). | 1. Dyna-Jump (Super can be jumped over by allies) 2. Demolition (Super deals +1000 damage). | Hypercharge: Super stuns longer and creates fires. | Satchel Charge + Demolition + Damage/Gear |
| Bo | Controller | Fires three explosive arrows in a cone (long range). | Super: lays 3 mines that are invisible until triggered. | 1. Super Totem (places a totem that charges nearby allies' Supers) 2. Tripwire (reveals invisible enemies for 3s). | 1. Circling Eagle (super mines reveal enemies for 6s) 2. Snare a Bear (mines stun enemies). | Hypercharge: Super mines deal +50% damage and knock back. | Tripwire + Snare a Bear + Damage/Health Gears |
| Tara | Controller | Fires 3 cards in a spread (pierces enemies). | Super: pulls enemies to a point and deals damage. | 1. Power Grab (next attack deals 40% more damage) 2. Support from Beyond (spawns a shadow that attacks). | 1. Black Portal (Super spawns 2 shadows) 2. Healing Shade (allies near shadow get healed). | Hypercharge: Super pull radius larger and deals +30% damage. | Power Grab + Black Portal + Damage/Gear |
| Penny | Controller | Fires a cannonball that explodes on impact (area damage). | Super: deploys a mortar that fires bombs at enemies. | 1. Last Blast (destroys mortar and deals damage around it) 2. Thermal Visitor (mortar leaves fire for 3s). | 1. Balls of Fire (mortar bombs leave fire) 2. Master Blaster (mortar shots push enemies back). | Hypercharge: Mortar fires faster and bombs larger. | Last Blast + Balls of Fire + Damage/Health Gears |
| Barley | Thrower | Throws a bottle that leaves a damaging puddle. | Super: throws 4 bottles in an arc, leaving fire. | 1. Stick Syrup (next attack slows enemies) 2. Recharging Drink (next attack heals Barley). | 1. Medical Use (Super heals allies in fire) 2. Extra Noxious (attack puddles deal +30% damage). | Hypercharge: Super bottles leave fire that lasts longer. | Stick Syrup + Extra Noxious + Damage/Heal Gears |
| Rico | Marksman | Fires bullets that bounce off walls. | Super: fires a burst of 8 bullets that bounce multiple times. | 1. Multiball Launcher (next attack fires 2 extra bullets) 2. Bouncy Castle (Super creates a bouncy zone). | 1. Robo Retreat (movement speed boost when health < 40%) 2. Super Bouncy (bullets bounce one more time). | Hypercharge: Super bullets deal +25% damage and bounce more. | Multiball Launcher + Super Bouncy + Damage/Gear |
| Darryl | Tank | Fires a double-barrel shotgun (2 shots). | Super: rolls inside his barrel, knocking enemies back and reducing damage taken. | 1. Tar Barrel (leaves oil that slows enemies) 2. Recoiling Rotator (spins and shoots while rolling). | 1. Steel Hoops (takes 30% less damage while rolling) 2. Rolling Reload (reloads 2 ammo after Super). | Hypercharge: Super roll deals 40% more damage and stuns. | Tar Barrel + Steel Hoops + Shield/Damage Gears |
| Pam | Support | Fires a spread of scrap metal (medium range). | Super: places a healing station that heals allies in range. | 1. Pulse Module (healing station blasts enemies) 2. Scrapsnatcher (steals enemy ammo). | 1. Mama's Hug (healing station heals Pam extra) 2. Mama's Squeeze (healing station deals damage to nearby enemies). | Hypercharge: Healing station pulses heal 50% more. | Pulse Module + Mama's Squeeze + Health/Heal Gears |
| El Primo | Tank | Fires a flurry of punches (short range, 4 hits per attack). | Super: jumps into the air and lands on a location, damaging and knocking enemies back. | 1. Suplex (grabs an enemy and throws them) 2. Meteor Rush (Super leaves fire on landing). | 1. El Fuego (Super leaves fire) 2. Meteorite (Super landing deals 20% more damage). | Hypercharge: Super jump deals 50% more damage and knocks back farther. | Suplex + El Fuego + Shield/Health Gears |
| Mortis | Assassin | Swipes his shovel twice in a wide arc (dash attack, reloads slowly). | Super: summons a swarm of bats that damage and heal Mortis. | 1. Combos (next attack hits 3 times) 2. Survival Shovel (heals 2000 when Super kills an enemy). | 1. Creepy Harvest (heals 1800 for each enemy hit) 2. Coiled Snake (dash range increases when ammo full). | Hypercharge: Super bats deal +30% damage and heal more. | Survival Shovel + Creepy Harvest + Health/Damage Gears |
| Crow | Assassin | Fires a dagger that poisons enemies over time. | Super: jumps into the air and drops poison daggers on a large area. | 1. Defense Booster (reduces damage taken by 40% for 3s) 2. Slowing Toxin (poison slows enemies). | 1. Extra Toxic (poison reduces healing by 40%) 2. Carrion Crow (deals extra damage to low-health enemies). | Hypercharge: Super poisons last 50% longer and damage +20%. | Slowing Toxin + Extra Toxic + Damage/Shield Gears |
| Spike | Marksman | Fires a cactus that explodes into a burst of spikes (area damage). | Super: places a cactus that explodes into a shower of spikes dealing damage over time. | 1. Popping Pincushion (fires 6 spikes instantly) 2. Life Plant (places a cactus that heals allies). | 1. Fertilize (Super leaves a healing area) 2. Curveball (spikes curve towards enemies). | Hypercharge: Super spikes spawn more and deal +25% damage. | Popping Pincushion + Curveball + Damage/Heal Gears |
| 8-Bit | Marksman | Fires a stream of laser bullets (very high damage, slow speed). | Super: places a booster that increases damage of allies within range. | 1. Cheat Cartridge (next attack deals 3x damage) 2. Extra Life (revives once per match with 25% health). | 1. Boosted Booster (booster range increased) 2. Plugged In (movement speed not reduced while attacking). | Hypercharge: Booster gives shield and lasts longer. | Cheat Cartridge + Boosted Booster + Damage/Health Gears |
| Collette | Damage Dealer | Swipes with an eraser that deals a percentage of max health (scales with opponent's HP). | Super: dashes through enemies, dealing damage and healing. | 1. Massage (heals 1500 over 3s) 2. Push It (Super pushes enemies back). | 1. Push It (Super pushes enemies back) (note: same name as gadget, but different) Actually SP: Mass Attack (attack hits enemies behind target) or… Wait need correct. Collette's SP: "Momentum" (Super charges faster) and "Massive Damage" (attack deals +50% damage to brawlers with full health). | Hypercharge: Super deals +40% damage and heals more. | Massage + Massive Damage + Damage/Health Gears |
| … | … | … | … | … | … | … | … |
Combos and Synergies
- Tank + Healer: e.g., Bull + Poco. Bull charges in, Poco heals from distance. Use Poco's Protective Tunes to remove stuns.
- Thrower + Wall: Dynamike or Barley behind walls. Pair with a brawler that can defend them (like Jessie's turret).
- Assassin + Control: Mortis or Crow with Bo’s mines. Bo reveals enemies, then assassins dive.
- Hypercharge Synergies: Combine Hypercharges with team-wide buffs (e.g., 8-Bit's booster + Pam's healing station for ultimate sustain).
- Tanks (Bull, Darryl, El Primo): Shield + Health Gears; Gadget that provides extra survivability (e.g., Stomper for Bull, Tar Barrel for Darryl). Star Power: Tough Guy or Steel Hoops.
- Marksmen (Colt, Brock, Rico): Damage + Reload Speed Gears; Gadget that enhances range or burst (Silver Bullet, Rocket Laces). Star Power: Magnum Special or More Rockets!.
- Assassins (Mortis, Crow, Leon): Damage + Health Gears; Gadget that provides escape or damage (Cloaking for Leon, Survival Shovel for Mortis). Star Power: Coiled Snake for Mortis, Extra Toxic for Crow.
- Throwers (Dynamike, Barley, Tick): Damage + Shield Gears; Gadget that controls area (Stick Syrup, Satchel Charge). Star Power: Demolition for Dynamike, Extra Noxious for Barley.
- Support (Poco, Pam, Byron): Heal + Health Gears; Gadget that heals or buffs (Tuning Fork, Pulse Module). Star Power: Da Capo for Poco, Mama's Squeeze for Pam.
- Controllers (Jessie, Bo, Tara): Damage + Health Gears; Gadget that deploys or reveals (Super Totem, Energize). Star Power: Snare a Bear for Bo, Black Portal for Tara.
- Attack: Always prioritize manual aim for accuracy. Use auto-aim at close range or when dodging.
- Super: Save for crucial moments (team fights, securing kills, breaking walls). For supports, use to heal or control areas.
- Gadget: Use early to gain advantage (e.g., dash to dodge, heal to survive). Manage charges wisely—3 per match.
- Star Power: Passive, but adapt choice based on map and mode. e.g., Band-Aid for aggressive Shelly in Gem Grab.
- Hypercharge: Activate when you have a clear combo (e.g., team grouped, enemy low). Can turn the tide of a match.
- Prioritize unlocking Gadgets at Power 7 for your main brawlers.
- At Power 9, choose Star Powers based on preferred playstyle (check guides).
- At Power 11, equip Gears (2 slots) and Hypercharge. Best Gears: Damage, Shield, Health, Heal (for supports), Gadget Charge (if applicable).
Recommended Builds by Role
When to Use Each Skill
Upgrades and Progression
This guide covers the core skill system for every brawler. For the most current stats and new brawler releases, always consult the official Brawl Stars patch notes.