Game Tips
Call of Duty: Modern Warfare II (2022) - Game Tips
This guide provides a comprehensive collection of tips to improve your performance in Call of Duty: Modern Warfare II. Tips are grouped by category and include beginner, intermediate, and advanced advice. Each tip includes an explanation of why it works and when to use it.
---
1. Beginner Tips
1.1 Adjust Your Controller Sensitivity
- Tip: Start with a sensitivity of 5–6 for horizontal and 5 for vertical. Lower sensitivity helps with aiming accuracy until you are comfortable.
- Why: Higher sensitivity can cause overcorrection. Beginners benefit from smooth, controlled aim.
- When to use: During your first few hours; gradually increase as you improve.
- Tip: Assign multiple operators to different loadouts. If one operator dies, you can switch to a backup without losing killstreak progress.
- Why: In modes like DMZ or Warzone 2.0, this prevents losing everything with one death.
- When to use: Always in DMZ/Warzone; for multiplayer, it’s less critical.
- Tip: Tap sprint to start, then slide by pressing crouch while sprinting. Use slide cancel (sprint + slide + jump) to reset tactical sprint.
- Why: Slide cancelling allows faster movement and breaks enemy aim assist. It’s a core technique for aggressive play.
- When to use: In gunfights to dodge shots or quickly reposition.
- Tip: Level up one assault rifle (e.g., M4) to unlock attachments rather than switching guns every match.
- Why: A fully modded M4 is versatile and competitive in most situations.
- When to use: Until you reach weapon level 15–20, then experiment.
- Tip: Always aim down sights (ADS) when approaching corners or doorways where enemies are likely to be.
- Why: ADS reduces hip-fire spread and allows faster reaction time.
- When to use: On maps with narrow corridors (e.g., Breenbergh Hotel, Farm 18).
- Tip: Press the mount button near a surface to steady your weapon. This reduces recoil and flinch.
- Why: Mounting provides a significant stability bonus, making long-range kills easier.
- When to use: When holding long sightlines or using LMGs/snipers. Avoid mounting in close quarters where you need mobility.
- Tip: In multiplayer, use the Silent Footsteps field upgrade to move quietly and flank enemies.
- Why: Sound is crucial – enemies often rely on footsteps to detect you. Silent movement allows surprise attacks.
- When to use: Before pushing into enemy spawn, capturing an objective, or clearing a building.
- Tip: With assault rifles like the Kastov 762, aim at upper chest so that recoil naturally climbs to the head.
- Why: This maximizes damage output and increases headshot chance.
- When to use: In medium-to-long range engagements.
- Tip: Tactical sprint (double-tap sprint) is faster but delays your ADS time. Use it only when crossing open areas.
- Why: If you enter a gunfight while tactical sprinting, you’ll lose the first shot.
- When to use: To rotate between cover, not before peeking.
- Tip: When climbing onto an object, jump just before the mantle animation finishes. This propels you forward.
- Why: It allows you to reach higher ledges faster and throws off enemy aim.
- When to use: To surprise enemies on headglitches or to vault over walls quickly.
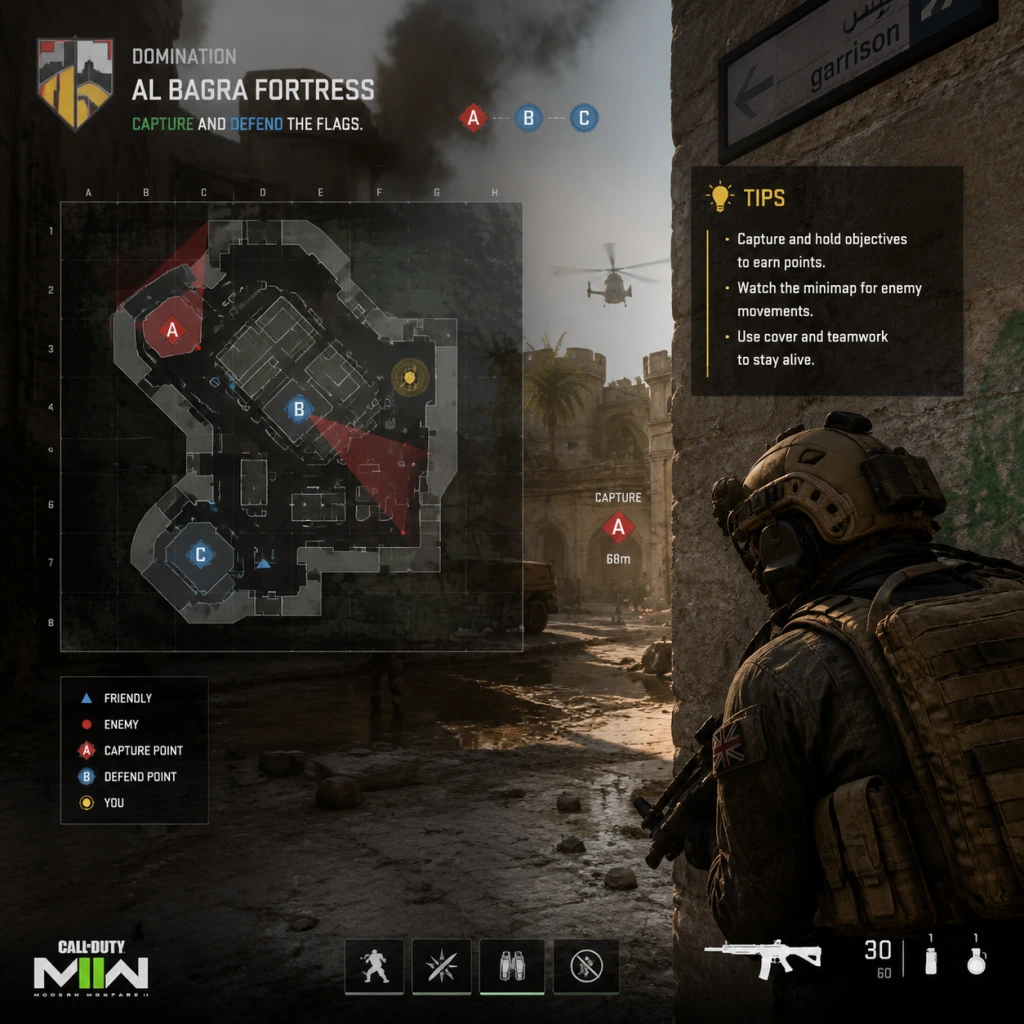
- Tip: Learn high-traffic areas and tactical advantages (e.g., the restaurant roof on Mercado Las Almas). Holding these positions gives you line of sight over multiple lanes.
- Why: Map control is key to victory. A strong position lets you react to enemies instead of running into them.
- When to use: In objective modes like Domination to cover flags.
- Tip: Sprint, slide, then immediately jump and ADS. This cancels the slide, allowing you to shoot faster while still moving.
- Why: Reduces the time between moving and shooting, making you a harder target.
- When to use: In close-quarters combat or when rounding corners.
- Attachments:
- Why: Balanced for recoil control, ADS speed, and ammo capacity. The 60-round mag reduces reloads.
- When to use: All-around for any mode.
- Attachments:
- Why: Maximizes hip-fire accuracy and movement speed; the laser helps with snap-aim.
- When to use: In tight maps like Shipment or for rushing objectives.
- Attachments:
- Why: The laser and stock improve ADS speed; the pro bolt increases rechamber speed for follow-up shots.
- When to use: In Ground War or any long-range map.
- Attachments:
- Why: Dragon’s Breath adds fire damage, ensuring one-shot kills at close range.
- When to use: In close-quarters maps or for completing shotgun challenges.
- Tip: Toss a stun grenade into a room before entering. It slows enemies and prevents them from aiming well.
- Why: Even if they survive, they are easy kills.
- When to use: When pushing a building with unknown enemies.
- Tip: Place deployable cover on rooftops or long sightlines to create instant headglitches.
- Why: Provides protection while you line up shots. Enemies have to hit a small head hitbox.
- When to use: In Ground War or Invasion when holding a position.
- Tip: Place a Trophy System near objectives (flags, bombs) to destroy incoming grenades and rockets.
- Why: It counters enemy explosives and protects teammates on the objective.
- When to use: Hardpoint, Headquarters, Domination.
- Tip: Use Ghost (stealth) with Dead Silence field upgrade to remain off UAV and silent.
- Why: Perfect for flanking and sneaking behind enemy lines.
- When to use: In modes where UAVs are common (TDM, Kill Confirmed).
- Tip: Choose UAV, Counter UAV, and Cluster Mine for low-cost streaks that help the team. Save high streaks for personal plays.
- Why: UAV reveals enemy positions, counter UAV disables theirs, cluster mine area-denies objectives.
- When to use: In Domination or Hardpoint.
- Tip: Use the Overclock perk to reduce field upgrade cooldown. Pair with Tactical Insertion for continuous spawn control.
- Why: Allows you to place Tac Insert and easily die/redeploy without losing streaks.
- When to use: In objective modes to keep pressure.
- Tip: In Domination, Hardpoint, etc., select scorestreaks instead of killstreaks. Score from objectives contributes to streaks.
- Why: You earn streaks by playing the objective, not just kills. Supports team play.
- When to use: Always in objective-based multiplayer modes.
- Tip: In DMZ, always keep at least $5,000 cash for a self-revive pistol from buy stations.
- Why: If you go down, you can revive yourself without teammate help.
- When to use: Whenever exploring high-risk areas or solo.
- Tip: Open the Tac Map (default M on PC) to see enemy pings, objective locations, and friendly positions.
- Why: Situational awareness prevents surprises and helps coordinate pushes.
- When to use: Before rotating, after respawning, or when planning a flank.
- Tip: In DMZ, orange and red chests contain better loot. Key locations: police stations, hospitals, and strongholds.
- Why: Better weapons and armor plates increase survival.
- When to use: Begin each DMZ match by looting high-tier areas quickly.
- Tip: Use the underground tunnels and riverbeds to move between regions without being seen.
- Why: Avoids open areas where snipers and AI patrols are dangerous.
- When to use: When moving across the map with valuable loot.
- Tip: Activate double weapon XP tokens before a match where you plan to grind a specific gun.
- Why: Token duration is match-time, so play longer matches (Ground War) to maximize.
- When to use: During the first 10 levels of a weapon to unlock attachments quickly.
- Tip: Each day offers three challenges. Completing them gives significant battle pass and weapon XP.
- Why: Efficient progression without added grind.
- When to use: Log in daily and knock them out in a couple of matches.
- Tip: Some attachments are shared across weapon classes. Level up weapons like the M4 and Lachmann-556 to unlock barrels and grips for other ARs.
- Why: Saves time rather than grinding each gun individually.
- When to use: When building a universal loadout for multiple guns.
- Tip: Ping an enemy quickly before shooting through thin walls. Follow the red marker to track their movement.
- Why: Helps land shots through cover even if they move.
- When to use: On maps with many penetrable surfaces (e.g., Shoothouse).
- Tip: Use SAM-57 launcher to shoot down enemy UAVs and helicopter reinforcements.
- Why: Denies intel to opponents and weakens AI threat.
- When to use: In DMZ when defending a stronghold or exfiling.
- Tip: In close quarters, drop shot (prone) to break enemy aim; at medium range, jump shot to gain head height advantage.
- Why: Different situations require different evasive maneuvers.
- When to use: Drop shot when enemy is sprinting toward you; jump shot when you peek a corner and expect headglitch.
- Tip: The M13B has a very high rate of fire, which causes heavy flinch on enemies. Use it to win duels even if you get hit first.
- Why: Flinch causes enemy aim to stray, giving you time to kill them.
- When to use: In open engagements where you cannot mount.
- Tip: Throw a decoy grenade to simulate fake gunfire in one direction, then flank from the opposite side while Ghost keeps you off radar.
- Why: Creates confusion; enemies often turn toward the decoy noise.
- When to use: In Search and Destroy or when attacking a well-defended objective.
- Tip: Set field of view to 100–110 for better peripheral vision. This helps see enemies on the edge of the screen.
- Why: Wider FOV gives more situational awareness at the cost of slightly smaller targets.
- When to use: Preferred for all modes; be cautious if you feel motion sick.
- Tip: Disable motion blur and weapon blur in graphics settings. This makes the image clearer during fast movements.
- Why: Reduces visual noise and improves target acquisition.
- When to use: Always; it has no competitive advantage.
- Tip: On PlayStation and Xbox, you can disable crossplay in settings to avoid stronger PC players (though wait times may increase).
- Why: PC players often have higher frame rates and can use mouse+keyboard.
- When to use: If you feel outmatched in lobbies; re-enable for faster matchmaking in less populated modes.
- Tip: Always loot armor plates first. Even a small cash pile is useless if you cannot survive.
- Why: Armor allows you to tank extra shots; cash can wait.
- When to use: Immediately after dropping; fill inventory before looting cash.
- Tip: First purchase should be a self-revive, then a UAV or killstreak if you have leftover cash.
- Why: Self-revive is essential for solo survival.
- When to use: At any buy station with >$5,000.
- Tip: Collect keycards from killed AI and use them to enter locked strongholds. These contain high-tier loot.
- Why: Strongholds have guaranteed orange chests and armor boxes.
- When to use: In DMZ when you need better gear.
1.2 Use the Active Duty Operator System
1.3 Learn the Basic Movement: Slide and Sprint
1.4 Stick to One Weapon Type Early On
---
2. Combat Tips
2.1 Pre-aim Common Angles
2.2 Master the Mount Mechanic
2.3 Use Dead Silence Strategically
2.4 Aim for Upper Chest/Head with High-Recoil Weapons
---
3. Movement & Positioning
3.1 Use Tactical Sprint Sparingly
3.2 Mantle Jump to Gain Height
3.3 Play the “Power Positions” on Each Map
3.4 Slide Cancel for Faster Aim
---
4. Weapons & Loadouts (Builds)
4.1 Universal Assault Rifle Build (M4)
- Barrel: 14" Carbine Shroud
- Optic: Cronen Mini Red Dot
- Underbarrel: FSS Sharkfin 90
- Magazine: 60-Round Mag
- Rear Grip: Phantom Grip
4.2 SMG Build for Aggressive Play (Fennec 45)
- Barrel: ZLR 18" Deadfall
- Laser: VLK LZR 7MW
- Stock: Agile Assault-7
- Magazine: 45-Round Drum
- Rear Grip: Fennec Rubber Grip
4.3 Sniper Build for Quick Scoping (SP-X 80)
- Barrel: SP-X 80 17.5" Barrel
- Laser: FSS OLE-V Laser
- Stock: Schlager Peak S1
- Bolt: SP-X 80 Pro Bolt
- Rear Grip: Schlager Match Grip
4.4 Shotgun One-Shot Kit (Expedite 12)
- Barrel: 18" Demo Field Barrel
- Pump Grip: VLK 6X Pump Grip
- Stock: Sawed Off Mod
- Ammunition: 12 Gauge Dragon’s Breath
---
5. Equipment & Field Upgrades
5.1 Use Stun Grenades to Clear Rooms
5.2 Deployable Cover for Snipers
5.3 Field Upgrade: Trophy System
---
6. Perks & Killstreaks
6.1 Perk Package: Ghost + Dead Silence
6.2 Killstreak Selection for Objective Modes
6.3 Overclock Field Upgrade Faster
---
7. Economy & Scorestreaks (Scorestreak System)
7.1 Switch to Scorestreaks in Objective Modes
7.2 Save Points for Self-Revive in DMZ
---
8. Exploration & Map Knowledge
8.1 Use the Tac Map Frequently
8.2 Learn Loot Tiers in DMZ
8.3 Safe Spots on Al Mazrah (DMZ)
---
9. Resources & Progression
9.1 Use Weapon Tokens to Boost XP
9.2 Complete Daily Challenges for Bonus XP
9.3 Unlock Attachments by Leveling Multiple Weapons
---
10. Advanced Strategies & Optimizations
10.1 Utilize the “Ping” System for Wallbangs
10.2 Airspace Control with SAM-57 (DMZ)
10.3 Drop Shotting vs. Jump Shotting
10.4 Use the M13B’s High Fire Rate for Flinch
10.5 Tactical Camouflage (Ghost) with Decoy Grenades
---
11. Platform-Specific Tips
11.1 PC: Use FOV Slider
11.2 Console: Turn Off Motion Blur
11.3 Use Crossplay with Care
---
12. Economy & Loot Management (Warzone/DMZ)
12.1 Prioritize Armor Plates Over Cash
12.2 Use Buy Station Prioritization
12.3 Stockpile Keycards for Strongholds
---
Conclusion
Mastering Call of Duty: Modern Warfare II requires practice, map knowledge, and smart use of game mechanics. Start with the beginner tips to build a foundation, then integrate intermediate and advanced techniques as you improve. Adjust your loadouts and strategies based on the mode and map. Good luck, soldier!