Getting Started
Getting Started Guide for Diablo III
Welcome to Sanctuary, new Nephalem! This guide is designed to get you through your first hour of Diablo III with confidence. We'll cover character creation, controls on every platform, the user interface, your essential early goals, what to avoid, and a day-one checklist. Let's dive in.
Character Creation
When you launch the game for the first time, you'll be prompted to create a character.
1. Choose your class. Diablo III has seven classes. For beginners, Barbarian (tanky melee), Monk (fast melee), or Demon Hunter (ranged damage) are easiest to pick up. Wizard and Witch Doctor are also fine but require more mana/resource management. Crusader (requires Reaper of Souls) is a heavy armor tank. Necromancer (requires DLC) is a pet-based caster.
2. Select a name and gender. Names must be unique on your account. Gender is purely cosmetic—it doesn't affect stats or skills.
3. Core vs. Hardcore. For your first character, choose Normal (Core). Hardcore means permadeath—one death and the character is gone. Beginners should avoid Hardcore.
4. Season vs. Non-Season. On PC, seasons offer cosmetic rewards and a fresh economy. For learning the game, Non-Season is simpler. On consoles, seasons work similarly—but you can start in either; just be aware that seasonal characters compete for leaderboards.
Your First Hour: Walkthrough
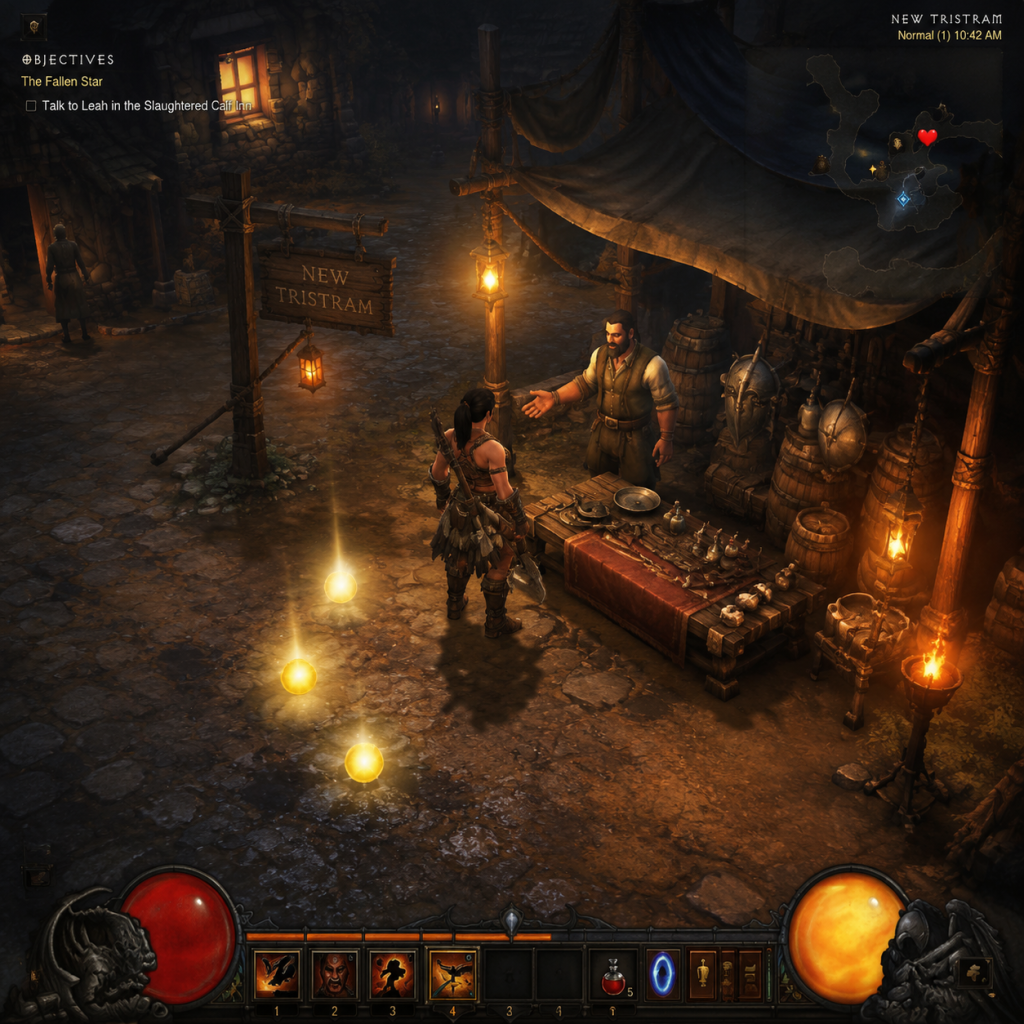
After the cinematic, you begin in New Tristram (Act I). A quest arrow points you to the central town.
- Talk to Deckard Cain to start the quest "The Fallen Star." Follow the arrow out of town into the Old Ruins. Kill zombies and weak enemies—your starting skill (e.g., Bash for Barbarian) is enough.
- Pick up everything that drops: gold, items, health potions. You can use health potions by pressing Q (PC) or the corresponding button on console.
- After a short path, you'll encounter the Skeleton King's forces. Just hack through. Reach a large gate—click on the lever to open it. Inside is a Hearth (campfire). Interact with it to light the way and get a checkpoint.
- Continue to the Cathedral. Enter and follow the linear path. You'll see Captain Haedrig. Talk to him; he'll ask you to charge his anvil by killing nearby enemies. Do that—watch for a special Champion pack (blue-named enemy with minions). Kill them carefully—kite them if needed.
- After charging the anvil, Haedrig joins your cause. Exit the cathedral and return to New Tristram. Talk to Cain and Haedrig again—you'll unlock the Blacksmith (Haedrig) at his forge in town.
- Salvage any white or blue weapons/armor you've collected. On PC, right-click items in inventory and select "Salvand"; on console, press the appropriate button (Y/Triangle). This gives you Crafting Materials (common debris, arcane dust).
- Equip better gear as you find it. Don't get attached to low-level items.
- Continue to the Old Mill area—follow the quest marker. You'll fight more monsters and eventually find the Fallen Star impact crater. Watch for a large boss-like Corpse of the Unclean—simply kill it.
- Return to town. Next quest: The Legacy of Cain. You'll need to go to the Cemetery of the Forsaken. Enter the Defiled Crypt—it's dark. Find the Jar of Souls event (not required but good XP). Deeper in, you'll find Leoric's Crown—pick it up.
- Return to Cain. He'll reveal that you must find the Skeleton King. Follow the quest to Leoric's Manor. The dungeon is linear. At the end, you'll face the Skeleton King—his fight has a few patterns: he charges, summons skeletons, and spins. Dodge his charge and hit him when he's stunned. He's not too tough. Defeat him to finish Act I's first major boss.
- Left mouse button: Move, interact, primary skill.
- Right mouse button: Secondary skill (set in skills menu).
- Number keys 1–4: Skill slots 3–6.
- Q: Health potion.
- Tab: Toggle map overlay.
- I: Inventory.
- C: Character sheet (stats).
- M: Full world map.
- Spacebar: Dodge roll? No, that's only in console versions. PC has no dodge roll.
- Shift + left click: Force stand still to attack without moving.
- Hold left click: Move to cursor continuously.
- Left stick: Move character.
- Right stick: Aim/rotate camera (limited).
- Face buttons/triggers: Skills (assigned in menu). Typically: Square/X = skill 1, Triangle/Y = skill 2, Circle/B = skill 3, Cross/A = skill 4, L1 = skill 5, R1 = skill 6.
- L2 (left trigger): Health potion (or press Up on D-pad).
- Options/Menu: Start/Settings.
- Touchpad (PS4/5) or View button (Xbox): Map overlay.
- Down on D-pad: Toggle loot name display.
- Dodge roll: Tap R3 (push right stick) in combat.
- Left stick: Move.
- Right stick: Aim/camera.
- A/B/X/Y: Skills (assignable).
- L/R: Skills 5 and 6.
- ZL: Health potion (or Up on D-pad).
- ZR: Dodge roll (tap).
- - (minus): Map.
- + (plus): Inventory/character menu (hold for pause).
- D-pad: Loot filter, quick inventory.
- Health Globe: Top-left corner of screen (PC) or left side (console). Green orb shows your health. Low health = slowly regenerate? No, health regenerates only through potions, health globes from enemies, or skills.
- Resource Globe: Just below health globe. Blue for Arcane Power (Wizard), Red for Fury (Barbarian), Purple for Mana (Witch Doctor), Yellow for Hatred/Disciple (Demon Hunter), Light blue for Spirit (Monk), Green for Wrath (Crusader), Cyan for Essence (Necromancer). You spend resource on skills; it regenerates via attacks or over time.
- Skill Bar: Bottom center of screen (PC) or bottom edge (console). Shows your 6 skills (including left/right click on PC). Skills unlock as you level up. You can drag skills from the Skills menu (opened with S on PC) onto slots.
- Mini-map: Top-right corner (PC) or upper-right (console). Shows enemies as red dots, quest objectives as blue diamond, teammates as green dots. White dots are friendly NPCs.
- Quest Tracker: Right side (PC) or left side over the map. Lists current act quest and optional objectives.
- Inventory (I key): Pressing I opens grid-based inventory. Each item takes up squares. Equipped items shown on paper doll. Right-click to equip or unequip.
- Character Sheet (C): Shows your stats: damage, toughness, healing, primary attributes (Strength, Dexterity, Intelligence, Vitality). Vitality affects health; main attribute varies by class.
- Town Portal (T key on PC, or button on console): Creates a portal back to town. Use it to sell, salvage, repair (though gear doesn't degrade), or gamble with Kadala later.
- Pick up all gold—you'll need it for the Mystic (enchanter) later.
- Salvage items you don't use. This gives you crafting materials that are essential for the Blacksmith and Jeweler.
- Repair your items? Actually weapons and armor never break in Diablo III, so repairing is not needed.
- Use health potions liberally—they drop frequently. Bind a potion key you can reach easily.
- Kill every elite pack (blue or yellow name) you see. They drop better loot and more gold.
- Break pots, barrels, and urns for extra gold and sometimes items.
- Visit the Blacksmith every time you return to town to salvage and craft if you have spare materials.
- Don't hoard low-level items. Your inventory is limited (60 slots). Salvage or sell everything you don't equip.
- Don't waste gold on item purchases from vendors. Early gear drops are better. Only buy gems or recipes if needed.
- Don't use your respec options too early. Skills can be changed freely (no cost) until you reach level 70? Actually you can change skills anytime for free—but you only have limited skill slots. Experiment but don't stress.
- Don't skip quest dialogue—it gives context, but you can skip cutscenes if you want.
- Don't try to fight bosses under-leveled. If you hit a boss (like Skeleton King) and die a lot, go back to town, do side areas for XP, or lower difficulty.
- Avoid Hardcore mode until you know the game well.
- Avoid Adventure Mode until you complete the campaign at least once—the story is worth experiencing.
- Gold: Used for gambles at Kadala (after level 70), crafting, enchanting (Mystic). Save gold—don't waste on vendors.
- Crafting Materials: Common Debris (from white items), Arcane Dust (from blue items), Veiled Crystal (from yellow). Keep these! They are crucial for the Blacksmith and Jeweler.
- Gems: Flawless gems drop at later levels. Early on, keep any gems you find; you'll need them for sockets. Combine them at the Jeweler (unlocks after Act II? Actually he appears in Act I after you find a recipe? No, he's available from the start in town but requires gold and materials to unlock upgrades.)
- Blood Shards: Only available after reaching level 70 in Adventure Mode. For campaign, ignore for now.
- Experience: Leveling is your primary goal. Kill monsters, complete quests, and do event shrines (like the Shrine of the Fallen).
- [ ] Install the game via Battle.net (PC) or from the store (console).
- [ ] Create a Normal Non-Season character (recommend Barbarian, Monk, or Demon Hunter).
- [ ] Complete the tutorial (reach New Tristram).
- [ ] Finish the first quest "The Fallen Star."
- [ ] Unlock the Blacksmith (Haedrig) and salvage all initial loot.
- [ ] Equip the best gear you have.
- [ ] Reach Level 5–7 (you should be around this after Skeleton King).
- [ ] Defeat the Skeleton King (first major boss) to get a guaranteed legendary item.
- [ ] Identify and equip any legendary items you find (right-click unidentified legendaries to auto-identify).
- [ ] Save all crafting materials you get.
- [ ] Explore the full first area—find waypoints and side dungeons for extra XP.
- [ ] Set your skills to a comfortable layout (1 generator, 1 spender, 1 mobility, 1 cooldown).
- [ ] Adjust difficulty if you're dying too often—you can lower it anytime from the Gameplay menu (on PC, press Escape -> Gameplay -> Difficulty). On console, change in Settings.
- [ ] Have fun! Don't stress about perfection—Diablo III is about smashing demons and getting loot.
By this point (about 30–60 minutes), you'll be level 5–8 and have a solid feel for combat.
Controls on All Platforms
#### PC (Keyboard & Mouse)
#### PlayStation 4/5 & Xbox One/Series X|S
#### Nintendo Switch
Important difference: Console versions include a dodge roll (R3/ZR) that PC version lacks. Use it to evade telegraphed attacks.
UI Overview
Essential Early Objectives
1. Complete the tutorial quests (The Fallen Star, The Legacy of Cain). This unlocks the Blacksmith and teaches basic mechanics.
2. Level up to at least level 7 to unlock your first skill rune (changes skill behavior). Prioritize killing monsters over looting early.
3. Salvage all white and blue items. Don't sell them—materials are more valuable later for crafting.
4. Equip the best gear for your class. Check armor for +Main Stat and +Vitality.
5. Learn your primary resource generator and spender. Each class has a basic attack that generates resource (e.g., Generator), and a powerful spender that consumes it. Use generator to build resource, then unleash spender on groups.
6. Find and activate all waypoints you pass—they allow fast travel later.
7. Defeat the Skeleton King (Act I boss) to progress the story and earn a guaranteed legendary helmet (on first kill).
What to Do First and What to Avoid
#### Do:
#### Avoid:
Early Resource Priorities
Common Beginner Mistakes
1. Not using town portal effectively. When inventory is full, press T to return to town, salvage/sell, then click the portal again to return to exact spot.
2. Ignoring your follower. Early on, the Templar follower (unlocked in Act I) can tank and heal. Give him decent gear. Set his skills to heal and tank.
3. Not picking up health globes. After killing enemies, orbs drop that restore health. Walk over them automatically—no need to click.
4. Using wrong skills. For example, using only generators without spenders. Balance is key.
5. Trying to fight too many enemies at once. Use walls or corners to funnel enemies.
6. Selling items instead of salvaging. Always salvage unless you're desperate for gold—materials are scarcer.
7. Not swapping gear because of set bonuses. Early sets are rare—your priority is higher stats.
Day-One Checklist
With this guide, you'll survive your first hour and be ready to dive deeper into Sanctuary. Good luck, and may the loot be legendary!