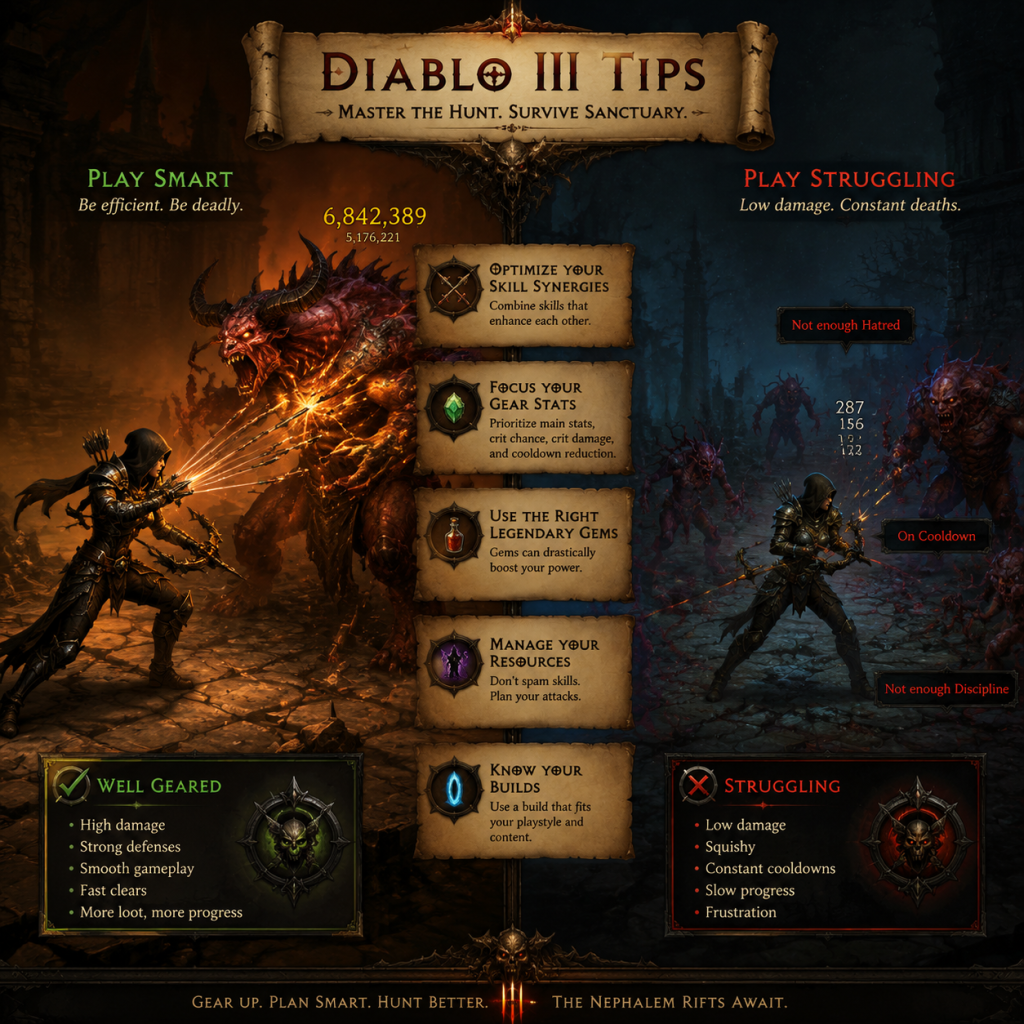
Game Tips
Game Tips for Diablo III
This guide collects essential tips spanning combat, exploration, resources, builds, economy, and advanced optimizations. Each tip includes a clear explanation and deeper analysis to help you survive Sanctuary, whether you’re a new Nephalem or a seasoned Paragon 5000+ veteran.
---
1. Combat Tips
Beginner Tip: Always Keep Moving
- Explanation: Enemies in Diablo III often telegraph attacks with ground effects (e.g., molten trails, arcane beams, frozen explosions). Standing still for even two seconds can result in a one-shot from a waller or teleporter elite pack.
- Why it works: Movement abilities and simple sidestepping break enemy AI targeting and avoid most crowd control effects. The game’s hit boxes are generous—you can dodge many attacks by strafing just a few yards.
- When to use: During every combat encounter, especially against champion packs, rift guardians, and in Greater Rifts above tier 70.
- Explanation: Every class has a primary resource (Hatred, Fury, Essence, Arcane Power, etc.). Your build must include a generator skill (e.g., Barbarian’s Bash, Demon Hunter’s Hungering Arrow) and at least one spender (e.g., Multishot, Hammer of the Ancients).
- Why it works: Generators restore resource and often trigger set bonuses (e.g., 4-piece bonus of Unhallowed Essence). Spenders deliver massive damage but drain resource; without a generator, you run dry and lose DPS.
- When to use: Early game when gear has no resource-cost reduction; later, you may swap to infinite-spending builds (e.g., Akkhan’s Champion with Akarat’s Champion) only after obtaining specific Legendary items (Cindercoat, Pride’s Fall, etc.).
- Explanation: Elite packs have random affixes: Arcane, Molten, Frozen, Waller, Teleporter, etc. Certain combinations are extremely dangerous (e.g., Arcane + Waller + Frozen). Learn to identify which affix combination will lock you down and prioritize killing the most dangerous elite first.
- Why it works: Crowd control immunity sets like “Laws of Seph” for the Monk or “The Witching Hour” with high toughness are useless if you ignore the affix synergy. Kiting a Waller + Mortar pack is nearly impossible; better to pop cooldowns and kill it fast.
- When to use: In high Greater Rifts (90+), always survey the elite pack before engaging. If you see a “Juggernaut” (cannot be stunned) affix, avoid using stun-heavy skills and focus on pure damage.
- Explanation: Every clickable object—chests, weapon racks, armor racks, corpses, loose stones—can drop gold, potions, crafting materials, and even Legendary items. The chance is low but free.
- Why it works: On Normal through Torment difficulties, loot is generated at the moment of interaction. Breaking objects also fuels the “Explorer” conquest for Season journeys.
- When to use: During the campaign and early Adventure Mode; in high-level Rifts, skip most breakables unless you need Death’s Breaths (from elite kills) for Kanai’s Cube.
- Explanation: Each Nephalem Rift tile set (e.g., Act 1 Cathedral, Act 2 Desolate Sands) has spawn patterns and progression-blocking doors. For example, Act 5’s “Pandemonium Fortress” tileset has many dead ends; Act 1’s “Fields of Misery” is mostly open with few obstacles.
- Why it works: Knowing which direction to run saves minutes per rift. The rift will close when you kill a certain number of enemies (progress bar) and then the Rift Guardian spawns. Experienced players clear 2–3 elite packs per floor and ignore trash if elites are far apart.
- When to use: Apply this knowledge in every Rift tier; in group play, one player scouts ahead while others kill.
- Explanation: Completing all five acts of bounties yields a Horadric Cache. Each cache contains bounty-specific crafting materials (e.g., Reusable Parts, Arcane Dust, Veiled Crystals) plus a chance for cache-only Legendaries (Ring of Royal Grandeur from Act I, Illusory Boots from Act II, etc.).
- Why it works: The cache materials are used to reroll Legendaries in Kanai’s Cube (Recipe 4). Without farming bounties, you cannot reforge items efficiently. The Ring of Royal Grandeur reduces set item requirements by 1, enabling many hybrid builds.
- When to use: Whenever you need to reforge a specific item (e.g., an Ancient weapon) or try for a cache-only Legendary. Speed farm bounties in a public group for maximum efficiency.
- Explanation: Vendors pay worthless gold; salvaging (through the Blacksmith) gives crafting materials (Arcane Dust, Veiled Crystals, Forgotten Souls for Legendaries). These materials are used for upgrading gems, enchanting items, and Cube recipes.
- Why it works: Gold is abundant after Torment I; materials are the true bottleneck. Early on, you need crystals to upgrade your Blacksmith and Jeweler. Never sell gear to a vendor except maybe in Hardcore before turning in bounties.
- When to use: From level 1 to para 800, salvage everything you don’t equip. After you have a full build, salvage legendaries that are not Ancient or part of your build.
- Explanation: Elites drop Death’s Breaths (DBs) only on Torment I and above. They are required for almost every Kanai’s Cube recipe: extracting powers, upgrading rare items, rerolling legendaries, and converting materials.
- Why it works: DBs are the second most important resource after bounty mats. Without them, you cannot upgrade a rare item into a Legendary, which is how many players obtain their first Ancient weapon. Always play on the highest Torment you can clear efficiently.
- When to use: In Rifts and bounties, prioritize killing elite packs even if they are off the main path. Legendary gems and DBs drop from elites at higher rates.
- Explanation: Recipe 3 allows you to reroll a legendary into a new random roll of the same item (different stats). It costs 5 of each bounty material, 50 Forgotten Souls, and 10 Death’s Breaths. Using it on a non-Ancient is wasteful because the resulting item is never guaranteed to be Ancient.
- Why it works: Ancient items have higher primary stat ranges (30% increase) and a free extra gem slot. Rerolling only ancients gives you a chance to improve the rolls to perfect (e.g., 650 Strength → 650 Strength, 7% IAS → 7% IAS). Each reroll resets the item; keep rerolling until you get desired stats.
- When to use: After you have a full Ancient set, use this recipe to perfect your weapon, amulet, or ring. For armor, it’s better to use the Enchantress instead (costs gold and one material type).
- Explanation: Hundreds of viable builds exist, but most rely on a 6-piece set bonus. Early on, you may not have a full set. Use leveling builds (often 1–70) that work with any gear, like “Multishot Demon Hunter” or “Whirlwind Barbarian” using the Legacy of Dreams gem after level 70.
- Why it works: The “Legacy of Dreams” Legendary gem (obtained from Greater Rift guardian) increases your damage by 3.75% (upgraded to 7.5%) per Legendary item equipped, with no set bonuses required. This allows you to wear random legendaries and still clear Torments.
- When to use: Start using Legacy of Dreams at level 70 until you have a full 6-piece set. Then transition to the set build.
- Explanation: Paragon points have four tabs: Core, Offense, Defense, Utility. Core: max movement speed then intelligence/dexterity/strength (mainstat). Offense: attack speed (up to 10%), then critical hit chance, critical hit damage, cooldown reduction. Defense: resist all (up to 250), then armor, life %, regeneration (skip). Utility: area damage (up to 50%), then resource cost reduction, gold find, pickup radius.
- Why it works: Area damage is one of the most powerful stats in the game for AoE builds because it creates a 20% chance for 50% (or more) damage in a 10-yard radius on every hit. Paragon area damage is additive with gear area damage, so max it first.
- When to use: After reaching para 800 (all 4 tabs maxed), prioritize Core: mainstat all the rest. Early on, follow the build-specific priority from your guide.
- Explanation: Each character can socket three Legendary gems in rings and amulets (helmet for Ruby or Diamond). Common top gems: Bane of the Trapped (damage vs slowed enemies), Bane of the Stricken (increases damage over time against single target), Enforcer (pet damage), Esoteric Alteration (non-physical resistance), Molten Wildebeest’s Gizzard (shield).
- Why it works: Gems are the primary source of multiplicative damage bonuses. For Greater Rift pushing (solo or group), Bane of the Stricken is mandatory for Rift Guardians because it ramps up damage every time you hit. Bane of the Trapped is the best generic DPS gem. Rank 25 unlocks legendary powers (e.g., Bane of the Trapped turns into a 15% damage increase aura).
- When to use: For speed runs (T16), use Trapped + Zei’s + Powerful (for elite kills). For pushing (GR 120+), use Trapped + Stricken + Esoteric or Molten. For pet builds, Enforcer + Trapped + Stricken.
- Explanation: In public games for bounties, all players get credit for each bounty completed by any member. The cache is individual. But each bonus act (the act with a red !) gives double loot; average 3–5 cache-mats per run.
- Why it works: Group bounty runs are 4x faster than solo if everyone splits up. You get the same number of caches per act completed. A full act 1–5 clear solo takes ~30 minutes; in a group it takes ~8–10 minutes.
- When to use: Whenever you need cache materials (always). Join a community like “Bounty Runz” or use the in-game public matchmaking.
- Explanation: Cube Recipe 8 allows converting one type of common material (white, blue, yellow) into another at a 1:100 ratio, requiring 1 Death’s Breath and 1 Veiled Crystal (for the conversion).
- Why it works: White crafting materials (Reusable Parts) are the rarest because they only drop from white-quality items. Most players salvage all whites, but you can convert spare blues and yellows into whites. This is critical for upgrading Rare items (Recipe 3) which costs 25 Veiled Crystals and DBs.
- When to use: When you are low on Reusable Parts but have thousands of blues and yellows.
- Explanation: Greater Rifts can be “Empowered” using 25% of your current gold amount (max 500 million gold per rift). This grants an extra upgrade chance for Legendary gems (4 upgrade slots instead of 3). Gold is easy to get on T16 with Goldwrap belt + Boon of the Hoarder gem (drops gold from enemies).
- Why it works: Empowered rifts cut gem leveling time by 25%. The gold cost is negligible once you have billions. Goldwrap + Boon combo makes you invincible in T16 (armor = gold picked up) and generates millions per minute.
- When to use: Always empower Greater Rifts if you have excess gold. Solo players can farm gold quickly with a speed build (e.g., Chakram DH with Goldwrap). Group players pool gold easily.
- Explanation: Many skills (e.g., Crusader’s Akarat’s Champion, Barbarian’s Wrath of the Berserker) require 100% uptime. Cooldown reduction (CDR) has breakpoints: you need at least 57.6% CDR for permanent Akarat’s Champion. Avoid overcap unless your build gains nothing else.
- Why it works: Each point of CDR gives diminishing returns (multiplicative). Exactly meeting the breakpoint saves stats for other affixes (e.g., area damage, critical hit). Attack speed breakpoints affect skill animations and resource generation; research your specific build’s breakpoint table on d3planner or Icy Veins.
- When to use: When gearing for push builds. Don’t blindly stack CDR—check your required uptime.
- Explanation: In solo play, you can equip a follower (Scoundrel, Templar, Enchantress). They provide passive buffs (e.g., Templar’s 10% resource regen) and active skills. The “Emanate” system allows certain follower legendary items to grant their powers to you (e.g., Nemesis Bracers spawn elites from shrines, Gloves of Worship extend shrine duration 10 minutes).
- Why it works: The follower can carry your 2nd or 3rd best weapon and support items. The “Cannot Die” token (relic) makes them invincible in Torment 16+. The “Emanate” items are key for speed builds.
- When to use: In all solo content—especially T16 bounties and low Greater Rifts (speed runs). For pushing high GR, followers are less impactful but still provide crowd control and healing.
- Explanation: To enter Greater Rifts, you need a Lesser Rift Keystone (dropped from Nephalem Rift Guardians) and later a Greater Rift Keystone (GR keys). Always open Nephalem Rifts at the highest Torment you can clear (T16 recommended) because keystone drop rate is 100% at T16.
- Why it works: The number of keys needed scales with how many GRs you plan to run. Each GR consumes one key. Efficiency means never running out of keys. T16 gives 12–16 Death’s Breaths per rift plus many materials.
- When to use: Always run T16 rifts unless you cannot survive; then drop to T13 or T10. Never waste time on lower torments for key farming.
- Explanation: The meta 4-player group is: Support Barb (zxBarb) for pull and buffs, Support Monk (zxMonk) for healing and crowd control, two Damage Dealers (usually a Rathma Necromancer or Wave of Light Crusader, but varies by season). Each player must follow a specific skill/build to synergize.
- Why it works: The support classes provide infinite resource, crowd control, damage reduction, and enemy pulling. The DPS classes then focus entirely on dealing damage. This combination allows clearing GR levels 150 in season 30+.
- When to use: For pushing leaderboards or high XP farming (GR 130+). Do not use this setup for speed runs (T16) because supports are slow.
- Explanation: Hardcore characters die permanently. The number one cause of death is lag, but the second is losing focus. A single frozen elite pack with waller and arcane can kill even the tankiest character if you’re not watching.
- Why it works: In Hardcore, you must prioritize toughness over damage. Always equip a cheat-death passive (e.g., Barbarian’s “Relentless”, Witch Doctor’s “Spirit Vessel”). Keep a pair of “save” legendaries in stash (Ancient weapon for when you level a replacement).
- When to use: Play Hardcore only if you accept the risk. Avoid pushing to the absolute limit; stay 5–10 GR levels below your softcore max. Farm bounties on lower difficulties for safety.
- Season Journey: Complete chapters 1–4 to get a free 6-piece set. Use that set to quickly farm T13+. Chapters 5–8 reward cosmetics and stash tabs.
- Console Specifics: On consoles (PS4/PS5, Xbox, Switch), you can dodge roll with the right stick (press in) and skills auto-aim. You can’t target specific enemies; use the skill slot assign logic (e.g., slot generator on X, spender on Square).
- Controller vs Keyboard: PC players have precise targeting with mouse (great for AoE builds). Console players benefit from movement control with analog sticks.
- Stash Tab Management: Buy all stash tabs from the “Stash” upgrade (gold cost). Then organize by set: one tab for each class’s set items, one for gems, one for potions and keys, one for crafting materials (they auto-stack).
- Exit Game to Reset Rifts: If you enter a Nephalem Rift and it’s a dead-end map (no progress after 2 minutes), exit game and resume to get a new random map. This is much faster than backtracking.
- Use the Armory: The Mystic (Enchantress) has an “Armory” feature allowing you to save up to 5 gear+skill sets. Switch between builds instantly for free. Use it for speed build, push build, and key farming build.
- Kadala (Gambling) : Spend Blood Shards at Kadala early to fill missing slots like rings, amulets, weapons (expensive). For smart gambling, only gamble for armor pieces (cost 25 shards each) because weapons and jewelry cost 75 or 100. The drop chance for Ancient from Kadala is 10% same as world drops.
- Cube Extract Powers: Always extract powers from items you don’t use, even if they are not Ancient. Some powers are vital for cube (e.g., Ring of Royal Grandeur, Convention of Elements, Stone of Jordan, Furnace).
- Join a Community: Use in-game communities (main menu > Social > Communities) to find players for bounties, rifts, and leveling. Popular communities: “Rift It Forward”, “Bounty Rifts”, “Seasonal Powerleveling”.
- PC Lag Solutions: Disable in-game sound (reduces CPU load), lower physics settings, and close browser tabs. For wireless connections, use a wired network cable.
- Pause the Game: Single-player on PC: press Escape; on consoles: open the in-game menu. Multiplayer cannot pause.
Intermediate Tip: Manage Your Resource Generators and Spenders
Advanced Tip: Understand Elite Affix Synergies
---
2. Exploration Tips
Beginner Tip: Always Open Chests and Break Objects
Intermediate Tip: Learn the Layout of Nephalem Rifts
Advanced Tip: Exploit Bounties for Cache Materials
---
3. Resources and Economy
Beginner Tip: Salvage All Unwanted Gear
Intermediate Tip: Collect Death’s Breaths from Elites
Advanced Tip: Use the Cube’s Recipe 3 (Reroll Legendary) Only on Ancient Items
---
4. Builds and Progression
Beginner Tip: Follow a Pre-Build Guide for Your Class
Intermediate Tip: Paragon Point Allocation
Advanced Tip: Legendary Gem Synergy
---
5. Economy (Gold and Material Farming)
Beginner Tip: Turn in Bounty Caches in a Group
Intermediate Tip: Convert Materials Using Kanai’s Cube
Advanced Tip: Gold Farming for Empowering Rifts
---
6. Advanced Optimizations
Tip: Understand Breakpoints for Cooldown Reduction and Attack Speed
Tip: Use the Follower System Effectively
Tip: Key Farming for Greater Rift Keys
Tip: Group Composition for High Greater Rifts
Tip: Hardcore Mode – Never Play Tired
---
7. Miscellaneous Tips
---
Pro tips are based on patch 2.7.7 / Season 30. Always check current patch notes for balance changes.