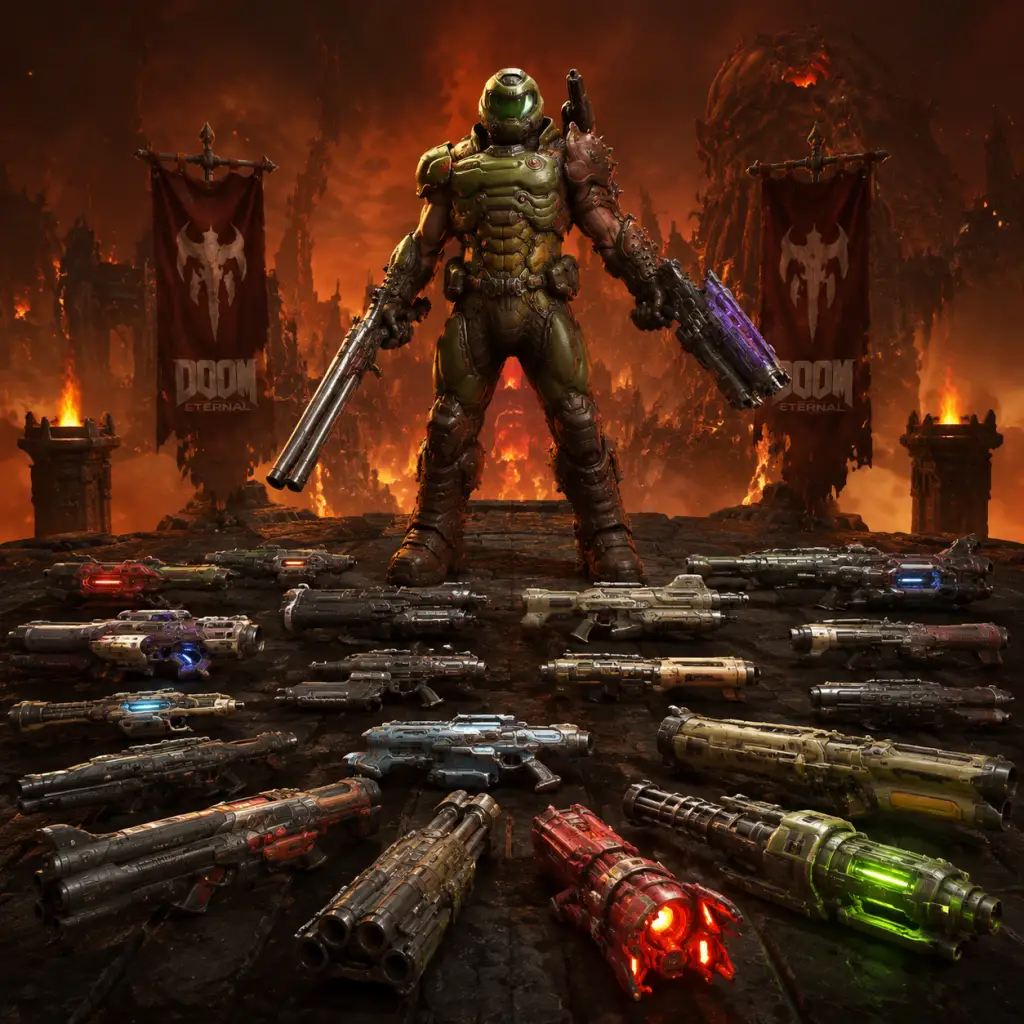
All Game Items
Overview
Doom Eternal features a vast arsenal of weapons, equipment, and collectibles that are central to its aggressive combat loop. This guide covers every major item category: weapons and their modifications, equipment such as grenades and the Flame Belch, Praetor Suit upgrades, runes, consumables, currencies, and collectibles. Items are grouped logically with explanations of function, acquisition, and optimal use.
Weapons
Combat Shotgun
- Description: A reliable pump-action shotgun effective at close range. Default weapon.
- Mods: Sticky Bombs (alt-fire lobs explosive grenades) and Full Auto (enables rapid fire at cost of ammo).
- How to Obtain: Given automatically at the start of the game.
- Upgrades: Mastery challenges for each mod increase damage or utility. Full Auto Mastery increases fire rate. Sticky Bombs Mastery increases explosion radius.
- Synergies: Use Sticky Bombs to destroy weak points on demons like Arachnotrons. Exploit environment barrels.
- Ammo: Shells (common drops from fodder demons).
- Description: A versatile assault rifle with high accuracy. Good for mid-range.
- Mods: Micro Missiles (alt-fire barrage of small rockets) and Precision Bolt (single high-damage shot).
- How to Obtain: Found in the first level "Hell on Earth" after the first encounter with possessed soldiers.
- Upgrades: Mastery for Micro Missiles increases magazine size. Precision Bolt Mastery adds zoom and damage.
- Synergies: Precision Bolt for sniping weak points (e.g., Mancubus cannons, Cacodemon eyes). Micro Missiles for crowd control.
- Ammo: Bullets (abundant).
- Description: Double-barreled shotgun delivering devastating damage at very close range. Includes a Meat Hook attachment.
- Mod: Meat Hook (alt-fire fires a grappling hook that pulls you toward a demon; if the demon is killed, you retain momentum. Can be used to close distance quickly).
- How to Obtain: Found in "Exultia" level.
- Upgrades: Mastery for Meat Hook increases speed and damage. Upgrades from Sentinel Battery stations.
- Synergies: Meat Hook + Flame Belch for armor farming. Super Shotgun + Ballista quick-switch combo for burst damage.
- Ammo: Shells (same as Combat Shotgun but uses more per shot).
- Description: Fires explosive rockets with high splash damage.
- Mods: Lock-On Burst (locks onto up to three targets for homing rockets) and Remote Detonate (detonates rocket mid-air manually).
- How to Obtain: Found in "Doom Hunter Base" level.
- Upgrades: Mastery for Lock-On Burst reduces lock-on time. Remote Detonate Mastery increases explosion radius.
- Synergies: Remote Detonate for hitting around corners or damaging demons from behind cover. Lock-On Burst for quickly eliminating flying enemies.
- Ammo: Rockets (limited but can be found in glory kills).
- Description: Energy weapon that stuns demons with heat damage. Good against shields.
- Mods: Stun Bomb (fires a projectile that disables a demon, useful against Marauders) and Heat Blast (charged alt-fire releases a burst of energy, overheat mechanic).
- How to Obtain: Found in "Super Gore Nest" level.
- Upgrades: Mastery for Stun Bomb increases stun duration. Heat Blast Mastery increases damage.
- Synergies: Stun Bomb to freeze Marauder for few seconds. Heat Blast for AoE damage when surrounded.
- Ammo: Plasma (medium availability).
- Description: High-damage precision energy weapon. Fires a single powerful bolt.
- Mods: Arbalest (explosive bolt with area damage) and Destroyer Blade (charge up a wide horizontal energy wave).
- How to Obtain: Found in "Nekravol" level.
- Upgrades: Mastery for Arbalest increases explosion size. Destroyer Blade Mastery increases charge speed.
- Synergies: Quick-switch combo: Ballista + Super Shotgun for massive DPS. Arbalest for crowd clearing.
- Ammo: Ballista cells (unique ammo, not shared).
- Description: Rotary machine gun with high rate of fire. Can overheat.
- Mods: Mobile Turret (deploys shield and fires while stationary, reduces recoil) and Energy Shield (creates a frontal shield that blocks some damage).
- How to Obtain: Found in "Mars Core" level.
- Upgrades: Mastery for Mobile Turret increases heat capacity. Energy Shield Mastery increases shield health.
- Synergies: Mobile Turret for suppressing fire. Energy Shield for defensive play or against Archvile.
- Ammo: Bullets (same as Heavy Cannon, but consumption is high).
- Description: Ultimate weapon. Fires a large energy ball that deals massive damage and chains lightning to nearby demons until killed.
- How to Obtain: Found in "The Holt" level (part of The Ancient Gods DLC) or in campaign at "Taras Nabad". Also from certain secret encounters.
- Ammo: BFG ammo (rare, only from pickups).
- Synergies: Use when overwhelmed by heavy demons. Combine with Power Seeker Sentinel Crystal for increased range.
- Note: Extremely limited ammo; use sparingly.
- Description: Rapid-fire energy weapon with infinite ammo but limited heat. Fires multiple projectiles simultaneously.
- How to Obtain: Unlocked by collecting all 6 Empyrean Keys.
- Ammo: Heat-based; cools down over time.
- Synergies: Best for area denial and clearing waves of weak demons.
- Description: One-hit-kill energy sword. Limited charges.
- How to Obtain: Acquired in late game (Mission "The Blood Swamps").
- Ammo: Crucible charges (found in levels).
- Synergies: Instant kill for any non-boss demon. Use on Marauders, Archviles, or Tyrants.
- Description: Standard explosive grenade.
- Cooldown: 30 seconds.
- Upgrades: Praetor Suit upgrades reduce cooldown and increase radius.
- Use: Area damage, stagger groups.
- Description: Freezes enemies in a radius, making them vulnerable and slowing them.
- Cooldown: 45 seconds.
- Upgrades: Praetor Suit upgrades extend freeze duration.
- Use: Crowd control, especially against fast demons.
- Description: Short-range flame thrower that causes demons to drop armor shards.
- Cooldown: 15 seconds.
- Upgrades: Praetor Suit upgrades increase flame time and armor shard amount.
- Use: Essential for building armor during combat.
- Purpose: Unlock passive upgrades to suit, such as health, armor, ammo capacity, and equipment cooldown reductions.
- How to Obtain: Found in levels as glowing green pickups (green cubes). Also from completing certain challenges.
- Categories: Health, Armor, Ammo, Equipment, Explosives, and Mobility.
- Recommendation: Prioritize Ammo capacity and Armor upgrades early.
- Description: Equippable modifiers that grant powerful passive abilities.
- Slots: Three active rune slots.
- How to Obtain: Found in secret encounters across levels. Each rune has a trial that must be completed to unlock its power.
- List:
- Synergies: Use Equipment Fiend with grenades for rapid cycling. Airborne for aerial combat.
- Description: Non-cosmetic suit upgrades found in optional challenge rooms (Sentinel Crystal puzzles).
- How to Obtain: Solve platforming or combat puzzles to reach Sentinel Crystals.
- Effects: Permanent stat upgrades like +25 health, +10 armor, +1 ammo capacity for specific weapons.
- Small Health Bonus: +15 HP, common from kills.
- Large Health Bonus: +40 HP, found in levels.
- Health Globes: Dropped by demons on stagger or glory kill. Green pickups restore health.
- Stim Packs: Instant +50 HP, found in arenas.
- Armor Shards: Dropped from Flame Belch kills. Each shard gives small armor.
- Armor Pickups: +20 armor or +50 armor found in levels.
- Ammo Boxes: Restore specific weapon ammo. Found in levels or dropped by killed demons (especially when using Chainsaw).
- Full Ammo: Rare pickups that refill all ammo.
- Berserker: Temporary unlimited ammo, increased damage, and health regen.
- Quad Damage: Greatly increases weapon damage.
- Haste: Increases movement and attack speed.
- Invisibility: Makes you invisible to demons (they lose aggro).
- Mega Health & Armor: Full restore.
- Purpose: Used to unlock and master weapon mods.
- How to Obtain: Found as collectibles in levels (golden gear icons), rewards from completing secret encounters, and from Sentinel Battery doors.
- Purpose: Used to upgrade the Praetor Suit.
- How to Obtain: Found in levels as green cube pickups. Some are hidden, others in plain sight.
- Purpose: Used to open special doors in the Fortress of Doom, which contain cosmetic items, cheat codes, and extra weapon points.
- How to Obtain: Found in levels, often behind optional objectives or puzzles.
- Purpose: Used to unlock the hidden Unmaykr weapon in the Fortress of Doom.
- How to Obtain: 6 total; each found in specific levels (e.g., "Exultia", "Super Gore Nest", etc.). Locations are often well-hidden or require solving puzzles.
- Purpose: Unlock fun gameplay modifiers (e.g., Infinite Ammo, Low Gravity, Big Head mode). Activated from the Fortress of Doom computer.
- How to Obtain: Found hidden in levels, some behind Sentinel Battery doors.
- Description: Collectible figurines of demons and characters. Placed in the Fortress of Doom on shelves.
- How to Obtain: Found hidden in levels, often behind secret doors or platforming puzzles.
- Benefit: Cosmetic only; completionist trophy/achievement.
- Description: Classic Doom soundtracks. Can be played in the Fortress of Doom on the jukebox.
- Locations: One per level often, hidden in secret areas.
- Description: Lore text and images explaining story, demonology, and world-building.
- Locations: Scattered throughout levels, often in side rooms.
- Benefit: Lore completion; some are required for achievements.
- Description: Completion of optional timed combat challenges rewards extra Weapon Points.
- How to Obtain: Activate the challenge pillar in a level, then survive against waves of demons within a time limit.
- While not an item, it's a hub world where many items are accessed. Key items like Sentinel Batteries unlock doors here.
- Description: A powerful melee attack that can be used after building up enough glory kills. Deals area damage and can stagger enemies.
- Upgrade: Rune "Punch and Reave" makes Blood Punch restore health.
- Description: Essential tool that instantly kills a fodder demon and restores ammo. Fuel regenerates over time or from pickups.
- Upgrade: Praetor Suit upgrades increase fuel capacity and allow chainsaw kills on heavier demons.
- Weapon Mod Combo: Use combos like Super Shotgun + Ballista quick-switch for huge DPS. Practice the "quickswap" technique by binding weapons to hotkeys.
- Flame Belch + Meat Hook: Super Shotgun's Meat Hook pulls you in; use Flame Belch before firing for armor from all enemies hit by the explosion.
- Ice Bomb + Rocket Launcher: Freeze enemies then lock-on or remote detonate for safe area damage.
- Rune Synergies: Combine Equipment Fiend + Frag Grenade for faster grenade cooldowns. Airborne + Mobility upgrades for aerial dominance.
- Praetor Suit Priority: Early game, invest in Ammo capacity (especially for shotgun shells and rockets) and Armor (increases durability). Later, focus on Equipment cooldown reduction.
Heavy Cannon
Super Shotgun
Rocket Launcher
Plasma Rifle
Ballista
Chaingun
BFG-9000
Unmaykr
Crucible
Equipment
Frag Grenade
Ice Bomb
Flame Belch
Praetor Suit & Upgrades
Praetor Suit Points
Runes
- Blood Fueled: Glory kills increase speed.
- Saving Throw: Prevents death once per life (long cooldown).
- Airborne: Air control allows mid-air movement.
- Dazed and Confused: Staggered enemies remain staggered longer.
- Punch and Reave: Blood Punch restores health.
- Seeker: Health/armor/ammo drops fly toward you.
- Equipment Fiend: Equipment cooldown reduced after glory kill.
- Siphon: Glory kills drop more health.
Sentinel Armor (Crystals)
Consumables & Pickups
Health
Armor
Ammo
Power-ups
Materials & Currencies
Weapon Points (Golden Gears)
Praetor Suit Points (Green Cubes)
Sentinel Batteries (Blue Batteries)
Empyrean Keys (Gold Keys)
Cheat Codes
Collectibles
Toys
Music Albums
Codex Entries
Secret Encounter Rewards
Key Items (Miscellaneous)
Fortress of Doom
Blood Punch
Chainsaw
Important Synergies & Tips
This concludes the All Game Items guide. For platform-specific notes, all items are identical across PC, PS4, PS5, Xbox One, Xbox Series X|S, and Nintendo Switch (though Switch has lower resolution and slower load times).