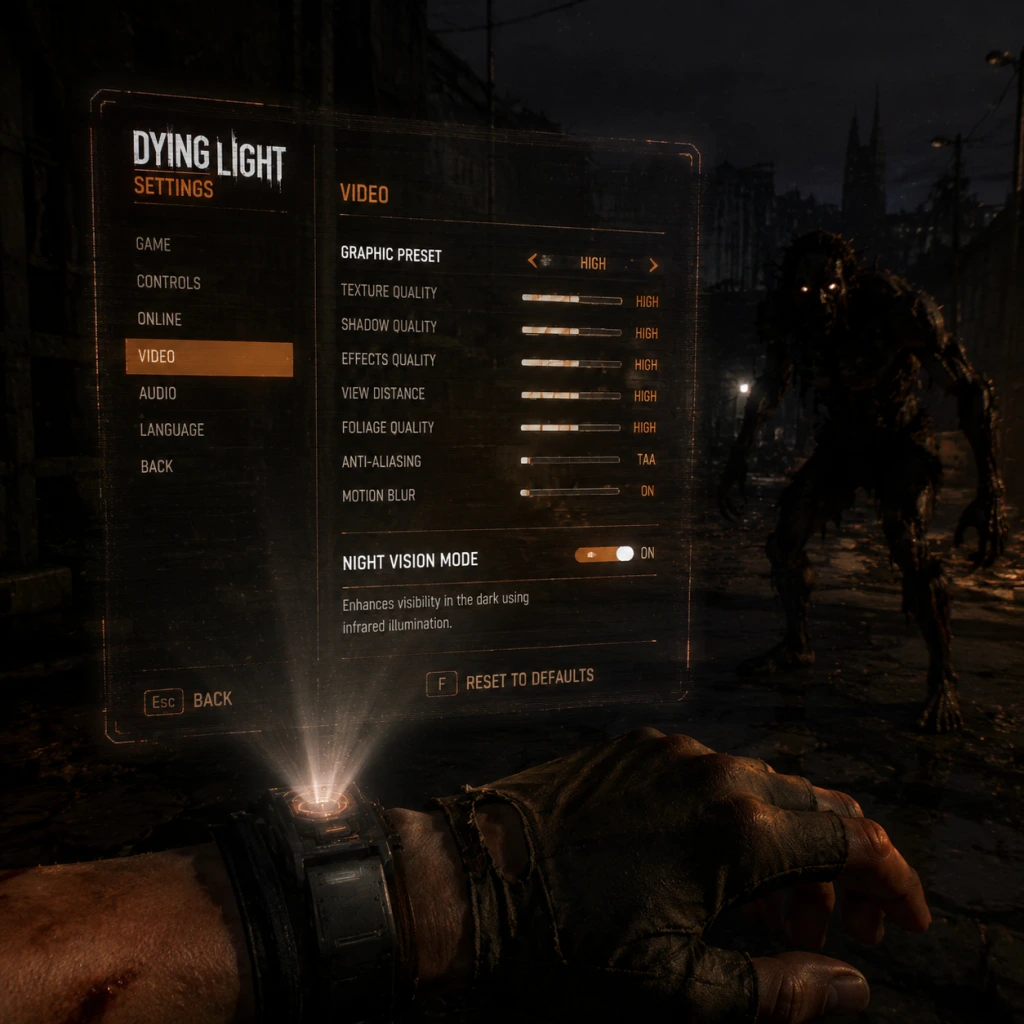
Game Settings
Game Settings Guide for Dying Light
This guide covers every settings category in Dying Light (including The Following expansion where applicable) and recommends optimal configurations for different hardware tiers. Proper setup—especially graphics and controls—can dramatically improve your performance, comfort, and survival success in Harran.
---
Graphics Settings
Adjusting graphics correctly balances visual fidelity with smooth gameplay. Dying Light is CPU-intensive in the city; view distance and shadows are the biggest performance hogs.
Display Options
| Setting | Recommendation | Notes |
|---|---|---|
| Resolution | Native monitor resolution | Lower resolution if struggling for FPS, but keep aspect ratio correct. |
| Display Mode | Fullscreen (exclusive) | Borderless windowed can cause input lag and V-Sync issues. |
| V-Sync | Off (use in-game framerate limit if needed) | V-Sync introduces measurable input lag; only enable if screen tearing bothers you. |
| Framerate Limit | 60 (or monitor refresh rate) | Uncapped can cause coil whine and unnecessary GPU load. |
| Field of View (FOV) | 90-100 (slider) | Higher FOV reduces motion sickness and aids parkour awareness; performance cost is minimal. |
| Motion Blur | Off | Can cause nausea and hides details; no performance benefit either way. |
| Ambient Occlusion | Medium/High (see table below) | Adds depth but impacts GPU heavily. |
| Anti-Aliasing | FXAA or SMAA (low) | MSAA is expensive; SMAA provides good edge smoothing with low cost. |
| Depth of Field | Off | Visual effect; no gameplay benefit. |
| Nvidia HairWorks | Off (if available) | Cripples performance on most cards; only use on top-end RTX cards if you love hairy zombies. |
| View Distance | Medium-High (50-70%) | Critical for parkour—shorter distance hides platforms and ledges at night; too high kills FPS. Adjust based on hardware. |
| Texture Quality | Low/Medium/High/Ultra | VRAM dependent: 2GB→Low, 4GB→Medium, 6GB+→High/Ultra. |
| Shadow Quality | Medium (low on low-end) | Shadows are a heavy CPU/GPU drain. Low shadows still provide enough occlusion without looking flat. |
| Post-processing | Low-Medium | Includes bloom, lens flare, chromatic aberration. Disable if you dislike the style. |
| Rain Quality | Medium (low on low-end) | Rain effects can drop FPS in heavy storms. |
Recommended Presets by Hardware Tier
Low-End (e.g., GTX 1050 / RX 560 – 2GB VRAM)
- Preset: Custom (Low with medium textures/medium view distance)
- Resolution: 900p or 720p
- View Distance: 30-40%
- Shadows: Low
- Target FPS: 30-45
- Preset: High
- Resolution: 1080p
- View Distance: 60%
- Shadows: Medium
- Target FPS: 60
- Preset: Very High (custom)
- Resolution: 1440p
- View Distance: 80%
- Shadows: High
- Nvidia HairWorks: Off
- Target FPS: 60+ (use Framerate Limit)
- Preset: Maximum (custom)
- Resolution: 4K or 1440p ultra-wide
- View Distance: 100%
- Nvidia HairWorks: On (careful: still heavy)
- Target FPS: 60 capped
- View Distance: Setting too low (e.g., 20%) makes night navigation dangerous as platforms fade in. Too high (100%) can halve framerate on mid-range hardware. Find the sweet spot for your GPU: start at 50% and adjust +10% until FPS drops below 45.
- Nvidia HairWorks: This toggle appears in the Advanced menu. If you see it, leave it OFF unless you own an RTX 2080 Ti or better. It causes massive framerate dips in cutscenes and during hordes.
- Motion Blur: Many players turn it off for motion sickness, but it also hides visual stuttering. If your FPS dips often, keep it off to reduce the illusion of smoothness.
Mid-Range (e.g., GTX 1060 / RX 580 – 6GB VRAM)
High-End (e.g., RTX 2070 / RX 5700 XT – 8GB VRAM)
Ultra (e.g., RTX 3080 / RX 6800 XT – 10GB+ VRAM)
⚠️ Settings That Are Easy to Misconfigure
---
Audio Settings
Good audio is crucial for detecting zombies at night and hearing spitball attacks.
| Setting | Recommendation | Notes |
|---|---|---|
| Master Volume | 80-100% | Keep high to hear footsteps and zombie growls. |
| Music Volume | 50-70% | Music can mask ambient audio; lower is often better for immersion. |
| SFX Volume | 100% | Essential – weapon swings, traps, volatiles. |
| Voice Volume | 80% | Dialog, NPC shouts, and your own character’s cues. |
| 3D Audio | On (if supported) | Use Windows Sonic or Dolby Atmos for spatial awareness. |
| Speaker Configuration | Stereo or Headphones | 5.1/7.1 can spread audio too thin for directional cues. |
| Controller Vibration | Off/On | Personal preference; vibration can drain batteries and distract during combat. |
---
Controls Settings
Dying Light relies heavily on smooth parkour and quick weapon switching. Customize controls to your muscle memory.
Keyboard & Mouse
| Action | Recommended Key | Notes |
|---|---|---|
| Move | WASD | Standard. |
| Jump | Space | No change needed. |
| Crouch | Left Ctrl | Keep for sliding and hiding. |
| Sprint | Left Shift | Toggle or hold? Use Hold for better control. |
| Interact | E | Open doors, pick items. |
| Melee Attack | Left Mouse | Primary. |
| Ranged Attack | Right Mouse | Aim down sights. |
| Throw Weapon | Middle Mouse | Quick throw. |
| Parkour Assist (Auto-vault, climb, slide) | On (toggle) | Highly recommended: enables automatic vaulting over small obstacles and clinging to ledges. Without it, you must manually press jump near every ledge. |
| Sensitivity (Mouse) | 5-10 (progress) | Lower for precision aiming, higher for parkour flicks. |
| Invert Y | Off | Personal. |
Controller (Xbox/PlayStation)
- Sensitivity: 50-70% (lower for aiming, higher for melee).
- Dead Zone: Leave at default (0.10-0.15). Only increase if drifting occurs.
- Auto-Aim Assist: On (Partial) – helps with targeting volatile heads without feeling like cheating.
- Invert Cursor: Off.
- Setting: “Parkour Elements” → “Automatic”
- Risk: If you turn this OFF (manual), you must press jump at every small ledge – slows down chases and increases fall damage. We strongly advise keeping it ON unless you are an expert speedrunner who wants full manual control. Manual mode also disables the convenient “grab edge” mechanic when dropping off a ledge.
⚠️ Special Attention: Parkour Assist
---
Accessibility Settings
Dying Light offers limited accessibility options, but the following can help:
| Setting | How to Enable | Notes |
|---|---|---|
| Subtitles | Gameplay → Subtitles (On) | Shows dialog and ambient speech. Size is not adjustable (fixed). |
| Colorblind Modes | Not natively available | Use Windows/console system-level tritanopia/deuteranopia filters. |
| HUD Size | Not adjustable | Entire HUD is fixed. You can toggle individual elements (minimap, health bar) in Gameplay settings. |
| Closed Captions | Audio → Closed Captions | Shows sound effects like “Door creaks” and “Volatile scream”. Useful for deaf/hard-of-hearing players. |
| Controller Vibration | Controls → Vibration | Can help with haptic feedback for damage and traps. |
| Text Size | None | UI text is small; use Windows scaling or zoom. |
| Quick-Time Events (QTEs) | Gameplay → QTE Mode (Hold vs. Tap) | Hold is more accessible – removes the need for rapid tapping. |
---
Language Settings
Accessible from the main menu or in-game pause menu → Options → Language.
- Text Language: Choose your UI language (available in 12+ languages).
- Voice Language: Choose voiceover language (usually English, German, French, Italian, Spanish, Polish, Russian).
- Subtitle Language: Overrides text language for subtitles only.
> Note: Changing voice language requires a game restart. Text language changes immediately in the menu.
---
Network Settings
Dying Light offers both cooperative and competitive (Be the Zombie) modes. Proper network settings reduce latency and matchmaking issues.
| Setting | Recommendation | Notes |
|---|---|---|
| Online Mode | Enabled (for co-op/events) | You can play offline entirely. |
| Co-op Matchmaking | Invite Only (or Friends Only) | Public can attract griefers; use password for private games. |
| Be the Zombie Mode | On/Off | Toggle if you want to be invaded as survivor. Off disables PvP. |
| Network Quality | High (if LAN) or Low (if on slow internet) | Actually, there’s no such explicit setting; but you can limit players in co-op. |
| NAT Type | Open (in router) | Essential for hosting. If you cannot connect, forward ports: UDP 30000-30009 or enable UPnP. |
| Voice Chat | Push-to-Talk (PC) or On (console) | Avoid open mic background noise. |
| Region | Auto (or closest) | Manual selection may be available in some versions (PC: set via Steam download region). |
⚠️ Common Network Pitfall
- “Failed to Join Session” error: Usually caused by strict NAT. Set your console/PC IP in router DMZ or forward required ports. If you use a VPN, disable it for Dying Light.
- Be the Zombie Mode remains On in menus: Even if you turn it off, some versions re-enable it after updates. Double-check before starting a new game if you want only co-op.
---
Gameplay Settings
These affect difficulty and HUD behavior.
| Setting | Recommendation | Notes |
|---|
Hard (veterans)
Nightmare (Hard + permadeath? Actually Nightmare in DL is a separate mode, not difficulty) | Dying Light has 3 difficulties: Normal, Hard, and Nightmare (unlocked after first playthrough). Nightmare makes zombies tougher and disables fast travel. Start on Normal to learn parkour and combat. Hard+ increases XP rewards but also damage. |
| QTE Mode | Hold | Tap mode requires fast button pressing; Hold is comfortable. |
| Auto-Equip Best Items | Off | Prevents accidentally equipping low-durability weapons from inventory. |
| Show Tutorial Hints | On (first playthrough) | Helpful reminders; turn off after learning. |
| Minimap Rotation | Rotate (heads-up) vs. Fixed (north always up) | Rotate is easier for navigation. |
| Show Quest Markers | On (unless doing immersive run) | Keeps you on track. |
| Subtitles | On (for dialog) | Also helps with ambient voice lines that give clues. |
| Radar Enemy Indicator | On | Shows direction of threats; crucial at night. |
| Camera Shake / Head Bobbing | Off (if you get motion sick) | Disabling Head Bobbing reduces nausea during fast movement. |
| Auto-Equip Lantern | Off | Manually equip using quick inventory; auto may waste battery. |
| Loot Highlight | On | Items glow when you look at them; speeds up scavenging. |
| Crosshair | On | Essential for ranged weapons. |
⚠️ Difficulty Misconception
Many players mistakenly think Nightmare is just a difficulty slider. It is actually a separate game mode that resets your inventory and survival rank, making zombies extremely tough and limiting resources. Do not select Nightmare for your first playthrough; choose Normal and later try Hard for higher challenge.
---
Summary of Settings to Double-Check
1. View Distance – too low (dangerous), too high (lag). Find balance.
2. Parkour Assist (Automatic) – enable unless you are a masochist.
3. QTE Mode – change to Hold for accessibility.
4. Motion Blur + Head Bobbing – disable if motion sickness.
5. Nvidia HairWorks – disable unless you have flagship GPU.
6. Online Mode & Be the Zombie – ensure they match your preferred playstyle.
7. Subtitles – enable if you play with low volume or language mismatch.
After adjusting settings, play the first 15 minutes (day and night) to verify everything feels right. Revisit Graphics if FPS dips below 30 during night sequences with volatiles.
---
Optimize, survive, and enjoy Harran.