Game Tips
Game Tips for Dying Light
This guide collects essential tips for every stage of your journey in Harran, from your first nightfall to mastering the hardest challenges. Tips are grouped by category and include explanations of why they work and when to use them.
---
Combat Tips
#### Beginner: Use Your Environment to Stun Zombies
- Tip: Kick zombies into walls, cars, or off ledges. A well-aimed kick (default Q on PC) sends them stumbling, leaving them open for a ground-pound or a head stomp.
- Why: It costs no stamina, can be chained, and stuns multiple enemies if they line up. It also prevents damage from random swipes.
- When: Always in early game; later when conserving weapon durability against weak foes.
- Tip: After unlocking power moves, use the dropkick (sprint + kick) to send single zombies flying, knocking down groups. Ground pound (jump + heavy attack while aiming down) crushes prone enemies.
- Why: Dropkick is excellent for clearing ledges or buying space. Ground pound deals area damage and can instantly kill biters on lower difficulties.
- When: Use dropkick when surrounded or facing a viral. Ground pound when you’ve knocked a group over (e.g., after a dropkick).
- Tip: Apply shock (electric weapon, star mod) then hit with a fire weapon (or throw a firecracker into a puddle of water.) The resulting stun + burn chain multiplies damage over time.
- Why: Electricity stuns, fire deals DoT. Together, they stack damage and prevent the zombie from attacking for several seconds.
- When: Against spitters, virals, or groups of biters. Avoid using on flammable surfaces if you’re standing in them.
- Tip: In the Slums and Old Town, rooftops are your safe zones. Before entering a new area, scan for yellow paint, dangling wires, and ledges. Practice chaining jumps without touching ground.
- Why: Zombies on ground are slower and can be avoided. Volatiles only spawn at night, but even during day, high ground gives you a tactical advantage and avoids hordes.
- When: Every time you move between objectives. Make it a habit to never run on ground level.
- Tip: Once unlocked (Survivor Rank 12), keep a grappling hook in your inventory. It can be used to quickly ascend buildings, cross large gaps, or escape from volatile packs.
- Why: The hook has no cooldown and can be spammed to travel faster than running. It also breaks fall damage if you hook just before landing.
- When: Expeditions across the map, escaping night chases, or reaching high platforms for air drops.
- Tip: When an airdrop lands at night, it attracts volatiles. Plan a route that uses safe houses as checkpoints. Grapple to the nearest building, drop down, grab the crate, then immediately use a UV flashlight + grapple to escape.
- Why: Airdrops at night give superior loot (weapons, rare crafting materials), but volatiles are drawn to the landing site. A prepared escape route ensures you survive.
- When: Once you have max stamina and a grappling hook. Ideal for farming gold-tier weapons.
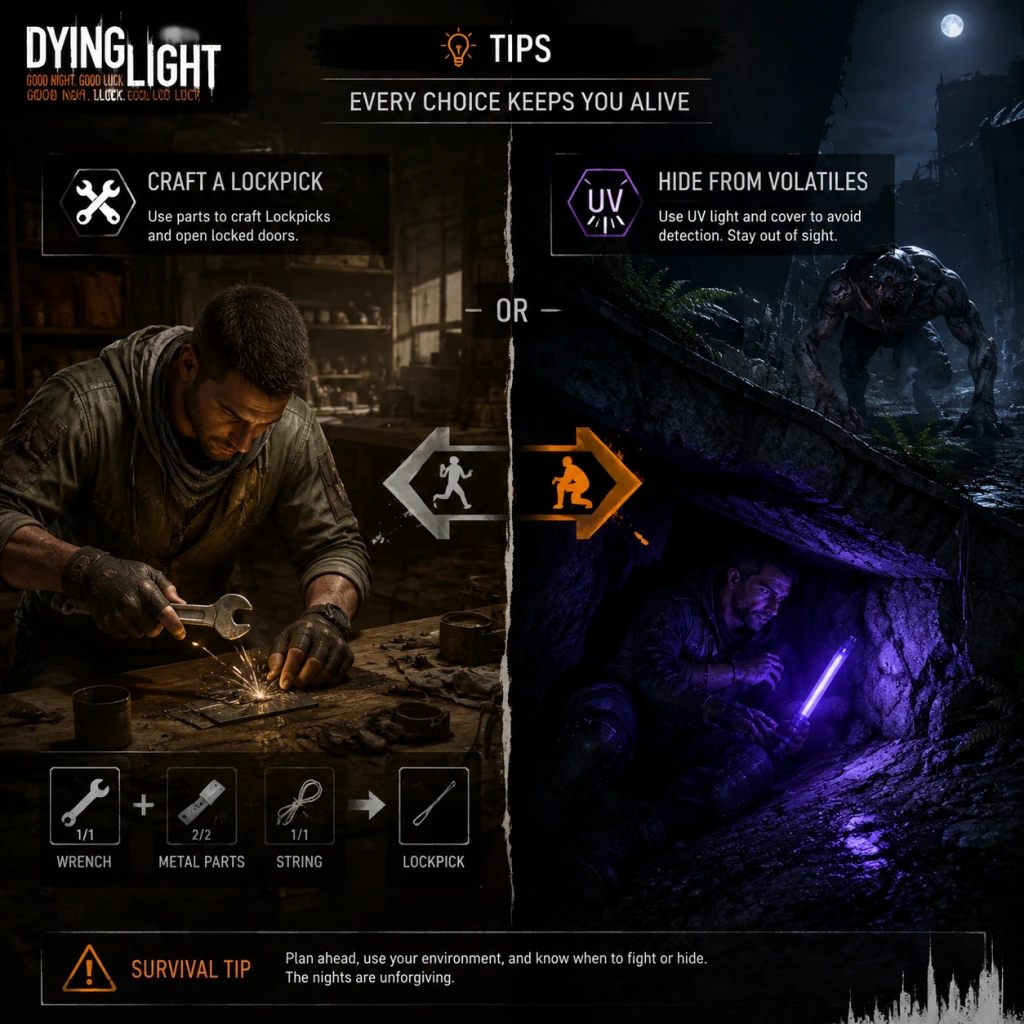
- Tip: Pick up all metal parts, electronics, duct tape, and alcohol. They are used for crafting medkits, lockpicks, and weapon modifications. Weapons themselves are plentiful; don't hoard low-tier ones.
- Why: Medkits are the most critical consumable. Duct tape + metal parts = repair kits; alcohol + gauze = medkits. Lockpicks are essential for police vans and chests.
- When: Always loot containers, dead bodies, and lockers. Early game, focus on blueprints and crafting materials over money.
- Tip: Never let a weapon break completely. Repair it before it hits zero durability (costs fewer resources) or junk it for parts. Use cheap weapons against trash mobs and save high-damage ones for human enemies or big zombies.
- Why: Weapon repairs cost materials that scale with durability remaining. Repairing a 5% durability weapon costs nearly full materials; repairing at 20% costs less. Junking gives you back some materials.
- When: After each fight, check durability. Use rusty pipes and wrenches on biters; use korek machetes or gold-tier weapons on demolishers and human enemies.
- Tip: In old game versions, you could repair a weapon infinitely by stripping the mod and re-applying it. This was patched. However, the King mod (obtainable from DLC or certain events) adds +75 durability and +75% damage. Stack King mods on a single weapon for extreme longevity.
- Why: A single King mod drastically extends weapon life. Combined with the “Repair” skill, you can restore durability indefinitely by using consumable repair kits.
- When: Once you have King mods (found in Bozak Horde or from Quartermaster rewards). Replace other mods with King to make a weapon last forever.
- Tip: Survivor rank determines the quality of items you find in the world (including weapons, mods, and crafting materials). Agility and Power levels only affect movement and combat perks.
- Why: Higher survivor rank means better loot from airdrops, police vans, and GRE containers. If you rush survivor xp (by completing quests and turning in airdrops), you’ll quickly get blue/purple/orange weapons.
- When: Early game, prioritize the “Survivor Sense” ability and “Lockpick” skill. Always grab free survivor xp from turning in airdrops at the Tower.
- Tip: If playing “Be the Zombie” mode, invest in skills that counter the Hunter: max UV flashlight duration, increased stamina, and the “Tackle” skill to knock the Hunter off walls. Carry flares and camouflage.
- Why: PvP requires you to survive long enough to turn in the antizin. The Hunter can oneshot you if you’re stationary. Mobility and UV light are your best friends.
- When: Only when invading or being invaded. Swap to a general parkour build for solo play.
- Tip: Equip weapons with the “Frenzy” mod (from The Following DLC) which increases attack speed as you kill enemies. Combine with “Brawler” skill (increases damage per consecutive hit). Use warrior potions (+50% damage for 60 seconds) and attack boosting from “Tough” booster.
- Why: Attack speed + damage multipliers stack multiplicatively. In late game, a single volley can kill a demolisher in seconds.
- When: Only for players who have completed main story and are farming legendary enemies. Not recommended for early game due to resource cost of potions.
- Tip: Vendors sell low-tier weapons at high prices. Instead, rely on looting from bodies and containers. Spend your money only on crafting materials (metal parts, electronics) and ammo (if using firearms).
- Why: The game gives you enough weapons for free. Buying is a waste of cash that could be used to buy king mods or safe zone upgrades.
- When: If you must buy something, purchase blueprint upgrades from Quartermaster – they are permanent.
- Tip: In the Slums, the vendor “Sahir” near the Tower will restock his inventory if you save and reload (quit to main menu). He sometimes sells legendary weapons or rare mods. Check him frequently.
- Why: Vendor inventories are random but fixed on first load. Reloading refreshes them. This lets you farm for god-tier items without cheating.
- When: Once you have surplus cash, spend it on his high-tier items. Reload until you see King mods or gold weapons.
- Tip: In the Harran Prison (Following DLC), you can duplicate cash and items by using the “store all” and “withdraw” glitch with the prison vendor. Step-by-step: deposit items, then withdraw one stack, then immediately quit game. Reload and you’ll have original items plus withdrawn stack.
- Why: This is an exploit that can generate infinite money and crafting materials. Useful for players who want to bypass grind.
- When: Only if you’re okay with cheating. Otherwise, stick to normal farming.
- Tip: At night, volatiles roam but regular zombies are reduced in number. If you stay near UV lights (safe zones), you can loot chests and run between safe houses. You can also outrun volatiles if you keep moving and don’t trip.
- Why: Night gives bonus XP for everything you do (1.5x to 2x). With careful routing, you can level up quickly without dying.
- When: Once you have a decent stamina bar and know the safe house locations. Avoid open fields; stick to rooftops.
- Tip: When a volatile spots you, immediately run to the nearest UV light (street lamp with yellow glow) or into a building interior (houses, parking garages). If you get pinned, use a flare to create a temporary UV bubble, then climb.
- Why: Volatiles cannot enter UV-lit zones. Flares buy you 30 seconds of safety. During a chase, your minimap shows volatile positions in red; anticipate their path.
- When: When you accidentally trigger a chase during night or while looting GRE crates. Always carry 3-4 flares on your quick slot.
- Tip: At max level, volatiles drop legendary XP and rare materials. To farm them safely: go to the “Stuffed Turtle” quarantine zone, stand on the high scaffolding, and shoot them with an upgraded shotgun. They can’t reach you, but you can hit their heads.
- Why: This method yields massive XP per hour – several hundred thousand. Also earns you king mods from volatile guts.
- When: Only after completing main game and unlocking legendary levels (100+). Requires a high-tier shotgun and unlimited ammo from crafting.
- Tip: Always upgrade your grappling hook to max tier (through the Quartermaster) – it becomes faster and uses less stamina.
- Tip: The “Cracked” throwable (firecrackers + metal parts) attracts zombies but does no damage. Use to clear areas or distract for stealth.
- Tip: When fighting human enemies (raise the health bar), use camouflage (from zombies) to walk past them, then strike. They cannot detect you if you are covered in zombie guts.
- Tip: If you see a Volatile nest in the countryside (The Following), destroy it with grenades or a truck to permanently disable spawns in that area.
- Tip: Do not sell rare crafting materials like “Sapphire” or “Ruby” – they are used for high-end weapon upgrades in The Following DLC.
- Tip: For the “Axiom” achievement, play on Nightmare difficulty, but only after you have fully upgraded your character and weapons – it doubles damage taken.
#### Intermediate: Master the Dropkick and Ground Pound
#### Advanced: Electric and Fire Combined with Melee
---
Exploration & Parkour Tips
#### Beginner: Learn the Verticality – Always Look Up
#### Intermediate: Use the Grappling Hook to Skip Danger Zones
#### Advanced: Air Drops & Night Airdrops – Route Planning
---
Resource Management Tips
#### Beginner: Scavenge Everything, but Prioritize
#### Intermediate: Weapon Durability Management
#### Advanced: Infinite Repair Glitch (Patch 1.0 – 1.3 only)
---
Build & Skill Optimization Tips
#### Beginner: Focus on Survivor Levels First
#### Intermediate: The Ultimate Night Hunter Build (PvP)
#### Advanced: Min-Max Melee Damage Build
---
Economy & Trading Tips
#### Beginner: Never Buy Weapons – Loot Them
#### Intermediate: The Gambling Vendor Trick
#### Advanced: The “Dying Money” Glitch (Single Player Only)
---
Night & Survival Tips
#### Beginner: Night is Not Always Scary – Use Safe Houses
#### Intermediate: How to Survive a Volatile Chase
#### Advanced: Farming Volatiles for Legend XP
---
General & Miscellaneous Tips
---
Final Words
Remember: Dying Light rewards creativity. The most powerful tactic is not brute force but using the environment, your parkour skills, and resource knowledge. Adapt these tips to your playstyle, and Harran will become your playground – even at night.