Game Tips
Game Tips
1. Beginner Tips
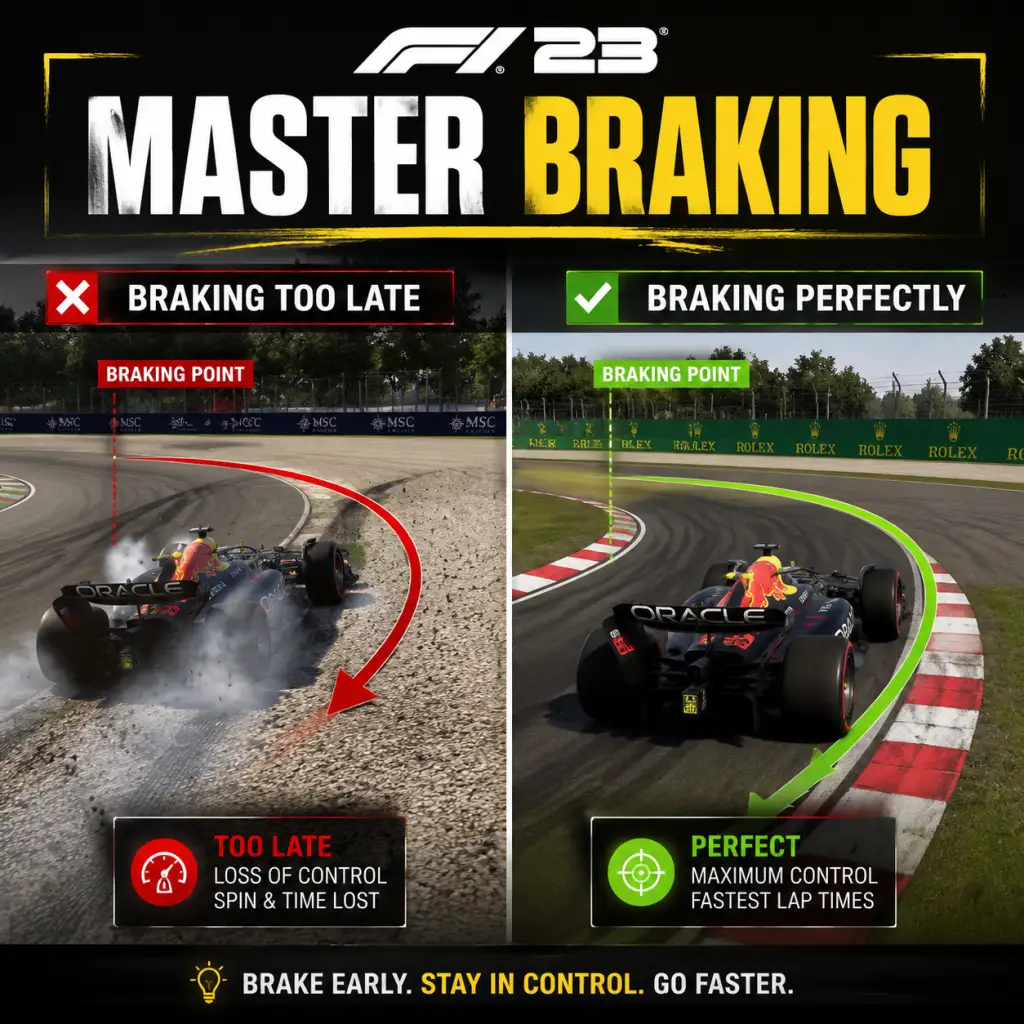
#### Master Braking Early
- Explanation: The most critical skill in F1 23 is braking. Use the distance marker boards (100m, 150m, etc.) as reference points. Brake in a straight line before turning the wheel, and release brakes gradually as you turn in.
- Deeper Analysis: Late braking can gain time, but for beginners it leads to understeer or spins. Start by braking earlier than you think, then move your braking point forward 5-10 meters each lap. This builds consistency and confidence.
- Explanation: Flashbacks allow you to rewind time and retry a corner. In single-player modes, use them to learn from mistakes.
- When to Use: After a crash or a major time loss, rewind to just before the error and analyze what went wrong. However, avoid heavy reliance—in multiplayer there are no flashbacks.
- Explanation: Cold tyres have low grip. On the out-lap, weave gently to warm them up. Overheated tyres lose performance and degrade faster.
- When: Always check the tyre temperature display (MFD) during practice and before pushing hard.
- Explanation: The Energy Recovery System can be set to different modes: None, Low, Medium, High, Overtake. Manual deployment saves battery for key moments.
- Deeper Analysis: In qualifying, use Overtake (blue lights) on main straights and Harvest (Low/Medium) in braking zones. In the race, balance between overtaking and defending. A full battery charge can gain 2-3 tenths per lap.
- Explanation: Drag Reduction System opens the rear wing, reducing drag for higher top speed. It is only allowed in designated DRS zones when within 1 second of the car ahead (in race) or in qualifying (anytime).
- When: Activate DRS as soon as you enter the detection zone if you are close enough. On tracks with multiple DRS zones (e.g., Bahrain), use it to set up overtakes into the next corner.
- Explanation: Jerky inputs unsettle the car, causing loss of traction or snap oversteer. Use a linear throttle and steering progression.
- Deeper Analysis: With traction control off, feather the throttle out of corners to manage wheelspin. With steering, use small corrections on the straights; for hairpins, turn more decisively but still smoothly.
- Explanation: Each weekend has three compounds (C1-C5). Softer tyres have more grip but wear faster; harder tyres last longer but provide less peak performance.
- When: In short stints (qualifying, early race battles), use softs. For long stints or high-degradation tracks (e.g., Singapore), choose mediums or hards. Always consider the projected delta between compounds.
- Explanation: The undercut is pitting earlier than your rival to gain track position by using fresh tyres on their out-lap. The overcut is staying out longer to benefit from a clear track and tire temperature.
- Deeper Analysis: The undercut works best when the pit delta is small (pit entry/exit loss < 2 seconds). The overcut works when the leading car has heavy traffic or tyre degradation. Use the race director and tyre wear map to decide.
- Explanation: The car starts with a set fuel load. You must manage fuel consumption to avoid running out. Use the MFD to adjust fuel mixture: Lean saves fuel but reduces power; Rich gives more power but consumes faster.
- When: At the start of the race with full tanks, use Standard mix. In safety car periods, switch to Lean to save fuel. On the final laps, if low, lift and coast gently.
- Explanation: The car setup affects handling. Key parameters: Aerodynamics (downforce wings), Suspension (mechanical grip), Brake bias, Differential.
- Deeper Analysis: For oversteer (rear slides more), soften rear anti-roll bar, stiffen front, or shift brake bias rearward. For understeer (car doesn't turn), stiffen rear, soften front, shift brake bias forward. Use track-specific setups from community or your own telemetry.
- Explanation: Gear ratios affect acceleration and top speed. Shorter ratios give better acceleration out of corners but lower top speed; longer ratios do the opposite.
- When: On low-speed twisty tracks (e.g., Monaco), use shorter ratios to maximize corner exit speed. On high-speed circuits (e.g., Monza), lengthen the top gear for higher straight-line speed.
- Explanation: Tyre pressure affects contact patch and wear. Higher pressure reduces rolling resistance but decreases grip. Camber (negative) improves cornering grip but wears the inner tyre.
- Advanced: Start with recommended pressures and adjust based on tyre temperature readings. If inner temps are high, reduce negative camber; if outer temps high, increase camber slightly.
- Explanation: Resource Points (RP) are earned from race results and objectives. Spend them on facility upgrades (e.g., wind tunnel, CFD, simulator) to improve car development, and on component upgrades (engine, chassis, aero, durability).
- When to Invest: Early career, prioritize Facilities first (speed up development), then focus on specific car weaknesses. For example, if you lose time on straights, upgrade Engine Power.
- Explanation: Each race weekend, you receive R&D objectives (e.g., complete a certain number of laps without spin) and manager goals (finish top 5, beat teammate). Completing them yields extra RP and team morale.
- Deeper Analysis: Always attempt the objectives, even if you risk a crash. If failing, restart qualifying with flashbacks. Manager goals affect your seat security; consistently meeting them leads to better contracts.
- Explanation: Your teammate's performance can help or hinder you. They can be asked to let you pass, hold up rivals, or block.
- When: In races where you're fighting for podium, request your teammate to slow down a rival (if they are behind). This can secure your position. However, overusing it may hurt team harmony.
- Explanation: F1 World features multiple car categories (e.g., 2023 Cars, Classic, Supercar). You earn tokens and blueprints from events to unlock and upgrade cars.
- When: At start, focus on one car per category to maximum level rather than spreading resources. Use daily/weekly events to farm upgrade materials.
- Explanation: Each event has bonus objectives (e.g., finish without damage, win with a certain car). Completing them gives extra rewards.
- Deeper Analysis: Re-run events with weaker cars for easier objectives, or use higher-level cars for win conditions. Prioritize events that reward parts you need.
- Explanation: In multiplayer, avoid dive-bombs and respect track limits. Use defensive lines when protecting position.
- Advanced: In ranked lobbies, learn the three overtaking techniques: slipstream pass into DRS zone, switchback after a late apex, and undercut via pit strategy. Use radar and mirror to anticipate moves.
- Explanation: Use the on-screen MFD and post-session data to analyze lap times, sector splits, throttle/brake traces.
- When: After practice sessions, compare your best lap to an optimal line. Look for areas where you lifted off throttle too early or braked too hard.
- Explanation: Adjust steering linearity, saturation, and wheel rotation for personal preference. For wheels, set rotation to 360° or 540° for F1 cars.
- Deeper Analysis: Higher linearity (e.g., 50) makes small movements more sensitive, beneficial for precise steering corrections. Lower saturation reduces maximum lock angle, helping avoid oversteer.
- Explanation: Assists like Traction Control, ABS, and Racing Line make driving easier but sacrifice pace. To improve, gradually disable them.
- Advanced Setup: Keep medium Traction Control for stability in wet conditions, but use no assists in dry for best lap times. Alternatively, leave ABS on if you struggle with locking.
- Explanation: Each circuit has unique challenges: heavy braking zones (e.g., Monaco Turn 1), high-speed corners (e.g., Eau Rouge), or kerb management (e.g., Baku castle section).
- How to Practice: Use time trial mode with a set lap requirement (e.g., 20 clean laps) to memorize ideal lines. Study telemetry from top leaderboard ghosts.
#### Use Flashbacks Wisely
#### Pay Attention to Tyre Temperatures
2. Driving Techniques (Intermediate)
#### ERS Management
#### DRS Activation
#### Smooth Steering and Throttle Input
3. Race Strategy
#### Tyre Compound Choice
#### Pit Stop Timing & Undercut/Overcut
#### Fuel Management
4. Car Setup
#### Basic Setup Principles
#### Gear Ratio Adjustments
#### Tyre Pressure & Camber
5. Career Mode
#### Resource Points Allocation
#### R&D Objectives & Manager Goals
#### Teammate Management
6. F1 World (Online & Live Events)
#### Building Your Car Collection & Upgrades
#### Completing Event Challenges Efficiently
#### Online Racecraft & Etiquette
7. Advanced Optimization
#### Telemetry & Data Analysis
#### Customizing Controller/Steering Wheel Settings
#### Using All Assists Strategically
#### Practice Track-Specific Techniques
Summary Table: Tiered Tips
| Tier | Focus Area | Key Tip |
|---|---|---|
| Beginner | Braking | Use brake markers and brake early |
| Beginner | Tyre Warmup | Weave on out-lap to heat tyres |
| Intermediate | ERS | Manual deploy on straights |
| Intermediate | Race Strategy | Use undercut with fresh tyres |
| Advanced | Setup | Adjust brake bias per corner exit |
| Advanced | Telemetry | Compare sector times to optimal |