Core Gameplay
Core Gameplay
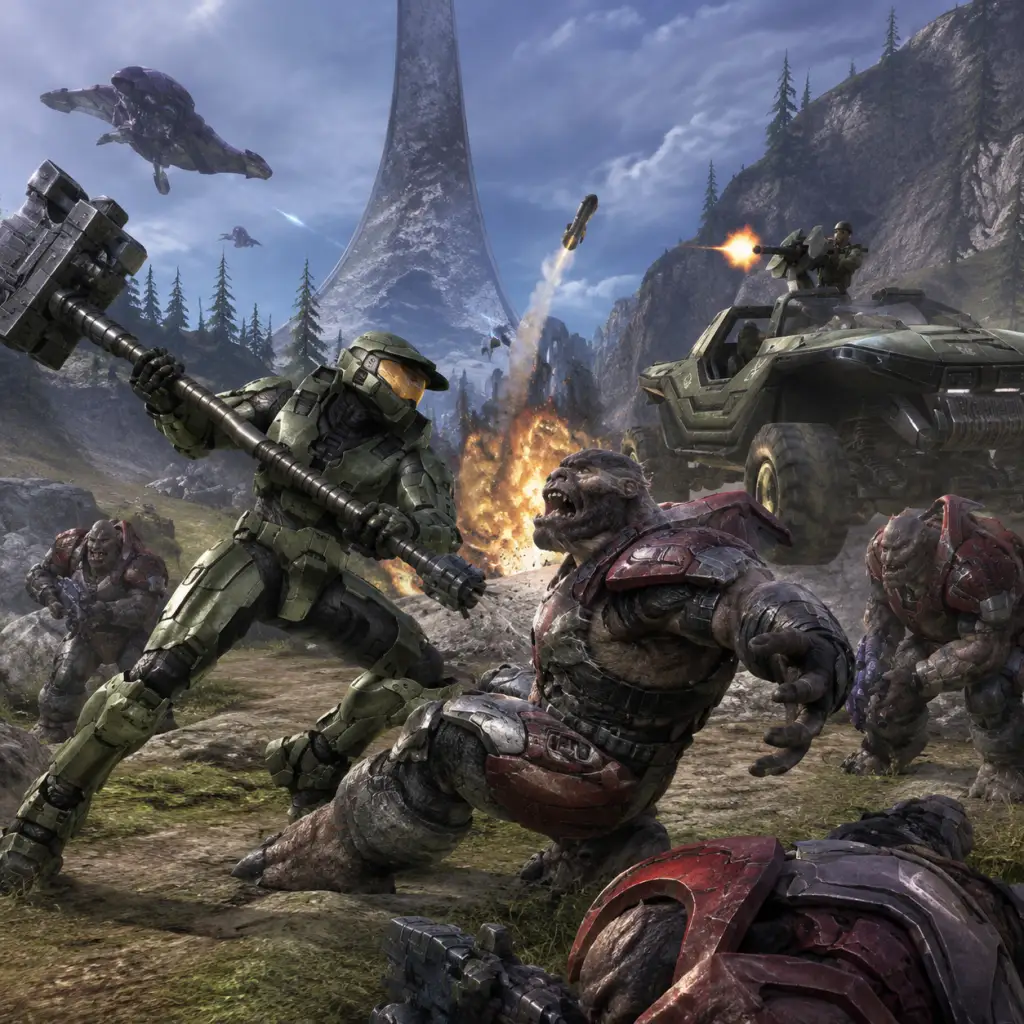
Halo 3 blends tight first-person shooting with large-scale sandbox battles, a unique ballistic/energy weapon ecosystem, and a dynamic physics engine. Its core loop revolves around engaging enemy forces (Covenant, Flood, and Brutes), managing your two-weapon loadout and grenades, and using equipment to overcome tactical challenges. While the campaign follows a linear path, each encounter offers multiple approaches. This guide breaks down the gameplay by progression tiers, covering early, mid, late, and endgame stages.
Gameplay Loop Fundamentals
The primary loop in Halo 3 is: Locate enemy → engage with weapons/grenades/melee → reposition (using shields, equipment, cover) → neutralize threat → loot or resupply → move to next encounter. This loop repeats throughout the campaign and is further refined by:
- Two-weapon limit: One weapon per hand; you can swap by picking up dropped weapons.
- Dual wielding: Some weapons (pistols, SMGs, plasma rifles) can be held in pairs, doubling firepower but disabling equipment/grenades.
- Recharging shields: Health is split into shield (recharges) and health (does not). Use cover to let shields recover.
- Equipment: One-use gadgets like Bubble Shield, Gravity Lift, Power Drain, etc., that alter the battlefield.
- Vehicle integration: Tanks, Warthogs, Banshees (limited availability).
- Difficulty selection (Easy, Normal, Heroic, Legendary)
- Skull unlocks (hidden collectibles that modify gameplay)
- Weapon mastery (learning each weapon’s role)
- Campaign scoring (for completing levels with multiplier)
- Multiplayer rank (if applicable, but this guide focuses on campaign mechanics; endgame touches on multiplayer meta)
- Set pieces: Jungle, Covenant cruiser interior, Installation 01.
- Encountered enemies: Grunts (low threats), Jackals (snipers with shields), Brutes (armored, aggressive; no shield but high health). Flood not yet introduced.
- Weapon sandbox starters: Mission-provided: Assault Rifle, Battle Rifle, Pistol (dual wield), Plasma Pistol (for overcharge EMP), Frag Grenades. You may find Covenant Carbine, Needler, and Brute Spiker.
Progression Tiers Overview
Halo 3 does not have traditional character levels or skill trees. Progression is driven by:
The following tiers assume you are playing on Normal or Heroic difficulty for the first time, which provides a balanced challenge.
---
Early Game (First 2–3 Campaign Missions)
Environments & Enemies
Combat Strategies
| Goal | Recommended Action |
|---|---|
| Engage Grunts | Use headshots (Battle Rifle/Carbine) or area grenade to scatter. Grunts flee when Brutes are killed. |
| Break Jackal shields | Plasma Pistol overcharge (hold fire to charge) then headshot. Alternatively, aim for unshielded hand. |
| Take down Brutes | Deplete their armour via sustained fire (Assault Rifle/needler) followed by precision headshot. Brutes may go berserk when unarmoured. |
| Manage equipment | Find and use Bubble Shield to revive Marines or outgun Brutes in close quarters. |
Core Loop Example (Mission 1: Sierra 117)
1. Exit jungle tunnel, meet Marines. You carry Battle Rifle and Assault Rifle.
2. Advance down hillside; Grunts and Jackals appear. Use Battle Rifle headshots on Jackals (2 shots to kill). Grenade Grunt clusters.
3. Brute major appears with plasma rifle. Switch to Assault Rifle to burn his armour, then Battle Rifle headshot when armour cracks.
4. Loot area: pick up Needler for fast Brute kill - Needler homing projectiles explode after enough hits.
5. Proceed to bridge; use Frags to clear Brute packs. Bubble Shield protects during bridge fight.
Skill Development Tips (Early Game)
- Practice shield management: Retreat after taking heavy damage; wait 3–4 seconds for full shield recharge.
- Master grenade arcs: Use crosshair angle to predict bounce; stickies (plasma grenades) only available later.
- Learn to dual wield: Hold trigger for two weapons at once; useful for suppressing fire but you lose grenades/equipment. Avoid in tight corridors.
- Look for hidden skulls: In Sierra 117 near the end, a skull (Iron or Black Eye) can be found. Pick it up for achievement; disable skulls in menu if challenge too high.
- Flood: Parasitic enemies that arise about mission 4 (The Flood). They have no shields, hit hard in melee, and come in combat forms (shoot infected weapons) and carrier forms (explode on death).
- Brute Chieftains: Hammer-wielding leaders that require heavy firepower (Fuel Rod Cannon, Spartan Laser) or multiple stickies.
- New equipment: Power Drain (temporarily disable enemy shields/vehicles), Flare (stuns Jackals/Flood in dark areas), Regenerator (heals health gradually).
- Vehicles: Scorpion Tank, Ghost, Warthog often available.
---
Mid Game (Missions 4–7, First Introduction of Flood)
New Elements
Adaptation to Flood
| Flood Type | Threat | Counter |
|---|---|---|
| Combat Form | Shoots your weapons at you, fast melee | Shoot head/body with precision; use Shotgun (found later) for instant kill. Avoid close range. |
| Carrier Form | Bloated, explodes damaging area | Shoot from distance or use shotgun; never let them melee you. |
| Infection Forms (small) | Jump and attach, drain health | Melee or shoot quickly. Keep moving to avoid swarms. |
| Pure Form (later) | Tank-like, can change shape | Use Power Drain to weaken; then heavy weapons or Plasma Pistol/Needler combo. |
Quests/Mission Structure
Campaign missions are linear with occasional open areas. Typically:
- Objective A: Reach point X (e.g., activate a bridge)
- Objective B: Defend or escort (Marines, AI)
- Objective C: Boss fight (Chieftain or Scarab)
- Optional: Find terminals or skulls (affects story/logs)
- Weapon loadout priority: Always carry a precision weapon (Battle Rifle, Carbine) and a power weapon (Rocket Launcher, Spartan Laser, Gravity Hammer when available).
- Skull hunting: In The Flood, a skull is behind a locked door (need Cortana use). Mid-game skulls often boost challenge or disable HUD. Consider collecting for achievements.
- Vehicle handling: Learn Warthog’s momentum - it’s a three-person vehicle (driver, gunner, passenger). Use gunner’s turret for effective support. Scorpion Tank is excellent against Flood swarms.
- The Covenant: Massive Warthog run, then ground battles with multiple Scarabs and Wraiths. You’ll face elite Brute units with power weapons.
- Environment: The Ark Installation - open plains, Forerunner architecture.
- Enemy variety: Flood Pure Forms (Stalker and Tank forms) appear alongside Covenant. Faction battles can be exploited.
Mid-game features the first Scarab fight (The Storm). Strategy: Board via jump from structure or Warthog. Destroy rear power core while avoiding plasma blasts. Use Spartan Laser or Rocket Launcher to disable legs first.
Progression Tips
---
Late Game (Missions 8–10, The Ark and The Covenant)
Difficulty Spike
Weapons & Equipment Meta
| Weapon | Role | Notes |
|---|---|---|
| Spartan Laser | Anti-vehicle heavy | Snipe Wraiths, flying Phantoms, Banshees. Requires charge time. |
| Fuel Rod Cannon | AOE anti-infantry/vehicle | Green plasma balls, large splash. One-shot Grunts, two-shot Brutes. |
| Shotgun | Flood killer | One-hit kill on Flood Combat and Carrier forms. Essential in Cortana mission. |
| Energy Sword | Brute/Flood melee | One-hit kill on most enemies. Limited uses (20 energy). |
| Plasma Grenade | Sticky explosive | Glows blue. Stick to Brutes or vehicles for instant kill. |
Critical Mission: The Covenant
This is the longest and most challenging level. Key steps:
1. Warthog Run: Keep turret gunner alive. Drive left to avoid Scarab beam. Use obstacles for cover.
2. Covenant & Flood fight: Enemies from both sides. Let them fight each other, then mop up.
3. Twin Scarabs: Use Spartan Laser to destroy their legs; board and shoot core. Alternatively, use Hornet (flying vehicle) with fuel rod.
4. Final push: Hold out in tunnel until activation. Turret positions help.
Endgame Preparation
- Save power weapons (Spartan Laser, Rockets) for boss encounters and vehicle-heavy sections.
- Stockpile grenades: Max 4 frags and 4 plasmas (if found). Use dual-wielding for plasma pistols to disable vehicles.
- Learn to hijack: Jump on any enemy vehicle and melee to eject driver (health required). Useful for stealing Wraiths or Ghosts.
- Cortana: Dense Flood corridors, minimal weapons. Rely on Shotgun, Energy Sword, and grenades. Tip: Avoid combat runs; sprint through tight paths. Use Gravity Lift to reach high platforms.
- Halo: The final Warthog run. Drive down the ring’s interior while dodging Flood and Sentinels. Strategy: Stay on the road, use boost, ignore most enemies. Jump the gap at the end. Then, a final boss fight – the Ark activating. Actually, Halo mission is a long drive and then the final structure fight with the Prophet of Truth (Brute Chieftain with invincibility until you lower shield by activating terminals).
- Enemy modifiers: Brutes have more health, increased accuracy, and throw grenades more often. Flood hit harder.
- Recommended loadout: Plasma Pistol (for overcharge to remove shields/disable vehicles) + any precision weapon. Energy Sword backup.
- Key tactics: Use plasma pistol overcharge + Battle Rifle headshot combo on everything. Noob combo. On Legendary, the Warthog run requires perfect driving; enemies one-shot you.
- Skulls to avoid: Black Eye (shield only recharges on melee kills) is brutal; Iron (restart upon death) recommended only for achievements.
- Matchmaking: Slayer, Capture the Flag, Oddball, etc. Each map has weapon spawns and equipment placements (Bubble Shield, Overshield, etc.) that affect meta.
- Forge: Create custom maps via editing forge worlds (Sandbox, Foundry). Use for custom games or testing.
- Campaign scoring: Replay levels with Skulls on for multiplier. Aim for highest score; used for achievements like “Endure” (score 200k on Legendary).
- Terminals & Easter eggs: Find all terminals for story depth or the “Halo 3” ending sequence—hidden items like the Eye of Truth or the Marine Easter egg.
---
Endgame (Missions 10–11, Wraith/Finisher & Legendary Play)
Final Missions: Cortana and Halo
Legendary Difficulty Endgame
Multiplayer & Forge (Endgame Content)
Once the campaign is finished on preferably Heroic or Legendary, consider:
Summary Table: Progression Milestones
| Tier | Key Milestone | Essential Skill |
|---|---|---|
| Early | Sierra 117 | Headshots, grenade placement |
| Early | Crow’s Nest | Vehicle handling (Warthog) |
| Mid | The Flood | Combat vs Flood (shotgun) |
| Mid | The Storm | Scarab takedown |
| Late | The Covenant | Multi-enemy management, Spartan Laser usage |
| Late | Cortana | Close-quarters survival |
| Endgame | Halo | Warthog driving and final boss |
| Endgame | Legendary playthrough | Noob combo mastery |
Final Advice
- Halo 3 rewards experimentation. Use equipment creatively: Bubble Shield to revive, Gravity Lift to reach sniper perches, Power Drain to break Brute Chieftain’s invincibility frames.
- Co-op play allows one player to revive the other (Health Pack; Press X on downed ally). Perfect for Legendary.
- Exploration: Look for hidden paths, often blocked by rocks or vents, containing skulls or weapon caches (like Rocket Launcher in early missions).
Master these systems, and you will dominate the Human-Covenant-Flood war from jungles to ringworlds.