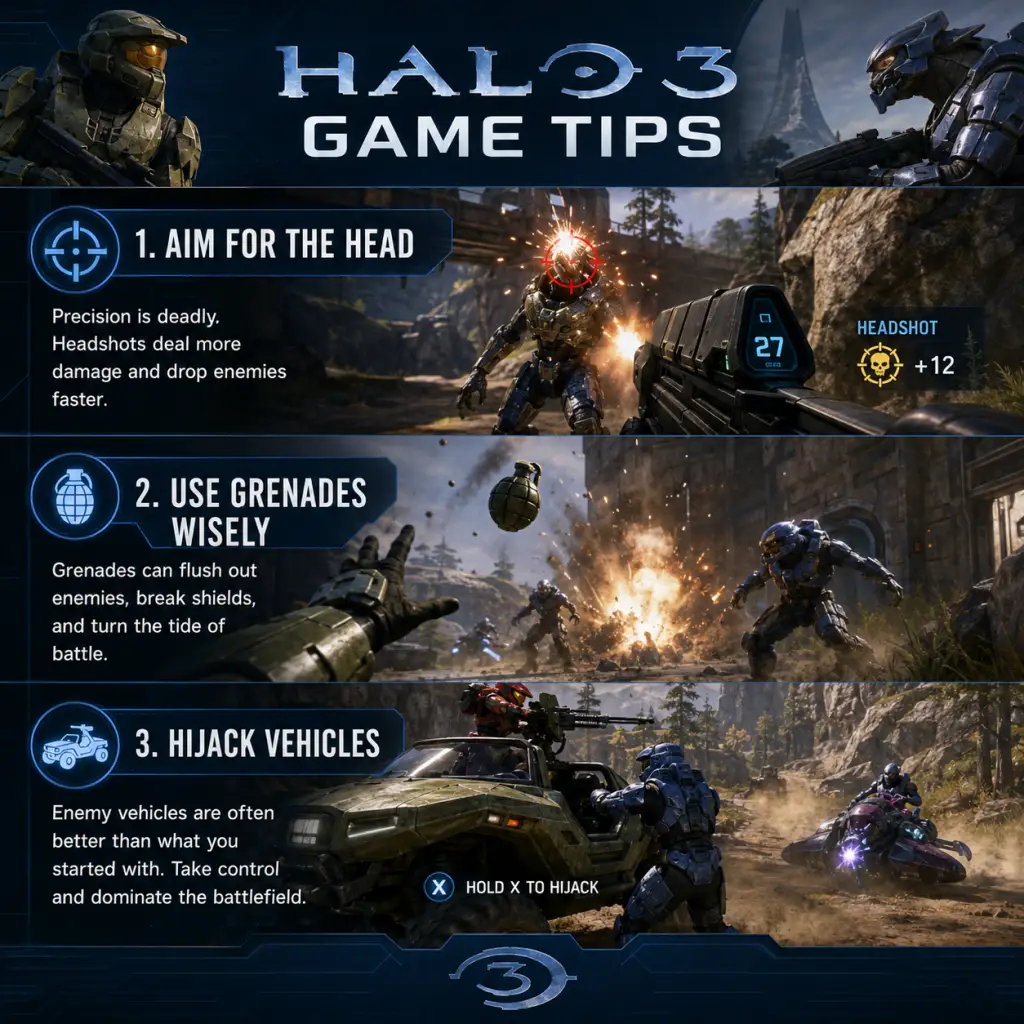
Game Tips
Game Tips
Below is a massive collection of Halo 3 tips organized by category, ranging from beginner fundamentals to advanced optimizations for campaign, multiplayer, and Firefight (if applicable). Every tip includes a clear explanation, analysis, and suggested use cases.
---
General Tips
- Stick and Move: Halo 3 combat is about positioning and angles. Never stand still—strafe, jump, and crouch to make yourself a harder target. The motion tracker (radar) is your best friend; always watch it for enemy blips.
- Learn the Weapon Sandbox: Each weapon has a specific role. Don’t just grab the Battle Rifle (BR) and ignore everything else. Practice with the Plasma Pistol for EMP, the Mauler for close range, the Carbine for mid-range, etc.
- Master the Melee: Melee attacks deal significant damage and can one-hit kill (with a backsmack) or break shields. Combine melee with a quick weapon swap for a faster follow-up (the “melee-swap” technique).
- Use Equipment Wisely: Equipment like the Bubble Shield, Regenerator, and Radar Jammer can turn a fight. Bubble Shield blocks all projectiles and melee from outside—use it to secure a power weapon or revive a teammate.
- Drive the Warthog Like a Pro: The Warthog is a powerful transport/gun platform. The driver should focus on positioning the gunner, not on kills. Keep moving and let the gunner (or passenger with rocket) do the work. Learn to “flip” the Hog back over with the action button (RB/X) to avoid being stranded.
- Vehicle Countering: The Plasma Pistol’s charged shot stops vehicles instantly (EMP). The Missile Pod and Spartan Laser can destroy any vehicle in one hit if aimed properly. The Splaser (Spartan Laser) requires leading on moving targets.
- Grenade Bouncing and Cooking: You can cook frag grenades (hold the throw button) to time detonation for when they reach the enemy. Bounce them off walls/ceilings to hit targets behind cover. Plasma grenades stick to enemies/vehicles—always aim for vehicles or Spartan shields.
- Headshot Awareness: In Halo 3, headshots only matter once shields are depleted. Body shots break shields; then one headshot kills (with a precision weapon like BR, Carbine, or Beam Rifle). Always aim for center mass until shields pop, then snap to the head.
- Communication is Key (Multiplayer): In team modes, call out enemy positions, weapon locations (e.g., “Sniper at top mid”), and power-ups like Overshield or Active Camo. Ping on MCC for quick markers.
- Learn the Maps: Each map has power weapon spawns, grenade locations, and flank routes. Spend time in custom games or theater mode exploring. Memorize the timers (usually 3 minutes for power weapons) to dominate.
- Start with the Battle Rifle (BR): The BR is the most versatile weapon. It has a 3-shot burst that kills in 4 bursts (12 bullets) if all headshots after shields. Practice the “4-shot” kill on bots.
- Use Cover Liberally: Don’t stand in the open. Peek around corners, jump-shot to land shots while moving, and retreat when shields are down (they recharge after a few seconds).
- Combined Arms: Fire a charged Plasma Pistol shot to completely drain shields, then quickly switch to BR for a headshot kill. This combo works on Spartans and Elites.
- Grenade First, Shoot Second: When engaging at mid-range, toss a frag grenade at the enemy’s position to force them to move or take damage, then follow up with precision fire.
- Melee When Close: If an enemy rushes you, time a melee attack just as they enter range. A melee + one BR burst will kill. Alternatively, use the shotgun or Mauler for a quick kill.
- Strafe Patterns: Learn to alternate your strafe direction unpredictably. Crouch-strafe (crouching while moving) throws off aim. Mix in short jumps to avoid grenade splash.
- Weapon Combos:
- Voice of an Enemy: Use the audio cues for shield depletion (beep) and grenade cooking (sound effect). Act on them—push when enemy shields are down.
- Power Weapon Control: In CTF or Slayer, always contest the Sniper Rifle, Rocket Launcher, or Energy Sword. Learn the map-timers to predict spawns. If you hold the power weapon, your team has a huge advantage.
- Brute Shot Utility: The Brute Shot fires a bouncing projectile that can bounce off walls. Use it for indirect fire, or to flush out enemies hiding behind cover. The melee is also a one-hit kill (backsmack).
- BXR (Buttton Glitch): In the original Halo 3 on Xbox 360 (patched in MCC), there was a rapid BR glitch (melee-cancel). For MCC, it’s removed, but the beat-down cancel exists: melee, then instantly swap weapons and back to reduce melee recovery. Practice this to get two attacks quickly.
- Perfect Nade Placement: Predict enemy movement. Throw a frag where they are about to run. For example, if an enemy breaks line of sight, toss a nade at the corner they’ll peek from.
- Double Melee Combo: Melee (shield break) → switch to a weapon like the Plasma Pistol (charged) → melee again for a quick kill. This is faster than a single melee + uncharged shot.
- Stickying: Practice the grenade stick on moving Spartans or vehicles. Plasma stick directly to the target; Frag sticks need a direct impact (rare). Use the training mode in Custom Games to practice.
- Gravity Hammer Timing: The Gravity Hammer has a lunge melee. Time your approach: sprint, jump, and slam at the peak to hit enemies below. The hammer sends vehicles flying—use it to flip enemy Ghosts.
- Campaign Hidden Areas: Many levels have hidden caves, tunnels, and terminals. Use the motion tracker to spot environmental audio cues (e.g., humming of a Forerunner terminal). Explore off the beaten path, especially on The Ark, The Covenant, and Halo.
- Skull Locations: There are 13 Skulls in the campaign. Each alters gameplay (e.g., Grunt Birthday Party, Famine). Find them by doubling back after events or looking in dark corners. Some are only accessible on Legendary difficulty.
- Terminal Collectibles: 7 Terminals in Halo 3 reveal lore. They’re often near major battles or in side rooms. Use a guide for exact locations, but generally look for blue glowing interfaces.
- Vehicles as Exploration Tools: You can drive a Mongoose into areas designed for Warthogs to bypass routes. Use the Hornet (on The Covenant) to reach high ledges and find shortcuts.
- Multiplayer Map Secrets: Each multiplayer map has easter eggs (e.g., The Foundry has a hidden skull, Sandtrap has a submerged elephant). In custom games, enable “empty” vehicles or teleporters to discover hidden areas.
- Walk, Don’t Run: In campaign, walking reduces your motion tracker noise. Use it to sneak past Flood spore rooms or ambush Covenant patrols.
- Environmental Hazards: Look for fusion coils (red explosive canisters) and plasma batteries (blue). Shoot them to create explosions that kill enemies or destroy vehicles. Great for clearing chokepoints.
- Ammo Conservation: Use your starting weapon efficiently. Don’t spray; every bullet counts, especially on higher difficulties. Pick up dropped weapons from enemies—Covenant weapons often have full ammo.
- Weapon Priority: Always carry two weapons that complement each other. Common loadouts:
- Grenade Economy: Always toss grenades before dying—don’t waste them. Use frags to force movement, plasma to EMP vehicles, and spikes (Flood) to slow enemies. Collect grenades from dead enemies.
- Power-up Timing: Overshield and Active Camo spawn at set intervals (e.g., 3 minutes). In multiplayer, time them with the in-game clock (e.g., “Overshield’s up in 30”). Grab them immediately or deny the enemy.
- Vehicle Fuel: Vehicles have limited fuel? Not in Halo 3, but they can be destroyed. Learn to bail out before explosion to save yourself. Keep vehicles repaired? No repairs, but you can flip them back over.
- Weapon Drop Priority: If you find a power weapon, drop your current weapon. Don’t hold two weak weapons. Communicate with teammates if you want to share.
- Campaign Health: On Legendary, health packs (medkits) are finite. Use them sparingly. Instead, wait for shield recharge near resupply points. Co-op players can revive you if they have a medkit? No, revival is automatic on MCC if you have a “Revive” skull? Actually, Halo 3 doesn’t have revive; you respawn at checkpoints. So avoid dying by staying alive.
- Experience and Rank (MCC): In Halo 3 multiplayer on MCC, you earn XP per match based on performance (kills, assists, medals, win/loss). Spend XP to unlock armor permutations, visor colors, and emblems. Focus on daily challenges for bonus XP.
- Medals Lead to XP: Aim for gold medals like “Killing Spree” (5 kills), “Overkill”, “Extermination”. These grant large XP bonuses. Use power weapons to get multi-kills.
- Win to Rank Faster: Winning matches (Slayer, CTF, etc.) gives a significant XP multiplier. Play objective-based modes even if you’re not slayer to contribute and secure wins.
- Seasonal Content: MCC has seasonal passes (e.g., Reach, Halo 3). Spend your season points on items you like; you can grind levels indefinitely. Use double XP weekends to maximize.
- Customs Browser: For the most efficient XP farming, find custom games with high score or fast respawns. However, avoid farming that spoils fun; legit play is more rewarding.
- Halo 3 does not have loadouts in standard multiplayer (you pick up weapons). However, in Custom Games and Forge, you can set weapon spawns and player traits. Use these tips to create effective loadouts for custom game modes.
- Spawn Weapon Strategy: For a balanced slayer map, set two spawn weapons: BR (primary) and Magnum (secondary). Add a power weapon like Sniper in the center. For Flood modes, set Shotgun and Assault Rifle for survivors, and Energy Sword for Flood.
- Player Traits: Adjust movement speed, shield strength, and gravity. For training, increase shields to 200% and reduce gravity to practice jumps. For competitive customs, use default or slightly increased speed (110%).
- Blocking Power Weapon Abuse: In custom games, you can set timers for power weapons (respawn time). Set Snipers to 3 minutes, Rockets to 2 minutes. This forces teams to contest regularly.
- Team Role Setup (For competitive customs):
- Spartan Abilities: In Halo 3, you can’t sprint (no sprint in base game). Use equipment like the Jetpack? No, Jetpack is in Halo: Reach. In Halo 3, you have limited equipment: Bubble Shield, Regenerator, Radar Jammer, Power Drain, Flare, Trip Mine, Grav Lift. Choose depending on game mode: Bubble Shield for CTF defense, Trip Mine for area denial, Grav Lift for vertical map movement.
- BXR and RRX (Legacy): While not available in MCC, some players still use a “beat-down cancel” by double-tapping melee. This is mostly a relic; focus on modern strafe-shooting.
- Timings: In Halo 3, grenade throw arcs are parabolic. Practice cooking a frag for 2 seconds so it explodes right as it hits the ground. Plasma grenades don’t bounce; use the arc to stick a stationary enemy.
- Vehicular Domination: On Sandtrap or The Ark campaign, use the Hornet to “hijack” enemy aircraft by boarding them. In multiplayer, boarding a vehicle requires a melee to the driver’s door. If you board a Scorpion, you can steal it.
- Grenade Jumping: Use a well-timed frag grenade explosion to boost yourself to higher ledges. This is risky but can create shortcuts. On The Covenant, grenade jumping over walls can skip sections.
- Laser Splash Damage: The Spartan Laser also deals splash damage on impact. If you miss the vehicle, the explosion can still kill nearby infantry. Use it as a pseudo-AOE against groups.
- Flood Combat: The Flood are weak to fire (flamethrower) and explosive weapons. The Shotgun is devastating against Flood forms (one hit kill for combat forms). The Plasma Rifle can slow them. Use grenades to clear spawn points.
- Legendary Difficulty: On Legendary, enemies have extremely strong shields and precision aim. Use the “plasma pistol + precision weapon combo” religiously. Stick to cover; never peak twice from the same spot. Brutes in Legendary will charge and melee one-shot you—keep distance.
- Co-op Synergy: In co-op, designate roles: one player focuses on plasma drain, another on headshots. Share power weapons. Vehicles are more effective with a driver and gunner. The passenger can repair? No repair, but you can swap seats quickly to avoid destruction.
- Theater Mode Analysis: After a multiplayer match, go to Theater to watch your gameplay. Look for bad decision points, missed nade opportunities, and aim mistakes. Watch top players’ POV to learn positioning.
- Map Control in Multiplayer: On Guardian, control the sword spawn and top mid. On Narrows, control the rocket spawn and the needler. On Pit, control the center BR and laser. Always push with numbers—don’t feed kills.
- Armor Abilities (MCC): In MCC, Halo 3 does not have armor abilities like Sprint or Jetpack. But in custom games, you can enable “Halo 3” settings with player traits that simulate them (e.g., increased movement speed). Use these for training or unique game types.
- Keep Your Cool: Halo 3 is about outsmarting and out-positioning. Panic leads to missed shots and poor grenade throws. Take a breath and trust your muscle memory.
- Learn from Pros: Watch high-level Halo 3 tournaments (e.g., MLG) or MCC stats leaderboard players. Mimic their routes, callouts, and engagement timings.
- Custom Games Are Your School: Practice specific techniques (4-shot, nade sticks, vehicle hijacking) in custom games with friends or bots. No pressure, just repetition.
- Have Fun: Ultimately, Halo 3 is a game of pure fun. Use the Sandbox to try wacky combos like the Gravity Hammer + Rocket launcher in customs. Don’t take it too seriously—except on Legendary campaign, where you will die a lot.
---
Combat Tips
#### Beginner
#### Intermediate
- Plasma Pistol (charged) + Carbine = instant shield drain + headshot (works great at range).
- Plasma Rifle + Magnum: Overheat the Plasma Rifle to deplete shields, then headshot with Magnum.
- Needler + Melee: Super Combine (needle explosion) after a few hits plus melee to finish.
#### Advanced
---
Exploration Tips
---
Resource Management Tips
- BR + Shotgun (close/mid)
- Carbine + Rocket Launcher (range/power)
- Plasma Pistol + Battle Rifle (shield drain + kill)
---
Economy (Multiplayer Scoring & Progression)
---
Builds / Loadouts (Custom Games & Multiplayer)
- Slayer: BR (main), Frags (for pushes).
- Objective (CTF/Assault): BR + Shotgun for flag carriers, or BR + Plasma Pistol for vehicle disruption.
- Support: BR + Carbine for long-range cover, plus Bubble Shield for defensive plays.
---
Advanced Strategies & Optimizations
---
Final Tips
---
This guide covers tips for both campaign and multiplayer. For more specific strategies on individual missions or maps, refer to the corresponding sections in the full walkthrough.