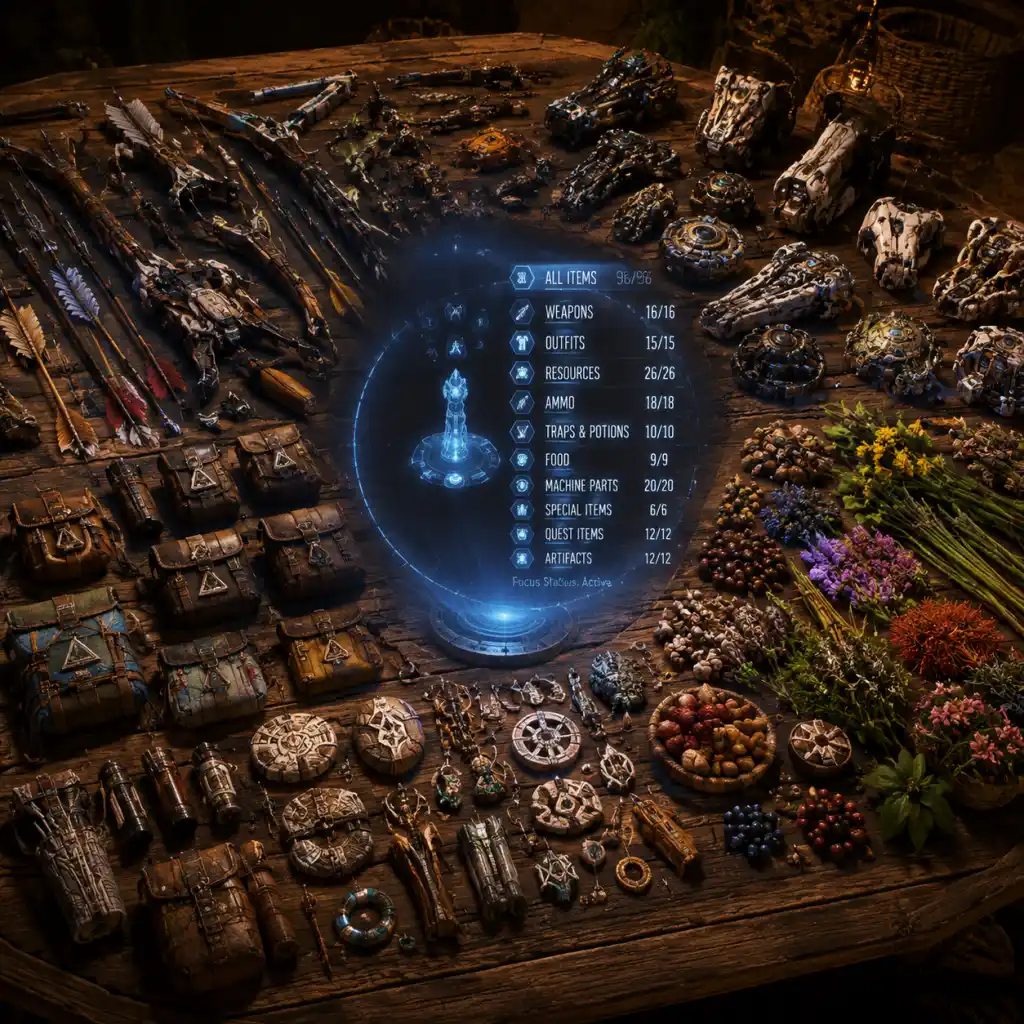
All Game Items
All Game Items
This section catalogs every major item category in Horizon Forbidden West. Items are grouped logically, with descriptions, acquisition methods, usage tips, and notable synergies. All information is based on the latest game version (1.18+).
Weapons
Weapons are your primary tools for combat. Each class has unique mechanics and can be upgraded at Workbenches using Machine Parts and Metal Shards.
#### Hunter Bow
- Description: Versatile mid-range bow. Fires standard arrows (hunting, hardpoint, elemental). Best for general damage and tear.
- How to Obtain: Starting weapon. Better variants (e.g., Carja's Bane, Sunshot) purchased from merchants or rewarded for quests.
- When Useful: All-purpose combat. Use Hardpoint Arrows for high tear and damage.
- Synergies: Combine with Concentration + Coils for increased accuracy and damage.
- Upgrades: Up to 3 upgrade levels at Workbench, requiring Metal Shards, Processed Metal Blocks, and specific machine parts.
- Description: Long-range precision bow. Fires precision arrows, plasma arrows, and advanced arrows. High tear but slow draw.
- How to Obtain: Early game at Chainscrape merchant. Legendary version "Forgefall" from Arena or Black Box collectibles.
- When Useful: Sniping weak points, removing components from a distance. Stealth kills.
- Synergies: Use Braced Shot weapon technique for massive single target damage.
- Upgrades: Unlock after completing "The Point of the Lance" main quest.
- Description: Short-range rapid-fire bow. Fires spread, but high rate of fire. Best for close combat and elemental buildup.
- How to Obtain: Purchase from merchants in Plainsong. Legendary variant "Rain of Sparks" from Apex machine hunts.
- When Useful: Build up elemental statuses quickly (fire, frost, acid, shock) on aggressive machines.
- Synergies: Pair with Melee Follow-Up coil to boost melee damage after hitting with Warrior Bow.
- Upgrades: Requires Sturdy Ropecaster parts and machine weaves.
- Description: Sets tripwires that trigger on contact. Different wires: shock, fire, blast, acid, frost, purification.
- How to Obtain: Default at start. Upgraded versions (e.g., Carja's Trap, The Final Chapter) from vendors.
- When Useful: Area denial, pre-battle traps, controlling enemy movement. Excellent for Human enemies.
- Synergies: Use for stealth ambushes. Combine with Blast Wire and skill "Quick Wire" for faster deployment.
- Upgrades: Unlock via main quest progression.
- Description: Fires ropes that tether machines to the ground. Can immobilize large enemies.
- How to Obtain: Purchased from merchants after "The Point of the Lance". Legendary "The Tie That Binds" from Cauldron KAPPA completion.
- When Useful: Roping down large machines like Thunderjaw, Slaughterspine, or Tremortusk for safe component removal.
- Synergies: Use when allies are present for coordinated attacks. Very low damage but high utility.
- Upgrades: Requires Braided Rope and various machine parts.
- Description: Launches grenades that explode on impact. Types: explosive, adhesive, fire, acid, frost, purgewater.
- How to Obtain: Purchase in The Daunt or Chainscrape. Legendary "The Blast of Time" from side quest "The Way Home".
- When Useful: AOE crowd control, destroying weak points from a distance, applying elemental states.
- Synergies: Use with Adhesive to slow machines, then switch to precision weapons.
- Upgrades: Unlock after completing "The Embassy" main quest.
- Description: Throws a disc that ricochets between targets. Catch the disc to empower the next throw (up to 5 stages).
- How to Obtain: First one from a Relic Ruin in The Daunt. More variants (e.g., Ancestor's Return) from Arena or Collector's Edition.
- When Useful: Fun alternative combat style. High tear and damage when mastered. Effective against groups.
- Synergies: Use with Stealth to get first empowered throw. Skill "Kill Zone" increases shredder damage.
- Upgrades: Requires Machine Cores and Chromatic Shards.
- Description: Lobbs explosive spikes. Can be aimed or fired quickly. Types: drill spikes (piercing), explosive, acid, fire, etc.
- How to Obtain: Purchased after reaching the Stillsands. Legendary "The Skykiller" from side quest "Lofty Ambitions".
- When Useful: High burst damage, especially to weak points. Drill spikes can pin machines.
- Synergies: Use with Valor Surge "Ranged Master" for massive spike damage.
- Upgrades: Needs Metal Shards and precious machine parts.
- Description: Automatic crossbow that fires bolts in bursts. Has two modes: Standard (spread) and Full Draw (charged single bolt).
- How to Obtain: First one given by Erend during "The Dying Lands" side quest. Legendary "The Blast Forge" from Arena Grind.
- When Useful: Sustained DPS on large machines. Full Draw mode for accuracy against fast movers.
- Synergies: Use with Stealth to open with a charged bolt. Works well with elemental bolts.
- Upgrades: Requires Processed Metal Blocks and machine sac webbings.
- Description: Low-level outfits focusing on stealth and survival. Examples: Nora Brave (starter), Nora Tracker (stealth)
- How to Obtain: Purchased in early settlements. Free from story progression.
- When Useful: Early game when stealth is key.
- Synergies: Combine with Silent Strike skills.
- Description: Balanced defense with bonuses to Concentration and weapon stamina. Examples: Carja Trader, Carja Wanderer
- How to Obtain: Merchants in Carja territory (Meridian area).
- When Useful: Mid-game concentration builds.
- Notable: Carja Stalker outfit has excellent stealth for collecting items.
- Description: High melee defense and stamina regen. Examples: Oseram Wayfarer, Oseram Explorer
- How to Obtain: Found in The Claim or purchased from Oseram merchants.
- When Useful: Melee-focused builds. Good against machines that charge.
- Synergies: Use with Melee coils on weapons.
- Description: Aggressive, with bonuses to close combat and valor. Examples: Tenakth Reaver, Tenakth Marshal
- How to Obtain: Best from Tenakth clan settlements (Deserted Lands, Memorial Grove).
- When Useful: Late-game high risk/high reward playstyles.
- Synergies: Valor Surge builds that expend valor quickly.
- Description: Defensive with elemental resistances and healing bonuses. Examples: Utaru Winterweave, Utaru Harvest">
- How to Obtain: From Plainsong merchants and quests.
- When Useful: Surviablity against elemental attacks.
- Synergies: Pair with food that boosts healing.
- Description: Rare, focused on machine damage and weapon stamina. Examples: Quen Deadeye, Quen Commander
- How to Obtain: In the San Francisco area (post-game expansion: Burning Shores adds Quen gear).
- When Useful: Endgame and New Game+.
- Important: Burning Shores DLC required for most Quen outfits.
- Description: Top-tier outfits with unique perks. Examples: Nora Thunder Warrior (melee combat), Oseram Artificer (trap-focused), Carja Stalker Elite (stealth), Tenakth Skirmisher (shock damage)
- How to Obtain: Arena Challenges, collecting all Black Boxes, or completing specific side quests.
- When Useful: Endgame optimization. Each requires 3 upgrade tiers.
- Note: Can be dyed at Dyer NPCs.
- Health Potion: Restores small HP. Crafted with Ridge-Wood (herbs).
- Large Health Potion: Restores ~50% HP. Crafted with Medicinal Berries and Power Cell (machine drop).
- Poultices: Over-time healing. Crafted with animal organs (e.g., Chicken Heart).
- When Useful: Combat emergencies. Use Large Health Potions before boss fights.
- Resistance Potion: Boosts a specific elemental defense. Crafted with machine lens + herbs.
- Purification Potion: Removes current elemental state. Crafted with Purified Water and Berries.
- When Useful: Against Apex machines that spam elemental attacks. Keep Purification for DoTs.
- Stamina Potion: Restores stamina (for weapon techniques). Crafted with Animal Bones.
- Large Stamina Potion: Full stamina restore. Crafted with Machine Circulator + herbs.
- When Useful: Before using multiple Valor Surges or weapon combos.
- Meals: Cooked at Campfires using animal meat. Provide long-lasting buffs (e.g., +damage, +stealth, +health regen). Recipes found throughout the world.
- Examples: Bristleback Roast (melee damage+), Juicy Roast (tear+), Sunwing Omelet (concentration duration+).
- When Useful: Before hunting rare machines or entering Cauldrons.
- Synergies: Stack with potions and outfit weaves.
- Explosive Trap: Deals damage. Crafted with Blastpaste (machine fat) and wires.
- Elemental Trap: Applies fire, frost, shock, or acid. Crafted with machine elemental sacs.
- Ropecaster Trap: Immobilizes. Crafted with Braided Rope and wire.
- When Useful: Pre-position before engaging large groups or tough machines.
- Tip: Use Trap Limit skill to place more.
- Common: Metal Shards (currency), Wire, Braided Rope
- Uncommon: Machine Lens, Machine Heart, Processed Metal Block
- Rare: Large Machine Core (from Thunderjaw, Slaughterspine), Apex Heart (from Apex machines), Sac Webbing (only from intact sacs)
- Legendary: Stormbird Cannons, Tremortusk Tusks – used for final weapon upgrades.
- How to Obtain: Loot after combat. Use Tear weapons to detach components for bonus drops.
- When Useful: Constantly needed for upgrades. Stockpile sac webbings early.
- Medicinal Berries: Heal small amount. Gathered from bushes.
- Ridge-Wood: Crafting potions and food. Found in forests.
- Wild Meat: Used for food. Hunt animals (boar, fox, goose).
- How to Obtain: Scan with Focus to highlight. Use Gatherer skill to increase yield.
- When Useful: Crafting health and stamina items. Always collect.
- Minor Machine Core: Tier 1 upgrade material.
- Machine Core: Tier 2.
- Large Machine Core: Tier 3.
- How to Obtain: Dropped from machines (e.g., Scroungers, Leaplashers). Apex machines drop rarer cores.
- When Useful: Weapon and outfit upgrades beyond level 1.
- Bones: Craft traps, potions, pouches.
- Skin: Craft pouches and some outfits.
- Organs: Craft poultices. Rare organs like Behemoth Tusk used for legendary gear.
- How to Obtain: Hunt animals with predator arrows or traps.
- When Useful: Pouch upgrades require specific animal parts (e.g., Fox Skin for quiver).
- Universal currency. Used for buying items, upgrading, crafting. Dropped from most containers and machines.
- How to Farm: Sell unwanted gear, complete salvage contracts, sell machine parts.
- Important: Do not sell rare materials unless needed.
- Earned by leveling up, completing quests, and discovering Tallnecks. Spend in Skill Trees.
- How to Obtain: Any XP source. Skill Points are character-specific (no shared pool).
- When Useful: Unlock new abilities. Consider "Concentration " and "Intense Concentration" early.
- Currency specific to DLC. Used to purchase legendary gear from the Quen merchant.
- How to Obtain: Found in lava rock deposits, from Apex machines, and as rewards.
- When Useful: Late-game DLC gear upgrades.
- Description: Yellow boxes scattered across the Forbidden West. Turn them in to the pilot at The Stillsands for rewards.
- Total: 12. Rewards include legendary weapons and outfits.
- How to Obtain: Found in ruins, mountains, or underwater. Use Focus to locate.
- Description: Small flying drones. Shoot them down to collect data. Turn in to the botanist at Plainsong.
- Total: 9. Reward: Legendary outfit (Utaru Winterweave).
- Tips: Use stealth arrows or sharpshot bow to avoid alerting nearby machines.
- Description: Ancient ruins with puzzles. Solve to get ornaments. Turn in to collector in The Daunt.
- Total: 10. Rewards include legendary weapons (e.g., Shredder Gauntlet: Ancestor's Return).
- Description: Scan drone points to match a historical photograph. Unlocks lore and sometimes loot boxes.
- Total: 9. Complete all for a legendary outfit (Nora Thunder Warrior).
- Description: Climb towers and activate signals. Rewards include skill points and XP.
- Total: 7. No major gear reward but useful early levels.
- Description: Firegleam (red cysts) can be destroyed with fire arrows to reveal loot. Metal Flowers (white plants) guard loot.
- Useful for machine parts and shards.
- Description: Aloy's AI device. Scans environment, highlights items, machine weak points, and enemy patrol paths.
- How to Obtain: Starting item. Upgraded later with "Focus Upgrade" skill.
- Usage: Press R3 to scan. Essential for stealth and resource gathering.
- Description: Parachute-like device that allows slow fall from heights. Also used for puzzles (wind currents).
- How to Obtain: Early main quest "The Point of the Lance".
- Usage: Hold X while airborne. Can be used with Sunwing mount for fast travel.
- Description: Fires a hook to pull yourself toward grapple points. Also pulls objects.
- How to Obtain: Very early main quest.
- Usage: Use L2 + R2 on golden grapple points. Helps traverse cliffs.
- Description: Allows underwater breathing and vision. Needed for underwater exploration.
- How to Obtain: Main quest "The Diving Mask" in San Francisco area (mid-game).
- Usage: Equipped automatically underwater.
- Description: Unlockable flying mount. After completing main story, you can override Sunwings at specific Cauldrons.
- How to Obtain: Cauldron GEMINI (story).
- Usage: Fast travel in open world, aerial combat.
- Description: Melee weapon. Can be upgraded at Workbench to increase damage and add power attacks.
- Special: Can be infused with elemental damage after completing "The Broken Sky".
- How to Obtain: Starting weapon. Upgrades require Machine Cores and Metal Shards.
- Description: Expand inventory capacity for arrows, potions, traps, machine parts, etc.
- Upgrade via Workbench using animal parts and machine components.
- Examples: Quiver (arrows) requires Fox Skin and Ridge-Wood. Potion Pouch requires Boar Bristle.
- Tips: Upgrade early to avoid running out of space.
- New Game+: Legendary gear can be acquired again for two versions (one for base, one for NG+). Coils and weaves carry over.
- Difficulty: No missable gear that locks you out of story, but some items (e.g., Burning Shores legendaries) are exclusive to DLC.
- Synergies: Consider outfits that complement weapon types. For example, Oseram Artificer outfits increase trap damage, ideal for Tripcaster users.
- Upgrade Priority: Focus on one weapon and one outfit early to maximize resources. Late-game, upgrade legendary gear fully.
#### Sharpshot Bow
#### Warrior Bow
#### Tripcaster
#### Ropecaster
#### Blast Sling
#### Shredder Gauntlet
#### Spike Thrower
#### Boltblaster
Outfits (Armor)
Outfits provide defense and passive bonuses. Each has three equipable Weaves (mods) and can be upgraded to increase defense and unlock weave slots. Outfits are obtained from merchants, quest rewards, or crafting.
#### Nora Outfits
#### Carja Outfits
#### Oseram Outfits
#### Tenakth Outfits
#### Utaru Outfits
#### Quen Outfits
#### Legendary Outfits
Consumables
Consumables grant temporary buffs or healing. They are crafted from herbs, animal parts, and machine drops. Stack effects with food and valor surges.
#### Health Potions
#### Elemental Potions
#### Stamina Potions
#### Food Buffs
#### Traps
Materials
Materials are used for crafting, upgrading, and trading. They are dropped by machines, gathered from plants, or found in loot.
#### Machine Parts
Each machine drops specific parts. Some are detachable (weak points) for extra loot.
#### Plants and Herbs
#### Machine Cores
#### Animal Parts
Currencies
Multiple currencies exist; manage them wisely.
#### Metal Shards
#### Skill Points
#### Brimshine (Burning Shores DLC)
Collectibles
Collectibles offer lore, XP, and special items.
#### Black Boxes
#### Survey Drones
#### Relic Ruins
#### Vista Points
#### Signal Towers
#### Firegleam and Metal Flowers
Key Equipment (Plot & Tools)
These items are essential for progression and exploration.
#### Focus
#### Shieldwing (Glider)
#### Pullcaster (Grapple Hook)
#### Diving Mask
#### Sunwing Mount
#### Spear
#### Pouches (Inventory Upgrades)