Getting Started
Getting Started Guide for Left 4 Dead 2 (New Players)
Welcome to Left 4 Dead 2, a cooperative first-person shooter where you and up to three friends fight through hordes of zombies (called the Infected) to reach safe rooms and complete campaigns. This guide is designed for absolute beginners. We'll cover the first hour, controls, UI, essential objectives, common mistakes, and a day-one checklist.
First Hour Walkthrough: From Main Menu to Your First Safe Room
1. Launch the game. After installation, start L4D2. You'll see the main menu: "Campaigns," "Versus," "Survival," "Scavenge," and options. Select Campaigns.
2. Choose a campaign. The default first campaign is "Dead Center" (set in a hotel/apartment). It's the recommended starting point. Select it and choose "Play" (singleplayer with AI bots) or "Online" (with friends/random players). For your first time, singleplayer is fine to learn mechanics.
3. No character creation. There is no character creation. You choose from four survivors (Coach, Ellis, Nick, Rochelle) – they are cosmetic, same stats. You can change at the lobby screen.
4. Start the game. You'll be in an elevator lobby. The AI bots will follow you. Your objective is to reach the safe room at the end of the level. Follow the yellow arrow (waypoint) on the ground or the on-screen indicator.
5. Movement and basics. Use WASD to move, mouse to look, left click to shoot, right click to aim down sights (or use iron sights for certain weapons). Press Shift to sprint (limited duration, recharges). Interact with objects (press E) to open doors, pick up items, heal, etc.
6. First encounter. You'll soon face a few Common Infected (the standard zombies). Shoot them in the head for quick kills. Melee with your starting weapon (pistol or melee weapon like a frying pan) by pressing Mouse 4 or Q (weapon switch to melee) then left click to swing. Melee is silent and infinite, but risky.
7. Ammo and health. Early on, you'll find ammo piles (green icon) – pick up by walking over them. Also find health packs (medkits) and pain pills (temporary health). Do not waste these. Use medkits only when health is below 50% or bleeding. Use pills for quick boosts before a fight.
8. Special Infected. You'll encounter specials like the Hunter (pounces on you – melee or shoot to save yourself), Smoker (tongue grabs you – shoot the tongue), and Boomer (vomits on you, attracting a horde). Listen for their unique sounds. Work as a team to free each other.
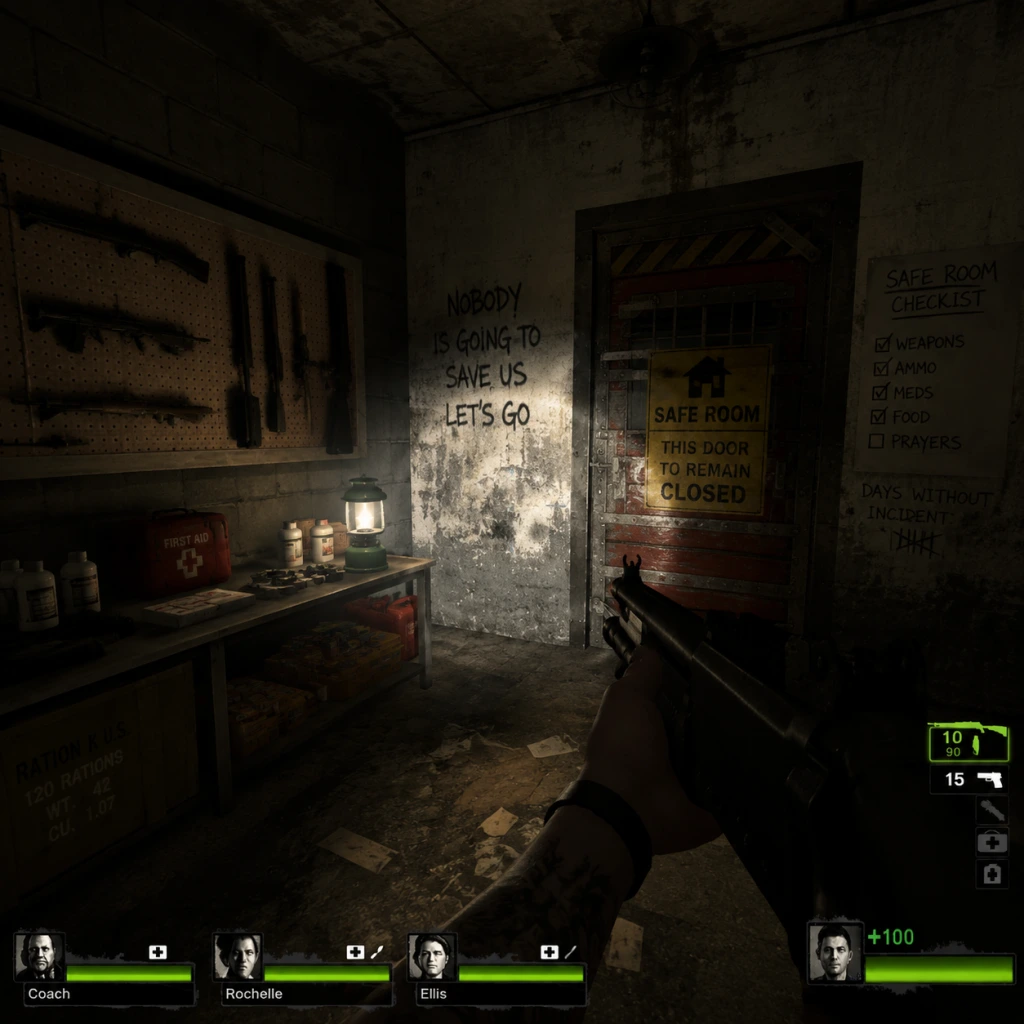
9. Reach the safe room. The level ends when all survivors enter the safe room (a metal door with a locking wheel). Once inside, you get a checkpoint and can restock before next chapter.
10. First hour tip: Stick with your team. Don't run ahead. Check corners. Use your flashlight (press F) in dark areas. Conserve ammo by using melee on lone Common Infected.
Character Creation (None)
Left 4 Dead 2 does not have character creation. You select from four pre-made survivors (Coach, Ellis, Nick, Rochelle) at the lobby. They are purely cosmetic – all have identical health, speed, and abilities. You can change your character between levels in the lobby screen. For your first playthrough, any character is fine.
Controls (All Platforms)
L4D2 is available on PC (Steam) and Xbox 360/One/Series X|S. There is no official PS4, Switch, or mobile version. Below are the default controls. PC controls are remappable; console controls are fixed.
#### PC Controls (Keyboard & Mouse)
| Action | Key |
|---|---|
| Move forward/back/left/right | W, A, S, D |
| Look around | Mouse movement |
| Shoot | Left mouse button |
| Aim down sights | Right mouse button |
| Reload | R |
| Switch weapon | 1, 2, 3 (or mouse wheel) |
| Melee attack | Left mouse button (when holding melee) |
| Use / Interact | E |
| Jump | Space |
| Crouch | Ctrl |
| Sprint | Shift (hold) |
| Flashlight | F |
| Call out / Ping | C (contextual) or V for voice chat |
| Health pack / Pills | 4 (or open inventory) |
| Throwable (pipe bomb, molotov) | 5, 6 |
| Drop item | G (with inventory open) |
| Pause / Menu | Escape |
| Action | Button |
|---|---|
| Move | Left stick |
| Look | Right stick |
| Shoot | RT (right trigger) |
| Aim down sights | LT (left trigger) |
| Reload | X |
| Melee attack | RB (right bumper) |
| Use / Interact | A |
| Jump | Y |
| Crouch | B (click left stick? crouch is usually click left stick) – Confirm: Crouch is Left Stick click or B? (B is crouch by default) |
| Sprint | Left stick click (hold while moving) |
| Flashlight | Up on D-pad |
| Quick switch weapon | Y? No, Y is jump. Weapon switch: Hold X? Actually on Xbox: X is reload, Y is jump, A interact, B crouch. Weapon slots are mapped to D-pad directions. Check in-game. For this guide, refer to your controller's in-game settings. |
| Voice chat | Press and hold the Back button (or View) |
UI Overview (Heads-Up Display)
- Health bar: Bottom left – a circle with your character's face. Green (100-40), yellow (39-20), red (19-0). A bandage icon means you have a medkit. A pills icon means you have pain pills.
- Weapon info: Bottom center – shows current weapon, ammo count, and a magazine indicator. Reload animation is shown on the weapon model.
- Team status: Top left – health bars and names of your teammates (colored according to health). If a teammate is incapacitated (downed), their bar turns red and they crawl.
- Objective indicator: Large yellow arrow or glow on the ground guiding you to the next safe room. Also a distance marker (e.g., "Safe Room: 50m") at the top of the screen.
- Ammo counter: Center-bottom shows remaining bullets in magazine and total reserve. White font: good; red font: low.
- Score and time: Only in Versus or Scavenge modes. Not relevant in Campaign.
- Team chat: Text chat appears on the left side of the screen. Voice chat indicator shows a speaker icon near a player's name when they speak.
- Stick together. The AI bots are decent but they cannot save you from all dangers. If you run ahead, you'll get surrounded and die.
- Reach the safe room. Each chapter ends in a safe room. Your first objective is to get there alive.
- Conserve resources. Ammo is limited; use melee on isolated Common Infected. Save medkits for emergencies. Use pipe bombs or molotovs only on large hordes or when the team is overwhelmed.
- Help incapacitated teammates. If a survivor goes down, you can revive them by pressing E near them while they are crawling (takes 3-4 seconds). If they die (whited out), you need to reach a safe room or a defibrillator (rare) to bring them back.
- Listen to audio cues. Special Infected have distinct sounds: Hunter screams, Smoker coughs, Boomer gurgles, Tank roars, Witch cries. React immediately.
Essential Early Objectives (First Campaign)
What to Do First vs. What to Avoid
| Do | Avoid |
|---|---|
| Check your surroundings before opening doors | Running through gas cans or explosive tanks (shoot them to clear paths but be careful) |
| Melee lone zombies to save bullets | Wasting ammo on Common Infected in the open when you can just run past |
| Stay close to your team | Splitting up, especially when one player is alone |
| Use throwables (pipe bombs) when a horde is coming | Using molotovs in small rooms (you'll burn yourself) |
| Heal when in yellow/red health | Hoarding medkits when you are at critical health (you can drop items by pressing G) |
| Look for ammo piles near safe rooms | Ignoring the mini-barricades and environmental hazards (e.g., alarm cars) that can trigger hordes |
| Learn the maps – note which paths are dead ends | Standing in front of a Witch (she will attack and down you) |
| Use the environment – climb onto vending machines, etc. | Sprinting endlessly (you'll become tired and slow) |
Early Resource Priorities
- Ammo: Always pick up ammo stacks. But don't swap weapons just because you have more ammo; consider the situation. Shotguns are powerful but slow. Assault rifles are versatile. Pistols are infinite ammo but weak.
- Health items: Pain pills (2 uses) are temporary; medkits (1 use) heal permanent damage. Prioritize medkits for teammates who have been incapacitated. Pills are good for boosting before a big fight.
- Throwables: Pipe bomb (attracts and kills Infected), Molotov (area denial), Bile Bomb (attracts Infected to a point). Use them wisely – pipe bomb for hordes, molotov for clearing chokepoints or damaging a Tank, bile bomb to distract Infected away from you.
- Weapons: Assault rifle (M16) is a good all-rounder. Shotgun (auto-shotgun) is great for close quarters. Pick up explosive weapons like grenade launcher if available. Avoid the M60 (limited ammo, cannot reload) unless you need a quick burst.
- [ ] Complete the first chapter of Dead Center on Easy or Normal difficulty.
- [ ] Learn the basic controls: movement, shooting, melee, healing, pinging.
- [ ] Recognize the sounds of each special Infected (Hunter, Smoker, Boomer, Tank, Witch).
- [ ] Practice using a medkit on yourself and a teammate.
- [ ] Successfully reach a safe room with no deaths (AI only).
- [ ] Use a pipe bomb to clear a horde.
- [ ] Revive a downed teammate.
- [ ] Play through the entire Dead Center campaign (5 chapters) to understand flow.
- [ ] Experiment with different weapons (shotgun, assault rifle, pistol) to find your preference.
- [ ] Review your progress and note what mistakes you made (e.g., running ahead, wasting throwables).
Common Beginner Mistakes
1. Running ahead: You'll get overwhelmed and the AI can't always help. Stay with the group.
2. Wasting medkits early: When your health is 70% and you have no injuries, don't use a medkit. Wait until you are below 50% or bleeding.
3. Not watching your back: Special Infected often spawn behind you. After clearing a room, check behind before moving on.
4. Ignoring special Infected sounds: If you hear a Hunter scream, expect a pounce. If you hear a Boomer, get ready to shoot it before it vomits.
5. Shooting the Witch: Do not shine your flashlight on her or shoot her unless you absolutely must. She is fast and can down you in seconds. If you wake her, run and keep your distance, shoot her only if you are confident.
6. Not sharing supplies: If you have two medkits and a teammate is bleeding, drop one (press G while inventory is open). Teamwork is vital.
7. Staying still during a horde: Keep moving. If you stand still, you'll be surrounded.
8. Trying to use the defibrillator on a dead teammate: It only works on recently deceased survivors (within a short time). Otherwise, you must reach a safe room to respawn them.
9. Not using the environment: You can climb over fences, jump on dumpsters, and break through barricades. Look for alternate routes.
10. Not watching your fuel meter: In some campaigns (e.g., Dead Center finale), you need to pour fuel into a car. Take turns, and protect whoever is pouring.
Day-One Checklist
Pro tip: After your first campaign, try the The Passing (connects with L4D1 survivors) or Dark Carnival for a different setting. Easy difficulty is best for learning. Once comfortable, move to Normal, then Advanced.
Remember: Teamwork matters more than skill. Communicate, share supplies, and watch each other's backs. The safe room is your friend. Good luck, survivor!