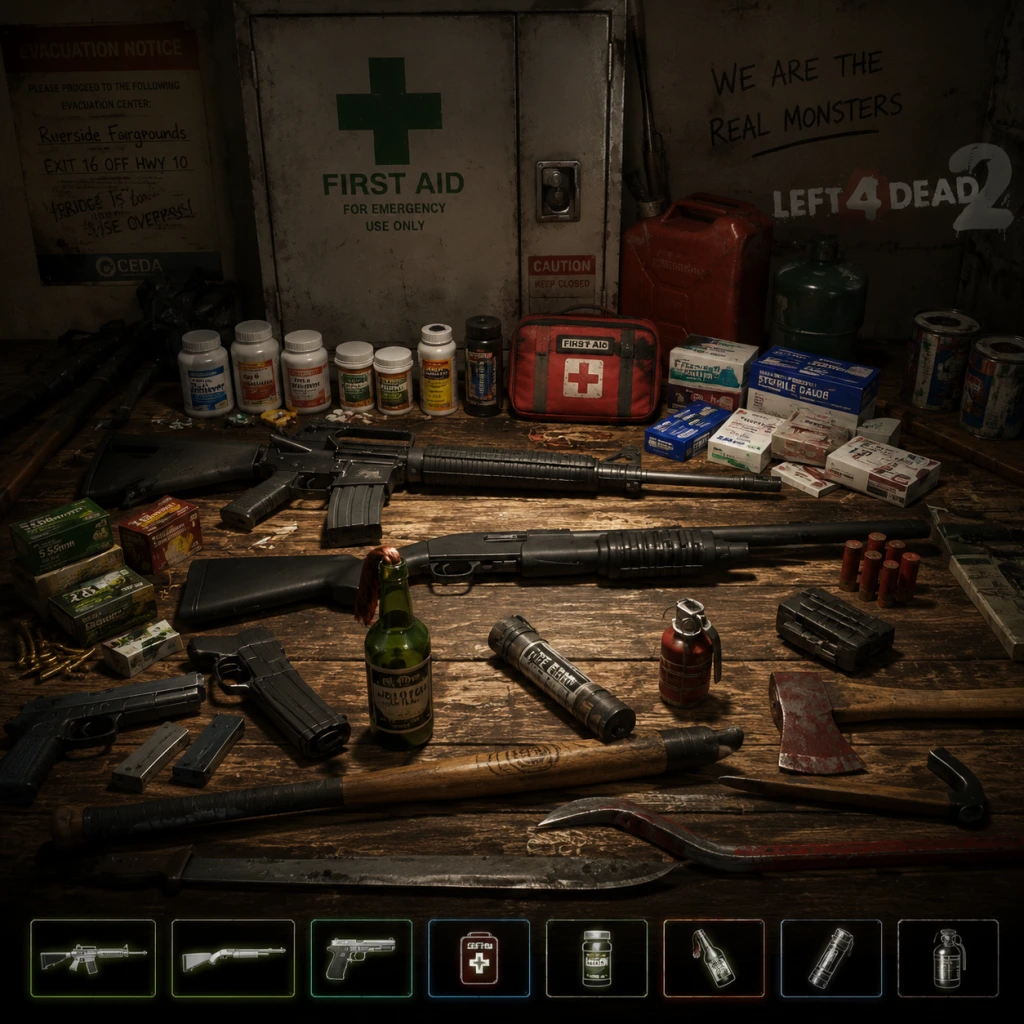
All Game Items
Comprehensive All Game Items Guide for Left 4 Dead 2
This guide covers every item you can find, carry, or use in Left 4 Dead 2. Items are grouped by category for easy reference. All stats are based on the official game (PC and Xbox 360 versions, updates up to Cold Stream). Note that item availability may vary slightly between campaigns (e.g., the Grenade Launcher and M60 only appear in DLC campaigns such as The Passing, The Sacrifice, and Cold Stream).
---
1. Melee Weapons
Melee weapons are unlimited-use, silent, and deal high damage per hit. They can knockdown or decapitate Common Infected instantly and are excellent for conserving ammunition against the horde. Each melee weapon has unique stats: Damage, Speed, Reach, and Force (knockback). Obtain them by finding them on the ground, on counters, or leaning against walls in the environment.
| Weapon | Damage (per hit) | Speed | Reach | Force | Special |
|---|---|---|---|---|---|
| Baseball Bat | ~40 | 1.0 | 90 units | 200 | Standard |
| Cricket Bat | ~50 | 1.0 | 95 units | 200 | Moderate |
| Crowbar | ~45 | 1.0 | 85 units | 250 | Mildly high force |
| Electric Guitar | ~60 | 0.8 | 100 units | 300 | High damage, slow speed |
| Fire Axe | ~70 | 0.9 | 100 units | 350 | Best damage and force |
| Frying Pan | ~50 | 1.2 | 80 units | 250 | Fast speed, moderate reach |
| Golf Club | ~45 | 1.1 | 90 units | 200 | Balanced |
| Katana | ~70 | 1.0 | 100 units | 300 | Same as Fire Axe but slightly faster |
| Machete | ~60 | 1.1 | 95 units | 275 | Good all-around |
| Tonfa | ~40 | 1.3 | 80 units | 200 | Fastest speed |
| Shovel | ~55 | 0.9 | 95 units | 250 | Similar to Crowbar |
How to Obtain
- Melee weapons are always in the environment; they do not drop from Infected.
- Common locations: kitchens (frying pan), garages (crowbar, axe), sporting goods stores (bat, golf club), military checkpoints (fire axe, machete). Chainsaw is found only in specific safe room closets or on rare spawn points.
- Any time you wish to conserve ammunition, especially during crescendo events or when holding a position.
- Melee weapons are essential for dealing with Jockeys (prevent them from mounting) and for breaking free from Smokers or Hunter pounces by using a quick bash and shot combo.
- The high-force weapons (Axe, Katana, Guitar) can stagger a Tank when hitting it repeatedly (though damage is minimal).
- Combine with a primary weapon lacking close-range power (e.g., Sniper or Assault Rifle) to cover all ranges.
- Using a melee weapon while carrying a Gas Can or Cola allows you to defend yourself without dropping the object (press attack while holding object).
- Damage: 20 per shot (headshot multiplier ~3x)
- Clip: 15 rounds | Reserve: Infinite (no ammo pickup needed)
- Fire Rate: Semi-automatic, moderate
- Use: Reliable backup. Dual-wielding doubles damage output but drains accuracy.
- Damage: 80 per shot
- Clip: 8 rounds | Reserve: Infinite (no ammo pickup)
- Fire Rate: Semi-automatic, slow
- Penetration: Can pierce multiple Common Infected (up to 3)
- Use: Excellent for killing Special Infected at range or conserving primary ammo. Slower firing but one-shot-kills Commons on body shots.
- Pistol is default secondary; you can drop your secondary to pick up a Magnum from the environment (found on tables, desks, or police stations). Magnum is rarer and more powerful.
- Standard Pistol: Last resort when primary is empty; dual-wield for horde clearing if you have no melee.
- Magnum: Great for taking out far-away Special Infected (e.g., Smoker, Hunter) without scavenging rifle ammo. Useful when carrying a shotgun or SMG that lacks range.
When Useful
Synergies
---
2. Firearms: Pistols
Pistols are secondary weapons. You always start with one pistol; you can pick up a second to dual-wield, which increases fire rate but reduces accuracy. The Magnum is a single-shot sidearm.
#### Standard Pistol (M1911)
#### Magnum (Desert Eagle .44)
How to Obtain
When Useful
---
3. Firearms: Shotguns
Shotguns deal massive damage at close range with spread. They use shotgun shells (ammo piles). Each pellet does damage; landing more pellets increases damage.
| Weapon | Damage (per pellet) | Pellets per shot | Total per shot | Clip | Spread | Uses |
|---|---|---|---|---|---|---|
| Chrome Shotgun | 31 | 8 | ~248 | 8 | Wide | Pump-action; good burst damage |
| Pump Shotgun | 31 | 8 | ~248 | 10 | Moderate | Semi-automatic; higher capacity |
| Auto Shotgun | 31 | 8 | ~248 | 10 | Wide | Full-auto; high DPS |
| Combat Shotgun | 30 | 8 | ~240 | 10 | Moderate | Full-auto; faster reload than Auto |
| SPAS-12 | 31 | 8 | ~248 | 10 | Narrow | Semi-auto; best accuracy |
- Shotguns are common in the early parts of campaigns, often in safe rooms or police stations. The SPAS-12 is rarer and appears later.
- Any close-quarters combat, especially against Tanks and Witches (a single headshot from any shotgun can kill a Witch on Normal difficulty).
- Shotguns are ideal for clearing hordes in corridors; the spread ensures hits even with poor aim.
- Pair with a melee weapon for when you run out of shells.
- The SPAS-12 or Combat Shotgun are favored for competitive multiplayer due to tight spread and high DPS.
When Useful
Synergies
---
4. Firearms: SMGs
SMGs are fast-firing, moderate damage automatic weapons. They use SMG ammo (often shared with assault rifles in some campaigns, but ammo piles are specific).
| Weapon | Damage | Clip | Fire Rate | Accuracy |
|---|---|---|---|---|
| SMG (Uzi) | 14 | 30 | 10 rounds/sec | Moderate |
| Silenced SMG | 13 | 30 | 10 rounds/sec | Higher (less spread) |
| AK-47 | 28 | 40 | 8 rounds/sec | Moderate |
- Found in many safe rooms and environmental spawns, especially in early levels. Silenced SMG can be found in specific levels (e.g., Dark Carnival).
- Good all-purpose weapon for players who prefer spraying. The Silenced SMG is quieter and slightly more accurate, making it better for stealth approaches (though stealth is rarely needed).
- Use SMGs as a stepping stone to better weapons; they are effective against Common Infected but require sustained fire for Special Infected.
When Useful
---
5. Firearms: Assault Rifles & Battle Rifles
These weapons use rifle ammo (common ammo piles). They offer a balance of range, damage, and firepower.
| Weapon | Damage | Clip | Fire Mode | Penetration | Rate |
|---|---|---|---|---|---|
| M16 | 15 | 50 | Full-auto | 2 enemies | 10/sec |
| AK-47 | 28 | 40 | Full-auto | 3 enemies | 8.3/sec |
| SCAR-L | 22 | 60 | 3-round burst | 2 enemies | ~6/sec |
| Desert Rifle | 30 | 30 | 3-round burst | 3 enemies | ~5/sec |
- Assault rifles appear after the first safe room or in armories. The Desert Rifle (a battle rifle) is less common and often found in military-themed areas.
- Any situation requiring sustained fire at medium to long ranges. The AK-47 is the most powerful per bullet; the M16 has the highest sustained DPS due to larger clip. SCAR-L offers good control; Desert Rifle excels at long range and penetration.
- All rifles can kill a Hunter or Smoker with a few rounds. They are versatile for all roles.
When Useful
---
6. Firearms: Sniper Rifles
Snipers use rifle ammo (same as assault rifles). They are single-shot or semi-auto with high damage and pinpoint accuracy.
| Weapon | Damage | Clip | Fire Mode | Zoom | Penetration |
|---|---|---|---|---|---|
| Hunting Rifle | 65 | 15 | Bolt-action | 2x scope | Unlimited through common enemies |
| Military Sniper | 65 | 15 | Semi-auto | 2x scope | Unlimited |
| AWP | 100 | 10 | Bolt-action | 4x scope | Unlimited |
- Snipers appear in later levels (e.g., Dead Center, Hard Rain, The Parish) or in specific weapon caches. The AWP is rarer and often found in high places (sniper nests).
- Long-range support: killing Spitters, Chargers, and Smokers from a distance before they close in.
- The AWP kills Common Infected instantly with body or headshot. Hunting Rifle and Military Sniper can kill Commons with body shots but may need two on higher difficulty.
- Snipers are not ideal for horde clearing unless you have excellent headshot aim.
- Combine with a melee weapon for close-quarters emergencies. Or use a Magnum as secondary to cover mid-range.
- Damage: 200 (direct hit), explosive radius of ~300 units
- Clip: 1 | Reserve: Up to 4 (ammo piles provide 4 rounds)
- Fire Rate: Semi-auto, slow
- Effect: Fires an explosive grenade that detonates on impact with surfaces or after a short delay if hitting an enemy. Kills Commons instantly in a large radius; heavily damages Special Infected.
- Obtainment: Only in DLC campaigns (The Passing, The Sacrifice, Cold Stream). Found in safe room closets or special weapon rooms.
- When Useful: Clearing dense hordes, damaging a Tank, or crowd control. Danger: can kill teammates if too close. Best used from a distance.
- Damage: 20 per bullet
- Clip: 150 (no reserve; once empty, the weapon is discarded)
- Fire Rate: Full-auto, ~8 rounds/sec
- Penetration: 3 enemies
- Obtainment: Same as Grenade Launcher (DLC only). Found once per campaign on a dead trooper or in a crate.
- When Useful: A disposable heavy machine gun with huge clip. Use it when facing a Tank or large horde, and then pick up another weapon afterwards. Excellent for sheer volume of fire.
- Effect: Attracts Common Infected to the grenade's beeping sound for ~3 seconds before exploding, killing all Commons in a medium radius. Also does 100 damage to Special Infected (less to Tank).
- How to Obtain: Found in scattered locations: on tables, in garbage, or on bodies. Common in every campaign.
- When Useful: Spectacular for clearing hordes or drawing them away from a choked point. Use it to buy time while reviving a teammate or escaping. Do not throw directly into Special Infected as they may still attack you; rather, throw at a wall to draw them.
- Effect: Creates a pool of fire that burns for about 10 seconds. Common Infected within the fire die instantly; Special Infected take heavy damage over time. The Tank is particularly vulnerable to fire (constant burn damage). The Witch can also be ignited.
- How to Obtain: Similar spawn points as Pipe Bomb.
- When Useful: Great for blocking a corridor, forcing the horde to take a different path, or damaging a Tank. Fire also stops a Charger's charge or a Jockey's mount if ignited. Caution: Fire can hurt allies and block escapes.
- Effect: Splashes green bile that attracts Common Infected to the impact point. Any Infected that touch the bile are temporarily (5 seconds) covered in it and will be attacked by other Infected (including the Tank). Does not directly cause damage but causes chaos.
- How to Obtain: Rare drop from Boomers? Actually Boomers do not drop bile jars. Bile jars are found as environmental items. They are less common than Pipe Bombs or Molotovs, often in kitchens or labs.
- When Useful: Extremely versatile. Throw it on a Tank to make Common Infected attack it, dealing damage to the Tank indirectly. Throw it on a Witch to cause Commons to attack her (but the Witch will kill many). Also useful for clearing a path: throw behind the group to draw the horde away.
- Always have one throwable equipped. They are invaluable for clutch saves.
- Know your distances: Pipe Bombs require good timing to ensure the horde gathers before explosion.
- Use Molotovs to force the Tank to burn; the fire slows him slightly and causes panic in many players.
- Effect: Restores 50 HP (up to maximum health of 100; any overheal is wasted). Heals over 5 seconds and is consumed. All survivors can use it on themselves or on a teammate (press use button).
- How to Obtain: Found in safe rooms (usually 4 kits) and randomly throughout levels (e.g., on counters, in closets).
- When Useful: Heal when your health drops below 40-50 to avoid being incapacitated easily. Share with teammates if you are at full HP. Do not waste kits for small injuries; use pills or adrenaline for minor healing.
- Effect: Grants 50 temporary health instantly (which decays over time at ~1 HP per 0.1 second?). Actually: gives 50 temporary HP that decays slowly (over about 45 seconds). Does not heal actual health; the temporary health acts as a buffer. Can stack with other pills? No, only one temporary health buff active at a time.
- How to Obtain: Common in every level, often on shelves, desks, or dead bodies.
- When Useful: Use when your health is moderate (30-50) to avoid being downed quickly. Also useful right before entering a dangerous area (e.g., crescendo event). They do not replace a first aid kit for permanent healing.
- Effect: Grants 25 temporary health instantly, plus a speed boost of 20% for 10 seconds and faster actions (reviving, healing, shooting? Actually speeds up all actions including healing, defibrillator use, and melee attack speed). Also reduces the time to use a first aid kit or defibrillator. The temporary health decays quickly (about 20 seconds?).
- How to Obtain: Less common than pills; found in medical areas or first aid stations.
- When Useful: Ideal for reviving a downed teammate during a horde (adrenaline + defibrillator is fast). Also useful for escaping a Tank or reaching a safe room. The speed boost and action speed make it a powerful clutch item.
- Effect: Revives a dead teammate (skull status) from the dead, restoring them to 50 permanent health. It takes about 5 seconds to use (or less with adrenaline).
- How to Obtain: Found in some safe rooms or on bodies in advanced areas. Rare.
- When Useful: Only use if a survivor has died and you have no extra lives. Note: You cannot use a defibrillator on yourself. Prioritize using a first aid kit on low-HP teammates first unless someone is dead. Also useful for respawning a high-DPS character.
- Always carry at least one health item (pills or kit).
- In Versus mode, health management is critical: don't waste kits on small bites.
- Adrenaline + defibrillator is a lifesaver for bringing back a key player during a Tank fight.
- Gas Can: Carry in weapon slot; can be thrown to create a large fire (or exploded) similar to a Molotov. Used to fuel the generator in The Passing. Can be detonated by shooting.
- Propane Tank: Cylindrical tanks that explode when shot, causing a large fireball and killing nearby Commons. Can also be carried and thrown. Often used for area denial.
- Oxygen Tank: Similar to propane, but explosion is smaller and deals less fire damage. Found in medical areas.
- Fireworks: Only in The Passing; used to distract the horde during the finale (launch a firework to attract zombies away). Not essential but helpful.
- Cola: In Dark Carnival, you can carry a cola bottle to drop into a vending machine to get a weapon (game rewards for holding it through a section). This is a unique mission item.
- Gnome Chompski: A collectible statue hidden in The Last Stand campaign (Cold Stream?). Taking it to a specific location unlocks an achievement. Not necessary for progression.
- Easter Egg Items: Several hidden items like the "Tied Down" gnome, "Fred" the doll, etc. These are purely for achievements.
- Gas cans and propane tanks can turn a chokepoint into a killing zone. Use them during horde events to clear masses.
- The cola is worth bringing if you want a free weapon (usually an M16 or shotgun) from the vending machine.
- Pistol ammo: Infinite for both standard and Magnum.
- Melee: Unlimited use.
- Primary ammo: You can pick up ammo piles to refill 50% of your max clip? Actually each ammo pile restores a percentage (e.g., 25% of your reserve?) It's simpler: picking up a pile refills a fixed amount depending on weapon type: e.g., Shotgun shells give 8 shells, rifle gives 30 rounds, SMG gives 50 rounds. Ammo caches in safe rooms refill all reserves completely.
- Grenade Launcher: Special ammo piles that look like green grenade shells; each gives 4 grenades.
- Synergy: Carrying a melee weapon frees you from worrying about ammo for secondary. Pair a Chrome Shotgun with a Katana for close combat; or a Hunting Rifle with a Magnum for range.
- Item Priority: Always grab a good primary weapon first; then a melee; keep a throwable; and carry a health item. Drop lower-tier items as needed.
- No Upgrades: Left 4 Dead 2 has no item upgrades or attachments (except the laser sight on some weapons? Actually there is no official laser sight. Some mods add them). Everything you find is as-is.
- Collectibles: Only affect achievements; do not impact gameplay.
When Useful
Synergies
---
7. Special Firearms (DLC / Campaign Specific)
#### Grenade Launcher
#### M60
---
8. Throwables
Throwable items are consumable grenades that provide area denial or crowd control. You can carry one at a time (except in some mods). All can be found on the ground or in safe rooms.
#### Pipe Bomb
#### Molotov Cocktail
#### Bile Jar (Boomer Bile)
General Tips for Throwables
---
9. Health Items
#### First Aid Kit
#### Pain Pills
#### Adrenaline Syringe
#### Defibrillator
Health Item Strategy
---
10. Environmental / Mission Items
These are non-inventory items that serve specific purposes in the environment or trigger events.
When Useful
---
11. Notes on Ammunition
Ammo is not an item you pick up individually; it appears as ammo piles (small boxes) and ammo caches (large crates) in safe rooms and points of interest.
Ammo management is crucial on Expert difficulty.
---
Final Tips
This guide covers all official items in Left 4 Dead 2 as of the final update. Happy zombie hunting!