Getting Started
Getting Started: A Brand-New Player's Guide to Minecraft
Welcome to Minecraft! This guide is designed to get you through your first hour, avoid common frustrations, and start your survival journey with confidence. Whether you're on PC, console, or mobile, the core principles are the same. Let's begin.
Character Creation (Skins & Appearance)
Minecraft does not have a character creation system that affects gameplay. Your character is always Steve (or Alex for Bedrock/Java Edition default). However, you can customize your appearance by changing your skin (the texture on the model).
- Java Edition: On the official website (minecraft.net) or using third-party tools, you can upload a custom .png file.
- Bedrock Edition (Windows 10/11, Xbox, PlayStation, Switch, Mobile): You can change your skin from the main menu's "Dressing Room" – some are free, others require purchase.
- For beginners, the default skin is perfectly fine. Don't worry about this yet.
Controls Overview (All Platforms)
#### PC (Java & Bedrock)
| Action | Java Edition | Bedrock Edition |
|---|---|---|
| Move | WASD | WASD |
| Jump | Space | Space |
| Sneak | Left Shift | Left Shift (toggle with Ctrl?) |
| Attack / Break Blocks | Left Click | Left Click |
| Use / Place Blocks | Right Click | Right Click |
| Drop Item | Q | Q |
| Inventory | E | E |
| Chat | T | T |
| Pause / Menu | Esc | Esc |
| Sprint | Double-tap W (or Ctrl?) | Double-tap W (or hold ?) |
#### Console (PlayStation, Xbox, Nintendo Switch)
| Action | Default Control |
|---|---|
| Move | Left Stick |
| Look | Right Stick |
| Jump | A (Xbox/Switch), X (PlayStation) |
| Sneak | Left Stick press (or B? depends on edition) |
| Attack / Break | Right Trigger (RT) |
| Use / Place | Left Trigger (LT) |
| Inventory | Y (Xbox), Triangle (PS), X (Switch) |
| Pause / Menu | Start / + |
| Drop Item | Right D-pad (usually) – check settings |
| Sprint | Press left stick while moving (toggle) |
- Touch controls appear on screen. You can customize the layout in settings.
- Attack/Break: Tap and hold on blocks.
- Place/Use: Tap once.
- Sneak: Tap the crouch button (default bottom left).
- Jump: Tap the jump button (bottom right).
- Inventory: Tap the backpack icon.
- Sprint: Double-tap forward arrow or use auto-sprint option.
- Crosshair (center): Where you're looking. You break/place blocks here.
- Hotbar (bottom): 9 slots for quick access. Use number keys (1-9) on PC, D-pad on console, or scroll wheel/tap on mobile.
- Health & Hunger: Two bars at the bottom left. The hearts show your health (10 hearts = 20 HP). The drumsticks show hunger – when empty, you start losing health.
- Experience bar (bottom center, above hotbar): Shows XP (gained from mining, killing mobs). Not essential early on.
- Air bubbles (appears near health bar when underwater).
- Armor icons (above health when you wear armor).
- Inventory (press E on PC, Y on Xbox, Triangle on PS, X on Switch, backpack icon on mobile): 27 storage slots + crafting grid (2×2) + armor slots.
- Don't mine straight down – you may fall into lava or a deep cave.
- Don't punch a creeper (green hissing mob) – it explodes and kills you.
- Don't go into dark caves without torches – mobs spawn in darkness.
- Don't eat raw meat (chicken, pork) – it can give you food poisoning (hunger drain). Cook it in a furnace first.
- Don't attack a zombie with your fist – they hit hard. Use a sword.
- Don't wander too far from spawn – you might get lost. Build a landmark (tower of dirt) to find your base.
> Tip: On all platforms, you can change controls in the "Settings > Controls" menu. For keyboard/mouse, consider rebinding sprint to a comfortable key like Left Ctrl.
UI Overview
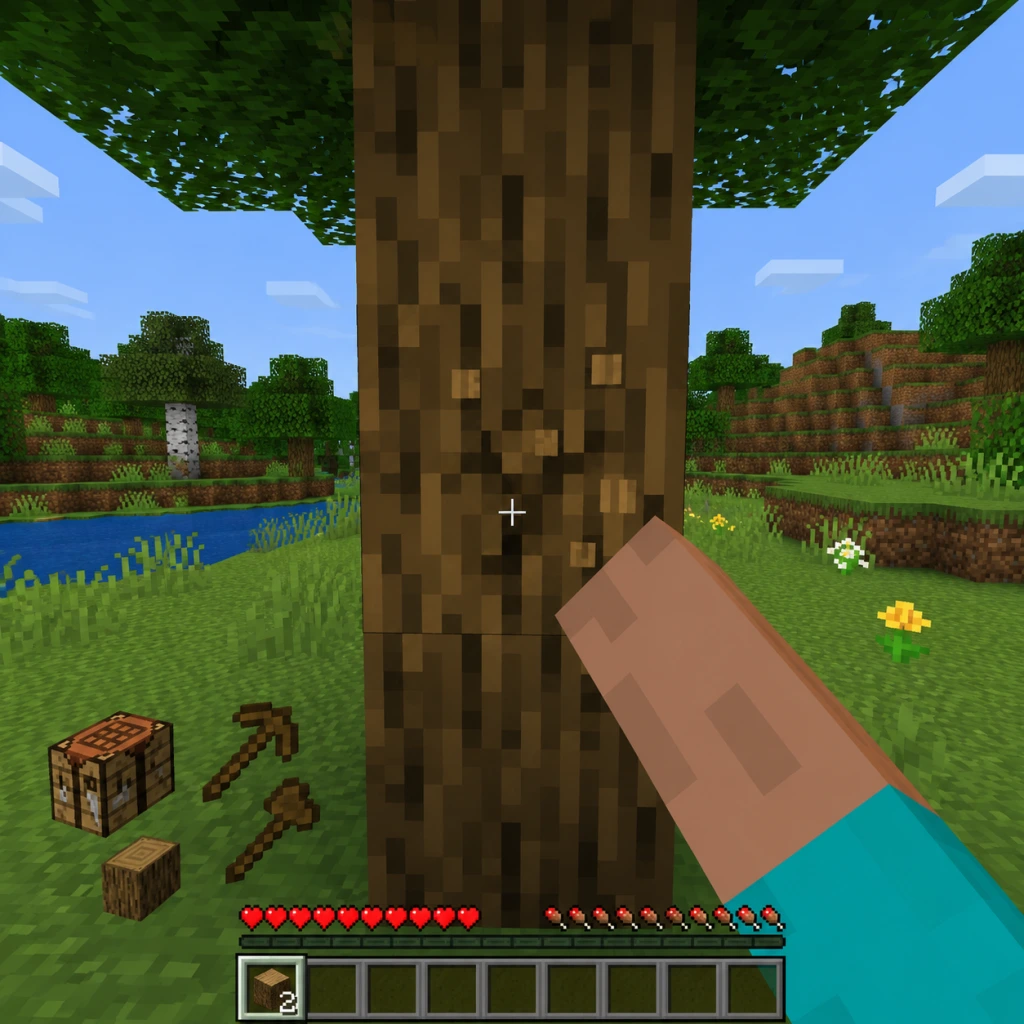
When you first start a new world, your screen looks like this:
Essential Early Objectives (First Hour Walkthrough)
Your first day in Minecraft (10 minutes long) is critical. Here's a step-by-step plan:
1. Spawn and Survey
- Look around. Note your surroundings: trees, water, animals, hills.
- Don't move far. Stay near spawn so you can find your way back.
2. Punch a Tree (Yes, literally)
- Aim at a tree trunk, hold left-click (or RT/tap) until it breaks.
- Collect at least 10 logs (any type: oak, spruce, etc.). Logs are brown with bark patterns.
3. Open Inventory & Craft Planks
- Press E (or inventory button).
- In the 2×2 crafting grid, place a log in any slot. You get 4 planks.
- Repeat until all logs are converted.
4. Craft a Crafting Table
- Fill the 2×2 grid with 4 planks (one in each slot).
- This creates a Crafting Table. Pick it up and place it on the ground (right-click/use on block).
5. Craft Basic Tools
- With the crafting table open (right-click it), you have a 3×3 grid.
- First, craft Sticks: place 2 planks vertically in a column (one above the other). Get 4 sticks.
- Then craft:
- Wooden Pickaxe (3 planks across top row, 2 sticks in middle column below).
- Wooden Axe (3 planks in one column, 2 sticks in middle and bottom of adjacent column – see recipe).
- Wooden Sword (2 planks in middle column, 1 stick below them).
- (Optional) Wooden Shovel (1 plank on top, 2 sticks below).
6. Mine 3 Stone Blocks
- Find a hill or cliff. Use your wooden pickaxe to mine cobblestone (gray block with cracks). You need at least 3.
- Stone is found underground or on mountain sides. It's lighter than dirt.
7. Upgrade to Stone Tools
- Back at your crafting table, make stone versions of pickaxe, axe, sword, and shovel using the same patterns but with cobblestone instead of planks.
- Stone tools are faster and last longer.
8. Build a Shelter Before Nightfall
- Night (7 minutes) brings hostile mobs: zombies, skeletons, spiders, creepers.
- You have 10 minutes in daytime. Use it!
- Simple shelter: dig a small hole in a hill (3 blocks deep, 1×2 hole), or build a small house with dirt/wood. Place a door (craft 6 planks in two vertical columns in crafting table) if you have planks.
- Minimum survival shelter: A 1×1 hole, 2 blocks deep, then block the top with dirt. You'll be safe from most mobs.
9. Create a Bed (Optional but Highly Recommended)
- If you find sheep (white fluffy animals), kill 3 for wool (drop 1-3 each). Craft a bed: 3 wool (any color) on top row, 3 planks on bottom row. Beds let you skip night and set your respawn point.
- If no sheep, don't worry – just stay safe in your shelter until dawn.
10. Survive the Night
- Wait inside your shelter. You can punch a hole to see outside but be wary of skeletons' arrows.
- If you have a bed, right-click it to sleep.
What to AVOID Early Game
Early Resource Priorities
| Resource | Priority | Why & How to Get |
|---|---|---|
| Wood | ★★★★★ | First block. Punch trees. Essential for tools, shelter, fuel. |
| Cobblestone | ★★★★☆ | After wood. Mine with pickaxe. Stone tools, furnace, stronger tools. |
| Coal | ★★★★☆ | Mine with pickaxe. Used for torches (lights up caves, prevents mob spawns) and furnace fuel. |
| Food | ★★★★☆ | Initially hunt animals (beef, pork, mutton, chicken). Cook them. Don't starve! |
| Iron Ore | ★★★☆☆ | Second day. Mine with stone pickaxe. Smelt ingots for iron tools, armor, buckets. |
| Wool | ★★☆☆☆ | For bed (skip night). Kill sheep (3). |
| Dirt | ★☆☆☆☆ | Easy to get. Used for filling holes or temporary structures. |
Common Beginner Mistakes
1. Not building a shelter on day one – The most frequent cause of death. Always have a safe place by nightfall.
2. Wasting wood on random structures – Save wood for tools, doors, and crafting tables. Use dirt for temporary builds.
3. Ignoring hunger – Your health doesn't regenerate unless your hunger bar is at least 9 drumsticks (18 out of 20). Always carry food.
4. Falling into water while mining – Avoid digging straight down, especially near oceans. Build a staircase instead.
5. Using the wrong tool – A pickaxe mines stone fast, but an axe chops wood. Using the wrong tool is slow and wastes durability.
6. Not making torches – Torches prevent mobs from spawning. Without them, your base or mine becomes a death trap. Place torches every 12 blocks.
7. Attacking creepers with melee – Creepers explode when close. Use a bow and arrow from a distance, or run away.
8. Leaving your inventory open while moving – In Java, you can walk while inventory is open. Watch out for cliffs.
9. Not naming your world – You'll have multiple worlds; name them something memorable (e.g., "First Survival").
10. Being afraid to die – Death sets you back to spawn with items lost. But you can always recover them if you die near your base. It's part of the learning.
Day-One Checklist
Complete these before your first night (within the first 10 minutes):
- [ ] Punch at least 10 logs.
- [ ] Craft planks from all logs.
- [ ] Craft a Crafting Table.
- [ ] Craft a Wooden Pickaxe.
- [ ] Mine at least 3 cobblestone.
- [ ] Upgrade to Stone Pickaxe.
- [ ] Craft a Wooden Sword.
- [ ] Find and kill 3 sheep (optional but ideal).
- [ ] Build a shelter (dirt hut, cave, or house).
- [ ] Place a bed (if you have wool) and sleep.
- [ ] Light up your shelter with torches (coal + stick).
- [ ] Cook any raw meat you have (make a furnace with 8 cobblestone).
- Expand your base.
- Mine for iron ore (found in caves at Y-levels < 64).
- Create a farm (wheat seeds from grass, carrots from villages) for sustainable food.
- Explore cautiously. Always bring torches, food, and armor.
What to Do After Day One
After surviving your first night, your priorities shift:
Remember: Minecraft is about learning through trial and error. Every death is a lesson. Enjoy your adventure!