Game Tips
Comprehensive Minecraft Game Tips Guide
Whether you're punching your first tree or planning a megabase, these tips will help you survive, thrive, and master Minecraft. Tips are organized by category and include beginner fundamentals, intermediate strategies, and advanced optimizations.
---
1. Combat Tips
#### Beginner: Master the Timing of Attacks
- Explanation: In Java Edition 1.9+ and Bedrock Edition, swords and axes have a cooldown. Spamming attack deals minimal damage. Wait for the cooldown indicator (sword reticle or animation) to fully reset before attacking for maximum damage.
- Why it works: A fully charged critical hit (while falling) does 150% damage. For example, a diamond sword deals 7 damage normally and 10.5 on a crit. Mastering the cooldown doubles your DPS.
- When to use: Every melee encounter – zombies, creepers, skeletons, and especially the Ender Dragon and Wither.
- Explanation: Right-click with a shield to block most incoming damage (up to 100% from arrows, 66% from melee). Block just before a creeper explosion to reduce damage to 0 and prevent knockback.
- Why it works: Shields negate skeleton arrows entirely and can save you from fatal creeper blasts. In PvP, a well-timed block can absorb a critical hit and let you counter-attack.
- When to use: Always have a shield in your off-hand when exploring caves or fighting ranged enemies. Practice blocking projectiles – you can even block blaze fireballs.
- Explanation: The sweep edge enchantment creates a sweeping attack that damages multiple enemies when you attack while moving. Combine with critical hits (jump and attack) to hit a group for massive burst damage.
- Optimization: Use a sword with Sweeping Edge III and Sharpness V. Sprint, jump, and swing to hit all mobs in a 2-block radius for ∼10 damage each.
- When to use: Hordes of zombies, piglin brutes, or during a raid. Avoid in tight spaces (sweep may hit unintended mobs or players).
- Explanation: Craft a compass (iron ingots + redstone) to always point to world spawn. Use a map (paper + compass) to fill in explored areas. Mark your home base with a waypoint (e.g., a tall tower of cobblestone).
- Why it works: Compasses prevent getting lost. Maps reveal terrain and show where you've been. Without them, desert, ocean, or dense forest disorientation can waste hours.
- When to use: Carry a compass and a paper map on every major expedition. Upgrade to an empty locator map (in Bedrock) to track other players.
- Explanation: Build a nether portal in the Overworld, go to the Nether, then break the bedrock ceiling (in Java Edition using glitches like ender pearl + piston). Build a portal on the roof – coordinates are divided by 8, so 1 block in the Nether = 8 in the Overworld.
- Why it works: The Nether roof has no lava oceans, few ghasts, and you can build unlimited blue ice highways. A 1000-block Overworld journey becomes 125 blocks in the Nether.
- When to use: For long-distance travel (biome hunting, village finding, or connecting bases). Requires a few early-game materials and a bit of practice.
- Explanation: Before massive builds, pre-generate chunks using world-border or mods like Chunky. On servers, use `/forceload add` to keep chunks active.
- Why it works: Pre-generating eliminates lag from loading new chunks while exploring. For redstone contraptions or farm designs, test in pre-generated areas to avoid performance dips.
- When to use: Large servers or single-player worlds with mega-builds. Also useful for ensuring specific biomes are loaded before creating important farms.
- Explanation: Punch a tree (wood) -> craft planks -> craft crafting table -> make wooden pickaxe -> mine stone -> stone tools. Then dig down to y=11 for iron and diamonds.
- Why it works: This sequence is the most efficient path to iron tools in under 2 minutes. Wooden tools break stone, but stone tools are faster and more durable.
- When to use: Every new world start. Do not skip to iron without making a full set of stone tools first – you'll waste time.
- Explanation: Dig a main tunnel at Y=11 (just above lava level). Mine two high, one wide, and branch off every 3 blocks left and right. This maximizes block exposure per chunk.
- Why it works: Diamonds appear between Y=1 and Y=15, most commonly at Y=11. Lava lakes spawn at Y=10, so Y=11 avoids flooding. One branch line covers ∼80% of all ores in a chunk.
- When to use: Once you have a stone pickaxe and at least 16 torches. Carry water buckets to turn lava into obsidian.
- Explanation: Use observer blocks to detect bamboo growth and pistons to break it automatically. Connect to a hopper clock to feed a composter for bone meal, or use a furnace array for smelting fuel.
- Why it works: Bamboo grows extremely fast – 64 bamboo per hour per plant in optimal conditions. A single observer-piston setup generates enough fuel for ∼30 furnace operations per minute.
- When to use: For infinite fuel without coal mining, or as a renewable bone meal source for crop farms. Extremely early-game (dirt + bamboo + redstone + piston).
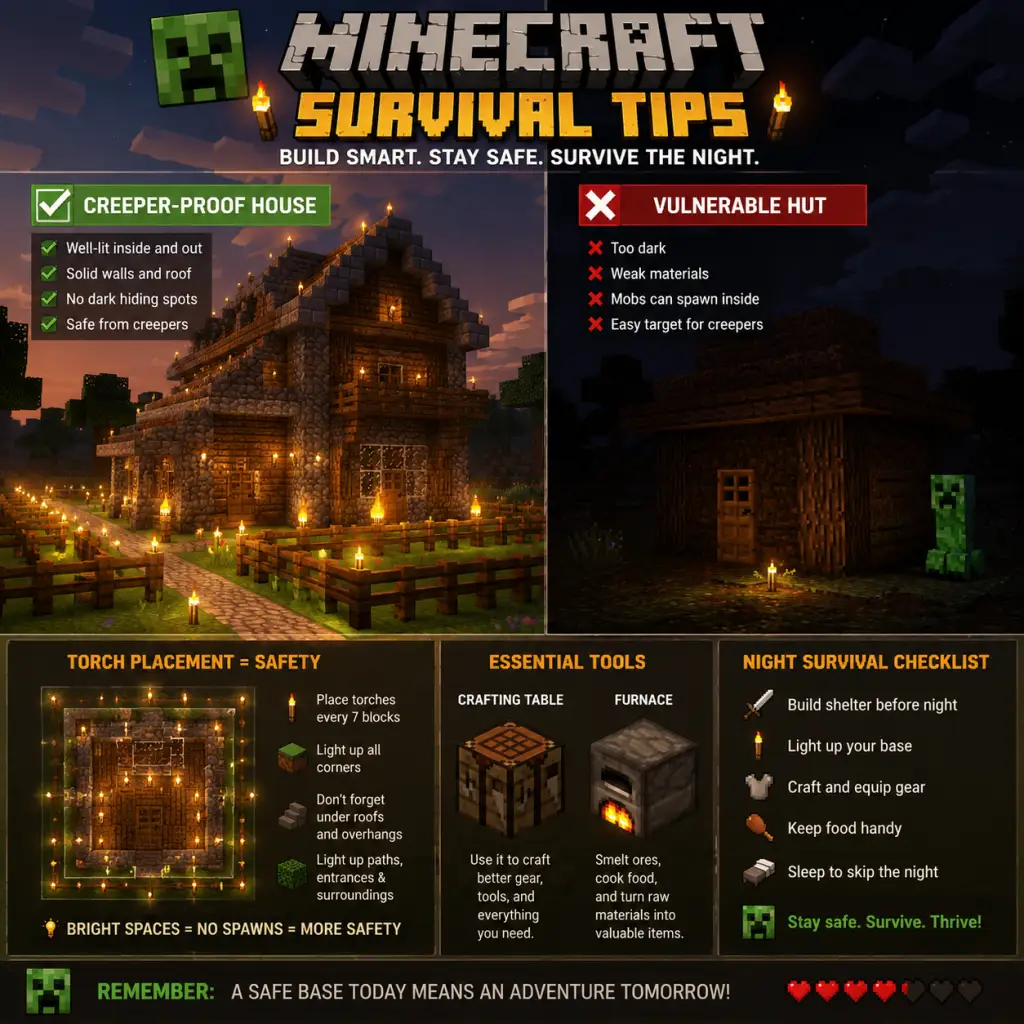
- Explanation: Build a 10x10 floor of any material (wood planks, stone bricks). Add walls 3 blocks high, a roof (slabs or stairs), door, windows (glass panes). Use accent colors for trim (spruce logs for corners).
- Why it works: A box is fast and functional. Adding depth (e.g., window frames with trapdoors, overhanging roof) transforms it from ugly to acceptable. You can always expand later.
- When to use: First night shelter, early base, or temporary house while scouting location.
- Explanation: Place upside-down stairs for a flat ceiling, or full block stairs for slanted roofs. Slabs make half-height decorations like window sills, fences, or pathways.
- Why it works: Stairs and slabs create curves and depth. A roof made of stairs is structurally realistic and looks professional. Slabs prevent mob spawning (mobs cannot spawn on slabs that are bottom-half).
- When to use: All builds after the first night. Experiment with different stair materials (stone brick stairs for medieval, prismarine stairs for underwater).
- Explanation: Use pressure plates + redstone dust to open iron doors. For hidden entrances, use sticky pistons + bookshelves or stone blocks. Use daylight detectors to turn on lamps at night automatically.
- Optimization: Use a 2x2 piston door with a Jeb door design (smooth, compact). Connect to a lever inside for manual override.
- When to use: Bases with automation needs – prevents mobs from entering if you forget doors. Daylight detector lamps save coal for torches.
- Explanation: Find a village, give farmers bread (from wheat) or carrots. They breed. Trading with farmers (wheat for emeralds) is easy early emeralds.
- Why it works: Villagers can be infinite emerald generators. Each wheat trade (20 wheat = 1 emerald) can be automated with a hoe and a large field.
- When to use: As soon as you find a village, start a small wheat farm (9x9) and trade with farmers.
- Explanation: Infect a villager using a zombie, then cure it with a golden apple + weakness potion. The cured villager gives permanent discounts on trades (e.g., 1 emerald for 10 wheat instead of 20).
- Why it works: Discounts stack up to ∼70% off. Trading with cured villagers legendary items (e.g., Mending book for 10 emeralds). You can re-cure multiple times for even lower prices.
- When to use: After obtaining a brewing station and golden apples. Best done in a secure area (lead the zombie into a trap).
- Explanation: Create 3+ villagers in a 5x5 space with beds and workstations. Place a zombie in a glass enclosure within 16 blocks. Villagers panic, summoning golems, which fall into a lava blade and drop iron ingots.
- Why it works: Iron golems spawn every 35 seconds on average (Java) if conditions met. A simple farm yields ∼40 iron ingots per hour, enough for anvil repairs, beacon bases, or tools.
- When to use: Mid-game, once you have villagers and a zombie. Essential for large-scale building or trading.
- Explanation: Hotbar slots: 1 – Sword, 2 – Pickaxe, 3 – Axe, 4 – Shovel, 5 – Torches, 6 – Food, 7 – Water bucket, 8 – Blocks, 9 – Compass/Map. Shift-click items from chests into inventory quickly.
- Why it works: Muscle memory lets you switch tools without looking. Reduces panic during combat. Always have torches in hand when mining.
- When to use: From day 1. Adjust for specific tasks (e.g., replace shovel with shears for wool).
- Explanation: Build a storage hall where a main chest feeds items into a chain of hoppers. Each hopper leads to a chest with a filter (non-stackable items like tools don't get sorted cheaply; use item frames with a sample item on the chest).
- Why it works: Automatically organizes blocks (cobblestone, wood, ores) into separate chests. Saves hours of manual sorting. Can be expanded infinitely.
- When to use: When you have at least 20 iron for hoppers and a few double chests of materials. Build it near your main base.
- Explanation: Store shulker boxes in an ender chest. Each shulker box holds 27 slots; ender chest holds 27 boxes = 729 inventory slots accessible from anywhere across dimensions.
- Why it works: You can carry entire base resources in a single inventory slot. For example, a box of stone, a box of wood, a box of food – all in one ender chest. Great for building away from home.
- When to use: After defeating the Ender Dragon and raiding End cities for shulkers. Essential for large-scale building projects.
- Explanation: Place 15 bookshelves around your enchanting table (1 block away, leaving a 2-high gap for the table). This unlocks level-30 enchantments (max). Enchant a diamond pickaxe with Efficiency III or IV.
- Why it works: Level 30 enchants give the best possible enchantments (e.g., Fortune III, Mending). Efficiency on a pickaxe triples mining speed.
- When to use: As soon as you have 45 leather (books), 30 obsidian, and 15 diamonds for the table. First enchant priority: pickaxe or sword.
- Explanation: Use an anvil to apply enchanted books to tools/armor. Combine two books with same enchantment but different levels (e.g., Protection III + Protection II = Protection IV). Repair with diamonds/ingots only if necessary.
- Why it works: Anvil costs increase with each use. Plan a sequence: put all lower-level books on a book first, then apply to gear. For Mending, always put on final step to avoid repair cost escalation.
- When to use: Mid-game after obtaining many books from villagers or fishing.
- Explanation: Brew awkward potion (nether wart + water) then add ingredients: blaze powder for Strength, sugar for Speed, magma cream for Fire Resistance. Extend with redstone, improve with glowstone (except for instant health).
- Why it works: Strength II (+6 attack damage) and Speed II (+40% speed) make melee combat trivial. Fire Resistance is essential for Nether and End fights.
- When to use: Before boss fights (Ender Dragon, Wither), Nether exploration, large raids, or PvP.
- Explanation: Place 2 sticky pistons facing each other, 2 blocks apart. Attach stone blocks to pistons. Use redstone torches and levers to control. Lift the top pistons to hide the door.
- Why it works: A functional secret door that blends with walls. Adds security and cool factor. Uses only basic redstone.
- When to use: Any time you want a hidden entrance to your base.
- Explanation: Place observer blocks behind each sugarcane stem. When sugarcane grows to height 3, observer triggers a piston that breaks the top two sugar canes. They fall into water stream leading to a hopper.
- Why it works: Sugarcane grows up to 3 blocks. The farm harvests every growth cycle (18 minutes) automatically. Produces enough paper for books and maps.
- When to use: After you have a few pieces of sugarcane, a piston, and a redstone repeater.
- Explanation: Build a sorter that separates 16+ different item types. Uses locked hoppers with 41 items of the type in a filter slot. Redstone comparators output signal when hopper has 42+ items (the input item), unlocking a hopper to drop into chest.
- Why it works: Sorts items automatically into chests. Scalable – each module handles one item. Works with any stackable item (64, 16, or 1).
- When to use: When you have at least a double chest of cobblestone, iron for hoppers, and redstone. Essential for large bases.
- Explanation: Craft a bed (3 wool + 3 planks) to set spawn point and skip night. Craft a clock (gold + redstone) to tell time underground.
- Why it works: Beds prevent night mobs from overwhelming you. Clocks let you know when it's safe to surface (if you need daylight for certain tasks).
- When to use: Bed from first night. Clock once you have gold (lower priority).
- Explanation: Craft a lead (string + slimeball). Right-click an animal (horse, cow, sheep, etc.) to attach lead; right-click a fence to tie it. Use boat on water for faster transport.
- Why it works: Leads let you move animals without building elaborate pathways. Perfect for bringing animals to your base for breeding and food.
- When to use: When you need to relocate a stable or bring exotic animals (llamas, parrots) home.
- Explanation: Obtain an elytra from End ships. Equip in chestplate slot. Use fireworks (with gunpowder) to boost flight. Glide with careful angle to maintain speed. Combine with Unbreaking III and Mending.
- Why it works: Elytra allows fast travel across whole map. With a few stacks of fireworks, you can easily travel 10,000 blocks. Use slow fall potions for more control.
- When to use: After defeating the Ender Dragon. Essential for exploring far biomes and finding End cities.
- Explanation: In most servers, use /claim to protect your land. Never grief, steal from chests, or build within 50 blocks of another player's base without permission.
- Why it works: Prevents conflict. Server rules often ban griefing – violation may lead to ban. Building far from others also reduces lag.
- When to use: Always on public servers.
- Explanation: Install a minimap mod (e.g., Xaero's Minimap) or use server-friendly data packs that show waypoints for bases, biomes, and portals.
- Why it works: Reduces reliance on memory. Coordinates shared among teammates become easy to navigate.
- When to use: After getting comfortable with vanilla mechanics.
- Explanation: On a server, limit render distance to 8-12 chunks. Use `chunk-loader` mechanisms (e.g., hopper clock + dropper + redstone) to keep specific chunks loaded for farms. Avoid loading hundreds of chunks unnecessarily.
- Why it works: High chunk load kills TPS (ticks per second). Efficient chunk loading keeps server smooth while running farms.
- When to use: Server owners or players with large automated farms.
- Water Bucket MLG: Practice dropping a water bucket just before hitting the ground to survive any fall. Essential for building towers and mountains.
- F3 Debug Screen (Java): Press F3 to see coordinates (get y-level), biome, light level, and facing direction. Immensely useful for mining and navigation.
- Villager Hall for All Trades: Build a hall with 1 of each profession villager (farmer, fletcher, librarian, cleric, etc.) to unlock all tradeable items (enchanted books, arrows, lapis, redstone).
- Kill the Ender Dragon with Beds: In the End, place beds near crystal towers and explode them (right-click at night) to damage the dragon – one bed does ∼20 damage.
- Netherite Upgrade: Use 4 gold + 4 scrap to make a netherite ingot. Upgrade diamond gear by combining with netherite ingot in smithing table. Gear becomes lava-proof and has higher durability.
- Honey Bottles Cure Poison: Drink a honey bottle (from bee nest) to remove poison effect. Great alternative to milk.
#### Intermediate: Use a Shield and Block Timing
#### Advanced: Sweep Edge + Critical Hit Combos (Java)
---
2. Exploration Tips
#### Beginner: Always Carry a Compass or Map
#### Intermediate: The Nether Roof – Fast Travel Hub
#### Advanced: Pre-Generated Chunk File Manipulation (Java)
---
3. Resource Gathering Tips
#### Beginner: The "Punch Tree, Make Bench" Starter
#### Intermediate: Branch Mining at Y-Level 11
#### Advanced: Automatic Bamboo/Bone Meal Farms with Observers
---
4. Building Tips
#### Beginner: Start with a Simple 10x10 Box (But Make It Pretty)
#### Intermediate: Use Stairs and Slabs for Roofs and Details
#### Advanced: Redstone Automatic Door and Lighting Systems
---
5. Economy (Trading & Villager) Tips
#### Beginner: Villager Breeding for Emeralds
#### Intermediate: Zombie Villager Curing for Discounts
#### Advanced: Automatic Iron Farm (Villager-based)
---
6. Inventory & Storage Management
#### Beginner: Keep a "Tool Belt" Hotbar Setup
#### Intermediate: Bulk Storage with Sorting System (Hoppers + Chests)
#### Advanced: Shulker Box Storage System with Ender Chest
---
7. Enchanting & Potion Making
#### Beginner: The 15 Bookshelf Enchanting Setup
#### Intermediate: Combining Enchanted Books for Perfect Gear
#### Advanced: Potion Brewing for Combat (Strength, Speed, Fire Resistance)
---
8. Redstone Automation & Farms
#### Beginner: Simple Piston Door (2x2)
#### Intermediate: Automatic Sugarcane Farm (Observer-based)
#### Advanced: Multi-Item Sorter (Stackable)
---
9. Survival Utilities & Quality of Life
#### Beginner: Always Have a Bed and a Clock
#### Intermediate: Lead for Animal Transport
#### Advanced: Elytra + Firework Rocket for Infinite Flight
---
10. Multiplayer & Server Etiquette
#### Beginner: Respect Claims and Bases
#### Intermediate: Use Waypoint Mods/Data Packs
#### Advanced: Optimize Server Chunk Loading
---
11. Miscellaneous Pro Tips
---
Remember: Minecraft is about creativity and personal goals. Use these tips as a foundation, then adapt them to your own playstyle. Happy mining and crafting!