Getting Started
PlayerUnknown's Battlegrounds (PUBG) – Getting Started Guide
This guide is designed for absolute beginners who have just installed PUBG. It covers your first hour, key decisions, controls on all platforms, the user interface, essential early objectives, common pitfalls, and a clear day-one checklist. Follow these steps to survive your first matches and start improving.
---
Character Creation – What You Need to Know
PUBG has no stat-based character creation. You can customize your character’s appearance (face, hairstyle, gender) from the main menu under "Customize" → "Appearance." Changes are purely cosmetic and do not affect gameplay. You can also purchase or earn outfits, which are cosmetic only. Do not spend time on this before your first match – you can change it later.
---
Your First Hour: Step-by-Step Walkthrough
1. Complete the Tutorial (if prompted). The game offers a brief tutorial that teaches basic movement, looting, and shooting. If you skip it, replay it from the main menu ("Training Mode" or "Tutorial").
2. Choose a Game Mode: Start with Solo (no teammates) to avoid pressure. Squad or Duos can be chaotic for a new player.
3. Map Selection: By default, you will play Erangel (the classic map). Stick to Erangel for your first 10 matches – it has clear landmarks and a gentle learning curve.
4. Lobby Phase: You will wait in a lobby for up to 60 seconds. Use this time to check your controls (see below) and listen to the plane countdown.
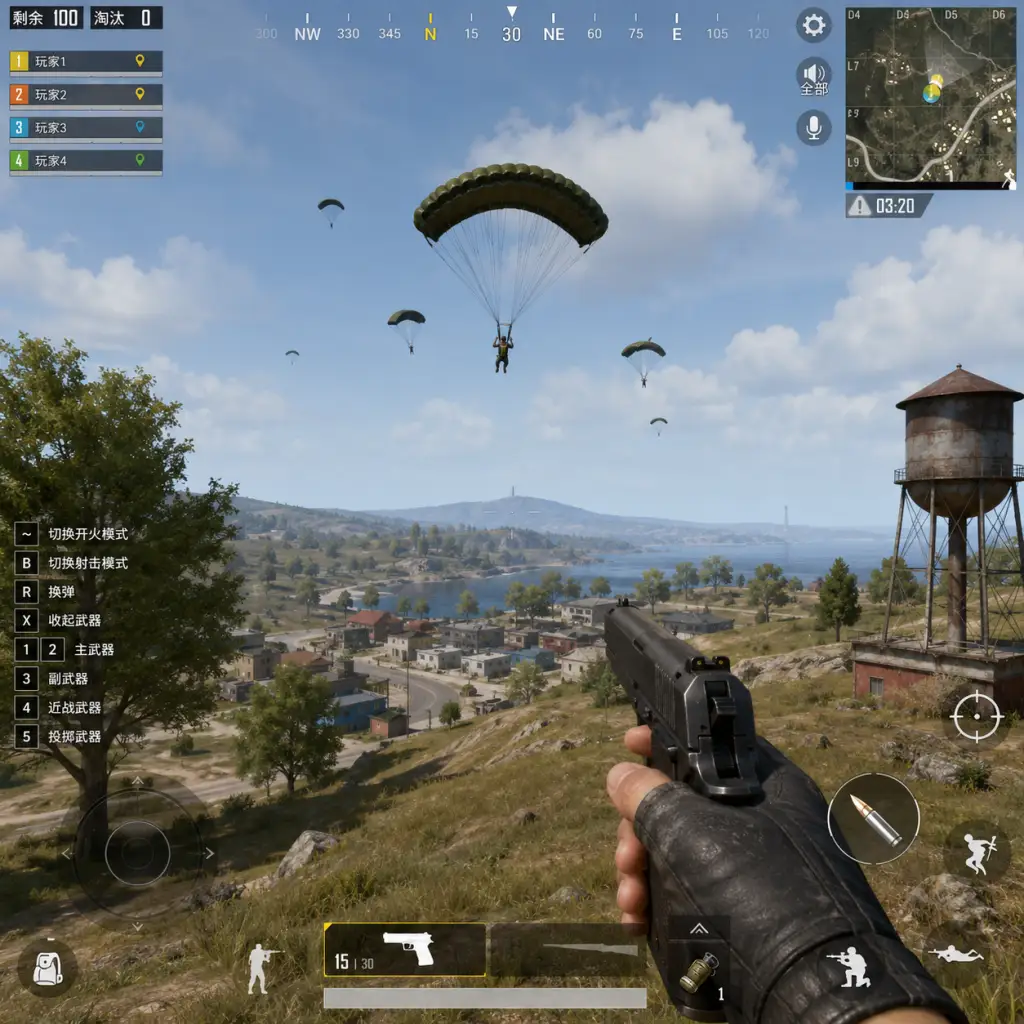
5. The Plane & Jumping: When the plane crosses the map, a mini-map shows the flight path. Open your parachute early (press the same button as jump again) to glide farther. As a beginner, drop in a low-population area (e.g., small clusters of houses away from the flight path). Avoid named cities like Pochinki or School.
6. After Landing: Immediately run inside a building and find a weapon – any weapon. Even a pistol is better than fists. Loot quickly but do not linger more than 2 minutes. Listen for footsteps and gunshots.
7. The Circle (Blue Zone): The play area shrinks. Check your map (M on PC, Touchpad on Console, map icon on Mobile) for the next safe zone. Plan to move before the blue zone reaches you. The blue zone damages you – it is not instant kill, but avoid staying in it.
8. Engagement Decision: For your first games, avoid unnecessary fights. If you see an enemy far away, let them pass. Focus on survival and learning loot locations.
9. Final Zones: As the circle gets small, stay near the edge of the safe zone. Listen, move slowly, and only shoot when you have a clear advantage or are forced to.
10. Elimination / Chicken Dinner: If you die, spectate and learn. The goal is to finish in the top 10, not necessarily win.
---
Controls – All Platforms
Below are the default controls for PC, PlayStation/Xbox, and Mobile. You can customize these in the settings menu.
#### PC (Mouse + Keyboard)
| Action | Key |
|---|---|
| Move | W, A, S, D |
| Look around | Mouse |
| Aim Down Sights (ADS) | Right Mouse Button (hold) |
| Shoot | Left Mouse Button |
| Reload | R |
| Interact / Pick up | F |
| Jump | Spacebar |
| Crouch | Left Ctrl |
| Prone | Z |
| Map | M |
| Inventory | Tab |
| Use Med | 7 (or drag) |
| Switch weapon | 1, 2, 3, 4 |
| Parachute | Press F again after jumping |
| Action | PS | Xbox |
|---|---|---|
| Move | Left Stick | Left Stick |
| Look | Right Stick | Right Stick |
| ADS | L2 (hold) | LT (hold) |
| Shoot | R2 | RT |
| Reload | Square | X |
| Interact | Triangle | Y |
| Jump | X | A |
| Crouch | Circle | B |
| Prone | Hold Circle | Hold B |
| Map | Touchpad | View button |
| Inventory | Options | Menu button |
| Use Med | Hold Triangle | Hold Y |
| Switch weapon | Tap L1 | Tap LB |
| Parachute | Press X again after jumping | Press A again after jumping |
- Left side joystick for movement.
- Right side drag to look.
- Buttons on screen: fire, scope (hold), jump, crouch, prone, map, inventory (backpack icon).
- Auto-aim is enabled by default; you can disable it in settings for more control.
- Health Bar (bottom center): White is health. Blue bar above it is armor durability. Red bar is boost (energy) – this heals over time when over 75%.
- Ammo & Weapon (bottom right): Current weapon name, ammo count, and fire mode (single/auto).
- Minimap (top left): Shows nearby terrain, enemy gunfire indicators (red markers), vehicle noises (yellow), and footsteps (white circles).
- Kill Feed (top right): Shows who killed whom. Ignore it for now.
- Inventory Screen (Tab on PC, Options/Menu on console, backpack icon on mobile): Shows all loot, gear slots, and attachments.
- Blue Zone Timer (bottom of map area): Time until the circle shrinks again.
- Player List (top of screen during match, usually hidden): Shows remaining alive (e.g., 45 alive out of 100).
- Don’t hot-drop: Avoid popular locations (School, Pochinki, Military Base) until you are comfortable with combat.
- Don’t loot for too long: Loot for 2-3 minutes maximum. After that, the circle will shrink, and you’ll be caught in the blue zone.
- Don’t drive cars loudly across open fields: Vehicles make noise and attract enemies. If you drive, park behind cover.
- Don’t stand still while looting: Keep moving. Crouch or go prone if you must, but do not stay stationary.
- Don’t shoot at every enemy you see: If you are not confident you can kill them, or if they haven’t seen you, let them go. Survival is more important than kills.
- Don’t ignore the map: Always know where the circle is going and how much time you have.
- Don’t use automatic fire at long range: Tap fire (single shots) for accuracy beyond 50 meters.
- Don’t peek the same angle twice: If you shoot from one window, an enemy will pre-aim that spot. Move after shooting.
- Don’t neglect healing: Use bandages or med kit as soon as you take damage and are in a safe spot. Boost (energy drinks/painkillers) when your health is above 75%.
- [ ] Adjust settings: Set mouse sensitivity to a medium level (e.g., 50 for general, 40 for ADS). Turn off motion blur. Set graphics to low/medium for better performance (unless you have a high-end PC). Enable Voice Chat to hear teammates (optional).
- [ ] Audio check: Make sure your headset or speakers work. Enable sound effects at 100%.
- [ ] Complete the tutorial or Training Mode for 10 minutes.
- [ ] Learn the basics of Erangel’s map by pulling up a map image online or using the in-game minimap during the pre-match lobby.
- [ ] Select Solo mode and Erangel.
- [ ] Drop in a low-risk area (e.g., Zharki, Stalber, or small towns near the coast).
- [ ] Survive for 10 minutes – your first goal is to reach the top 30.
- [ ] After your first match, review what went wrong: Did you loot too long? Did you get caught in the blue zone? Did you engage too early?
- [ ] Repeat: Play 5-10 matches, each time focusing on one aspect (looting speed, positioning, or avoiding fights).
- Team up later: After 10-20 solo matches, try Duos or Squad to learn from more experienced players.
- Watch replays: PUBG records your last match. Use the "Replay" feature to see how you died and what you could have done differently.
- Stay calm: Panic kills more than bad aim. Breathe, use cover, and make deliberate movements.
- Keep learning: Watch beginner-friendly YouTube guides (e.g., ChocoTaco or WackyJacky101) for advanced tips on recoil control, circle management, and rotations.
Tip: Spend 5 minutes in the Training Mode (accessible from the main menu) to practice shooting, driving, and parachuting without risk.
---
UI Overview – Understanding Your HUD
---
Essential Early Objectives (What to Do First)
1. Loot a Weapon and Some Armor: The first 30 seconds are critical. Prioritize a shotgun or SMG for close range, then find a vest and helmet (even level 1 is better than nothing).
2. Gather at Least 30-60 rounds of ammo for your main weapon, plus 1-2 med kits and bandages.
3. Check the Map Immediately: Identify the circle’s location. If you are far from it, plan your route – mark a point about halfway.
4. Close All Doors Behind You: This makes houses look looted, deterring other players.
5. Listen and Look: Turn on audio! Footsteps, gunfire, and vehicle sounds are crucial. Use headphones.
6. Move in the Circle: Always head toward the safe zone. Never stay in the blue zone longer than necessary.
7. Pick Up a Backpack: Increases carry capacity. Even a level 1 backpack helps.
8. Learn the Maps: Focus on Erangel first. Use the in-game mini-map to memorize common loot spots and cover.
---
What to Avoid (Common Beginner Mistakes)
---
Early Resource Priorities
When looting, prioritize items in this order:
1. Weapon (any gun) – to defend yourself.
2. Armor (vest & helmet) – increases survivability.
3. Backpack – to carry more loot.
4. Ammo – 60 rounds for AR, 30 for sniper.
5. Healing items – 3-5 bandages, 1-2 med kits, 2 boosts.
6. Attachments – grips, scopes (red dot/holo first), suppressors.
7. Throwables – grenades, smoke (smoke is great for cover).
Do not hoard useless items like multiple pairs of shoes. Drop them when you need space.
---
Day-One Checklist
Before you play your first match, complete this checklist:
---
Final Tips for New Players
Good luck, and see you on the battlegrounds!