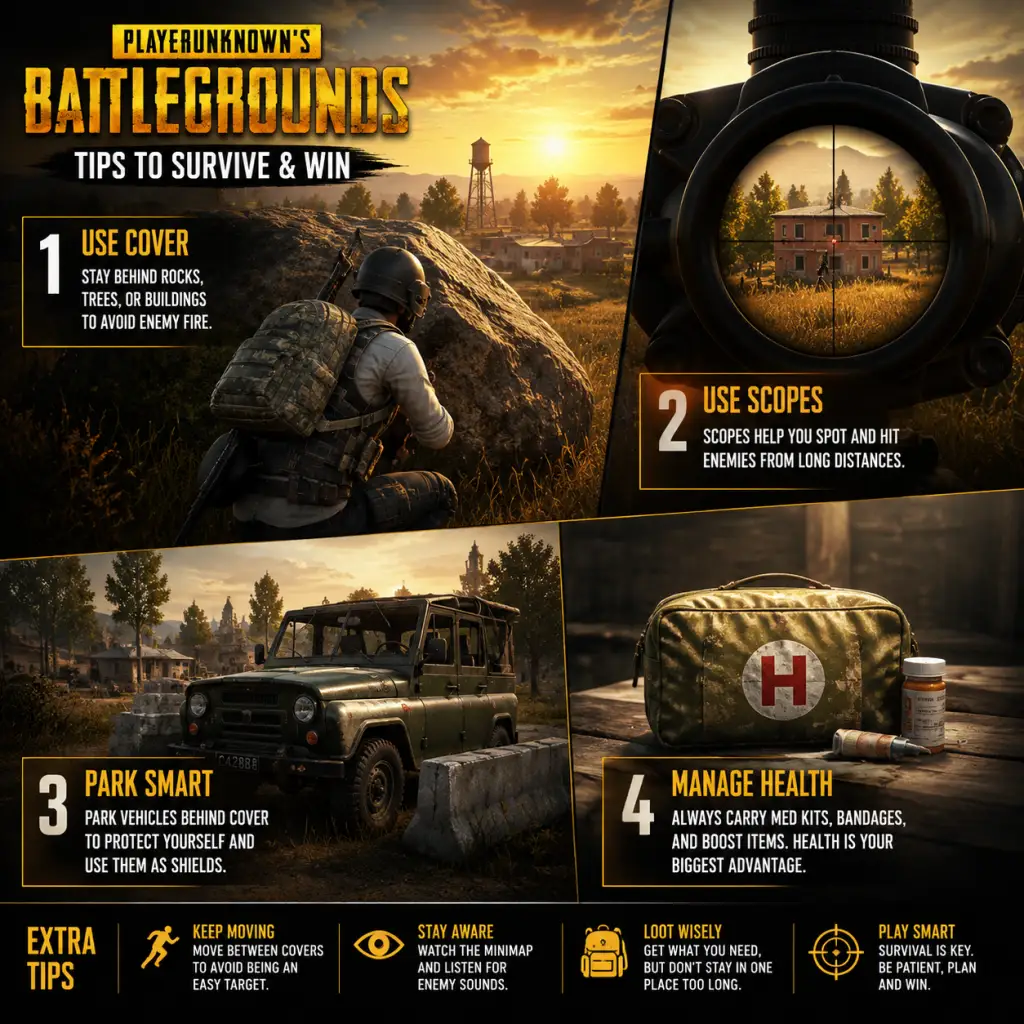
Game Tips
PlayerUnknown's Battlegrounds (PUBG) – Game Tips Guide
A comprehensive collection of tips for players of all skill levels, organized by category. Each tip includes an explanation of why it works and when to apply it.
---
1. General Survival Tips (Beginner)
Tip 1: Land Safely
- Avoid hot drops like School, Pochinki, or Military Base if you are new. Instead, choose isolated compounds or small towns. This gives you time to loot without immediate pressure.
- Why it works: You survive longer, loot at your own pace, and avoid early fights where you may lack gear or experience.
- When to use: Every match as a beginner until you feel comfortable with combat mechanics.
- Never run across open fields without a plan. Use trees, rocks, and terrain contours to move.
- Why it works: PUBG’s high TTK (time-to-kill) means exposed movement gets you killed quickly. Cover gives you a chance to react and heal.
- When to use: During all phases, especially mid-game rotations.
- When entering a building, close the doors you open. This hides your path from enemies and makes the building appear unlooted.
- Why it works: Players often check open doors vs closed ones. Closed doors signal safety and may lure enemies into a trap.
- When to use: Any time you enter a structure, even if you plan to leave quickly.
- For weapons like the M416, SCAR-L, or AKM, switch to single-shot and tap fire for shots beyond 50 meters. This reduces recoil and maintains accuracy.
- Why it works: Automatic spray at range is highly inaccurate. Tapping resets recoil between shots.
- When to use: When engaging enemies not immediately up close.
- Hold Q or E to lean around corners or rocks. This exposes less of your body while giving you a view.
- Why it works: Only your head and shoulder are visible, making you a smaller target. You can shoot without fully exposing yourself.
- When to use: Almost every engagement where you have hard cover.
- Learn the vertical and horizontal recoil pattern of your primary weapon. Pull your mouse down and slightly left or right depending on the weapon.
- Example: The AKM pulls up and to the right. Drag your mouse down-left during a spray.
- Why it works: Mastering recoil allows you to hit consecutive shots, winning duels at medium range.
- When to use: When spraying automatic fire at close to medium range.
- If you know an enemy is behind a wall or door, start shooting a few bullets before you round the corner.
- Why it works: The first bullet has no travel time if you’re already firing; the enemy reacts to your audio/visual cue late.
- When to use: When pushing a known position, especially in buildings.
- Use the inventory grid to drag items fast. Prioritize: Armor > Helmet > Weapon > Ammo > Healing > Attachments.
- Why it works: Time is critical. Looting too long leaves you vulnerable. Good armor and a weapon let you fight or survive.
- When to use: After landing and whenever you enter a new loot area.
- You can hear when someone picks up items within ~10 meters. If you hear loot sounds but no footsteps, an enemy might be near but not moving.
- Why it works: Provides passive intel. You can prepare an ambush or decide to avoid the area.
- When to use: When approaching unknown buildings or compounds.
- Many buildings have loot on top of shelves, in attics (e.g., two-story houses), or on the roof. Use jump or climbing mechanics to reach them.
- Why it works: These spots are often overlooked, giving you higher-tier gear like level 3 helmets or suppressors.
- When to use: While looting any multi-story building.
- Boost items (Energy Drink, Painkiller, Adrenaline Syringe) provide health regeneration and a speed boost. Pop them when you are at 75% health or less, and before engaging a fight.
- Why it works: Boosts increase your effective health and movement speed, giving you an edge in combat. Regeneration can bring you back to 100% HP without using first aid.
- When to use: Before pushing an enemy, after a fight to heal up to full, or when rotating across open ground.
- First aid kits restore 75% HP. In an extended fight, you’ll use them often. Keep a few extra for your squad.
- Why it works: Running out of healing mid-fight is devastating. The weight of a few extra kits is negligible.
- When to use: For any match; adjust based on playstyle (aggressive vs passive).
- Don’t pick up 300 rounds of 5.56 if you plan to use an AKM (7.62). Carry ~150-200 rounds for your primary and 30-60 for a secondary, plus extra for your squad.
- Why it works: Extra ammo weighs you down, slows movement, and is unnecessary. Remove it from inventory.
- When to use: After looting, take only what you need and share with teammates.
- BP is earned per match. Spend on crates in the menu (e.g., Raider, Archaic) rather than on temporary skins. Crates give you items that can be sold on the Steam Marketplace (PC) or used for crafting.
- Why it works: Over time, you can make real money by selling rare skins. Even duplicates can be exchanged.
- When to use: Only buy crates that are profitable; check current market prices.
- G-Coins are premium currency. Only spend them on battle passes if you play enough to complete them. Avoid cosmetic purchases unless you want to support the game.
- Why it works: The battle pass gives you multiple rewards and a chance at exclusive items for a flat fee. Single skins are expensive and don’t help progression.
- When to use: When a new season starts and you plan to play 20+ hours.
- If you get duplicate or valuable skins, list them on the Steam Community Market. Prices fluctuate—sell during new seasons when demand is high.
- Why it works: Passive income. You can reinvest in crates or buy other games.
- When to use: For rare or legendary items; check before listing.
- Sniper + AR (e.g., Kar98k + M416): Best for all ranges. Sniper for long, AR for mid/close. Use a red dot for AR when close.
- DMR + AR (e.g., Mini-14 + Beryl): More flexible than bolt-action. DMR allows quicker follow-up shots.
- SMG + Shotgun (e.g., Vector + S12K): YOLO close-range build. Only viable in urban areas or final circles.
- Why it works: Cover your weaknesses. A long-range weapon paired with a close-range weapon ensures you can fight at any distance.
- When to use: Based on circle placement. If final circles are in fields, sniper+AR; if city, SMG+shotgun.
- For ARs: Compensator > Flash Hider > Suppressor (reduces recoil most). Grip: Vertical Grip for control, but Half Grip or Thumb Grip for quicker ADS.
- For SMGs: Suppressor (keeps you off minimap) is valuable.
- Why it works: Compensator reduces vertical recoil by 25%, making spray control easier. Suppressor hides muzzle flash but doesn’t help recoil.
- When to use: Aggressive players prefer compensator; stealth players might use suppressor.
- Red Dot or Holo for close quarters (<50m). 2x/3x for mid range (50-200m). 4x/6x for long range (>200m). 8x/15x only for snipers.
- Why it works: Higher zoom lowers field of view, making close range fighting harder. Use the appropriate scope for your playstyle and circle phase.
- When to use: Pick up multiple scopes in inventory. Swap depending on engagement distance.
- White circles shrink to a random location. The next circle usually pulls toward the center of the current one, but not always. Watch the timer and plan your move 30 seconds before the blue zone closes.
- Why it works: Being caught in the blue zone deals increasing damage each phase. Early planning avoids damage and gives you position advantage.
- When to use: Always, but especially in phases 2-4.
- When rotating toward the circle, take a wide approach using hills, trees, or buildings. Avoid running straight through open ground.
- Why it works: Reduces risk of ambush. Enemies tend to look toward the center; coming from an unexpected angle gives you the drop.
- When to use: Whenever you move from one cover to another.
- In endgame, hold the highest point inside the safe zone. You have a better view, easier headshots, and harder for enemies to push uphill.
- Why it works: Vertical advantage makes it harder for enemies to hit you and easier for you to spot them.
- When to use: As soon as you can secure the height, especially in phases 5-8.
- Park a vehicle perpendicular to your position, between you and the likely enemy direction. The engine block absorbs bullets.
- Why it works: Vehicles have ~800 HP. A well-placed car can save you from a sniper or act as a mobile shield.
- When to use: In open fields, or when you need to heal under fire.
- Aim for slopes and avoid sudden turns. Learn the physics: the Dacia is fast but slides; the UAZ is heavy and stable. The motorcycle is fast but deadly.
- Why it works: Crashes cause damage and expose you. Smooth driving keeps you alive longer and makes you a harder target.
- When to use: When rotating early or escaping the blue zone.
- If you hit a loot crate inside a vehicle, the driver can’t loot; passengers can. If alone, drive to a safe spot before stopping.
- Why it works: Stopping in open areas to loot from a crate makes you a sitting duck. Better to use the crate as cover after exiting.
- When to use: When you encounter air drops or vehicle loot.
- PUBG’s audio is directional. Footsteps, gunshots, and vehicles come from specific directions. Good headphones give you a huge advantage.
- Why it works: You can pinpoint enemy location within ~10 degrees. React instantly instead of guessing.
- When to use: Always. Never play on speakers.
- Learn the sound of each weapon. An M249 sounds different from an M416. This tells you what range and threat level.
- Why it works: You can infer the enemy’s loadout and estimate distance (e.g., a suppressed weapon sounds muffled).
- When to use: In combat or while looting; helps prioritize threats.
- Press Ctrl to crouch-walk. This reduces your footstep noise dramatically, making it harder for enemies to hear you.
- Why it works: Many players rely on sound to track enemies. Silent movement can allow you to flank or ambush without detection.
- When to use: When inside buildings near enemies, or when you suspect someone is nearby.
- Use the compass direction (e.g., “Enemy at 215, behind the big rock, south of the red house”). Avoid vague calls like “over there”.
- Why it works: Precise callouts allow teammates to react instantly without searching.
- When to use: Every time you spot an enemy.
- If you find a better armor than your teammate, drop yours and let them equip. Similarly, share ammo types when low.
- Why it works: Team survival depends on collective gear. One well-equipped player is better than four with mediocre gear.
- When to use: During looting phases and after fights.
- When a teammate is downed, smoke the area immediately. Use your own body or a vehicle as extra shield while reviving.
- Why it works: Enemies will push the smoke or shoot through it. Thick smoke and hard cover give you time.
- When to use: Whenever a teammate goes down in an exposed position.
- In third-person, when you lean out from cover, you see the enemy before they see you. Use Q/E quickly and shoot while moving back into cover.
- Why it works: The game renders your view first, giving you a split-second head start. This is critical in close duels.
- When to use: In close-quarters combat when you have a corner.
- When rounding a corner, jump and shoot simultaneously. Your head hitbox bobs unpredictably. Crouching during spray reduces recoil but makes you stationary.
- Why it works: Jumping throws off the enemy’s aim because they’re aiming at chest height. Crouching stabilizes your spray.
- When to use: Jump shooting when attacking exposed enemies; crouch spraying when you have cover.
- Always carry one or two smoke grenades and one frag grenade (or flashbang). Smokes are for cover and revives. Frags are for clearing rooms.
- Why it works: Grenades offer utility beyond bullets. They force enemies out of cover, block vision, or finish downed players.
- When to use: Smokes when rotating or reviving; frags when you know enemy position is behind a wall.
- Set Shadows, Post-Processing, and Effects to Low/Very Low. This reduces visual clutter and improves FPS. Keep View Distance to Ultra (to spot far players).
- Why it works: Higher FPS reduces input lag and makes aiming smoother. Low shadows remove dark areas where enemies might hide.
- When to use: Apply always; competitive players use low settings for clarity.
- Bind lean to side mouse buttons. Bind a separate key for “Quick Heal” (e.g., F1). Remove map shortcut to free key near movement.
- Why it works: Dedicated keys reduce time to react. Quick heal automatically uses the best healing item.
- When to use: Set up in practice mode before playing matches.
- Use a DPI of 400-800 and in-game sensitivity of 30-50 for ADS. Lower sensitivity allows finer aim. Find a balance where you can do a 180-degree turn with one swipe.
- Why it works: Consistency in aim. High sensitivity makes fine adjustments difficult. Low sensitivity gives pixel-perfect tracking.
- When to use: Test in the training range until your muscle memory feels natural.
Tip 2: Always Have Cover
Tip 3: Close Doors Behind You
---
2. Combat Tips
Beginner: Tap Fire at Range
Intermediate: Use Third-Person Peek
Advanced: Recoil Control Patterns
Tip: Pre-Fire Corners
---
3. Exploration & Looting
Tip 1: Loot Quickly and Prioritize
Tip 2: Listen for Loot Sounds
Tip 3: Check Attic and Rooftop Loot
---
4. Resource Management (Healing, Boost, Ammo)
Tip 1: Use Boost Items Wisely
Tip 2: Carry at Least 3 or 4 First Aid Kits
Tip 3: Conserve Ammo for Your Main Weapon
---
5. Economy (In-Game Currency, Crates, and BP)
Tip 1: Save Battle Points (BP) for Crates
Tip 2: Don’t Buy G-Coins Often
Tip 3: Sell Items on Marketplace (PC)
---
6. Build & Loadout Optimization
Tip 1: Optimal Weapon Pairings
Tip 2: Attachments Priority
Tip 3: Scope Selection
---
7. Map Knowledge & Rotations
Tip 1: Learn Safe Zones Predictions
Tip 2: Use Flanks, Not Direct Paths
Tip 3: Control High Ground
---
8. Vehicles & Movement
Tip 1: Use Vehicles as Cover
Tip 2: Drive Predictively
Tip 3: Don’t Loot While Driving
---
9. Sound & Audio Cues
Tip 1: Use Headphones
Tip 2: Differentiate Gunshots
Tip 3: Crouch Walking Reduces Sound
---
10. Squad Play & Communication
Tip 1: Call Out Landmarks
Tip 2: Share Loot Efficiently
Tip 3: Revive Under Cover
---
11. Advanced Mechanics
Tip 1: Peeker’s Advantage
Tip 2: Jump Shooting & Crouch Spraying
Tip 3: Shipment of Grenades
---
12. Settings & Optimization
Tip 1: Lower Graphics for Performance
Tip 2: Customize Keybinds
Tip 3: Adjust Mouse Sensitivity
---
Final Words
These tips cover the fundamentals and advanced tactics needed to improve in PUBG. Practice each category separately in matches or the training mode. Good luck, and may the dinner be yours!