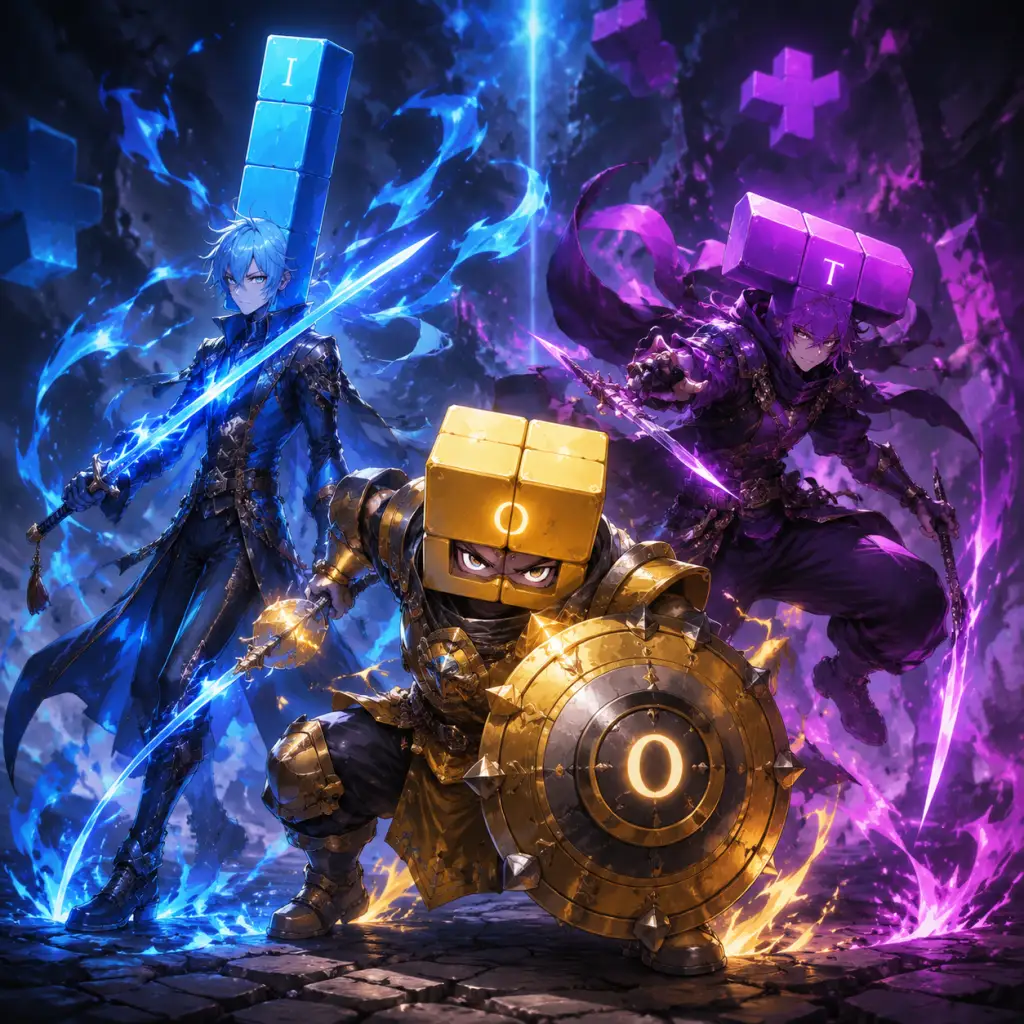
Character Skills
Introduction
In Tetris, there are no traditional characters with unique abilities. Instead, each of the seven tetromino pieces (I, O, T, S, Z, J, L) functions like a distinct "character" with its own shape, rotation states, and strategic value. Mastery of these pieces is the key to becoming a skilled player. This guide treats each piece as a playable character and describes their skills, techniques, combos, and optimal usage.
Additionally, universal mechanics such as T-Spin, Tetris, Perfect Clear, and Back-to-Back serve as powerful "spells" that can be executed with precise piece placement. Finally, roles in multiplayer (e.g., attacker, defender) are also covered.
---
Playable Characters (Tetrominoes)
Each tetromino is described with its shape, color, rotation states (standard SRS – Super Rotation System), and key skills.
1. I-Piece (Cyan)
- Shape: 4x1 line.
- Rotation States: 0°, 90°, 180°, 270°. Has two horizontal and two vertical orientations.
- Skills:
- Cooldown: Not applicable; piece appears at random intervals.
- Upgrades: Learn to hold the I-piece until you have a 4-high gap; practice T-Spin Triple setups that require I-piece as a placeholder.
- Combos:
- Synergies: Works best with flat boards; avoid using I-piece early if you might need it later for a Tetris.
- Recommended Build: Tetris-focused playstyle – always hold I-piece until you have a perfect 4-line gap. Aim for Back-to-Back Tetris clears.
- When to Use: Use when you have a clear 4-high column and the board is low. Avoid using I-piece to clear 1-2 lines unless emergency.
- Shape: 2x2 square.
- Rotation States: Only one; rotation does nothing.
- Skills:
- Cooldown: None.
- Upgrades: Learn to predict where O-piece will fit; use it to create flat surfaces for T-spin setups.
- Combos:
- Synergies: Works well with any piece that creates 2-wide columns.
- Recommended Build: All-rounder – use O-piece to smooth the stack and avoid creating deep holes.
- When to Use: Use whenever you have a 2-wide gap; otherwise hold it for later.
- Shape: 3-block T shape.
- Rotation States: 4 (0°, 90°, 180°, 270°).
- Skills:
- Cooldown: None; piece frequency is random but you can hold it.
- Upgrades: Master all T-spin patterns (facing left, right, down, up). Practice T-spin triple setups like the "Infinite TST" (requires precise placement).
- Combos:
- Synergies: Works best with a stack that has 2-wide gap and a 1-block overhang. Pairs well with S/Z pieces for filling side holes.
- Recommended Build: T-Spin Specialist – focus on setting up T-spin doubles and triples. Use I-piece only for emergency or to finish a Tetris after T-spin.
- When to Use: Use T-piece whenever you have a suitable hole; do not waste it on trivial placements. Hold T-piece if no good T-spin is available.
- Shape: 3-block Z-shaped (but rotated 90°).
- Rotation States: 4.
- Skills:
- Cooldown: None.
- Upgrades: Learn to use S-piece to fix overhangs; practice S-spin patterns.
- Combos: Often used in Perfect Clear setups due to its shape.
- Synergies: Works with Z-piece to create a flat surface if placed oppositely.
- Recommended Build: Balanced Stacker – use S-piece to reduce height on one side.
- When to Use: Use when the stack has a step on the left or right that matches S's slope. Avoid placing S-piece flat if it creates holes.
- Shape: 3-block S-shaped (rotated 90° opposite of S).
- Rotation States: 4.
- Skills:
- Cooldown: None.
- Upgrades: Learn Z-spin patterns and how to use Z-piece to balance the board after S-piece.
- Combos: Often paired with J or L pieces to create a 4-wide hole for Tetris.
- Synergies: Opposite of S-piece; use together to keep board flat.
- Recommended Build: Defensive Stacker – use Z-piece to fix right-handed overhangs.
- When to Use: Use when the stack slopes up to the left; otherwise hold.
- Shape: 3-block L shape with tail on the left.
- Rotation States: 4.
- Skills:
- Cooldown: None.
- Upgrades: Practice J-spin patterns and use J-piece for Perfect Clear setups.
- Combos: J-piece + L-piece can form a 4-wide gap if placed correctly.
- Synergies: Works with I-piece for vertical alignment.
- Recommended Build: Flexible Player – use J-piece to fill left-side holes.
- When to Use: Use when you need a 3-block vertical piece on the left.
- Shape: 3-block L shape with tail on the right.
- Rotation States: 4.
- Skills:
- Cooldown: None.
- Upgrades: Same as J-piece but mirrored. Learn to recognize when L-piece is needed.
- Combos: J+L can create a Tetris hole.
- Synergies: Reverses J-piece.
- Recommended Build: Mirror Player – use L-piece to balance right-side stack.
- When to Use: Use for right-side vertical gaps.
- Effect: Clear lines by rotating a T-piece into a 3-wide gap with an overhang. Gives score bonus and more garbage in multiplayer.
- Variants: Single, Double, Triple.
- Cooldown: None; but requires proper board state.
- Upgrades: Learn all four rotation T-spin patterns; master T-spin triple setups (e.g., "TST" – T-spin Triple).
- Combos: Back-to-Back bonus if alternated with Tetris or other T-spins.
- When to Use: Whenever you have a T-spin setup; prioritize T-spin double over Tetris for score and garbage.
- Effect: Clear 4 lines with an I-piece in a vertical 4-hole.
- Cooldown: Requires holding I-piece and proper setup.
- Upgrades: Learn to clear Tetris while maintaining flat board.
- Combos: Back-to-Back Tetris gives extra points.
- When to Use: Use when you have a 4-high gap and the board is low; otherwise T-spins are often better.
- Effect: Clear the entire playfield (no blocks left). Gives massive bonus and fully resets garbage.
- Cooldown: Requires specific setup (10-line clear).
- Upgrades: Practice common Perfect Clear patterns (e.g., 4-wide combo ending).
- Combos: Often ends a combo or Back-to-Back chain.
- When to Use: Near the end of a match or when you can guarantee a perfect clear.
- Effect: Consecutive difficult clears (Tetris, T-spin, Perfect Clear) without an easy clear in between. Doubles the line clear bonus.
- Cooldown: Requires alternating hard clears.
- Upgrades: Plan piece sequence to maintain back-to-back.
- When to Use: Always try to maintain back-to-back by avoiding single-line clears.
- Effect: Clear lines in multiple consecutive placements. Each subsequent clear increases bonus and garbage.
- Cooldown: Resets if you place a piece that does not clear a line.
- Upgrades: Use 3-wide or 4-wide setups to force multiple line clears.
- When to Use: In multiplayer, combos can overwhelm opponents.
- Goal: Send maximum garbage to opponents.
- Skills: Prioritize T-spin doubles, Tetris, and combos. Use Back-to-Back chain.
- Recommended Build: T-spin specialist with aggressive holding.
- When to Use: When team needs pressure on a strong opponent.
- Goal: Keep a low stack and clear incoming garbage efficiently.
- Skills: Focus on flat stacking, quick line clears, and Perfect Clears to reset board.
- Recommended Build: Balanced stacker using all pieces equally; hold I-piece for emergency Tetris.
- When to Use: When receiving heavy garbage or in survival modes.
- Goal: Use team abilities (like Zone) to freeze opponent's board or clear garbage for allies.
- Skills: Coordinate with team to activate Zone at opportune times.
- Recommended Build: Any; communication is key.
- When to Use: When team's boards are high or to counter opponent's zone.
- Focus: T-spin doubles and triples.
- Piece Priority: Hold T-piece until setup; use S/Z to build overhangs.
- Advantages: Higher score per line, more garbage.
- Disadvantages: Board may become messy.
- Focus: Fast Tetris clears using I-piece.
- Piece Priority: Hold I-piece; use all pieces to create 4-wide gaps.
- Advantages: Simple and fast.
- Disadvantages: Less efficient against T-spin players.
- Focus: 3-wide or 4-wide combos.
- Piece Priority: Use any piece that maintains the wide gap.
- Advantages: Can send massive garbage in bursts.
- Disadvantages: High risk; requires fast decision-making.
- Focus: Set up a Perfect Clear as a finisher.
- Piece Priority: Plan ahead (e.g., 10-line all-clear patterns).
- Advantages: Devastating in close games.
- Disadvantages: Requires precise knowledge.
- T-Spin Double + Tetris: Clear 2 lines with T, then immediately drop I for 4-line clear. Back-to-Back bonus applied.
- T-Spin Triple + Perfect Clear: Use T-spin triple to set up a 1-line gap perfect clear. Very rare.
- O-Piece + T-Spin Setup: Place O-piece to create a 2-wide gap, then T-spin into it.
- S/Z Pairing: Alternate S and Z to keep board flat.
- J/L Pairing: Use J for left side, L for right side to create Tetris hole.
- Straight Drop: Place vertically to clear a Tetris (4 lines). The most powerful line clear.
- Horizontal Tuck: Sliding the I-piece horizontally into tight gaps to set up perfect clears or reduce height.
- Wall Kick: The I-piece has unique wall kick data allowing it to slide far into tight spaces (e.g., under a 2-wide column).
- Tetris + T-Spin Double: After a T-Spin Double, drop an I-piece for a Tetris (Back-to-Back bonus).
- Perfect Clear: I-piece often key in 10-line all-clear setups (e.g., with J/L pieces).
2. O-Piece (Yellow)
- Stabilizer: The O-piece is the most forgiving piece for filling gaps. It cannot be rotated, so placement is purely horizontal.
- Gap Filler: Use to fill 2x2 holes.
- O-Piece into T-Spin Setup: Placing O-piece can create the overhang needed for a T-spin.
- Perfect Clear: Often used in 10-line all-clear solutions.
3. T-Piece (Purple)
- T-Spin: The signature skill. By rotating the T-piece into a 3-wide hole, you can clear lines while gaining bonus points and sending garbage in multiplayer.
- T-Spin Single: Clear 1 line (basic).
- T-Spin Double: Clear 2 lines (powerful).
- T-Spin Triple: Clear 3 lines (rare, requires deep setup).
- Tuck: Using wall kicks to slide the T-piece into tight slots.
- Corner Kicks: The T-piece has unique wall kick possibilities that enable T-spins from almost any orientation.
- T-Spin Double + Tetris: Back-to-Back bonus chain.
- T-Spin Triple + Perfect Clear: Endgame all-clear.
4. S-Piece (Green)
- S-Spin: A spin that clears lines (less common than T-spin but possible). Requires specific wall kicks.
- S-Tuck: Place S-piece in awkward gaps to invert the slope.
5. Z-Piece (Red)
- Z-Spin: Similar to S-spin, can clear lines with precise placement.
- Z-Tuck: Can be used to fill gaps where the slope is left-high.
6. J-Piece (Blue)
- J-Stick: Place J-piece vertically to fill 3-high gaps on the left side.
- J-Spin: Spin to clear lines (less common than T-spin).
7. L-Piece (Orange)
- L-Stick: Vertical placement for right-side gaps.
- L-Spin: Spin to clear lines.
---
Universal Skills and Special Moves (Spells)
These are techniques that can be triggered by any piece (mostly T and I) and are crucial for high-level play.
1. T-Spin
2. Tetris (4-line clear)
3. Perfect Clear (All-Clear)
4. Back-to-Back
5. Combo (Consecutive line clears)
---
Roles in Multiplayer (Tetris Effect: Connected and others)
In cooperative or competitive modes, players can adopt roles based on their playstyle.
1. Attacker
2. Defender
3. Support (Zone in Tetris Effect: Connected)
---
Recommended Builds (Playstyles)
Build 1: T-Spin Master
Build 2: Speed Stacker
Build 3: Combo Machine
Build 4: Perfect Clear Endgame
---
Combos and Synergies Examples
---
Conclusion
While Tetris lacks RPG-style characters, each tetromino demands unique handling. By mastering the skills described for each piece, and leveraging universal techniques like T-spins and Perfect Clears, you can elevate your gameplay. Choose a build that matches your style, and practice intentional piece placement. Remember: the best player is not the one who gets lucky with pieces, but the one who skillfully uses every piece that comes their way.