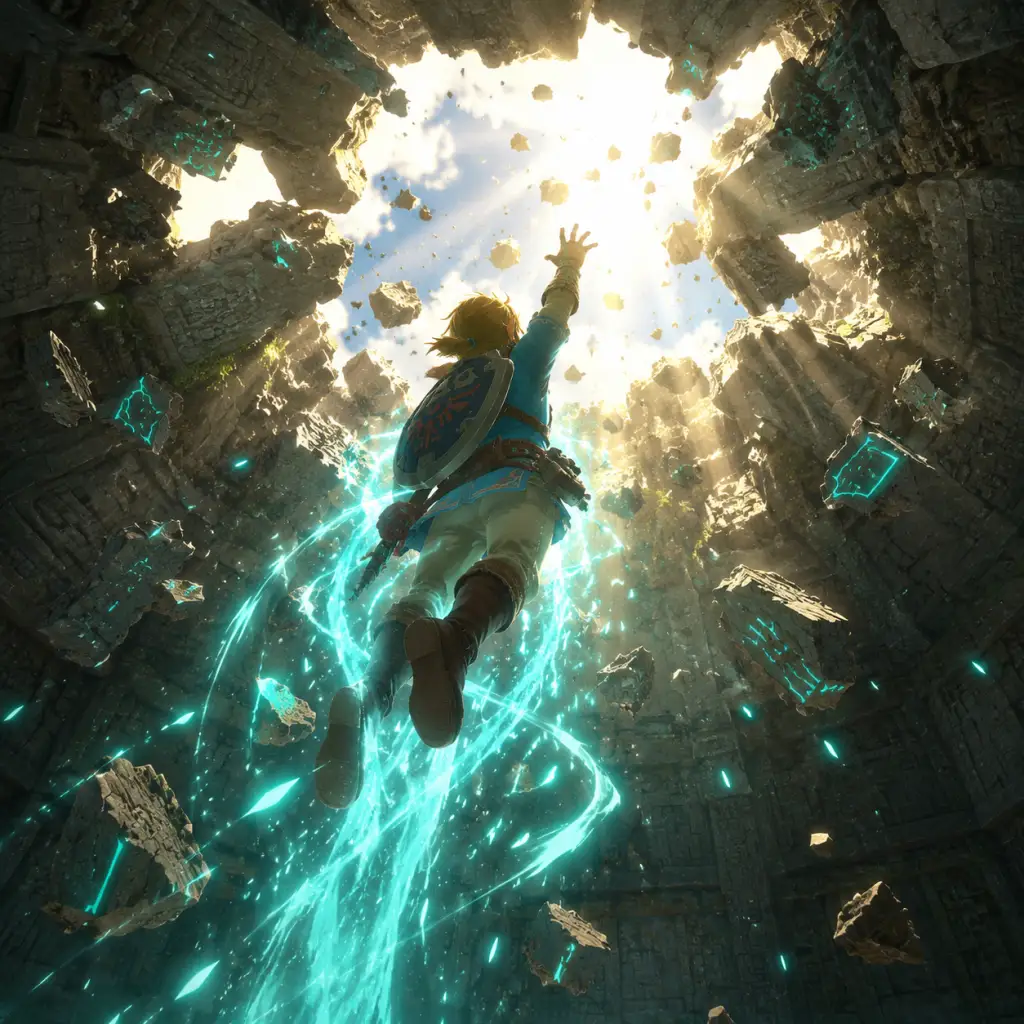
Character Skills
Overview
In The Legend of Zelda: Tears of the Kingdom, the only playable character is Link. Unlike traditional RPGs, Link does not have a class or skill tree. Instead, his capabilities are defined by three categories: Arm Abilities (granted by Rauru’s right hand), Sage Abilities (unlocked by completing the Regional Phenomena quests), and Combat Techniques (universal mechanics). This guide covers every skill, its effects, cooldowns, upgrades (where applicable), combos, synergies, recommended builds, and optimal usage.
---
Arm Abilities (Rauru’s Hand)
These five abilities are unlocked sequentially during the Great Sky Island tutorial and the Crisis at Hyrule Castle main quest. They are always available once obtained and consume no resources (except Zonaite for Autobuild).
1. Ultrahand
- Effect: Picks up, moves, rotates, and attaches objects (including Zonai devices). Attached objects form a single physics object. Link can carry objects while moving, but heavy objects drain stamina.
- Cooldown: None (instant use; stamina drain only for heavy loads).
- Upgrades: None directly, but Autobuild complements it by recalling saved builds.
- Combos:
- Synergies: Pairs with Stamina Vessels and Endura ingredients for longer heavy carries; use with Zonai Charges to power attached devices.
- Recommended Builds: No specific armor required. Maximize stamina (e.g., Climbing Set for mobility, or Energy Set for Zonai efficiency).
- When to Use:
- Effect: Combines a weapon, shield, or arrow with a material or item to modify its stats and effects. Fusing arrows requires holding ZR and pressing Up on the D-pad.
- Cooldown: None (instant, costs nothing).
- Upgrades: No direct upgrade, but Pelison in Tarrey Town can break fusions (costs Rupees). Note that fused arrows are consumed on use.
- Combos:
- Synergies: Combine with Multi-Shot Bows to apply area effects; use Mighty Bananas (fused as weapon) for temporary stealth boost? No, only cooking. Armor sets like Barbarian Set increase base damage, making fused weapons even stronger.
- Recommended Builds: Always have a variety of fused weapons (one for each element). Use Zora Weapons (double damage when wet) fused with strong parts; Gerudo Weapons (add raw damage) fused with Lynel parts.
- When to Use:
- Effect: Allows Link to swim upward through solid surfaces (ceilings, overhangs) to reach the top. He emerges on the surface directly above. Works only if there is a flat ceiling within a certain distance (roughly 2-3 body lengths).
- Cooldown: None (instant; no cost).
- Upgrades: None.
- Combos:
- Synergies: Use with Climbing Gear (reduces stamina cost for climbing) to reach Ascend points faster; Sneak Set helps avoid detection while emerging.
- Recommended Builds: No special gear needed. Ascend is invaluable for caving – look up before entering dark caves.
- When to Use:
- Effect: Reverses the movement history of a single object for a short duration (about 8 seconds). Only affects objects that have moved, not enemies (except some constructs frozen by shock). Can be used repeatedly on same object if within cooldown? No cooldown per se, but the object’s history resets after Recall ends.
- Cooldown: None (once the object stops, you can reapply Recall if it moves again).
- Upgrades: None.
- Combos:
- Synergies: Use Time Armor? No such set. General mobility: recall is essential for accessing sky islands without a launcher.
- Recommended Builds: Equip Climbing Gear if scaling after Recall launch; Glide Set for mid-air maneuverability.
- When to Use:
- Effect: Summons a previously saved Zonai device build (or an auto-completed schematic) using Zonaite as currency. Builds appear instantly in front of Link. Can also automatically fill missing parts with Zonaite (costly). Unlocked after completing the Crisis at Hyrule Castle main quest (investigate the Depths).
- Cooldown: Cooldown is replaced by Zonaite cost; no time cooldown.
- Upgrades: Can increase max saved builds via Schema Stones (found in Depths). Max 8 favorite builds can be selected.
- Combos:
- Synergies: Use Zonaite Set (reduces Zonaite cost by up to 50%) or Energy Set (increases battery efficiency). Stockpile Zonaite and large Zonaite from Depths mines.
- Recommended Builds: Have combat vehicles (e.g., hoverbike with cannons) and utility builds (e.g., bridge, elevator) saved. Equip Zonaite Armor for cost reduction.
- When to Use:
- Ultrahand + Recall: Move an object, then use Recall to reverse its motion (e.g., raise a board with Ultrahand, then Recall to send it down).
- Ultrahand + Fuse: Attach a Zonai device to a weapon/shield/arrow after moving it.
- Ultrahand + Ascend: Build a platform with Ultrahand, then Ascend through it.
- Exploration: create bridges, rafts, floating platforms.
- Puzzle solving: move blocks, align crystals, rotate gears.
- Combat: lift heavy objects to drop on enemies, build instant barricades.
2. Fuse
- Fuse + Elemental Material: Adds fire, ice, or shock damage; applies status effects.
- Fuse + Monster Part: Increases attack power (e.g., Lynel Horn + Silver = +50 attack).
- Fuse + Zonai Device: Adds unique effects (e.g., Cannon, Flame Emitter).
- Fuse + Gem: AoE burst on hit (ruby = fire, sapphire = ice, topaz = shock).
- Before every combat: fuse a high-damage part to your primary weapon.
- Elemental puzzles: fuse fire/ice/shock to arrows to activate switches or freeze lava.
- Mining: fuse a Stone Talus Heart or Cobble Crusher to a weapon for efficient ore breaking.
3. Ascend
- Ascend + Ultrahand: Build a platform near a ceiling, then Ascend through it.
- Ascend + Recall: Recall a falling object downward, then Ascend onto it.
- Ascend + Rockets: Fuse a rocket to a shield, shield surf, then Ascend at peak height for extra vertical reach.
- Exiting caves or wells (faster than climbing).
- Reaching high ledges in shrines.
- Escaping combat by diving underground and Ascending elsewhere.
- Non-obvious shortcuts: many overworld rock formations are thin enough to Ascend through.
4. Recall
- Recall + Falling Rock: Ride a falling rock back up to sky islands.
- Recall + Ultrahand: Move an object with Ultrahand, then Recall to send it back to its original position (used in puzzles).
- Recall + Zonai Device: Reverse a moving vehicle to undo a mistake.
- Recall + Enemy Projectiles: However, it only works on physical objects, not arrows or magic. It can work on boulders thrown by Hinox.
- Traversal: catch falling rocks, floating platforms, or Ferris wheel-like structures to ride upward.
- Puzzles: reposition objects precisely by reversing their movement.
- Combat (limited): reverse a boulder an enemy threw to hit them back.
5. Autobuild
- Autobuild + Ultrahand: After autobuild, use Ultrahand to fine-tune or add parts.
- Autobuild + Recall: If build moves, recall to reverse.
- Autobuild + Fuse: Fuse additional parts to the autobuilt vehicle.
- Combat: summon an instant turret or drone.
- Puzzles: autobuild a solution if you have the schematic.
---
Sage Abilities (Avatar Abilities)
After completing each of the four Regional Phenomena (Wind Temple, Fire Temple, Water Temple, Lightning Temple) and the fifth sage side quest (Mineru), you gain the ability to summon a Sage Avatar. Each avatar has a unique active ability that can be triggered by interacting with them (press A near them). The abilities have a cooldown of approximately 30-60 seconds (tested). You can also turn avatars on/off from the Key Items menu.
| Sage | Ability | Effect | Cooldown | Best Use |
|---|---|---|---|---|
| Tulin (Wind) | Tulin’s Gust | Fires a strong gust of wind that pushes enemies away, clears fog, and can blow Link’s paraglider upward when activated while gliding (acts like a boost). | ~30 sec | Gliding vertical boost; crowd control; revealing buried treasure in sand (blows sand away). |
| Yunobo (Fire) | Yunobo’s Charge | Charges forward in a fiery ball, destroying cracked walls, breaking ore deposits, and dealing heavy fire damage to enemies in a line. Can also light torches and grass. | ~45 sec | Mining and wall breaking; igniting multiple torches quickly; AoE fire combat. |
| Sidon (Water) | Sidon’s Shield | Creates a water bubble around Link that blocks one hit (any damage) and then breaks. While the bubble is active, Link inflicts extra water damage on melee attacks and can destroy Mud and Sludge enemies. | ~30 sec | Survival: nullify one strong attack; combat: boost melee damage against fire enemies; traversal: protect from lava (Lava-resistant armor still needed). |
| Riju (Lightning) | Riju’s Lightning | Summons a lightning strike on a targeted area (automatically aimed at the nearest enemy or object). Deals moderate shock damage and stuns enemies. Can be aimed manually by holding R. | ~60 sec | Combat crowd control: stun groups; puzzle activation: power electrical devices (like in Gerudo town); destroys metal shields. |
| Mineru (Spirit) | Construct Rider | Summons a construct mech that Link can ride. The construct has its own health and can punch, stomp, and use Zonai devices fused to its arms/back. Link can dismount at any time. This is not a cooldown ability but a persistent summoned vehicle until destroyed or dismissed. | No cooldown; costs nothing. Can be resummoned immediately if destroyed after a short delay. | Heavy combat, traversal over rough terrain, using Zonai devices on the construct. |
Combos & Synergies:
- Tulin + Paraglider: Use Tulin’s Gust while gliding to gain altitude.
- Yunobo + Ascend: Yunobo can break through rock ceilings from below if they are crackable.
- Sidon + Zora Weapons: Zora weapons (double damage when wet) synergize perfectly with Sidon’s water shield (keeps Link wet).
- Riju + Multi-Shot Bow: Riju stuns enemies, allowing easy headshots.
- Mineru + Autobuild: Mineru can use constructed Zonai devices (like cannons) affixed to its arms for extra firepower.
- Tulin: Always on for gliding boost; use in combat to scatter groups or blow away enemies near cliffs.
- Yunobo: Essential for breaking cracked walls and mining; good for clearing path in caves. In combat, use against fire-weak enemies (ice-breath Lizalfos, Keese swarms).
- Sidon: Activate before facing a strong enemy (Lynel, Hinox) to block a single hit; great in rain to keep weapons wet for Zora bonus.
- Riju: Use against metal enemies (Lynel, Constructs) to stun and drop weapons; in Gerudo Desert for activating electric puzzles.
- Mineru: Summon for exploring dangerous areas (Depths, lava zones) as the construct absorbs damage; use for mining with its fists; can carry multiple Zonai weapons.
- Description: After performing a perfect dodge (backflip or side hop) at the moment an enemy attacks, time slows down, allowing Link to unleash a rapid series of strikes (up to 6 hits with one-handed weapons, less with two-handed).
- Activation: Hold ZL to lock on, then press X + direction (backflip for overhead attacks, side hop for horizontal attacks). Timing must be precise.
- Cooldown: None; can be triggered repeatedly.
- Upgrades: None; damage depends on weapon.
- Combos: Can be followed by a charged attack out of Flurry Rush? Not directly, but after the rush ends you can continue attacking.
- Synergies: High-damage weapons (e.g., Royal Broadsword with Lynel Horn) maximize DPS. Barbarian Set (50% attack up) or Fierce Deity Set stack multiplicatively.
- When to Use: Against single strong enemies with telegraphed attacks (Lynel, Hinox, Stalkoblin). Avoid using when overwhelmed by multiple enemies due to lock-on limitation.
- Description: Block an attack with a shield at the exact moment of impact, causing the enemy to stagger and become vulnerable. Can also reflect Guardian lasers (not in TotK, but works on Construct lasers).
- Activation: Hold ZL to raise shield, press A just before the attack lands.
- Cooldown: None.
- Upgrades: None.
- Combos: After parrying, you can immediately attack (recommended: use a heavy weapon for big damage).
- Synergies: Shield Guard Up food or armor can make parrying easier? No, but a shield with high durability is important. Pot Lid is the most durable parry shield? Actually, the Hylian Shield is best but rare.
- When to Use: Against melee enemies that stagger easily; essential for deflecting Boss Bokoblin charges and Lynel roars. Use against Stone Talus to create climb opportunities.
- Description: Hitting an enemy’s head with an arrow (or any projectile) staggers them and can knock them down. Most effective from stealth.
- Activation: Aim with bow, shoot head.
- Cooldown: None.
- Upgrades: None.
- Combos: Follow up with a Sneakstrike or Charged Attack while they are stunned.
- Synergies: Stealth Set (Sheikah Set) increases sneak attack damage by 8x from behind. Bow fuse with Keese Wings for homing arrows? No, Keese eyes give homing – use Ancient Arrow? Not in TotK; use Cryonis? Not present. Use Bomb Arrows for AoE.
- When to Use: Stealth approach; disabling lookout enemies; starting combat with advantage.
- Description: Attack an enemy from behind while undetected. Deals 8x damage (with stealth armor, 8x; without, 2x? Actually base sneakstrike is 2x, but Sheikah Set gives 8x total? The exact multiplier: without stealth, 2x damage; with full Sheikah Set, 8x damage. Check: In BotW it was 8x with Sheikah Set; in TotK it is likely the same.
- Activation: Crouch (press L3) and approach enemy from behind, press Y.
- Cooldown: None.
- Upgrades: None; damage scales with weapon.
- Combos: Use after a headshot or stealth consumable (Mighty Bananas? Not crafted).
- Synergies: Sheikah Set mandatory for maximum damage. Use with Octo Balloons to distract enemies.
- When to Use: Clearing camps silently; taking down Stal enemies efficiently.
- Description: Hold Y to charge a melee attack. For one-handed weapons, Link spins continuously (stamina drain). For two-handed weapons, he charges a single powerful swing. Spears have a multi-hit thrust.
- Activation: Hold Y.
- Cooldown: Uses stamina.
- Upgrades: None.
- Combos: Release near end of stamina for max hits. Combine with Barbarian Set or Fierce Deity Set for damage boost.
- Synergies: Stamina Vessels and Endura Carrots for longer spins. Use against groups of weak enemies.
- When to Use: Crowd control; breaking ore deposits with two-handed charged swing.
- Bullet Time: While airborne (gliding, falling, or shield surfing), time slows, allowing multiple arrows to be fired. Activation: Draw bow while in air.
- AoE Arrows: Fuse gem to arrow for area explosion. Bomb Flowers create blast radius.
- Elemental Arrows: Fuse elemental items (Fire Fruit, Ice Fruit, Shock Fruit) for status effects.
- Armor: Fierce Deity Set (attack up + charge attack up) or Barbarian Set (attack up) – both increase damage by 50%.
- Weapons: Royal Broadsword fused with White-Maned Lynel Horn (54 base + 55 fuse = 109 attack). Shield: Hylian Shield (durability). Bow: Savage Lynel Bow (3-shot or 5-shot).
- Abilities: Use Recall for mobility, Fuse for weapon upgrades always.
- Sage Avatars: Turn on Tulin, Sidon, Riju (Yunobo optional). Use Sidon’s shield before engaging boss.
- Armor: Sheikah Set (sneak strike up 8x, night speed up).
- Weapons: Eightfold Blade (high damage) fused with Silver Lynel Horn. Phantom Ganon weapons also good.
- Abilities: Use Sneakstrike and Headshot. Avoid engagement.
- Sage Avatars: Turn off all (they break stealth). Use only when needed.
- Armor: Zonaite Set (reduces Zonai energy cost, increased battery).
- Weapons: Fuse Zonai devices to weapons (e.g., Cannon Sword).
- Abilities: Autobuild and Ultrahand focus.
- Sage Avatars: Mineru (construct) for building and combat. Use Riju for electricity.
- Armor: Champion’s Leotard (no bonus) + Fierce Deity headpiece for attack. Or Snowquill Set for cold resistance.
- Weapons: Keep one of each element: Fire Sword (Flame Gleeok Horn + sword), Ice Spear, Shock Arrow.
- Abilities: Fuse accordingly.
- Sage Avatars: Use Sidon’s shield for water, Yunobo for fire, Riju for lightning.
When to Use Each Sage Ability:
---
Combat Techniques (Universal Skills)
These are not obtained as abilities but are core mechanics that every player should master.
Flurry Rush
Perfect Guard (Parry)
Headshot (Arrow to Weak Point)
Sneakstrike
Charged Attack (Spin Attack)
Bow Techniques
---
Recommended Builds and Synergies
General All-Purpose Build
Stealth Assassin Build
Zonai Engineer Build
Elemental Specialist Build
---
When to Use Each Skill Summary
| Skill | When to Use |
|---|---|
| Ultrahand | Puzzle solving, building vehicles, moving obstacles, combat (drop objects). Always available. |
| Fuse | Before any fight (fuse weapon/shield/arrow), for puzzle activation, mining. Always. |
| Ascend | Exiting caves, reaching high ledges, escaping combat. Use in any confined space with a ceiling. |
| Recall | Traversal via falling rocks, puzzles requiring time reversal, retrieving items that fell off cliffs. |
| Autobuild | When you need a complex build quickly and have enough Zonaite. Prime for combat vehicles. |
| Tulin’s Gust | Gliding boost, clearing fog, blowing away enemies near edges. |
| Yunobo’s Charge | Breaking cracked walls and ore; igniting torches; AoE fire damage. |
| Sidon’s Shield | Blocking one hit from a strong enemy; activating Zora weapon bonus; surviving lava area (briefly). |
| Riju’s Lightning | Stunning groups or metal enemies; activating electric devices. Long cooldown, use wisely. |
| Mineru’s Construct | Heavy combat, mining, traversal over lava/quicksand, Zonai device platform. Always useful when exploring dangerous terrain. |
| Flurry Rush | Against single enemies with predictable attacks; avoid in crowds. |
| Perfect Guard | Deflecting physical attacks; breaking enemy stance. |
| Headshot | Starting combat, stealth takedowns, disabling enemies with bows. |
| Sneakstrike | Clearing camps without alerting others; massive damage from behind. |
| Charged Attack | Crowd control, breaking ore, hit-and-run tactics. |
Final Notes
The beauty of Tears of the Kingdom is that there are no wrong choices – every ability has multiple uses. Experiment with combinations: for example, use Ultrahand to carry a Zonai cannon into position, Autobuild to duplicate it, then Fuse the cannons to weapons. The only limitation is your creativity. Master these skills, and Hyrule is yours."