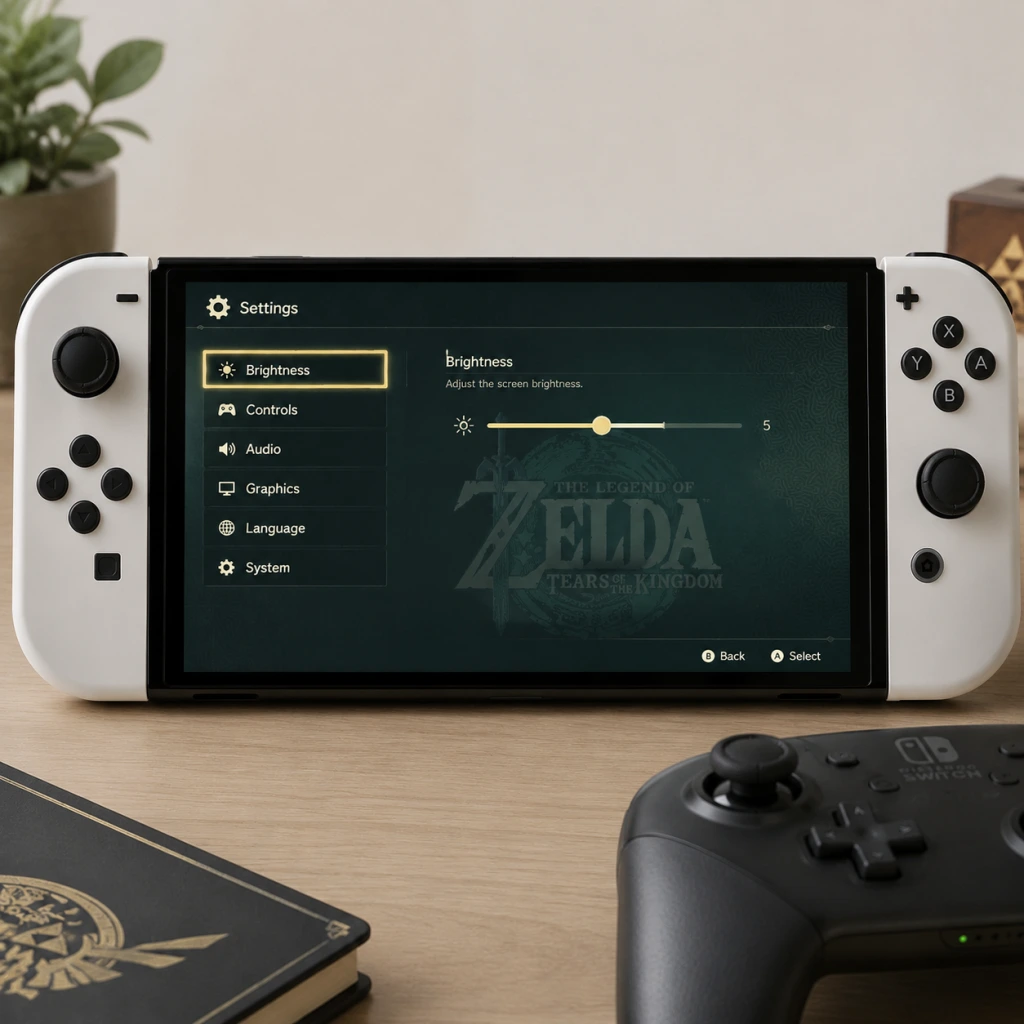
Game Settings
Game Settings
The Legend of Zelda: Tears of the Kingdom is exclusively available on the Nintendo Switch family of systems, including the original Switch, Switch Lite, and Switch OLED. As a first-party Nintendo title, its settings menu is streamlined, focusing on comfort and personalization rather than PC-like graphical tweaks. Below is a comprehensive breakdown of every accessible setting, with recommendations for optimal experience across different hardware configurations.
---
Graphics / Display
Brightness
- Adjust the overall luminance of the game world. The default is usually set to 4 out of 7.
- Optimal setting: Set to 5–6 for a vivid image without crushing blacks. If playing on a standard Switch in handheld mode, keep at 5. On OLED models (docked or handheld), 4–5 is sufficient due to the deeper blacks of the OLED panel.
- Misconfiguration risk: Setting too high washes out colors, too low makes dark areas (caves, depths) nearly invisible. Use the in-game calibration screen (when adjusting brightness) to ensure the faint logo is just barely visible.
- The Nintendo Switch does not support HDR output. This setting does not exist in Tears of the Kingdom. Ignore any system-level HDR toggles on your TV — keep them off for this game to avoid color distortion.
- Not adjustable. The camera zoom is fixed, but you can change camera distance slightly by using the right stick to pull the camera back in certain situations. No FOV slider is provided.
- The game targets a dynamic resolution (900p docked, 720p handheld) at 30fps. No user settings can alter this. Performance dips occur in busy areas (e.g., Korok Forest, Skyview Towers) or when using Ultrahand with many objects.
- Tip: If you experience noticeable lag, try closing other software or restarting the console. Physically cleaning the vents can help maintain consistent performance on older Switch units.
- Controls overall volume of the game. Adjust as comfortable. For best immersion, set to 60–80% on a TV, or 70–90% with headphones.
- Sound effects (combat, environment, items). Keep at 100% to not miss important audio cues like enemy detection, falling rocks, or shrines.
- Background music. The dynamic orchestral score is a highlight; leave at 100% to fully appreciate it. If you are doing heavy puzzle-solving and find music distracting, lower to 70%.
- Controls character voices (Link grunts, Zelda, NPCs). Keep at 100% to catch story dialogue. No option to disable voices entirely — only volume.
- System-level setting on Switch, not in-game. Ensure you select the correct output (TV speakers, headphones, or stereo/mono) in the Switch System Settings.
- Options: Normal, Wide, Narrow.
- Normal: Default, balanced for most players.
- Wide: Increases stick sensitivity — camera moves faster. Good for quick exploration but may cause overshooting in precise aiming (e.g., arrows, Ultrahand).
- Narrow: Decreases sensitivity, requiring more stick movement. Helps with precision aiming, especially for bow shots or rotating objects with Ultrahand.
- Optimal setting: Normal for general play; switch to Narrow when you are doing long-range bow challenges (e.g., Korok pinwheel targets) or building complex vehicles. Can be changed mid-game.
- On/Off. Enable to use tilt of the controller for fine-tuning bow aim, camera control in shooting galleries, or steering vehicles.
- Optimal setting: On — it provides precision that is impossible with sticks alone. However, if you play in handheld mode and find it disorienting, switch Off.
- Misconfiguration risk: Players often forget this is on and wonder why their aim drifts. Calibrate your controllers via Switch System Settings > Controllers and Sensors > Calibrate Control Sticks if gyro feels off.
- In-game button mapping is not provided. Only system-level remapping is available via Switch System Settings > Controllers and Sensors > Change Button Mapping. Use this to swap A/B or X/Y if you prefer a different layout (e.g., for jump/run).
- Tip: The default mapping is well-optimized. Changing sprint from (B) to (L3) can reduce finger strain during long exploration.
- Normal – default. Inverted – swaps the direction of vertical/horizontal camera movement.
- Optimal setting: Use your preference from other games. Many veteran Zelda players keep Normal. If you play inverted in other titles, enable both Y and X inversion here.
- Hold – you must keep ZL held to maintain lock-on. Toggle – press once to lock, press again to release.
- Optimal setting: Hold gives more control, especially during combat when you need to switch targets quickly. Toggle can be useful if your ZL finger tires easily.
- Subtitles are available in multiple languages (English, Japanese, French, Spanish, German, Italian, etc.). Affects spoken dialogue subtitles. Does not change voiced language — see Language section.
- Tip: Always enable subtitles for cutscenes to catch dialogue over loud music or sound effects.
- Options: Small, Medium, Large.
- Optimal setting: Large if playing on a small handheld screen or if you have vision difficulties. Medium works well for most TVs. Small can be hard to read during fast conversations.
- Toggle for hearing-impaired players. Adds descriptions of sounds (e.g., "[sword clang]", "[wind blowing]") in addition to dialogue subtitles.
- Recommendation: Off for standard play; On if you need auditory cues conveyed textually.
- Not adjustable in-game. The HUD (hearts, stamina, map, etc.) is fixed size. On handheld mode, the UI can feel small; no workaround exists. If you struggle, play docked on a larger screen.
- Not available. The game does not include a dedicated colorblind or high-contrast option. Colorblind players may rely on shape/location of UI elements (e.g., green stamina wheel, red hearts are distinguishable by shape).
- Select from: English, Japanese, French (France), French (Canadian?), German, Spanish (Spain), Spanish (Latin America), Italian, Dutch, Russian, Chinese (Simplified), Chinese (Traditional), Korean, etc. (Varies by region; download language packs may be required.)
- Optimal: Choose the language you understand best. Note that the lip syncing is not matched to non-English languages; it only matches the original English/Japanese performances.
- Misconfiguration risk: If you change this, the voices in cutscenes will be in the selected language while subtitles remain in your system language (if set separately). Ensure subtitle language matches your voice language if you rely on reading.
- Set by the console’s system language. In-game, you cannot change it separately. To change, exit the game and go to Switch System Settings > System > Language.
- Managed at system level (System > Automatic Software Updates). Keep On to receive patches, bug fixes, and any DLC automatically.
- Requires a Nintendo Switch Online subscription. The game supports cloud saves. Go to System Settings > Data Management > Save Data Cloud to ensure uploads are enabled. This is not an in-game setting but crucial for preserving progress if your console is lost or broken.
- Note: Some users report that enabling cloud saves helps avoid corruption after crashes, but there is no in-game toggle.
- Accessible in-game from the pause menu under “Items” > “amiibo.” This is not a settings menu per se, but it controls how amiibo scanning works. No configuration needed; simply tap amiibo to the NFC reader.
- On/Off. When enabled, the camera will slightly follow enemies when you draw your bow, making it easier to hit moving targets.
- Optimal setting: On for most players, especially beginners. Off for experienced archers who want manual control or for precise aiming at non-combat objects (e.g., shooting a balloon from a specific angle).
- Not adjustable. The game auto-saves frequently (e.g., after completing a shrine, entering a new area, every few minutes). You cannot increase or decrease intervals. Rely on manual saves at Save Points (glowing green pillars) or when exiting the game.
- Only one control scheme exists. The game uses standard Switch layout (A: interact, B: run/jump, X: ascend/use ability, Y: attack, L: whistle/paraglider, R: throw/create, ZL: aim/lock-on, ZR: use rune/ability). No alternative control presets.
- In the Settings menu, you can choose between Camera Follow (the camera automatically tries to keep Link in frame while moving) and Camera Not Follow (the camera stays fixed in the direction you last set unless you move the stick).
- Optimal setting: Camera Follow for most players — it reduces the need to constantly adjust the camera during exploration. Camera Not Follow gives more control for precise platforming or sneakstrikes, but can be disorienting.
- When you hold ZR, you can swap between available abilities (Ultrahand, Fuse, Ascend, etc.) using the right stick. The setting does not affect this. No toggle available.
- Performance: Expect occasional frame drops in busy areas. No settings can improve framerate.
- Brightness: Set to 5, as the screen lacks the vividness of OLED.
- Subtitle Size: Large — the smaller screen makes Medium text hard to read.
- Motion Controls: Off if you find gyro awkward in handheld (the screen moves with the controller).
- Control Stick Sensitivity: Narrow to avoid overshooting due to shorter stick travel.
- Brightness: 4–5 (TV dependent).
- Subtitle Size: Medium or Large, depending on TV size and distance.
- Motion Controls: On — docked play benefits from gyro precision.
- Control Stick Sensitivity: Normal – the larger screen and stable grip make Normal feel right.
- Brightness: 5 (similar to original, but screen is smaller).
- Subtitle Size: Large mandatory.
- Motion Controls: Off — gyro on Lite can cause accidental tilting of the entire device.
- Control Stick Sensitivity: Narrow for better precision.
- Note: Switch Lite cannot output to TV, so all settings are handheld-focused.
- Brightness: 4 – the OLED panel’s deep blacks make lower brightness look better.
- Subtitle Size: Medium (thanks to larger, higher-contrast screen).
- Motion Controls: Off if you find it awkward; On can be nice due to comfort grips.
- Control Stick Sensitivity: Normal – the slightly larger thumbsticks help.
- Same as Original Docked, but you can also set Brightness to 3–4 for HDR-like effect on an OLED TV.
HDR (High Dynamic Range)
Field of View (FOV)
Resolution & Framerate
---
Audio
Master Volume
SFX Volume
Music Volume
Voice Volume
Audio Output
Misconfiguration risk: Setting SFX or Music too low can break immersion or make puzzles harder (e.g., the sound of a shrine motor indicates a nearby shrine entrance).
---
Controls
Control Stick Sensitivity
Motion Controls (Gyro Aiming)
Button Mapping
Camera Control (Invert Y/X-Axis)
Lock-On (Z Targeting)
---
Accessibility
Subtitle Language
Subtitle Size
Closed Captions
UI Scale
High Contrast Mode
---
Language
Voice Language
Menu Language
---
Network
Automatic Software Updates
Save Data Cloud Backup
amiibo Settings
---
Gameplay
Aim Assist
Auto-Save Frequency
Control Style
Camera Style
ZR Rune Swapping
---
Optimal Settings by Hardware
#### Nintendo Switch (Original – Handheld Mode)
#### Nintendo Switch (Original – Docked Mode)
#### Nintendo Switch Lite (Handheld Only)
#### Nintendo Switch OLED (Handheld Mode)
#### Nintendo Switch OLED (Docked Mode)
---
Special Attention Points During Setup
1. Motion Controls Default On: Many players return the game thinking their bow aiming is broken — gyro is on by default. If you find the camera drifting, check this setting first and calibrate controllers if needed.
2. Voice Language vs. Subtitle Language: Changing voice language does not automatically change subtitles. If you pick Japanese voices with English subtitles, you may hear the original performance but subtitles will not match lip movements perfectly.
3. Brightness Calibration: The brightness slider is not just visual — it affects visibility in the Depths (underground) which is pitch black. Setting too low makes the Depths unnavigable without Lightbloom seeds; too high washes out the atmosphere. Use the official calibration logo.
4. Auto-Save Overwriting: The game only keeps one auto-save slot plus several manual slots. If you die, the auto-save may have saved in a failing scenario. Always create a manual save before a major boss or dangerous climb.
5. Switch System Settings Impact: Many “in-game” settings are actually system-level, such as controller remapping, vibration, and screen brightness. Do not overlook them for the best experience.
---
Summary Table of Recommended Settings
| Setting | Recommendation (Handheld / Lite) | Recommendation (Docked / OLED Docked) |
|---|---|---|
| Brightness | 5 | 4–5 |
| SFX Volume | 100% | 100% |
| Music Volume | 100% | 100% |
| Voice Volume | 100% | 100% |
| Control Stick Sensitivity | Normal (Narrow for Lite/Precision) | Normal |
| Motion Controls | Off (On if comfortable) | On |
| Invert Y-Axis | As per personal preference | Same |
| Lock-On Style | Hold | Hold |
| Subtitles | On, Large | On, Medium |
| Closed Captions | Off | Off |
| Aim Assist | On | On |
| Camera Follow | On | On |
By carefully adjusting these settings, you can tailor The Legend of Zelda: Tears of the Kingdom to your playstyle and hardware, ensuring a smooth and immersive journey across the skies, surface, and Depths of Hyrule.